2019 CHEVROLET SONIC change time
[x] Cancel search: change timePage 191 of 351

Chevrolet Sonic Owner Manual (GMNA-Localizing-U.S./Canada-12461769) -
2019 - crc - 5/21/18
190 Driving and Operating
Caution
If you add electrical parts or
accessories, you could change
the way the engine operates. Any
resulting damage would not be
covered by the vehicle warranty.
SeeAdd-On Electrical Equipment
0 219.
Manual Transmission
The shift lever should be in Neutral
and the parking brake engaged.
Hold the clutch pedal to the floor
and start the engine.
Starting Procedure
Key Access
1. With your foot off the accelerator pedal, turn the
ignition to START. When the
engine cranks, let go of the
key. The idle speed will go
down as the engine gets warm.
Caution
Holding the key in START for
longer than 15 seconds at a time
will cause the battery to be
drained much sooner. And the
excessive heat can damage the
starter motor. Wait about
15 seconds between each try to
help avoid draining the battery or
damaging the starter.
2. If the engine does not start, wait about 15 seconds and try
again. Wait about 15 seconds
between each try.
When the engine has run about
10 seconds to warm up, the
vehicle is ready to be driven.
Do not run the engine at high
speed when it is cold.
If the weather is below freezing
(0 °C or 32 °F), let the engine
run for a few minutes to
warm up. 3. If the engine still will not start,
or starts but then stops, it could
be flooded with too much
gasoline. Try pushing the
accelerator pedal all the way to
the floor and holding it there as
you hold the key in START for
about three seconds. If the
vehicle starts briefly but then
stops again, do the same thing,
but this time keep the pedal
down for five or six seconds.
This clears the extra gasoline
from the engine.
Keyless Access 1. With the Keyless Access system, the RKE transmitter
must be in the vehicle. Press
ENGINE START/STOP with the
brake pedal applied. When the
engine begins cranking, let go
of the button.
The idle speed will go down as
the engine gets warm. Do not
race the engine immediately
after starting it.
Page 202 of 351
Chevrolet Sonic Owner Manual (GMNA-Localizing-U.S./Canada-12461769) -
2019 - crc - 5/21/18
Driving and Operating 201
For the best fuel economy,
accelerate slowly and shift when the
light comes on, and if the weather,
road, and traffic conditions allow.
It is normal for the light to go on and
off if the accelerator position
changes quickly. Ignore the light
during downshifts.Brakes
Antilock Brake
System (ABS)
This vehicle has an Antilock Brake
System (ABS), an advanced
electronic braking system that helps
prevent a braking skid.
When the vehicle begins to drive
away, ABS checks itself.
A momentary motor or clicking noise
may be heard while this test is going
on, and it may even be noticed that
the brake pedal moves a little. This
is normal.
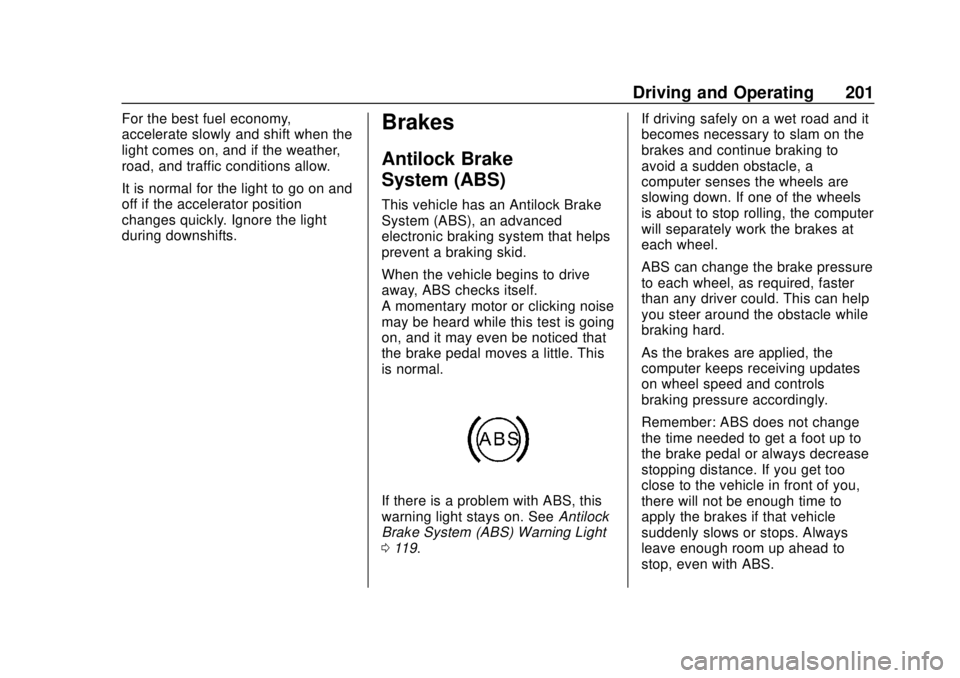
If there is a problem with ABS, this
warning light stays on. SeeAntilock
Brake System (ABS) Warning Light
0 119. If driving safely on a wet road and it
becomes necessary to slam on the
brakes and continue braking to
avoid a sudden obstacle, a
computer senses the wheels are
slowing down. If one of the wheels
is about to stop rolling, the computer
will separately work the brakes at
each wheel.
ABS can change the brake pressure
to each wheel, as required, faster
than any driver could. This can help
you steer around the obstacle while
braking hard.
As the brakes are applied, the
computer keeps receiving updates
on wheel speed and controls
braking pressure accordingly.
Remember: ABS does not change
the time needed to get a foot up to
the brake pedal or always decrease
stopping distance. If you get too
close to the vehicle in front of you,
there will not be enough time to
apply the brakes if that vehicle
suddenly slows or stops. Always
leave enough room up ahead to
stop, even with ABS.
Page 212 of 351
Chevrolet Sonic Owner Manual (GMNA-Localizing-U.S./Canada-12461769) -
2019 - crc - 5/21/18
Driving and Operating 211
The RVC system may have a
feature that lets the driver view park
assist symbols on the infotainment
display while using the RVC. Rear
Park Assist (RPA) must not be
disabled to use the caution symbols.
The error message Rear Park Assist
Symbols Unavailable may display if
RPA has been disabled and the
symbols have been turned on. See
Park Assist0211.
When the System Does Not
Seem to Work Properly
The RVC system may not work
properly or display a clear image if:
.
The RVC is turned off.
. It is dark.
. The sun or the beam of
headlamps is shining directly
into the camera lens.
. Ice, snow, mud, or anything else
builds up on the camera lens.
Clean the lens, rinse it with
water, and wipe it with a soft
cloth. .
The back of the vehicle is in a
crash. The position and
mounting angle of the camera
can change, or the camera can
be affected. Be sure to have the
camera and its position and
mounting angle checked at your
dealer.
Park Assist
If equipped, Rear Park Assist (RPA)
assists the driver with parking and
avoiding objects while in
R (Reverse). RPA operates at
speeds less than 8 km/h (5 mph).
The sensors on the rear bumper
detect objects up to 1.5 m (4.9 ft)
behind the vehicle, and at least
20 cm (8 in) off the ground. The
distance at which objects can be
detected may be less during warmer
or humid weather.
{Warning
The Park Assist system does not
detect children, pedestrians,
bicyclists, animals, or objects
below the bumper or that are too
close or too far from the vehicle.
It is not available at speeds
greater than 8 km/h (5 mph). To
prevent injury, death, or vehicle
damage, even with Park Assist,
always check the area around the
vehicle and check all mirrors
before backing.
How the System Works
RPA comes on automatically when
the shift lever is moved into
R (Reverse). A single beep sounds
to indicate the system is working.
RPA operates only at speeds less
than 8 km/h (5 mph).
An obstacle is indicated by audible
beeps. The time between the beeps
becomes shorter as the vehicle gets
Page 215 of 351
Chevrolet Sonic Owner Manual (GMNA-Localizing-U.S./Canada-12461769) -
2019 - crc - 5/21/18
214 Driving and Operating
Collision Alert occurs, the brake
system may prepare for driver
braking to occur more rapidly which
can cause a brief, mild deceleration.
Continue to apply the brake pedal
as needed. Cruise control may be
disengaged when the Collision Alert
occurs.
Tailgating Alert
The red FCA display will stay
continuously illuminated when you
are following a detected vehicle
ahead much too closely.
Selecting the Alert Timing
The Collision Alert control is on the
steering wheel. Press COLLISION
ALERT to set the alert timing to far,
medium, near, or off. The first button
press shows the current control
setting on the DIC. Additional button
presses will change this setting. The
chosen setting will remain until it is
changed and will affect both the
Collision Alert and the Tailgating
Alert features. The timing of both
alerts will vary based on vehicle
speed. The faster the vehicle speed,
the farther away the alert will occur.Consider traffic and weather
conditions when selecting the alert
timing. The range of selectable alert
timing may not be appropriate for all
drivers and driving conditions.
Unnecessary Alerts
FCA may sometimes set
unnecessary alerts to turning
vehicles, vehicles in other lanes,
objects that are not vehicles,
or shadows. These alerts are
normal operation and the vehicle
does not need service.
Cleaning the System
If the FCA system does not seem to
operate properly, cleaning the
outside of the windshield in front of
the rearview mirror may correct the
issue.
Lane Departure
Warning (LDW)
If equipped, LDW may help avoid
crashes due to unintentional lane
departures. It may provide an alert if
the vehicle is crossing a lane
without using a turn signal in thatdirection. LDW uses a camera
sensor to detect the lane markings
at speeds of 56 km/h (35 mph) or
greater.
{Warning
The LDW system does not steer
the vehicle. The LDW system
may not:
. Provide enough time to
avoid a crash.
. Detect lane markings under
poor weather or visibility
conditions. This can occur if
the windshield or
headlamps are blocked by
dirt, snow, or ice; if they are
not in proper condition; or if
the sun shines directly into
the camera.
. Detect road edges.
. Detect lanes on winding or
hilly roads.
(Continued)
Page 228 of 351

Chevrolet Sonic Owner Manual (GMNA-Localizing-U.S./Canada-12461769) -
2019 - crc - 5/21/18
Vehicle Care 227
1.Engine Air Cleaner/Filter 0231.
2. Engine Oil Dipstick. See Engine Oil 0227.
3. Engine Cooling Fan (Out of View). See Cooling System
0 232.
4. Engine Oil Fill Cap. See Engine Oil 0227.
5. Engine Coolant Surge Tank and Pressure Cap. See
Cooling System 0232.
6. Brake/Clutch Fluid Reservoir. See Brake Fluid 0238 and
Hydraulic Clutch 0231.
7. Battery - North America 0239.
8. Windshield Washer Fluid Reservoir. See Washer Fluid
0 237.
9. Engine Compartment Fuse
Block 0249.Engine Oil
To ensure proper engine
performance and long life, careful
attention must be paid to engine oil.
Following these simple, but
important steps will help protect
your investment:
.
Use engine oil approved to the
proper specification and of the
proper viscosity grade. See
“Selecting the Right Engine Oil”
in this section.
. Check the engine oil level
regularly and maintain the
proper oil level. See “Checking
Engine Oil” and“When to Add
Engine Oil” in this section.
. Change the engine oil at the
appropriate time. See Engine Oil
Life System 0229.
. Always dispose of engine oil
properly. See “What to Do with
Used Oil” in this section.
If the engine oil pressure light
comes on, check the engine oil level
right away. The oil pressure light is
on the instrument cluster. See
Engine Oil Pressure Light 0123.
Check the engine oil level regularly;
this is an added reminder.
Checking Engine Oil
Check the engine oil level regularly,
every 650 km (400 mi), especially
prior to a long trip. The engine oil
dipstick handle is a loop. See
Engine Compartment Overview
0 226 for the location.
{Warning
The engine oil dipstick handle
may be hot; it could burn you.
Use a towel or glove to touch the
dipstick handle.
Page 231 of 351
Chevrolet Sonic Owner Manual (GMNA-Localizing-U.S./Canada-12461769) -
2019 - crc - 5/21/18
230 Vehicle Care
indicated can vary considerably. For
the oil life system to work properly,
the system must be reset every time
the oil is changed.
When the system has calculated
that oil life has been diminished, it
indicates that an oil change is
necessary. A
:% CHANGE
message in the DIC comes on.
Change the oil as soon as possible
within the next 1 000 km (600 mi).
It is possible that, if driving under
the best conditions, the oil life
system might indicate that an oil
change is not necessary for up to a
year. The engine oil and filter must
be changed at least once a year
and, at this time, the system must
be reset. Your dealer has trained
service people who will perform this
work and reset the system. It is also
important to check the oil regularly
over the course of an oil drain
interval and keep it at the proper
level.
If the system is ever reset
accidentally, the oil must be
changed at 5 000 km (3,000 mi) since the last oil change.
Remember to reset the oil life
system whenever the oil is changed.
How to Reset the Engine Oil
Life System
Reset the system whenever the
engine oil is changed so that the
system can calculate the next
engine oil change. To reset the
system:
1. Press MENU to show Remaining Oil Life on the
display. This display shows an
estimate of the oil’s remaining
useful life. If 99% is displayed,
that means that 99% of the
current oil life remains.
2. To reset the engine oil life system, press SET/CLR while
the oil life display is active.
Select YES and press and hold
SET/CLR. After a few seconds,
there will be a single chime and
the oil life will be reset
to 100%. Be careful not to reset the oil life
display accidentally at any time
other than after the oil is changed.
It cannot be reset accurately.
If the
:% CHANGE message in
the DIC comes back on when the
vehicle is started, the engine oil life
system has not reset. Repeat the
procedure.
Automatic Transmission
Fluid
How to Check Automatic
Transmission Fluid
It is not necessary to check the
transmission fluid level.
A transmission fluid leak is the only
reason for fluid loss. If a leak
occurs, take the vehicle to your
dealer and have it repaired as soon
as possible.
There is a special procedure for
checking and changing the
transmission fluid. Because this
procedure is difficult, you should
have this done at your dealer.
Page 239 of 351
Chevrolet Sonic Owner Manual (GMNA-Localizing-U.S./Canada-12461769) -
2019 - crc - 5/21/18
238 Vehicle Care
be heard all the time when the
vehicle is moving, except when
applying the brake pedal firmly.
{Warning
The brake wear warning sound
means that soon the brakes will
not work well. That could lead to
a crash. When the brake wear
warning sound is heard, have the
vehicle serviced.
Caution
Continuing to drive with worn-out
brake pads could result in costly
brake repair.
Some driving conditions or climates
can cause a brake squeal when the
brakes are first applied or lightly
applied. This does not mean
something is wrong with the brakes.
Properly torqued wheel nuts are
necessary to help prevent brake
pulsation. When tires are rotated, inspect brake pads for wear and
evenly tighten wheel nuts in the
proper sequence to torque
specifications. See
Capacities and
Specifications 0310.
Brake pads should be replaced as
complete sets.
Brake Pedal Travel
See your dealer if the brake pedal
does not return to normal height,
or if there is a rapid increase in
pedal travel. This could be a sign
that brake service may be required.
Replacing Brake System Parts
Always replace brake system parts
with new, approved replacement
parts. If this is not done, the brakes
may not work properly. The braking
performance expected can change
in many other ways if the wrong
replacement brake parts are
installed or if parts are improperly
installed.
Brake Fluid
The brake/clutch master cylinder
reservoir is filled with GM approved
DOT 3 brake fluid as indicated on
the reservoir cap. See Engine
Compartment Overview 0226 for
the location of the reservoir.
Checking Brake Fluid
Place the vehicle in P (Park) or
Neutral with the parking brake
applied if equipped with a manual
transmission. On a level surface,
the brake fluid level should be
between the minimum and
maximum marks on the brake fluid
reservoir.
Page 267 of 351
Chevrolet Sonic Owner Manual (GMNA-Localizing-U.S./Canada-12461769) -
2019 - crc - 5/21/18
266 Vehicle Care
unusual wear continues after the
rotation, check the wheel
alignment.
SeeWhen It Is Time for New
Tires 0266 andWheel
Replacement 0271.
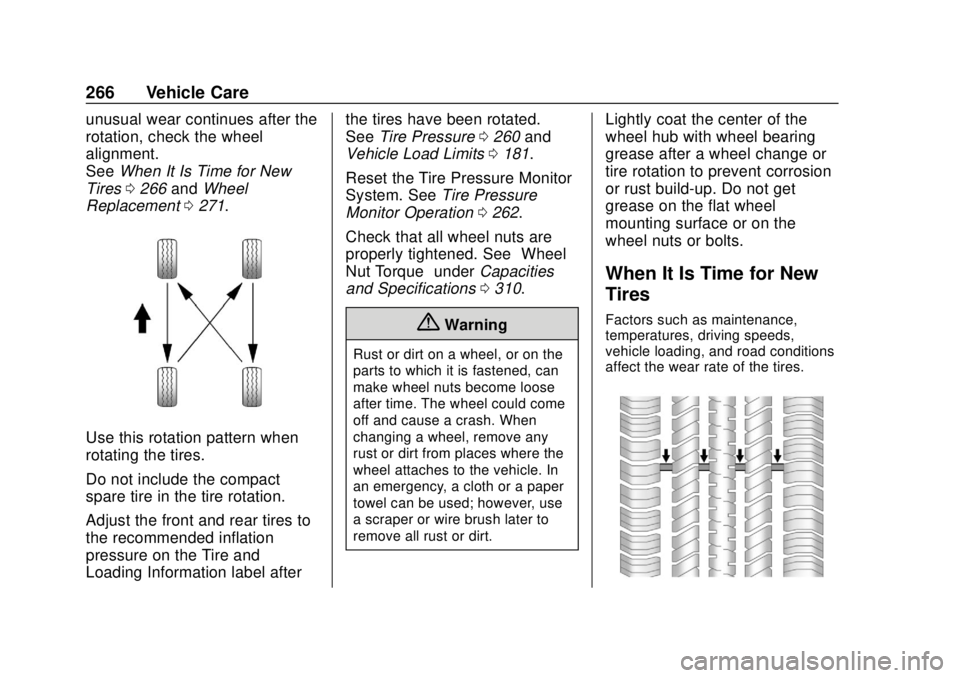
Use this rotation pattern when
rotating the tires.
Do not include the compact
spare tire in the tire rotation.
Adjust the front and rear tires to
the recommended inflation
pressure on the Tire and
Loading Information label after the tires have been rotated.
See
Tire Pressure 0260 and
Vehicle Load Limits 0181.
Reset the Tire Pressure Monitor
System. See Tire Pressure
Monitor Operation 0262.
Check that all wheel nuts are
properly tightened. See “Wheel
Nut Torque” underCapacities
and Specifications 0310.
{Warning
Rust or dirt on a wheel, or on the
parts to which it is fastened, can
make wheel nuts become loose
after time. The wheel could come
off and cause a crash. When
changing a wheel, remove any
rust or dirt from places where the
wheel attaches to the vehicle. In
an emergency, a cloth or a paper
towel can be used; however, use
a scraper or wire brush later to
remove all rust or dirt.
Lightly coat the center of the
wheel hub with wheel bearing
grease after a wheel change or
tire rotation to prevent corrosion
or rust build-up. Do not get
grease on the flat wheel
mounting surface or on the
wheel nuts or bolts.
When It Is Time for New
Tires
Factors such as maintenance,
temperatures, driving speeds,
vehicle loading, and road conditions
affect the wear rate of the tires.