Page 389 of 474

Chevrolet Silverado Owner Manual (GMNA-Localizing-U.S./Canada/Mexico-
1500-11698642) - 2019 - CRC - 2/20/19
388 Vehicle Care
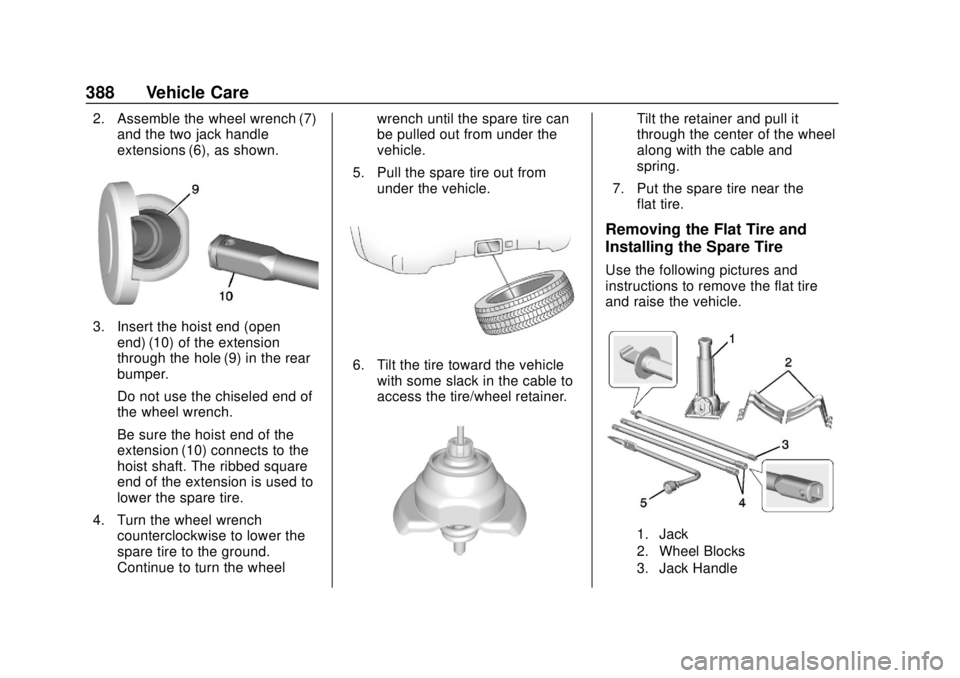
2. Assemble the wheel wrench (7)and the two jack handle
extensions (6), as shown.
3. Insert the hoist end (open
end) (10) of the extension
through the hole (9) in the rear
bumper.
Do not use the chiseled end of
the wheel wrench.
Be sure the hoist end of the
extension (10) connects to the
hoist shaft. The ribbed square
end of the extension is used to
lower the spare tire.
4. Turn the wheel wrench counterclockwise to lower the
spare tire to the ground.
Continue to turn the wheel wrench until the spare tire can
be pulled out from under the
vehicle.
5. Pull the spare tire out from under the vehicle.
6. Tilt the tire toward the vehiclewith some slack in the cable to
access the tire/wheel retainer.
Tilt the retainer and pull it
through the center of the wheel
along with the cable and
spring.
7. Put the spare tire near the flat tire.
Removing the Flat Tire and
Installing the Spare Tire
Use the following pictures and
instructions to remove the flat tire
and raise the vehicle.
1. Jack
2. Wheel Blocks
3. Jack Handle
Page 395 of 474

Chevrolet Silverado Owner Manual (GMNA-Localizing-U.S./Canada/Mexico-
1500-11698642) - 2019 - CRC - 2/20/19
394 Vehicle Care
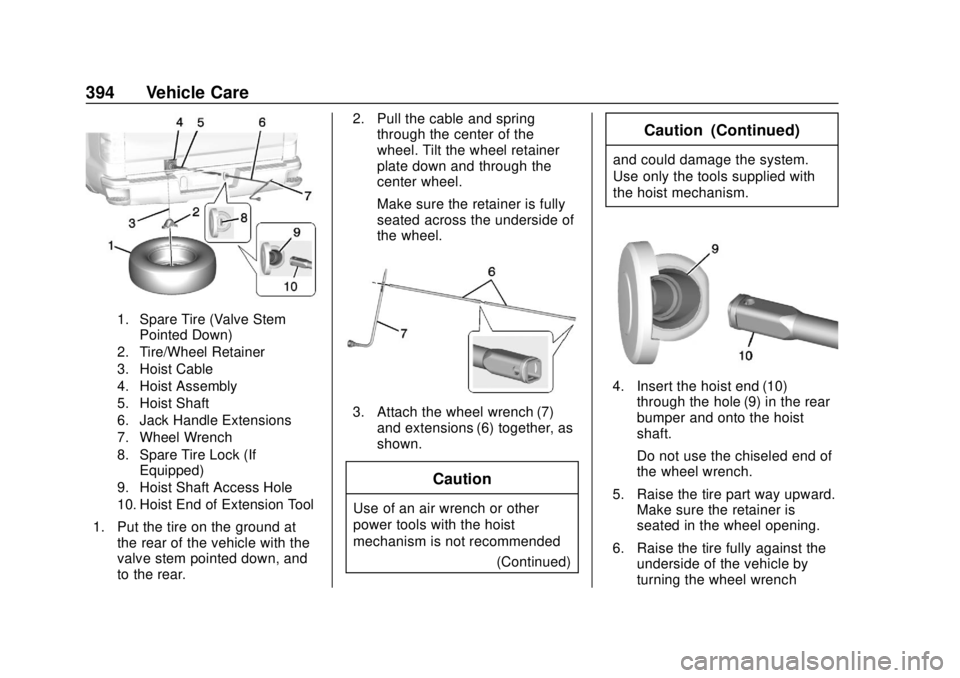
1. Spare Tire (Valve StemPointed Down)
2. Tire/Wheel Retainer
3. Hoist Cable
4. Hoist Assembly
5. Hoist Shaft
6. Jack Handle Extensions
7. Wheel Wrench
8. Spare Tire Lock (If Equipped)
9. Hoist Shaft Access Hole
10. Hoist End of Extension Tool
1. Put the tire on the ground at the rear of the vehicle with the
valve stem pointed down, and
to the rear. 2. Pull the cable and spring
through the center of the
wheel. Tilt the wheel retainer
plate down and through the
center wheel.
Make sure the retainer is fully
seated across the underside of
the wheel.
3. Attach the wheel wrench (7)
and extensions (6) together, as
shown.
Caution
Use of an air wrench or other
power tools with the hoist
mechanism is not recommended
(Continued)
Caution (Continued)
and could damage the system.
Use only the tools supplied with
the hoist mechanism.
4. Insert the hoist end (10)through the hole (9) in the rear
bumper and onto the hoist
shaft.
Do not use the chiseled end of
the wheel wrench.
5. Raise the tire part way upward. Make sure the retainer is
seated in the wheel opening.
6. Raise the tire fully against the underside of the vehicle by
turning the wheel wrench
Page 399 of 474

Chevrolet Silverado Owner Manual (GMNA-Localizing-U.S./Canada/Mexico-
1500-11698642) - 2019 - CRC - 2/20/19
398 Vehicle Care
Caution (Continued)
damaged. Only use a vehicle that
has a 12-volt system with a
negative ground for jump starting.
2. If you have a vehicle with a diesel engine with two
batteries, you should know
before you begin that,
especially in cold weather, you
may not be able to get enough
power from a single battery in
another vehicle to start your
diesel engine. If your vehicle
has more than one battery,
using the battery that is closer
to the starter will reduce
electrical resistance. This is
located on the passenger side,
in the rear of the engine
compartment.
3. Get the vehicles close enough so the jumper cables can
reach, but be sure the vehicles
are not touching each other.
If they are, it could cause an
unwanted ground connection. You would not be able to start
your vehicle, and the bad
grounding could damage the
electrical systems.
To avoid the possibility of the
vehicles rolling, set the parking
brake firmly on both vehicles
involved in the jump start
procedure. Put the automatic
transmission in P (Park) before
setting the parking brake. If you
have a four-wheel-drive
vehicle, be sure the transfer
case is in a drive gear, not in
N (Neutral).
Caution
If any accessories are left on or
plugged in during the jump
starting procedure, they could be
damaged. The repairs would not
be covered by the vehicle
warranty. Whenever possible, turn
off or unplug all accessories on
either vehicle when jump starting.
4. Turn the ignition off on both
vehicles. Unplug unnecessary
accessories plugged into the
accessory power outlets. Turn
off the radio and all the lamps
that are not needed. This will
avoid sparks and help save
both batteries. And it could
save the radio!
5. Open the hood on the other vehicle and locate the
positive (+) and negative (−)
terminal locations on that
vehicle.
The positive (+) terminal is
under a red plastic cover at the
positive battery post. To
uncover the positive (+)
terminal, open the red plastic
cover.
For more information on the
location of the remote
positive (+) and remote
negative (−) terminals, see
Engine Compartment Overview
0317.
Page 401 of 474

Chevrolet Silverado Owner Manual (GMNA-Localizing-U.S./Canada/Mexico-
1500-11698642) - 2019 - CRC - 2/20/19
400 Vehicle Care
11. Start the vehicle with the goodbattery and run the engine for a
while.
12. Try to start the vehicle that had the dead battery. If it will not
start after a few tries, it
probably needs service.
Caution
If the jumper cables are
connected or removed in the
wrong order, electrical shorting
may occur and damage the
vehicle. The repairs would not be
covered by the vehicle warranty.
Always connect and remove the
jumper cables in the correct order,
making sure that the cables do
not touch each other or other
metal.
Jumper Cable Removal
Reverse the sequence exactly when
removing the jumper cables.
After starting the disabled vehicle
and removing the jumper cables,
allow it to idle for several minutes.
Towing the Vehicle
Caution
Incorrectly towing a disabled
vehicle may cause damage. The
damage would not be covered by
the vehicle warranty. Do not lash
or hook to suspension
components. Use the proper
straps around the tires to secure
the vehicle. Do not drag a locked
wheel/tire while loading the
vehicle. Do not use a sling type
lift to tow the vehicle. This could
damage the vehicle.
GM recommends a flatbed tow truck
to transport a disabled vehicle. Use
ramps to help reduce approach
angles, if necessary. A towed
vehicle should have its drive wheels
off the ground. Contact Roadside
Assistance or a professional towing
service if the disabled vehicle must
be towed.
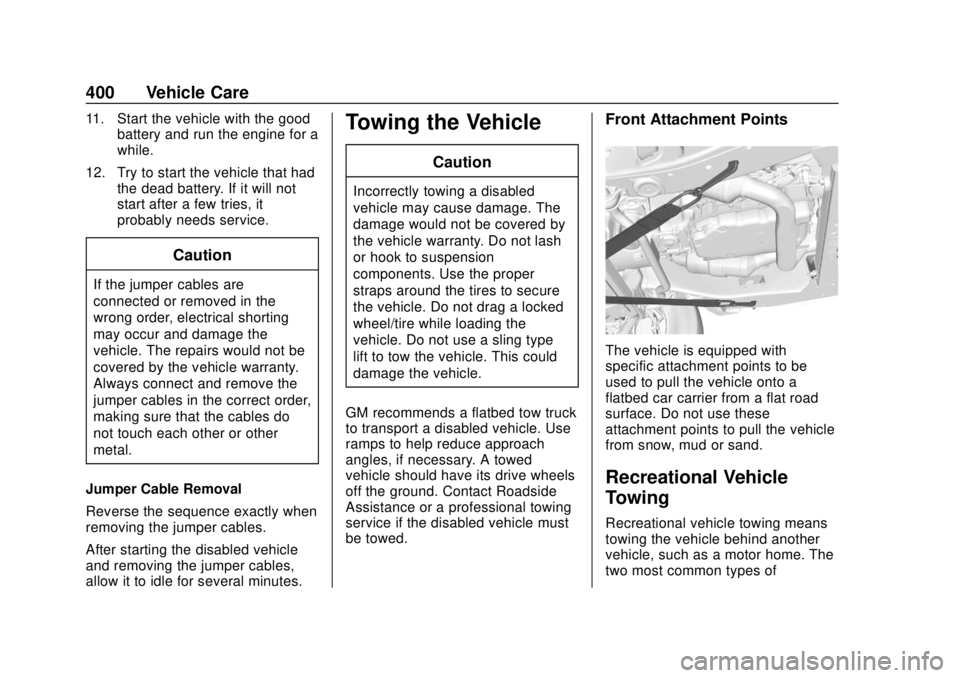
Front Attachment Points
The vehicle is equipped with
specific attachment points to be
used to pull the vehicle onto a
flatbed car carrier from a flat road
surface. Do not use these
attachment points to pull the vehicle
from snow, mud or sand.
Recreational Vehicle
Towing
Recreational vehicle towing means
towing the vehicle behind another
vehicle, such as a motor home. The
two most common types of