2019 CHEVROLET SILVERADO change wheel
[x] Cancel search: change wheelPage 173 of 474
Chevrolet Silverado Owner Manual (GMNA-Localizing-U.S./Canada/Mexico-
1500-11698642) - 2019 - CRC - 2/20/19
172 Instruments and Controls
Remote Window Operation
If equipped, this feature enables
remote operation of the windows
with the RKE transmitter. See
Remote Keyless Entry (RKE)
System Operation (Keyless Access)
034 or
Remote Keyless Entry (RKE)
System Operation (Key Access)
0 42.
Touch Off or On.
Passive Door Unlock
This allows the selection of what
doors will unlock when using the
button on the driver door to unlock
the vehicle.
Touch All Doors or Driver Door Only.
Passive Door Lock
This allows passive locking to be
turned on or off and selects
feedback. See Remote Keyless
Entry (RKE) System Operation
(Keyless Access) 034 or
Remote Keyless Entry (RKE)
System Operation (Key Access)
0 42. Touch Off, On with Horn
Chirp, or On.
Remote Left in Vehicle Alert
This feature sounds an alert when
the RKE transmitter is left in the
vehicle. This menu also enables
Remote No Longer In Vehicle Alert.
Touch Off or On.
Seating Position
Touch and the following may
display:
.
Seat Entry Memory
. Seat Exit Memory
Seat Entry Memory
This feature automatically recalls
the previously stored 1 or 2 button
positions when the ignition is
changed from off to on or ACC/
ACCESSORY. See Memory Seats
0 73.
Touch Off or On. Seat Exit Memory
This feature automatically recalls
the previously stored exit button
position when the ignition is
changed from on or ACC/
ACCESSORY to off and the driver
door is open. See
Memory Seats
0 73.
Touch Off or On.
Teen Driver
See “Teen Driver” under“Settings”
in the infotainment manual.
Valet Mode
This will lock the infotainment
system and steering wheel controls.
It may also limit access to vehicle
storage locations, if equipped.
To enable valet mode:
1. Enter a four-digit code on the keypad.
2. Select Enter to go to the confirmation screen.
3. Re-enter the four-digit code.
Page 178 of 474
Chevrolet Silverado Owner Manual (GMNA-Localizing-U.S./Canada/Mexico-
1500-11698642) - 2019 - CRC - 2/20/19
Lighting 177
Lighting
Exterior Lighting
Exterior Lamp Controls . . . . . . . 177
Exterior Lamps OffReminder . . . . . . . . . . . . . . . . . . . 179
Headlamp High/Low-Beam Changer . . . . . . . . . . . . . . . . . . . . 179
Flash-to-Pass . . . . . . . . . . . . . . . . 180
Daytime Running Lamps (DRL) . . . . . . . . . . . . . . . 180
Automatic Headlamp System . . . . . . . . . . . . . . . . . . . . . . 180
Hazard Warning Flashers . . . . . 181
Turn and Lane-Change Signals . . . . . . . . . . . . . . . . . . . . . . 182
Fog Lamps . . . . . . . . . . . . . . . . . . . 182
Task Lighting . . . . . . . . . . . . . . . . . 183
Exterior Cargo Lamps . . . . . . . . 183
Interior Lighting
Instrument Panel Illumination Control . . . . . . . . . . . . . . . . . . . . . . 184
Dome Lamps . . . . . . . . . . . . . . . . . 184
Reading Lamps . . . . . . . . . . . . . . 185
Lighting Features
Entry Lighting . . . . . . . . . . . . . . . . 185
Exit Lighting . . . . . . . . . . . . . . . . . . 185 Battery Load Management . . . 186
Battery Power Protection . . . . . 186
Exterior Lighting Battery
Saver . . . . . . . . . . . . . . . . . . . . . . . 187
Exterior Lighting
Exterior Lamp Controls
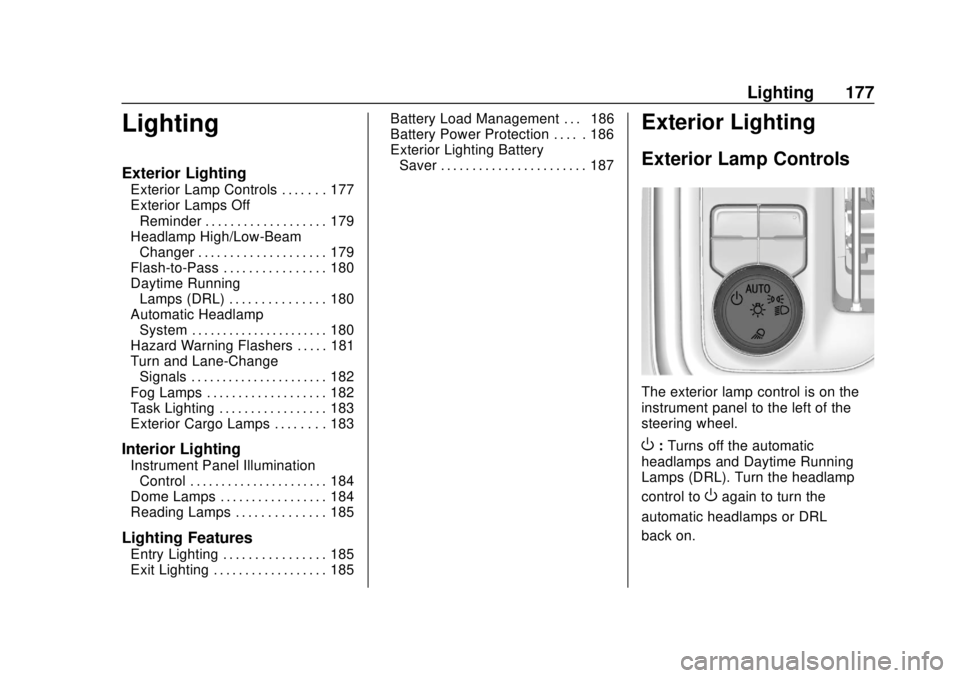
The exterior lamp control is on the
instrument panel to the left of the
steering wheel.
O: Turns off the automatic
headlamps and Daytime Running
Lamps (DRL). Turn the headlamp
control to
Oagain to turn the
automatic headlamps or DRL
back on.
Page 198 of 474

Chevrolet Silverado Owner Manual (GMNA-Localizing-U.S./Canada/Mexico-
1500-11698642) - 2019 - CRC - 2/20/19
Driving and Operating 197
Driving and
Operating
Driving Information
Distracted Driving . . . . . . . . . . . . 198
Defensive Driving . . . . . . . . . . . . . 199
Drunk Driving . . . . . . . . . . . . . . . . . 199
Control of a Vehicle . . . . . . . . . . . 199
Braking . . . . . . . . . . . . . . . . . . . . . . . 199
Steering . . . . . . . . . . . . . . . . . . . . . . 200
Off-Road Recovery . . . . . . . . . . . 200
Loss of Control . . . . . . . . . . . . . . . 201
Off-Road Driving . . . . . . . . . . . . . 201
Driving on Wet Roads . . . . . . . . 206
Hill and Mountain Roads . . . . . 207
Winter Driving . . . . . . . . . . . . . . . . 207
If the Vehicle Is Stuck . . . . . . . . 209
Vehicle Load Limits . . . . . . . . . . . 210
Truck-Camper LoadingInformation . . . . . . . . . . . . . . . . . . 215
Starting and Operating
New Vehicle Break-In . . . . . . . . . 217
Ignition Positions (KeyAccess) . . . . . . . . . . . . . . . . . . . . . 218
Ignition Positions (Keyless Access) . . . . . . . . . . . . . . . . . . . . . 220
Starting the Engine . . . . . . . . . . . 222 Stop/Start System . . . . . . . . . . . . 223
Engine Heater . . . . . . . . . . . . . . . . 224
Retained Accessory
Power (RAP) . . . . . . . . . . . . . . . . 226
Shifting Into Park . . . . . . . . . . . . . 226
Shifting out of Park . . . . . . . . . . . 227
Parking over Things
That Burn . . . . . . . . . . . . . . . . . . . 228
Active Fuel Management . . . . . 228
Extended Parking . . . . . . . . . . . . 228
Engine Exhaust
Engine Exhaust . . . . . . . . . . . . . . 229
Running the Vehicle While Parked . . . . . . . . . . . . . . . . . . . . . . 229
Automatic Transmission
Automatic Transmission . . . . . . 230
Manual Mode . . . . . . . . . . . . . . . . . 233
Tow/Haul Mode . . . . . . . . . . . . . . . 235
Drive Systems
Four-Wheel Drive . . . . . . . . . . . . . 236
Brakes
Antilock BrakeSystem (ABS) . . . . . . . . . . . . . . . 241
Electric Parking Brake . . . . . . . . 242
Brake Assist . . . . . . . . . . . . . . . . . . 243
Hill Start Assist (HSA) . . . . . . . . 244
Ride Control Systems
Traction Control/Electronic Stability Control . . . . . . . . . . . . . 244
Hill Descent Control (HDC) . . . 246
Driver Mode Control . . . . . . . . . . 247
Limited-Slip Differential . . . . . . . 251
Locking Rear Axle . . . . . . . . . . . . 251
Cruise Control
Cruise Control . . . . . . . . . . . . . . . . 251
Driver Assistance Systems
Driver Assistance Systems . . . 254
Assistance Systems for Parking or Backing . . . . . . . . . . 255
Assistance Systems for Driving . . . . . . . . . . . . . . . . . . . . . . 261
Forward Collision Alert (FCA) System . . . . . . . . . . . . . . . . . . . . . . 261
Forward Automatic Braking (FAB) . . . . . . . . . . . . . . . 264
Front Pedestrian Braking (FPB) System . . . . . . . . . . . . . . . 265
Side Blind Zone Alert (SBZA) . . . . . . . . . . . . . . . . 267
Lane Change Alert (LCA) . . . . . 268
Lane Departure Warning (LDW) . . . . . . . . . . . . . 270
Lane Keep Assist (LKA) . . . . . . 270
Page 202 of 474
Chevrolet Silverado Owner Manual (GMNA-Localizing-U.S./Canada/Mexico-
1500-11698642) - 2019 - CRC - 2/20/19
Driving and Operating 201
3. Turn the steering wheel to gostraight down the roadway.
Loss of Control
Skidding
There are three types of skids that
correspond to the vehicle's three
control systems:
.Braking Skid —wheels are not
rolling.
. Steering or Cornering Skid —
too much speed or steering in a
curve causes tires to slip and
lose cornering force.
. Acceleration Skid —too much
throttle causes the driving
wheels to spin.
Defensive drivers avoid most skids
by taking reasonable care suited to
existing conditions, and by not
overdriving those conditions. But
skids are always possible.
If the vehicle starts to slide, follow
these suggestions: .
Ease your foot off the
accelerator pedal and steer the
way you want the vehicle to go.
The vehicle may straighten out.
Be ready for a second skid if it
occurs.
. Slow down and adjust your
driving according to weather
conditions. Stopping distance
can be longer and vehicle
control can be affected when
traction is reduced by water,
snow, ice, gravel, or other
material on the road. Learn to
recognize warning clues —such
as enough water, ice, or packed
snow on the road to make a
mirrored surface —and slow
down when you have any doubt.
. Try to avoid sudden steering,
acceleration, or braking,
including reducing vehicle speed
by shifting to a lower gear. Any
sudden changes could cause
the tires to slide.
Remember: Antilock brakes help
avoid only the braking skid.
Off-Road Driving
Four-wheel-drive vehicles can be
used for off-road driving. Vehicles
without four-wheel drive and
vehicles not equipped with All
Terrain (AT) or On-Off Road (OOR)
tires must not be driven off-road
except on a level, solid surface. For
contact information about the
original equipment tires, see the
warranty manual.
One of the best ways for successful
off-road driving is to control the
speed.
{Warning
When driving off-road, bouncing
and quick changes in direction
can easily throw you out of
position. This could cause you to
lose control and crash. You and
your passengers should always
wear seat belts.
Page 206 of 474
Chevrolet Silverado Owner Manual (GMNA-Localizing-U.S./Canada/Mexico-
1500-11698642) - 2019 - CRC - 2/20/19
Driving and Operating 205
downhill. If the vehicle slips
sideways, it can hit something
that will trip it—a rock, a rut,
etc. —and roll over.
. Hidden obstacles can make the
steepness of the incline more
severe. If a rock is driven across
with the uphill wheels, or if the
downhill wheels drop into a rut
or depression, the vehicle can tilt
even more.
. If an incline must be driven
across, and the vehicle starts to
slide, turn downhill. This should
help straighten out the vehicle
and prevent the side slipping.
{Warning
Getting out of the vehicle on the
downhill side when stopped
across an incline is dangerous.
If the vehicle rolls over, you could
be crushed or killed. Always get
out on the uphill side of the
vehicle and stay well clear of the
rollover path.
Driving in Mud, Sand, Snow,
or Ice
Use a low gear when driving in mud
—the deeper the mud, the lower
the gear. Keep the vehicle moving
to avoid getting stuck.
Traction changes when driving on
sand. On loose sand, such as on
beaches or sand dunes, the tires
tend to sink into the sand. This
affects steering, accelerating, and
braking. Drive at a reduced speed
and avoid sharp turns or abrupt
maneuvers.
Traction is reduced on hard packed
snow and ice and it is easy to lose
control. Reduce vehicle speed when
driving on hard packed snow
and ice.
{Warning
Driving on frozen lakes, ponds,
or rivers can be dangerous. Ice
conditions vary greatly and the
vehicle could fall through the ice;
(Continued)
Warning (Continued)
you and your passengers could
drown. Drive your vehicle on safe
surfaces only.
Driving in Water
{Warning
Driving through rushing water can
be dangerous. Deep water can
sweep your vehicle downstream
and you and your passengers
could drown. If it is only shallow
water, it can still wash away the
ground from under your tires.
Traction could be lost, and the
vehicle could roll over. Do not
drive through rushing water.
Page 238 of 474
Chevrolet Silverado Owner Manual (GMNA-Localizing-U.S./Canada/Mexico-
1500-11698642) - 2019 - CRC - 2/20/19
Driving and Operating 237
{Warning
If equipped with four-wheel drive,
the vehicle will be free to roll if the
transfer case is in N (Neutral),
even when the shift lever is in
P (Park). You or someone else
could be seriously injured. Be
sure the transfer case is in a drive
gear—2
m, 4m, or 4n—or set the
parking brake before placing the
transfer case in N (Neutral). See
Shifting Into Park 0226.
Caution
Extended high-speed operation in
4
nmay damage or shorten the
life of the drivetrain.
An engagement noise and bump is
normal when shifting between 4
n
and 4mor N (Neutral), with the
engine running. Shifting into 4
nwill turn Traction
Control and StabiliTrak/Electronic
Stability Control (ESC) off. See
Traction Control/Electronic Stability
Control 0244.
Automatic Transfer Case
Two-Speed Transfer Case
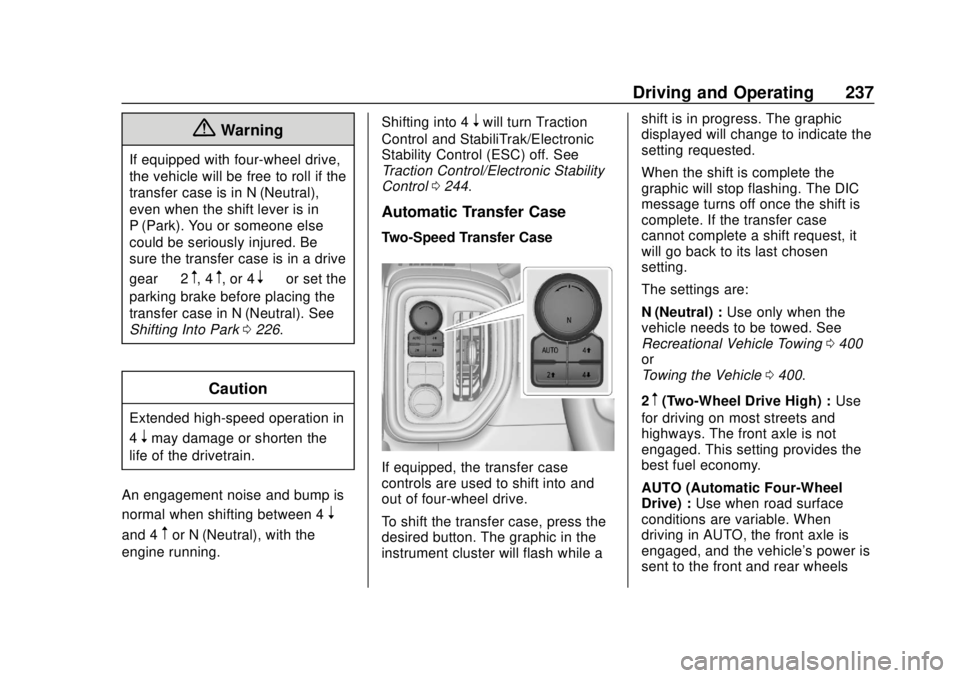
If equipped, the transfer case
controls are used to shift into and
out of four-wheel drive.
To shift the transfer case, press the
desired button. The graphic in the
instrument cluster will flash while a shift is in progress. The graphic
displayed will change to indicate the
setting requested.
When the shift is complete the
graphic will stop flashing. The DIC
message turns off once the shift is
complete. If the transfer case
cannot complete a shift request, it
will go back to its last chosen
setting.
The settings are:
N (Neutral) :
Use only when the
vehicle needs to be towed. See
Recreational Vehicle Towing 0400
or
Towing the Vehicle 0400.
2
m(Two-Wheel Drive High) : Use
for driving on most streets and
highways. The front axle is not
engaged. This setting provides the
best fuel economy.
AUTO (Automatic Four-Wheel
Drive) : Use when road surface
conditions are variable. When
driving in AUTO, the front axle is
engaged, and the vehicle's power is
sent to the front and rear wheels
Page 241 of 474

Chevrolet Silverado Owner Manual (GMNA-Localizing-U.S./Canada/Mexico-
1500-11698642) - 2019 - CRC - 2/20/19
240 Driving and Operating
Shifting Into N (Neutral)
To shift into N (Neutral):1. Start the vehicle.
2. Shift the transmission to N (Neutral).
3. Shift the transfer case to 2
m.
4. Apply the parking brake and/or brake pedal.
5. Press 2
mfive times in
10 seconds until the N (Neutral)
graphic starts flashing in the
instrument cluster. When the
shift is complete, the graphic
stops flashing. If the parking
brake and/or brake pedal is not
applied within 20 seconds, the
transfer case will remain in the
original state.
6. If the transmission is not shifted into N (Neutral) or the
vehicle has not slowed to
5 km/h (3 mph) within
20 seconds, the transfer case
will remain in its original state.
This will be indicated in the
instrument cluster. Shifting Out of N (Neutral)
To shift out of N (Neutral):
1. Turn the ignition on with the engine off. See Ignition
Positions (Key Access) 0218
or
Ignition Positions (Keyless
Access) 0220.
2. Set the parking brake. See Electric Parking Brake 0242.
3. Shift the transmission to N (Neutral).
4. Shift the transfer case to 2
m.
Transfer case shifts out of
N (Neutral) can only be made
into 2
m. When the shift to 2mis
complete, the graphic in the
instrument cluster will stop
flashing. If the transfer case
cannot complete a shift, the
graphic will return to the
previously selected setting. Single Speed Transfer Case
If equipped, the transfer case
controls are used to shift into and
out of four-wheel drive.
To shift the transfer case, press the
desired button. The graphic in the
instrument cluster will flash while a
shift is in progress. The graphic
displayed will change to indicate the
setting requested.
When the shift is complete the
graphic will stop flashing. The DIC
message turns off once the shift is
complete. If the transfer case
Page 243 of 474
Chevrolet Silverado Owner Manual (GMNA-Localizing-U.S./Canada/Mexico-
1500-11698642) - 2019 - CRC - 2/20/19
242 Driving and Operating
ABS can change the brake pressure
to each wheel, as required, faster
than any driver could. This can help
you steer around the obstacle while
braking hard.
As the brakes are applied, the
computer keeps receiving updates
on wheel speed and controls
braking pressure accordingly.
Remember: ABS does not change
the time needed to get a foot up to
the brake pedal or always decrease
stopping distance. If you get too
close to the vehicle in front of you,
there will not be enough time to
apply the brakes if that vehicle
suddenly slows or stops. Always
leave enough room up ahead to
stop, even with ABS.
Using ABS
Do not pump the brakes. Just hold
the brake pedal down firmly and let
ABS work. You may hear noise or
feel vibration while the ABS is
operating.
The Traction Control System (TCS)/
StabiliTrak indicator light will flash to
indicate that ABS is active. WhenABS is active, it may indicate that
road surfaces are slippery. Braking
sooner may be required for driving
conditions.
Braking in Emergencies
ABS allows you to steer and brake
at the same time. In many
emergencies, steering can help
more than even the very best
braking.
Electric Parking Brake
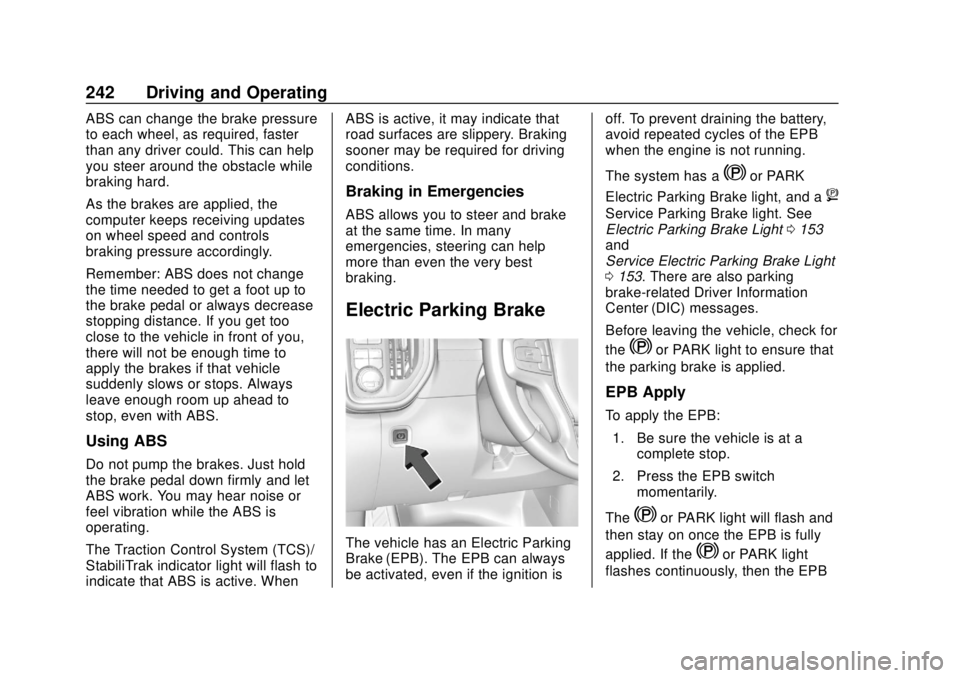
The vehicle has an Electric Parking
Brake (EPB). The EPB can always
be activated, even if the ignition is
off. To prevent draining the battery,
avoid repeated cycles of the EPB
when the engine is not running.
The system has a
Yor PARK
Electric Parking Brake light, and a
8
Service Parking Brake light. See
Electric Parking Brake Light 0153
and
Service Electric Parking Brake Light
0 153. There are also parking
brake-related Driver Information
Center (DIC) messages.
Before leaving the vehicle, check for
the
Yor PARK light to ensure that
the parking brake is applied.
EPB Apply
To apply the EPB:
1. Be sure the vehicle is at a complete stop.
2. Press the EPB switch momentarily.
The
Yor PARK light will flash and
then stay on once the EPB is fully
applied. If the
Yor PARK light
flashes continuously, then the EPB