2019 CHEVROLET SILVERADO ground
[x] Cancel search: groundPage 277 of 474
Chevrolet Silverado Owner Manual (GMNA-Localizing-U.S./Canada/Mexico-
1500-11698642) - 2019 - CRC - 2/20/19
276 Driving and Operating
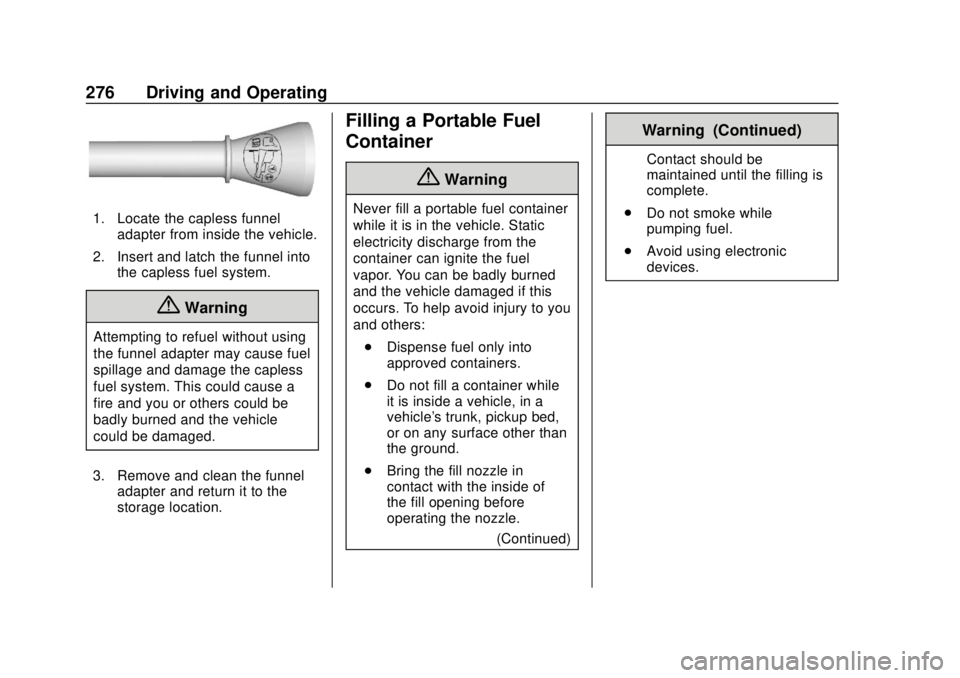
1. Locate the capless funneladapter from inside the vehicle.
2. Insert and latch the funnel into the capless fuel system.
{Warning
Attempting to refuel without using
the funnel adapter may cause fuel
spillage and damage the capless
fuel system. This could cause a
fire and you or others could be
badly burned and the vehicle
could be damaged.
3. Remove and clean the funnel adapter and return it to the
storage location.
Filling a Portable Fuel
Container
{Warning
Never fill a portable fuel container
while it is in the vehicle. Static
electricity discharge from the
container can ignite the fuel
vapor. You can be badly burned
and the vehicle damaged if this
occurs. To help avoid injury to you
and others:
. Dispense fuel only into
approved containers.
. Do not fill a container while
it is inside a vehicle, in a
vehicle's trunk, pickup bed,
or on any surface other than
the ground.
. Bring the fill nozzle in
contact with the inside of
the fill opening before
operating the nozzle.
(Continued)
Warning (Continued)
Contact should be
maintained until the filling is
complete.
. Do not smoke while
pumping fuel.
. Avoid using electronic
devices.
Page 281 of 474

Chevrolet Silverado Owner Manual (GMNA-Localizing-U.S./Canada/Mexico-
1500-11698642) - 2019 - CRC - 2/20/19
280 Driving and Operating
The vehicle can tow in D (Drive).
Shift the transmission to a lower
gear if the transmission shifts too
often under heavy loads and/or hilly
conditions.
When towing at higher altitudes,
engine coolant will boil at a lower
temperature than at lower altitudes.
If the engine is turned off
immediately after towing at high
altitude on steep uphill grades, the
vehicle could show signs similar to
engine overheating. To avoid this,
let the engine run, preferably on
level ground, with the transmission
in P (Park) for a few minutes before
turning the engine off. If the
overheat warning comes on, see
Engine Overheating0332.
Viewing Systems
If equipped, the viewing systems on
the vehicle can improve visibility
while hitching, backing, and driving
with a trailer. See Driver Assistance
Systems 0254.
Parking on Hills
{Warning
To prevent serious injury or death,
always park your vehicle and
trailer on a level surface when
possible.
When parking your vehicle and your
trailer on a hill: 1. Press the brake pedal, but do not shift into P (Park) yet. Turn
the wheels into the curb if
facing downhill or into traffic if
facing uphill.
2. Have someone place chocks under the trailer wheels.
3. When the wheel chocks are in place, gradually release the
brake pedal to allow the chocks
to absorb the load of the trailer.
4. Reapply the brake pedal. Then apply the parking brake and
shift into P (Park).
5. Release the brake pedal.
Leaving After Parking on a Hill
1. Apply and hold the brake pedal.
.Start the engine.
. Shift into a gear.
. Release the parking brake.
2. Let up on the brake pedal.
3. Drive slowly until the trailer is clear of the chocks.
4. Stop and have someone pick up and store the chocks.
Launching and Retrieving
a Boat
Backing the Trailer into the Water
{Warning
.Have all passengers get out
of the vehicle before
backing onto the sloped part
of the ramp. Lower the
driver and passenger side
windows before backing
onto the ramp. This will
(Continued)
Page 289 of 474
Chevrolet Silverado Owner Manual (GMNA-Localizing-U.S./Canada/Mexico-
1500-11698642) - 2019 - CRC - 2/20/19
288 Driving and Operating
Weight-Distributing Hitch and Adjustment
A weight-distributing hitch may be useful with some trailers. Use the following guidelines to determine if a
weight-distributing hitch should be used.Vehicle Series Trailer Weight Weight-Distributing Hitch
Usage Hitch Distribution
1500 Up to 3 175 kg (7,000 lb) OptionalRefer to trailer
manufacturer ’s
recommendation
1500 Over 3 175 kg (7,000 lb) Required50%
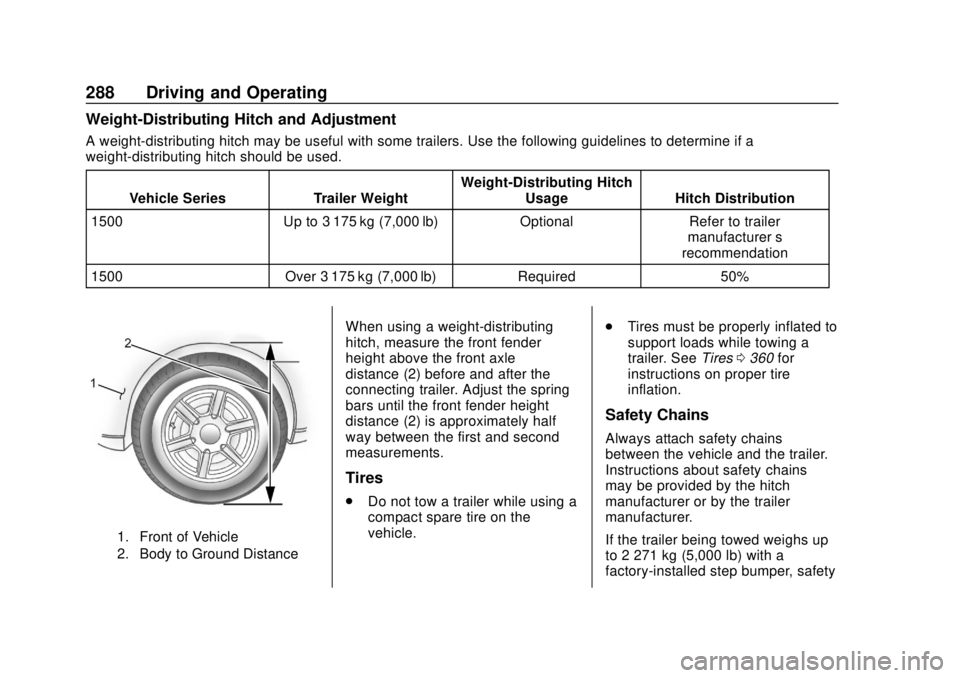
1. Front of Vehicle
2. Body to Ground Distance
When using a weight-distributing
hitch, measure the front fender
height above the front axle
distance (2) before and after the
connecting trailer. Adjust the spring
bars until the front fender height
distance (2) is approximately half
way between the first and second
measurements.
Tires
.
Do not tow a trailer while using a
compact spare tire on the
vehicle. .
Tires must be properly inflated to
support loads while towing a
trailer. See Tires0360 for
instructions on proper tire
inflation.
Safety Chains
Always attach safety chains
between the vehicle and the trailer.
Instructions about safety chains
may be provided by the hitch
manufacturer or by the trailer
manufacturer.
If the trailer being towed weighs up
to 2 271 kg (5,000 lb) with a
factory-installed step bumper, safety
Page 290 of 474
Chevrolet Silverado Owner Manual (GMNA-Localizing-U.S./Canada/Mexico-
1500-11698642) - 2019 - CRC - 2/20/19
Driving and Operating 289
chains may be attached to the
attaching points on the bumper;
otherwise, safety chains should be
attached to holes on the trailer hitch.
Cross the safety chains under the
tongue of the trailer to help prevent
the tongue from contacting the road
if it becomes separated from the
hitch. Always leave enough slack in
the safety chains to allow the
combination to turn. Never allow
safety chains to drag on the ground.
Trailer Brakes
Loaded trailers over 900 kg
(2,000 lb) must be equipped with
brake systems and with brakes for
each axle. Trailer braking equipment
conforming to Canadian Standards
Association (CSA) requirement
CAN3-D313, or its equivalent, is
recommended.
State or local regulations may
require trailers to have their own
braking system if the loaded weight
of the trailer exceeds certain
minimums that can vary from state
to state. Read and follow the
instructions for the trailer brakes sothey are installed, adjusted, and
maintained properly. Never attempt
to tap into your vehicle's hydraulic
brake system. If you do, both the
vehicle antilock brakes and the
trailer brakes may not function,
which could result in a crash.
Trailer Wiring Harness
If the vehicle is not equipped with a
trailer connector on the rear bumper,
a 7-wire trailering harness is tied to
the vehicles frame. The harness
requires the installation of a trailer
connector, which is available
through your dealer.
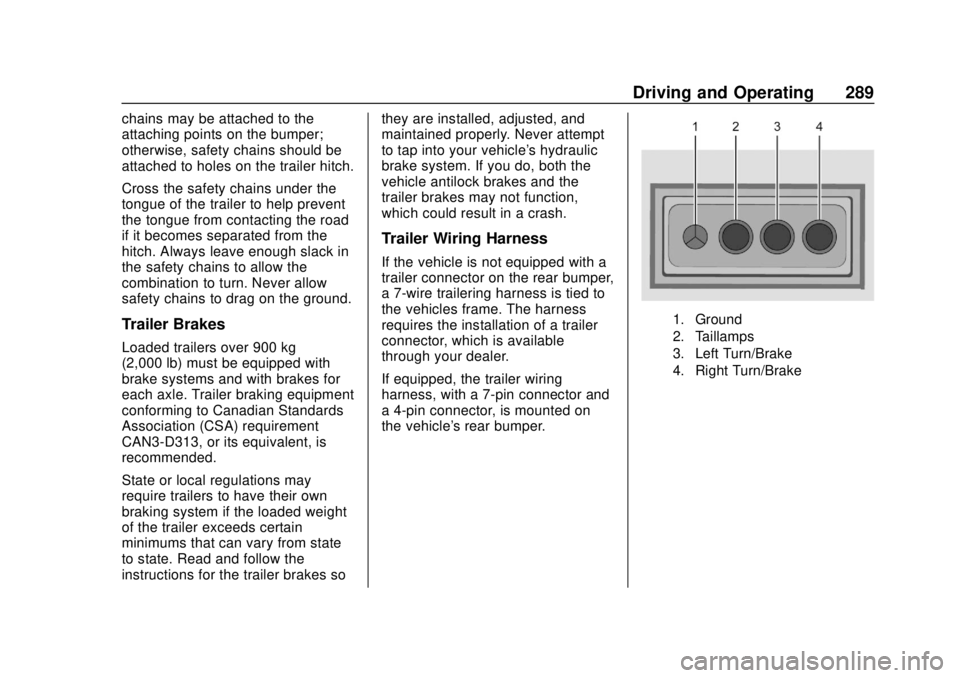
If equipped, the trailer wiring
harness, with a 7-pin connector and
a 4-pin connector, is mounted on
the vehicle's rear bumper.
1. Ground
2. Taillamps
3. Left Turn/Brake
4. Right Turn/Brake
Page 291 of 474

Chevrolet Silverado Owner Manual (GMNA-Localizing-U.S./Canada/Mexico-
1500-11698642) - 2019 - CRC - 2/20/19
290 Driving and Operating
1. Left Turn/Brake
2. Taillamps
3. Reverse Lamps
4. Battery Feed
5. Right Turn/Brake
6. Electric Brakes
7. Ground
Use only a round, seven-wire
connector with flat blade terminals
meeting SAE J2863 specifications
for proper electrical connectivity.
Electric Brake Control Wiring
Provisions
If the vehicle is not equipped with
an integrated trailer brake controller,
and the trailer has electric brakes, a
trailer brake controller needs to be
installed on the vehicle. The brake
controller should be installed by
your dealer or a qualified service
center.
If equipped, there is a trailer brake
jumper harness provided with the
vehicle. The connector on the trailer
brake jumper harness is attached to
a mating connector to the left of the
steering wheel behind the knee
bolster. The four blunt cut wires on
the jumper harness need to be
connected to an aftermarket electric
trailer brake controller. The harness
contains the following circuits:Electric Trailer
Brakes Blue
Battery Feed Red/Violet or
Red/Black
Brake Apply
Signal White/Blue Ground Black
The fuse for the electric trailer brake
circuit is in the engine compartment
fuse block, but the wires may not be
connected. They should be
connected by your dealer or a
qualified service center.
Refer to the aftermarket electric
trailer brake controller owner's
manual to determine wire color
coding of the electric trailer brake
controller. The wire colors on the
brake controller may be different
from the vehicle.
Trailer Lamps
Always check all trailer lamps are
working at the beginning of each
trip, and periodically on longer trips.
If equipped, the Trailering App will
monitor the RH turn/brake lamp
circuit, LH turn/brake lamp circuit,
running lamp circuit, and reverse
lamp circuits on the trailer. DIC
messages and Trailering App alerts
may be displayed if lighting circuit
issues are detected on the trailer.
Page 324 of 474

Chevrolet Silverado Owner Manual (GMNA-Localizing-U.S./Canada/Mexico-
1500-11698642) - 2019 - CRC - 2/20/19
Vehicle Care 323
Follow these guidelines:
.To get an accurate reading, park
the vehicle on level ground.
Check the engine oil level after
the engine has been off for at
least two hours. Checking the
engine oil level on steep grades
or too soon after engine shutoff
can result in incorrect readings.
Accuracy improves when
checking a cold engine prior to
starting. Remove the dipstick
and check the level.
. If unable to wait two hours, the
engine must be off for at least
15 minutes if the engine is
warm, or at least 30 minutes if
the engine is not warm. Pull out
the dipstick, wipe it with a clean
paper towel or cloth, then push it
back in all the way. Remove it
again, keeping the tip down, and
check the level.When to Add Engine Oil
If the oil is below the cross-hatched
area at the tip of the dipstick and
the engine has been off for at least
15 minutes, add 1 L (1 qt) of the
recommended oil and then recheck
the level. See “Selecting the Right
Engine Oil” later in this section for
an explanation of what kind of oil to
use. For engine oil crankcase
capacity, see Capacities and
Specifications 0432.
Caution
Do not add too much oil. Oil
levels above or below the
acceptable operating range
shown on the dipstick are harmful
to the engine. If the oil level is
(Continued)
Caution (Continued)
above the operating range (i.e.,
the engine has so much oil that
the oil level gets above the
cross-hatched area that shows
the proper operating range), the
engine could be damaged. Drain
the excess oil or limit driving of
the vehicle, and seek a service
professional to remove the
excess oil.
See Engine Compartment Overview
0 317 for the location of the engine
oil fill cap.
Add enough oil to put the level
somewhere in the proper operating
range. Push the dipstick all the way
back in when through.
Selecting the Right Engine Oil
Selecting the right engine oil
depends on both the proper oil
specification and viscosity grade.
See Recommended Fluids and
Lubricants 0427.
Page 325 of 474
Chevrolet Silverado Owner Manual (GMNA-Localizing-U.S./Canada/Mexico-
1500-11698642) - 2019 - CRC - 2/20/19
324 Vehicle Care
Specification
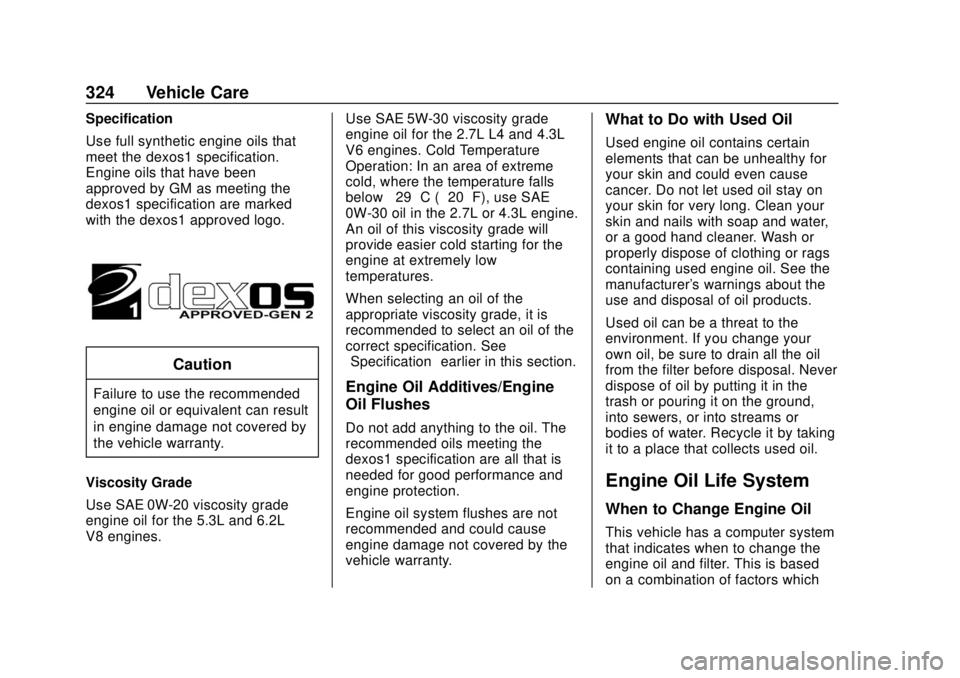
Use full synthetic engine oils that
meet the dexos1 specification.
Engine oils that have been
approved by GM as meeting the
dexos1 specification are marked
with the dexos1 approved logo.
Caution
Failure to use the recommended
engine oil or equivalent can result
in engine damage not covered by
the vehicle warranty.
Viscosity Grade
Use SAE 0W-20 viscosity grade
engine oil for the 5.3L and 6.2L
V8 engines. Use SAE 5W-30 viscosity grade
engine oil for the 2.7L L4 and 4.3L
V6 engines. Cold Temperature
Operation: In an area of extreme
cold, where the temperature falls
below
−29 °C (−20 °F), use SAE
0W-30 oil in the 2.7L or 4.3L engine.
An oil of this viscosity grade will
provide easier cold starting for the
engine at extremely low
temperatures.
When selecting an oil of the
appropriate viscosity grade, it is
recommended to select an oil of the
correct specification. See
“Specification” earlier in this section.Engine Oil Additives/Engine
Oil Flushes
Do not add anything to the oil. The
recommended oils meeting the
dexos1 specification are all that is
needed for good performance and
engine protection.
Engine oil system flushes are not
recommended and could cause
engine damage not covered by the
vehicle warranty.
What to Do with Used Oil
Used engine oil contains certain
elements that can be unhealthy for
your skin and could even cause
cancer. Do not let used oil stay on
your skin for very long. Clean your
skin and nails with soap and water,
or a good hand cleaner. Wash or
properly dispose of clothing or rags
containing used engine oil. See the
manufacturer's warnings about the
use and disposal of oil products.
Used oil can be a threat to the
environment. If you change your
own oil, be sure to drain all the oil
from the filter before disposal. Never
dispose of oil by putting it in the
trash or pouring it on the ground,
into sewers, or into streams or
bodies of water. Recycle it by taking
it to a place that collects used oil.
Engine Oil Life System
When to Change Engine Oil
This vehicle has a computer system
that indicates when to change the
engine oil and filter. This is based
on a combination of factors which
Page 331 of 474
Chevrolet Silverado Owner Manual (GMNA-Localizing-U.S./Canada/Mexico-
1500-11698642) - 2019 - CRC - 2/20/19
330 Vehicle Care
.Helps keep the proper engine
temperature.
Caution
Do not use anything other than a
mix of DEX-COOL coolant that
meets GM Standard
GMW3420 and clean, drinkable
water. Anything else can cause
damage to the engine cooling
system and the vehicle, which
would not be covered by the
vehicle warranty.
Never dispose of engine coolant by
putting it in the trash, or by pouring
it on the ground, or into sewers,
streams, or bodies of water. Have
the coolant changed by an
authorized service center, familiar
with legal requirements regarding
used coolant disposal. This will help
protect the environment and your
health.
Checking Coolant
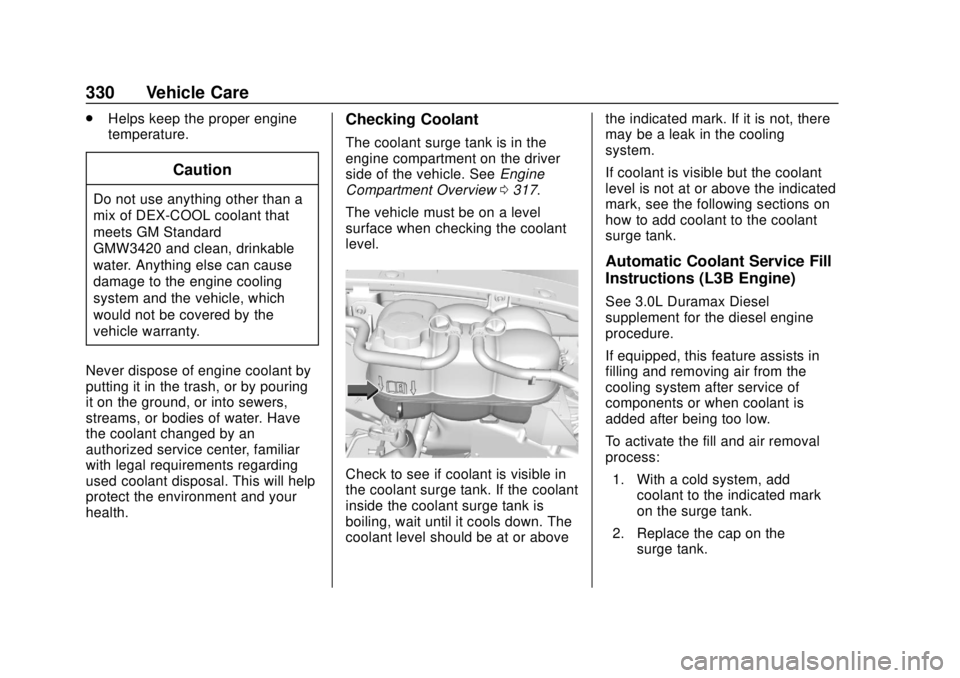
The coolant surge tank is in the
engine compartment on the driver
side of the vehicle. See Engine
Compartment Overview 0317.
The vehicle must be on a level
surface when checking the coolant
level.
Check to see if coolant is visible in
the coolant surge tank. If the coolant
inside the coolant surge tank is
boiling, wait until it cools down. The
coolant level should be at or above the indicated mark. If it is not, there
may be a leak in the cooling
system.
If coolant is visible but the coolant
level is not at or above the indicated
mark, see the following sections on
how to add coolant to the coolant
surge tank.
Automatic Coolant Service Fill
Instructions (L3B Engine)
See 3.0L Duramax Diesel
supplement for the diesel engine
procedure.
If equipped, this feature assists in
filling and removing air from the
cooling system after service of
components or when coolant is
added after being too low.
To activate the fill and air removal
process:
1. With a cold system, add coolant to the indicated mark
on the surge tank.
2. Replace the cap on the surge tank.