2019 CHEVROLET SILVERADO steering
[x] Cancel search: steeringPage 2 of 20

2
INSTRUMENT PANEL
Cruise Control/ Forward Collision AlertF/Heated Steering WheelF Buttons
Electric Parking Brake Switch
Power Mirror/Window Buttons
Driver Information Center Controls/Voice Recognition Buttons
Audio Volume Control (behind steering wheel)
Steering Wheel Adjustment Lever
Audio Next/Previous Favorite Station Controls (behind steering wheel)
Exterior/Instrument Panel/Cargo Lamp Controls
4WD ControlsF/Drive Mode Control
Turn Signal/Windshield Wipers Lever
Range Selection Mode Buttons
Driver Information Center
HUD ControlsF (behind steering wheel)
Low Fuel
Traction Control Off
Brake System
Cruise Control
StabiliTrak Active
StabiliTrak Off
Forward Collision Alert
Security
PARK Electric Parking Brake
Electric Parking Brake Service
Lights On Reminder
Airbag Readiness
Engine Oil Pressure
Check Engine
Lane Keep Assist
SYMBOLS
Page 7 of 20

7F Optional equipment
STEERING WHEEL ADJUSTMENT
CLIMATE CONTROLS/VEHICLE CONTROLSF
With the vehicle parked, pull the lever under the steering column to adjust the steering wheel up or down and closer or farther away.F Push up the lever to lock the steering wheel in place.
See Instruments and Controls in your Owner’s Manual.
AUTO Driver’s Temp. Control/Automatic Operation
SYNC Passenger’s Temp. Control/Link passenger’s setting to driver’s setting
/ Air Conditioning/ Recirculation Mode
Fan Speed/ On/Off
MA X/REAR Defrost Mode/Rear Window-Heated Outside Mirror Defog
Air Delivery Modes: Defog Vent Floor
Park Assist On/OffF
Lane Keep Assist On/OffF
Press and hold to open all windowsF
�$ Auto Engine Stop/Start Disable On/Off
Press to lower/Press and hold to raise the power tailgateF
Cargo Box Power Outlet On/OffF (Ignition must be On)
Hazard Warning Flashers On/Off
Traction Control/ StabiliTrak On/Off
Dual automatic climate controlsF shown
See Instruments and Controls in your Owner’s Manual.
Page 8 of 20

8F Optional equipment
DRIVER INFORMATION CENTER
MULTI-COLOR HEAD-UP DISPLAYF
The Driver Information Center (DIC) on the instrument cluster displays\
a variety of
vehicle messages and system information.
BASE DIC CONTROL
Use the trip odometer reset stem on the instrument cluster to access the\
DIC menu. Turn the stem to scroll through the menu. Press and hold the stem to res\
et an item.
MIDLEVEL AND UPLEVEL DIC CONTROLSF
Use the controls on the right side of the steering wheel to view the various menus.
Press the or button to move between the display zones.
Rotate the thumbwheel up or down to move through the menus.
Press the thumbwheel to open a menu, or to select or reset an item.
SELECT INFO PAGESF
1. Use the controls to open the Options menu.
2. Scroll to Info Page Options. Press the thumbwheel to enter the menu.
3. Scroll through the list of items.
4. Press the thumbwheel to select or deselect an item to display in the Inf\
o menu.
See Instruments and Controls in your Owner’s Manual.
The Head-Up Display (HUD) projects some operating information on the windshield. Temporary information, such as audio changes and navigation maneuvers, also may be displayed. The HUD con-trols are on the left side of the instrument panel. HUD HUD
Lift up or press down to adjust the position of the image. It cannot be adjusted side-to-side.
INFO
Press to select from four displays:
• Speed View – Speedometer only
• Active Safety View – Speedometer and driver assistance information
• Navigation View – Speedometer and turn-by-turn navigation information
• Off-Road View – Speedometer and off-road information
Brightness
Lift up or press down to brighten or dim the display. Hold down to turn \
off the display.
See Instruments and Controls in your Owner’s Manual.
Midlevel and uplevel DIC ControlsF shown
Page 10 of 20

10F Optional equipment
INFOTAINMENT SYSTEM
STORING FAVORITES
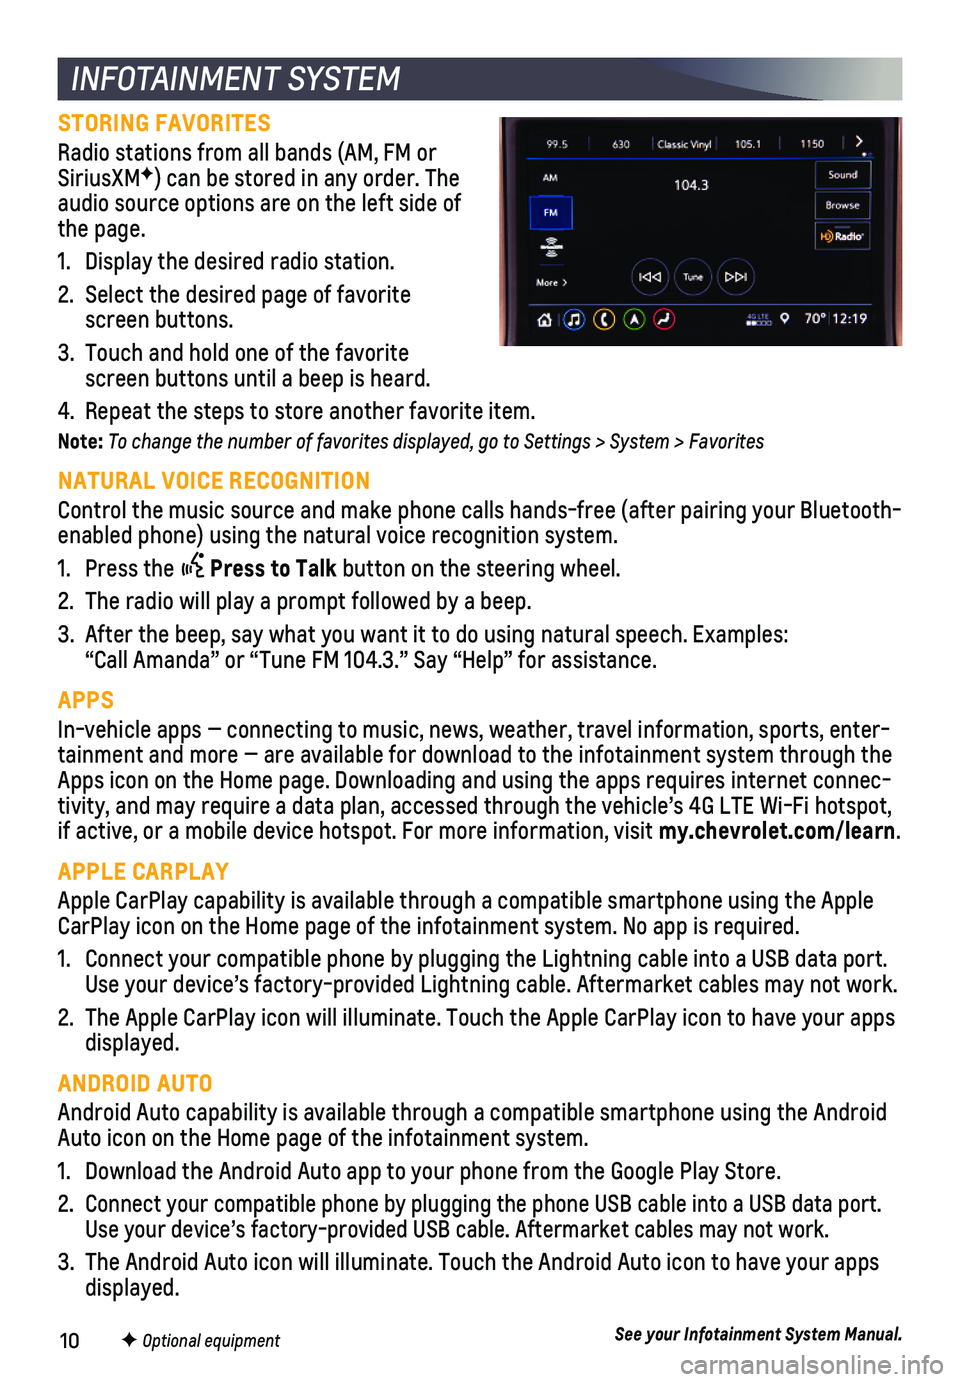
Radio stations from all bands (AM, FM or SiriusXMF) can be stored in any order. The audio source options are on the left side of the page.
1. Display the desired radio station.
2. Select the desired page of favorite screen buttons.
3. Touch and hold one of the favorite screen buttons until a beep is heard.
4. Repeat the steps to store another favorite item.
Note: To change the number of favorites displayed, go to Settings > System > Favorites
NATURAL VOICE RECOGNITION
Control the music source and make phone calls hands-free (after pairing\
your Bluetooth-enabled phone) using the natural voice recognition system.
1. Press the Press to Talk button on the steering wheel.
2. The radio will play a prompt followed by a beep.
3. After the beep, say what you want it to do using natural speech. Example\
s: “Call Amanda” or “Tune FM 104.3.” Say “Help” for assistance.
APPS
In-vehicle apps — connecting to music, news, weather, travel informat\
ion, sports, enter-tainment and more — are available for download to the infotainment sy\
stem through the Apps icon on the Home page. Downloading and using the apps requires inte\
rnet connec-tivity, and may require a data plan, accessed through the vehicle’s 4\
G LTE Wi-Fi hotspot, if active, or a mobile device hotspot. For more information, visit my.chevrolet.com/learn.
APPLE CARPLAY
Apple CarPlay capability is available through a compatible smartphone us\
ing the Apple CarPlay icon on the Home page of the infotainment system. No app is requ\
ired.
1. Connect your compatible phone by plugging the Lightning cable into a USB\
data port. Use your device’s factory-provided Lightning cable. Aftermarket cable\
s may not work.
2. The Apple CarPlay icon will illuminate. Touch the Apple CarPlay icon to \
have your apps displayed.
ANDROID AUTO
Android Auto capability is available through a compatible smartphone usi\
ng the Android Auto icon on the Home page of the infotainment system.
1. Download the Android Auto app to your phone from the Google Play Store.
2. Connect your compatible phone by plugging the phone USB cable into a USB\
data port. Use your device’s factory-provided USB cable. Aftermarket cables may \
not work.
3. The Android Auto icon will illuminate. Touch the Android Auto icon to ha\
ve your apps displayed.
See your Infotainment System Manual.
Page 11 of 20

11
BLUETOOTH® SYSTEMF
AUDIO STEERING WHEEL CONTROLSF
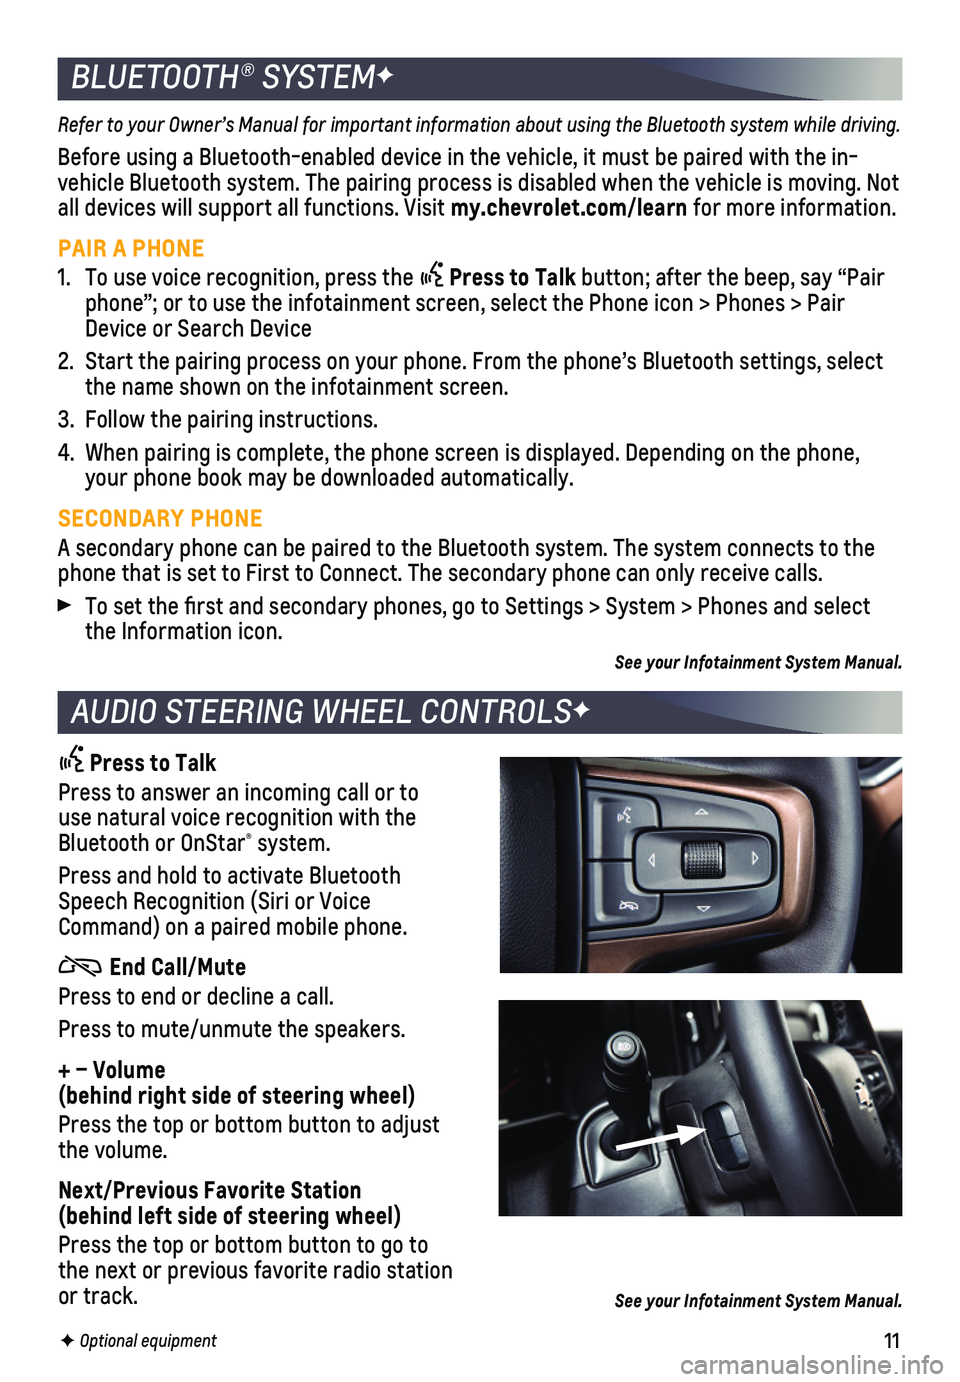
Press to Talk
Press to answer an incoming call or to use natural voice recognition with the Bluetooth or OnStar® system.
Press and hold to activate Bluetooth Speech Recognition (Siri or Voice Command) on a paired mobile phone.
End Call/Mute
Press to end or decline a call.
Press to mute/unmute the speakers.
+ – Volume (behind right side of steering wheel)
Press the top or bottom button to adjust the volume.
Next/Previous Favorite Station (behind left side of steering wheel)
Press the top or bottom button to go to the next or previous favorite radio station or track.
F Optional equipment
Refer to your Owner’s Manual for important information about using the Bluetooth system while driving.
Before using a Bluetooth-enabled device in the vehicle, it must be paire\
d with the in-vehicle Bluetooth system. The pairing process is disabled when the vehic\
le is moving. Not all devices will support all functions. Visit my.chevrolet.com/learn for more information.
PAIR A PHONE
1. To use voice recognition, press the Press to Talk button; after the beep, say “Pair phone”; or to use the infotainment screen, select the Phone icon > Ph\
ones > Pair Device or Search Device
2. Start the pairing process on your phone. From the phone’s Bluetooth s\
ettings, select the name shown on the infotainment screen.
3. Follow the pairing instructions.
4. When pairing is complete, the phone screen is displayed. Depending on th\
e phone, your phone book may be downloaded automatically.
SECONDARY PHONE
A secondary phone can be paired to the Bluetooth system. The system conn\
ects to the phone that is set to First to Connect. The secondary phone can only rece\
ive calls.
To set the first and secondary phones, go to Settings > System > Phone\
s and select the Information icon.
See your Infotainment System Manual.
See your Infotainment System Manual.
Page 14 of 20

14F Optional equipment
DRIVER ASSISTANCE SYSTEMSF
Safety or driver assistance features are no substitute for the driver’\
s responsibility to operate the vehicle in a safe manner. The driver should remain attentive to traffic, surroundings and road conditions at all times. Read your Owner’s Manual for important feature limitations and information.
SAFETY ALERT SEAT – The driver’s seat pulses — left side, right side or simultan\
eously — to alert the driver of the direction of potential hazards.
Audible alerts or seat pulsing alerts may be selected. To change the ale\
rt settings, go to Settings > Vehicle > Collision/Detection Systems > Alert Type.
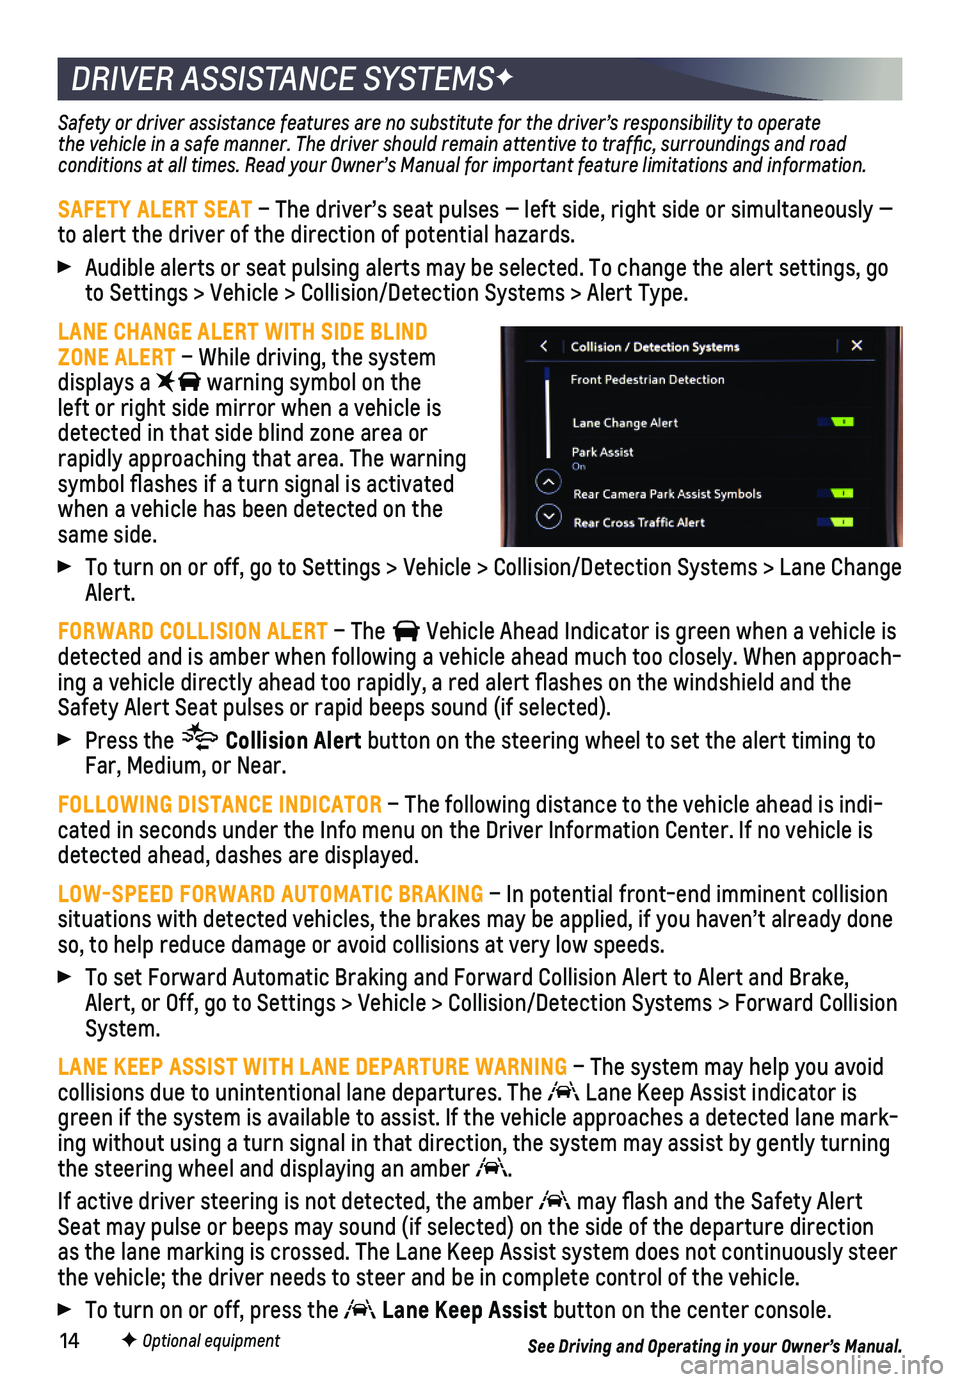
LANE CHANGE ALERT WITH SIDE BLIND ZONE ALERT – While driving, the system displays a warning symbol on the left or right side mirror when a vehicle is detected in that side blind zone area or rapidly approaching that area. The warning symbol flashes if a turn signal is activated when a vehicle has been detected on the same side.
To turn on or off, go to Settings > Vehicle > Collision/Detection System\
s > Lane Change Alert.
FORWARD COLLISION ALERT – The Vehicle Ahead Indicator is green when a vehicle is detected and is amber when following a vehicle ahead much too closely. W\
hen approach-ing a vehicle directly ahead too rapidly, a red alert flashes on the w\
indshield and the Safety Alert Seat pulses or rapid beeps sound (if selected).
Press the Collision Alert button on the steering wheel to set the alert timing to Far, Medium, or Near.
FOLLOWING DISTANCE INDICATOR – The following distance to the vehicle ahead is indi-cated in seconds under the Info menu on the Driver Information Center. I\
f no vehicle is detected ahead, dashes are displayed.
LOW-SPEED FORWARD AUTOMATIC BRAKING – In potential front-end imminent collision situations with detected vehicles, the brakes may be applied, if you hav\
en’t already done so, to help reduce damage or avoid collisions at very low speeds.
To set Forward Automatic Braking and Forward Collision Alert to Alert an\
d Brake, Alert, or Off, go to Settings > Vehicle > Collision/Detection Systems > \
Forward Collision System.
LANE KEEP ASSIST WITH LANE DEPARTURE WARNING – The system may help you avoid collisions due to unintentional lane departures. The Lane Keep Assist indicator is green if the system is available to assist. If the vehicle approaches a \
detected lane mark-ing without using a turn signal in that direction, the system may assist\
by gently turning the steering wheel and displaying an amber .
If active driver steering is not detected, the amber may flash and the Safety Alert Seat may pulse or beeps may sound (if selected) on the side of the dep\
arture direction as the lane marking is crossed. The Lane Keep Assist system does not con\
tinuously steer the vehicle; the driver needs to steer and be in complete control of the\
vehicle.
To turn on or off, press the Lane Keep Assist button on the center console.
See Driving and Operating in your Owner’s Manual.
Page 18 of 20

18F Optional equipment
HILL DESCENT CONTROLF
INTEGRATED TRAILER BRAKE CONTROL (ITBC)F
Hill Descent Control sets and maintains vehicle speed from 1–14 mph w\
hile descending a steep incline in a forward or reverse gear.
1. Press the Hill Descent Control button on the center of the instrument panel. Vehicle speed must be below 31 mph to enable the system. The Hill Descen\
t Control symbol will illuminate on the instrument cluster.
2. Increase or decrease speed by applying the accelerator or brake pedal or\
use the Cruise Control +/– buttons on the steering wheel. The adjusted speed becomes the new set speed. The symbol flashes when the system is actively applying\
the brakes to maintain vehicle speed.
See Driving and Operating in your Owner’s Manual.
The ITBC system can be used to adjust the amount of power output, or Trailer Gain, available to the trailer brakes. The con-trol panel is located on the left side of the instrument panel. ITBC information is dis-played on the Driver Information Center.
Squeeze the control together (right side does not move) to manually apply the trailer brake.
Adjust the Trailer Gain by pressing the +/– adjustment buttons on the control panel.
The trailer app will remember your Trailer Gain adjustments for each tra\
iler profile.
See Driving and Operating in your Owner’s Manual.
TIRE PRESSURE MONITOR
The Low Tire Pressure warning light on the instrument cluster illuminates wh\
en one or more of the vehicle’s tires is significantly underinflated. Fi\
ll the tires to the proper tire pressures listed on the Tire and Loading Information label, located belo\
w the driver’s door latch. Current tire pressures can be viewed on the Driver Information Center.
The Tire Fill Alert provides visual and audible alerts to help when infl\
ating a tire to the recommended tire pressure (does not apply to spare tire). When the rec\
ommended pres-sure is reached, the horn sounds and the turn signals change from flas\
hing to solid.
Refer to your Owner’s Manual for information about normal monthly tir\
e maintenance.
See Driving and Operating in your Owner’s Manual.