Page 351 of 489
Chevrolet Silverado LD 1500 and Silverado 2500/3500 Owner Manual (GMNA-
Localizing-U.S./Canada-12162993) - 2019 - crc - 4/4/18
350 Vehicle Care
Warning (Continued)
not careful. SeeJump Starting -
North America 0408 for tips on
working around a battery without
getting hurt.
Infrequent Usage: Remove the
black, negative (−) cable from the
battery to keep the battery from
running down.
Extended Storage: Remove the
black, negative (−) cable from the
battery or use a battery trickle
charger.
Four-Wheel Drive
Transfer Case
When to Check Lubricant
Refer to Maintenance Schedule
0 430 to determine when to check
the lubricant.
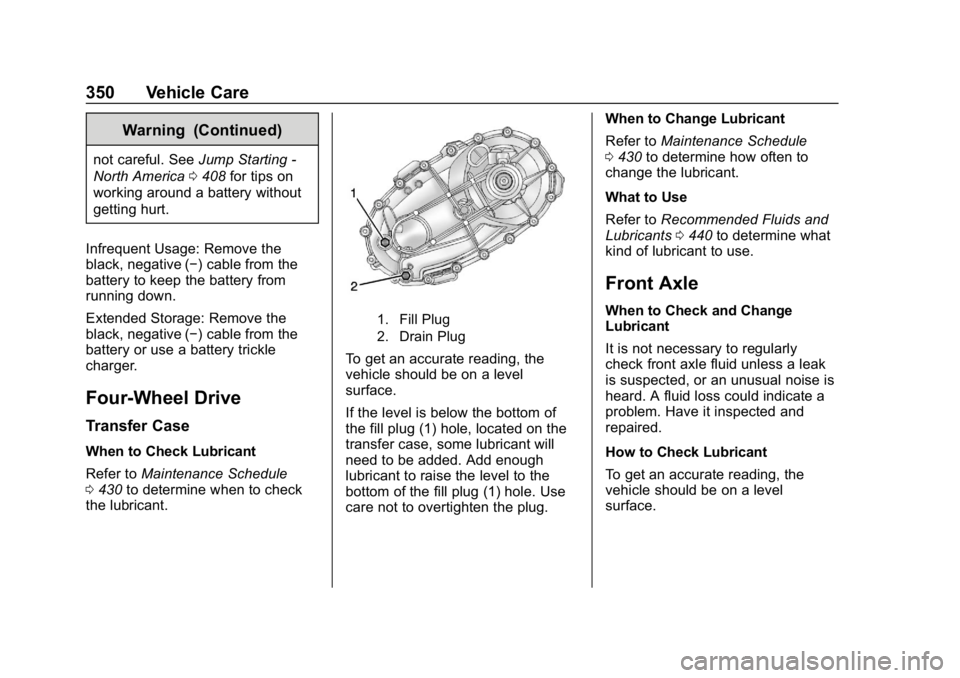
1. Fill Plug
2. Drain Plug
To get an accurate reading, the
vehicle should be on a level
surface.
If the level is below the bottom of
the fill plug (1) hole, located on the
transfer case, some lubricant will
need to be added. Add enough
lubricant to raise the level to the
bottom of the fill plug (1) hole. Use
care not to overtighten the plug. When to Change Lubricant
Refer to
Maintenance Schedule
0 430 to determine how often to
change the lubricant.
What to Use
Refer to Recommended Fluids and
Lubricants 0440 to determine what
kind of lubricant to use.
Front Axle
When to Check and Change
Lubricant
It is not necessary to regularly
check front axle fluid unless a leak
is suspected, or an unusual noise is
heard. A fluid loss could indicate a
problem. Have it inspected and
repaired.
How to Check Lubricant
To get an accurate reading, the
vehicle should be on a level
surface.
Page 359 of 489
Chevrolet Silverado LD 1500 and Silverado 2500/3500 Owner Manual (GMNA-
Localizing-U.S./Canada-12162993) - 2019 - crc - 4/4/18
358 Vehicle Care
High Intensity Discharge
(HID) Lighting
{Warning
The High Intensity Discharge
(HID) lighting system operates at
a very high voltage. If you try to
service any of the system
components, you could be
seriously injured. Have your
dealer or a qualified technician
service them.
After an HID headlamp bulb has
been replaced, the beam might be a
slightly different shade than it was
originally. This is normal.
LED Lighting
This vehicle has several LED lamps.
For replacement of any LED lighting
assembly, contact your dealer.
Headlamps, Front Turn
Signal, Sidemarker, and
Parking Lamps
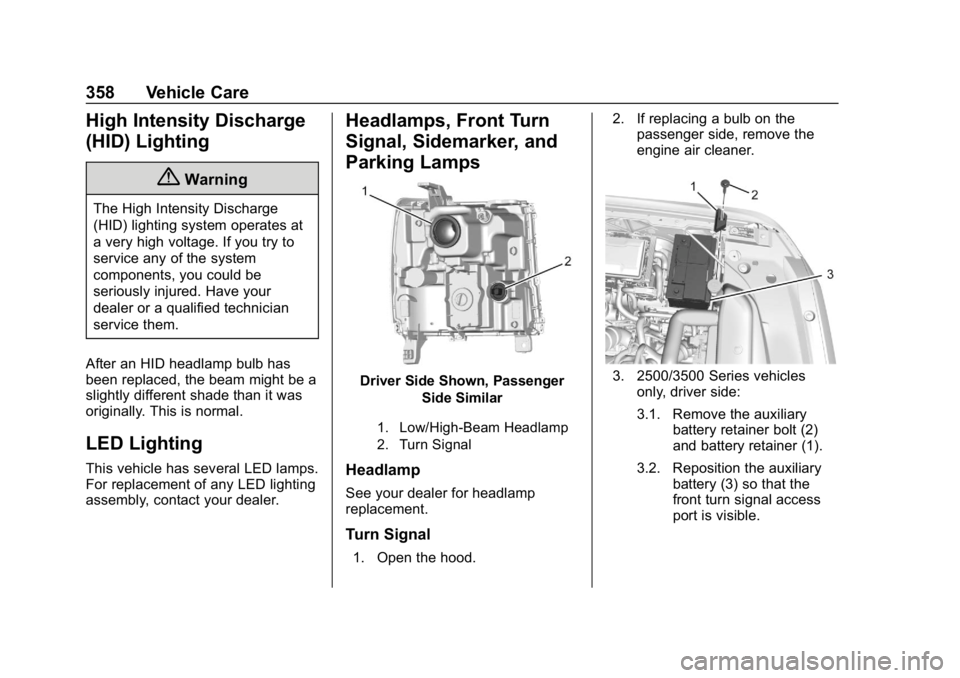
Driver Side Shown, Passenger Side Similar
1. Low/High-Beam Headlamp
2. Turn Signal
Headlamp
See your dealer for headlamp
replacement.
Turn Signal
1. Open the hood. 2. If replacing a bulb on the
passenger side, remove the
engine air cleaner.
3. 2500/3500 Series vehicles
only, driver side:
3.1. Remove the auxiliary battery retainer bolt (2)
and battery retainer (1).
3.2. Reposition the auxiliary battery (3) so that the
front turn signal access
port is visible.
Page 360 of 489
Chevrolet Silverado LD 1500 and Silverado 2500/3500 Owner Manual (GMNA-
Localizing-U.S./Canada-12162993) - 2019 - crc - 4/4/18
Vehicle Care 359
4. Turn the bulb socketcounterclockwise to remove it
from the headlamp assembly
and pull it straight out.
5. Remove the bulb by pulling it straight out of the bulb socket.
6. Install the new bulb into the bulb socket.
7. Turn the bulb socket clockwise to install it in the headlamp
assembly.
8. 2500/3500 Series vehicles only, driver side:
8.1. Reposition the auxiliary
battery (3).
8.2. Install the auxiliary battery retainer (1) and
battery retainer bolt (2).
9. If replacing a bulb on the passenger side, reinstall the
engine air cleaner.
10. Close the hood.
Fog Lamps
To replace the front fog lamp bulb: 1. Locate the fog lamp in the front
bumper.
2. Disconnect the electrical connector from the fog lamp
bulb assembly by pressing the
connector release.
3. Remove the bulb from the housing by squeezing the two
release tabs and pulling it
straight out of the assembly.
Taillamps (Chassis Cab
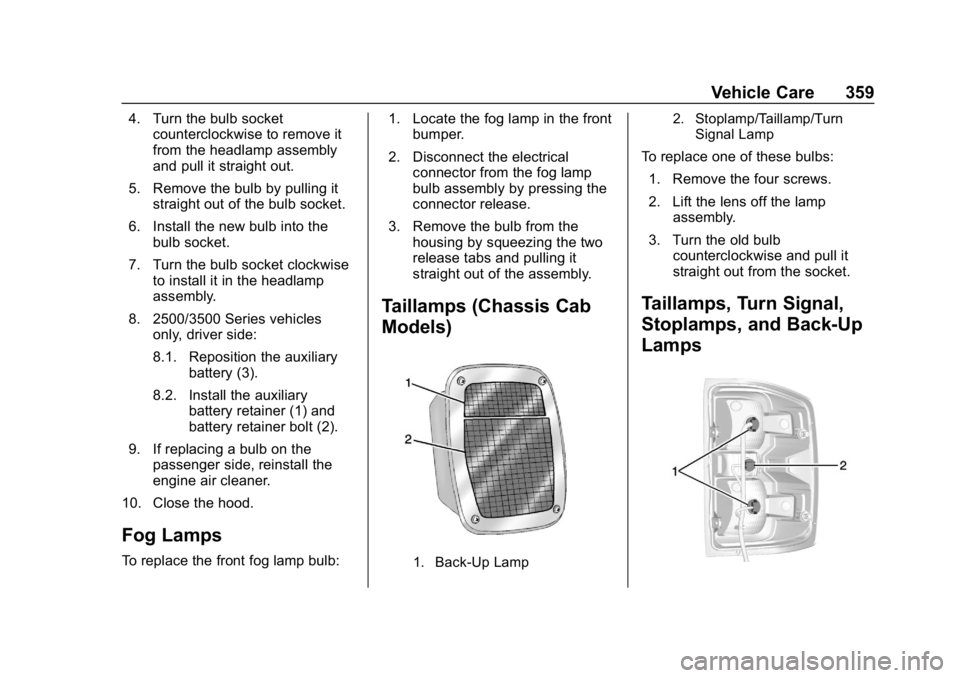
Models)
1. Back-Up Lamp 2. Stoplamp/Taillamp/Turn
Signal Lamp
To replace one of these bulbs:
1. Remove the four screws.
2. Lift the lens off the lamp assembly.
3. Turn the old bulb counterclockwise and pull it
straight out from the socket.
Taillamps, Turn Signal,
Stoplamps, and Back-Up
Lamps
Page 364 of 489
Chevrolet Silverado LD 1500 and Silverado 2500/3500 Owner Manual (GMNA-
Localizing-U.S./Canada-12162993) - 2019 - crc - 4/4/18
Vehicle Care 363
Caution
Spilling liquid on any electrical
component on the vehicle may
damage it. Always keep the
covers on any electrical
component.
A fuse puller is available in the left
instrument panel fuse block.
The vehicle may not be equipped
with all of the fuses, relays, and
features shown.
Fuses Usage
1 Trailer brake Fuses
Usage
2 Trailer battery
Page 366 of 489
Chevrolet Silverado LD 1500 and Silverado 2500/3500 Owner Manual (GMNA-
Localizing-U.S./Canada-12162993) - 2019 - crc - 4/4/18
Vehicle Care 365
FusesUsage
45 Fuel injectors B –
even
46 O2 Sensor B
47 Throttle control
48 Horn
49 Fog lamps
50 O2 Sensor A
51 Engine control module
52 Interior heater
53 Accessory power module/TPM pump
54 Front washer
55 Air conditioning/ Battery regulated
voltage control
56 Air conditioning module/
Battery pack
57 Transmission control module/
Engine control
module Fuses
Usage
58 Headlamps
74 Electric running boards
76 Fuel pump prime / MGU motor
77 Cabin pump motor
79 Vacuum pump
Relays Usage
59 Fuel pump
60 Upfitter 2
61 Upfitter 3
62 Upfitter 4
63 Trailer parking lamps
64 Run/Crank
65 Upfitter 1
66 Fuel pump 2
67 Air conditioning control
68 Starter Relays
Usage
69 Rear window defogger
70 Engine control module
71 Vacuum pump/ Cooling fan clutch
72 CKT 95
73 CKT 92
75 Fuel pump prime/ MGU motor
78 Vacuum pump switch
Page 368 of 489
Chevrolet Silverado LD 1500 and Silverado 2500/3500 Owner Manual (GMNA-
Localizing-U.S./Canada-12162993) - 2019 - crc - 4/4/18
Vehicle Care 367
FusesUsage
2 Accessory power outlet 4
7 Body control module 4
8 Body control module 8
9 Rear seat entertainment
10 Cargo lamp
15 Steering wheel controls
18 Radio
19 –
20 Sunroof
23 Airbag/Info
26 Export/Power take off/ Special equipment
option/Battery 1
27 Obstacle detection/ USB ports
28 Body control module 2
32 Special equipment option/Battery 2 Fuses
Usage
35 Air conditioning inverter
36 Amplifier
37 Battery system
39 Rear sliding window
42 Right door window motor
43 Front blower
44 Special equipment option
45 Body control module 6
46 Body control module 7
47 Passenger seat
Relays Usage
50 Retained accessory power
51 Rear sliding window open
52 Rear sliding window closeInstrument Panel Fuse
Block (Left)
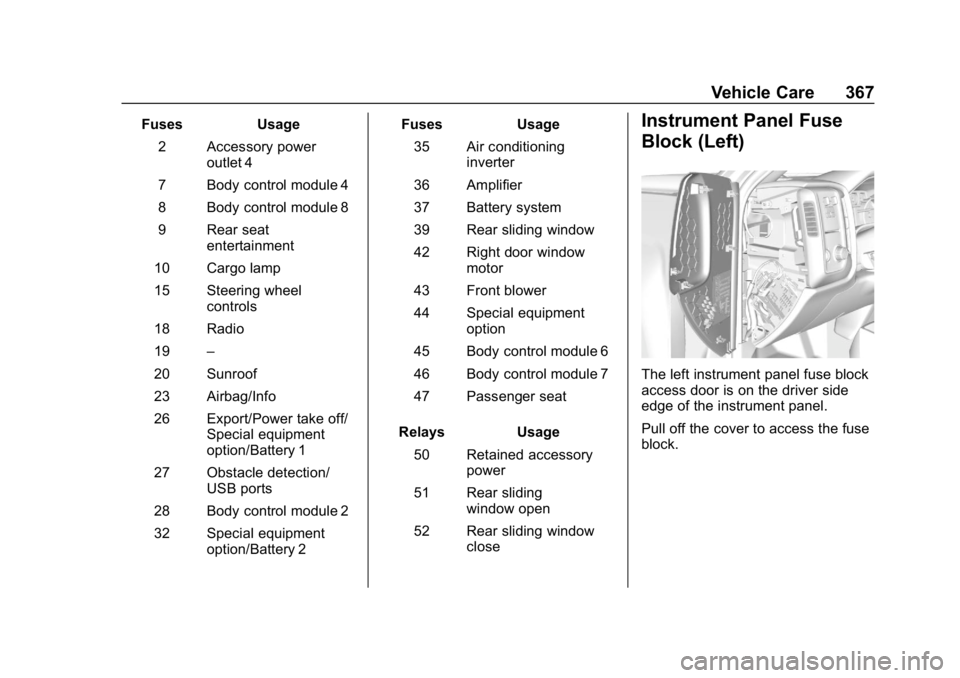
The left instrument panel fuse block
access door is on the driver side
edge of the instrument panel.
Pull off the cover to access the fuse
block.
Page 369 of 489
Chevrolet Silverado LD 1500 and Silverado 2500/3500 Owner Manual (GMNA-
Localizing-U.S./Canada-12162993) - 2019 - crc - 4/4/18
368 Vehicle Care
The vehicle may not be equipped
with all of the fuses, relays, and
features shown.Fuses Usage
1 Accessory power outlet 2 Fuses Usage
2 Special equipment option/Retained
accessory power
3 Universal remote system/Interior
rearview mirror
6 Body control module 3
7 Body control module 5
8 Driver window switch/ Mirror switch
9 –
10 Accessory power outlet/Retained
accessory power
11 Accessory power outlet battery
12 Accessory power outlet 1/Cigarette
lighter
13 Discrete logic ignition switch
14 Switch backlighting
17 Body control module 1
Page 385 of 489
Chevrolet Silverado LD 1500 and Silverado 2500/3500 Owner Manual (GMNA-
Localizing-U.S./Canada-12162993) - 2019 - crc - 4/4/18
384 Vehicle Care
.There is interference from an
external device or transmitter.
. The air pressure from the
inflation device is not sufficient
to inflate the tire.
. There is a malfunction in
the TPMS.
. There is a malfunction in the
horn or turn signal lamps.
. The identification code of the
TPMS sensor is not registered to
the system.
. The battery of the TPMS sensor
is low.
If the tire fill alert does not operate
due to TPMS interference, move the
vehicle about 1 m (3 ft) back or
forward and try again. If the tire fill
alert feature is not working, use a
tire pressure gauge.
TPMS Sensor Matching
Process
Each TPMS sensor has a unique
identification code. The identification
code needs to be matched to a new
tire/wheel position after rotating the vehicle’s tires or replacing one or
more of the TPMS sensors. Also,
the TPMS sensor matching process
should be performed after replacing
a spare tire with a road tire
containing the TPMS sensor. The
malfunction light and the DIC
message should go off at the next
ignition cycle. The sensors are
matched to the tire/wheel positions,
using a TPMS relearn tool, in the
following order: driver side front tire,
passenger side front tire, passenger
side rear tire, and driver side rear.
See your dealer for service or to
purchase a relearn tool. A TPMS
relearn tool can also be purchased.
See Tire Pressure Monitor Sensor
Activation Tool at
www.gmtoolsandequipment.com or
call 1-800-GM TOOLS
(1-800-468-6657).
There are two minutes to match the
first tire/wheel position, and
five minutes overall to match all four
tire/wheel positions. If it takes
longer, the matching process stops
and must be restarted.
The TPMS sensor matching
process is:
1. Set the parking brake.
2. Turn the ignition on without starting the vehicle.
3. Uplevel DIC Only: Make sure the Tire Pressure info page
option is turned on. The info
pages on the DIC can be
turned on and off through the
Settings menu.
See Driver Information Center
(DIC) (Base Level) 0154 or
Driver Information Center (DIC)
(Uplevel) 0156.
4. If the vehicle has an uplevel DIC, use the DIC controls on
the right side of the steering
wheel to scroll to the Tire
Pressure screen under the DIC
info page.
If the vehicle has a base level
DIC, use the trip odometer
reset stem to scroll to the Tire
Pressure screen.