2019 CHEVROLET SILVERADO 3500 instrument panel
[x] Cancel search: instrument panelPage 98 of 489
Chevrolet Silverado LD 1500 and Silverado 2500/3500 Owner Manual (GMNA-
Localizing-U.S./Canada-12162993) - 2019 - crc - 4/4/18
Seats and Restraints 97
If a child restraint is secured in the
front outboard passenger seat, and
the vehicle has a switch on the
passenger side instrument panel
endcap to manually turn off the front
outboard passenger airbag, see
Airbag On-Off Switch082 and
Securing Child Restraints (With the
Seat Belt in the Center Front Seat)
0 113 orSecuring Child Restraints
(With the Seat Belt in the Rear
Seat) 0110 orSecuring Child
Restraints (With the Seat Belt in the
Front Seat) 0113 for more
information, including important
safety information.
Never put a rear-facing child
restraint in the front. This is because
the risk to the rear-facing child is so
great if the airbag deploys.
{Warning
A child in a rear-facing child
restraint can be seriously injured
or killed if the front outboard
passenger frontal airbag inflates.
This is because the back of the
(Continued)
Warning (Continued)
rear-facing child restraint would
be very close to the inflating
airbag. A child in a forward-facing
child restraint can be seriously
injured or killed if the front
outboard passenger frontal airbag
inflates and the passenger seat is
in a forward position.
Even if the passenger sensing
system or airbag switch has
turned off the front outboard
passenger frontal airbag, no
system is fail-safe. No one can
guarantee that an airbag will not
deploy under some unusual
circumstance, even though it is
turned off.
Secure rear-facing child restraints
in a rear seat, even if the airbag
is off. If you secure a
forward-facing child restraint in
the front outboard passenger
seat, always move the seat as far(Continued)
Warning (Continued)
back as it will go. It is better to
secure the child restraint in a
rear seat.
{Warning
A child in a child restraint in the
center front seat can be badly
injured or killed by the frontal
airbags if they inflate. Never
secure a child restraint in the
center front seat. It is always
better to secure a child restraint in
a rear seat.
Do not use child restraints in the
center front seat position.
If the vehicle does not have a rear
seat that will accommodate a
rear-facing child restraint, a
rear-facing child restraint should not
be installed in the vehicle, even if
the airbag is off.
Page 117 of 489
Chevrolet Silverado LD 1500 and Silverado 2500/3500 Owner Manual (GMNA-
Localizing-U.S./Canada-12162993) - 2019 - crc - 4/4/18
116 Seats and Restraints
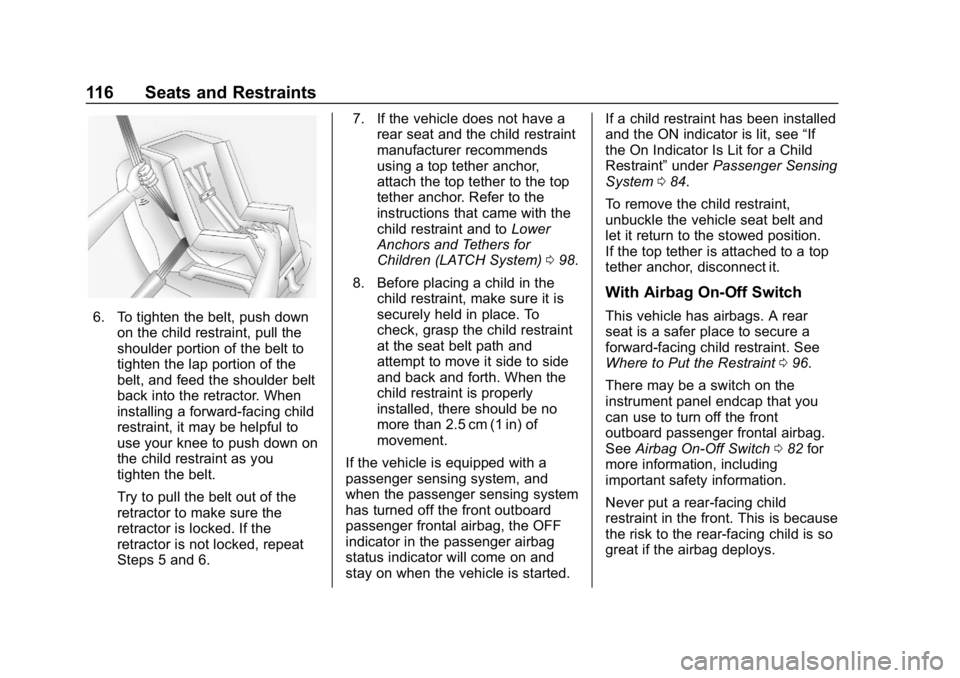
6. To tighten the belt, push downon the child restraint, pull the
shoulder portion of the belt to
tighten the lap portion of the
belt, and feed the shoulder belt
back into the retractor. When
installing a forward-facing child
restraint, it may be helpful to
use your knee to push down on
the child restraint as you
tighten the belt.
Try to pull the belt out of the
retractor to make sure the
retractor is locked. If the
retractor is not locked, repeat
Steps 5 and 6. 7. If the vehicle does not have a
rear seat and the child restraint
manufacturer recommends
using a top tether anchor,
attach the top tether to the top
tether anchor. Refer to the
instructions that came with the
child restraint and to Lower
Anchors and Tethers for
Children (LATCH System) 098.
8. Before placing a child in the child restraint, make sure it is
securely held in place. To
check, grasp the child restraint
at the seat belt path and
attempt to move it side to side
and back and forth. When the
child restraint is properly
installed, there should be no
more than 2.5 cm (1 in) of
movement.
If the vehicle is equipped with a
passenger sensing system, and
when the passenger sensing system
has turned off the front outboard
passenger frontal airbag, the OFF
indicator in the passenger airbag
status indicator will come on and
stay on when the vehicle is started. If a child restraint has been installed
and the ON indicator is lit, see
“If
the On Indicator Is Lit for a Child
Restraint” underPassenger Sensing
System 084.
To remove the child restraint,
unbuckle the vehicle seat belt and
let it return to the stowed position.
If the top tether is attached to a top
tether anchor, disconnect it.
With Airbag On-Off Switch
This vehicle has airbags. A rear
seat is a safer place to secure a
forward-facing child restraint. See
Where to Put the Restraint 096.
There may be a switch on the
instrument panel endcap that you
can use to turn off the front
outboard passenger frontal airbag.
See Airbag On-Off Switch 082 for
more information, including
important safety information.
Never put a rear-facing child
restraint in the front. This is because
the risk to the rear-facing child is so
great if the airbag deploys.
Page 123 of 489
Chevrolet Silverado LD 1500 and Silverado 2500/3500 Owner Manual (GMNA-
Localizing-U.S./Canada-12162993) - 2019 - crc - 4/6/18
122 Storage
Storage
Storage Compartments
Storage Compartments . . . . . . . 122
Instrument Panel Storage . . . . 122
Glove Box . . . . . . . . . . . . . . . . . . . . 122
Cupholders . . . . . . . . . . . . . . . . . . . 123
Sunglasses Storage . . . . . . . . . . 123
Center Console Storage . . . . . . 123
Floor Console Storage . . . . . . . . 124
Additional Storage Features
Cargo Tie-Downs . . . . . . . . . . . . . 124
Storage
Compartments
{Warning
Do not store heavy or sharp
objects in storage compartments.
In a crash, these objects may
cause the cover to open and
could result in injury.
Instrument Panel Storage
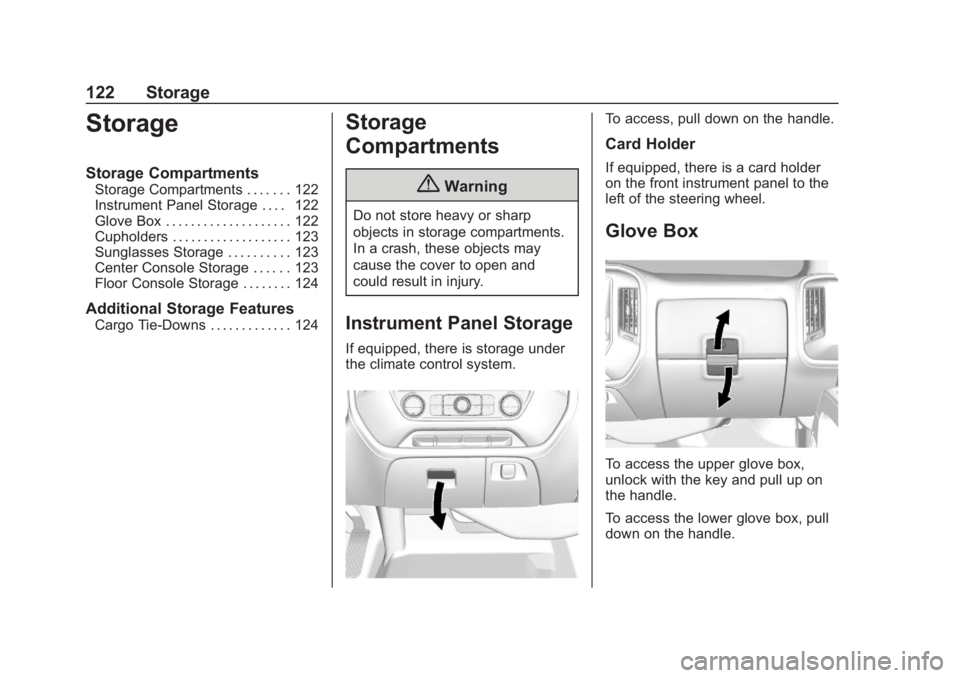
If equipped, there is storage under
the climate control system.
To access, pull down on the handle.
Card Holder
If equipped, there is a card holder
on the front instrument panel to the
left of the steering wheel.
Glove Box
To access the upper glove box,
unlock with the key and pull up on
the handle.
To access the lower glove box, pull
down on the handle.
Page 145 of 489
Chevrolet Silverado LD 1500 and Silverado 2500/3500 Owner Manual (GMNA-
Localizing-U.S./Canada-12162993) - 2019 - crc - 4/4/18
144 Instruments and Controls
The airbag readiness light comes on
for several seconds when the
vehicle is started. If the light does
not come on then, have it fixed
immediately.
{Warning
If the airbag readiness light stays
on after the vehicle is started or
comes on while driving, it means
the airbag system might not be
working properly. The airbags in
the vehicle might not inflate in a
crash, or they could even inflate
without a crash. To help avoid
injury, have the vehicle serviced
right away.
If there is a problem with the airbag
system, a Driver Information Center
(DIC) message may also come on.
Airbag On-Off Light
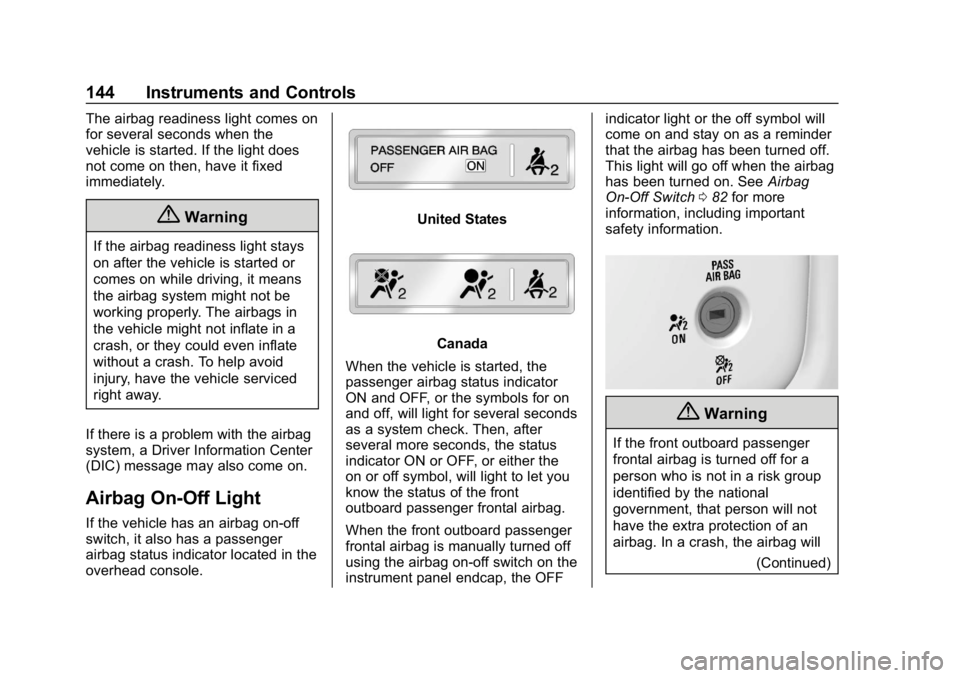
If the vehicle has an airbag on-off
switch, it also has a passenger
airbag status indicator located in the
overhead console.
United States
Canada
When the vehicle is started, the
passenger airbag status indicator
ON and OFF, or the symbols for on
and off, will light for several seconds
as a system check. Then, after
several more seconds, the status
indicator ON or OFF, or either the
on or off symbol, will light to let you
know the status of the front
outboard passenger frontal airbag.
When the front outboard passenger
frontal airbag is manually turned off
using the airbag on-off switch on the
instrument panel endcap, the OFF indicator light or the off symbol will
come on and stay on as a reminder
that the airbag has been turned off.
This light will go off when the airbag
has been turned on. See
Airbag
On-Off Switch 082 for more
information, including important
safety information.
{Warning
If the front outboard passenger
frontal airbag is turned off for a
person who is not in a risk group
identified by the national
government, that person will not
have the extra protection of an
airbag. In a crash, the airbag will
(Continued)
Page 149 of 489
Chevrolet Silverado LD 1500 and Silverado 2500/3500 Owner Manual (GMNA-
Localizing-U.S./Canada-12162993) - 2019 - crc - 4/4/18
148 Instruments and Controls
the atmosphere. A few driving
trips with the adapter removed
may turn off the light.
. Poor fuel quality can cause
inefficient engine operation and
poor driveability, which may go
away once the engine is warmed
up. If this occurs, change the
fuel brand. It may require at
least one full tank of the proper
fuel to turn the light off. See
Recommended Fuel 0290.
If the light remains on, see your
dealer.
Emissions Inspection and
Maintenance Programs
If the vehicle requires an Emissions
Inspection/Maintenance test, the
test equipment will likely connect to
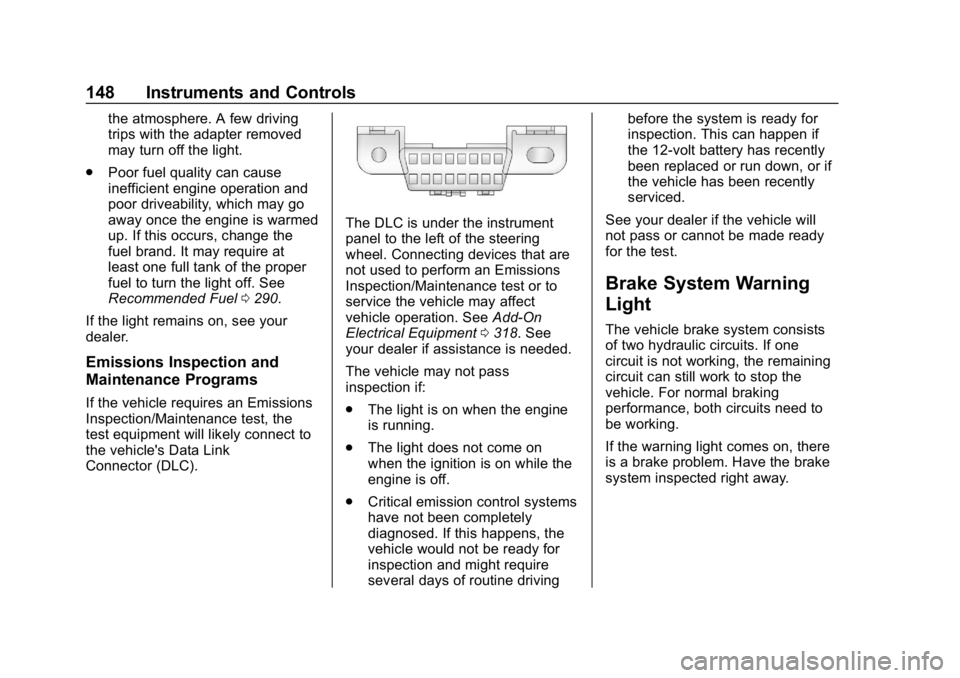
the vehicle's Data Link
Connector (DLC).
The DLC is under the instrument
panel to the left of the steering
wheel. Connecting devices that are
not used to perform an Emissions
Inspection/Maintenance test or to
service the vehicle may affect
vehicle operation. See Add-On
Electrical Equipment 0318. See
your dealer if assistance is needed.
The vehicle may not pass
inspection if:
. The light is on when the engine
is running.
. The light does not come on
when the ignition is on while the
engine is off.
. Critical emission control systems
have not been completely
diagnosed. If this happens, the
vehicle would not be ready for
inspection and might require
several days of routine driving before the system is ready for
inspection. This can happen if
the 12-volt battery has recently
been replaced or run down, or if
the vehicle has been recently
serviced.
See your dealer if the vehicle will
not pass or cannot be made ready
for the test.
Brake System Warning
Light
The vehicle brake system consists
of two hydraulic circuits. If one
circuit is not working, the remaining
circuit can still work to stop the
vehicle. For normal braking
performance, both circuits need to
be working.
If the warning light comes on, there
is a brake problem. Have the brake
system inspected right away.
Page 172 of 489

Chevrolet Silverado LD 1500 and Silverado 2500/3500 Owner Manual (GMNA-
Localizing-U.S./Canada-12162993) - 2019 - crc - 4/4/18
Lighting 171
Lighting
Exterior Lighting
Exterior Lamp Controls . . . . . . . 171
Exterior Lamps OffReminder . . . . . . . . . . . . . . . . . . . 173
Headlamp High/Low-Beam Changer . . . . . . . . . . . . . . . . . . . . 173
Flash-to-Pass . . . . . . . . . . . . . . . . 174
Daytime Running Lamps (DRL) . . . . . . . . . . . . . . . 174
Automatic Headlamp System . . . . . . . . . . . . . . . . . . . . . . 174
Hazard Warning Flashers . . . . . 175
Turn and Lane-Change Signals . . . . . . . . . . . . . . . . . . . . . . 175
Fog Lamps . . . . . . . . . . . . . . . . . . . 176
Auxiliary Roof-Mounted Lamp . . . . . . . . 176
Exterior Cargo Lamps . . . . . . . . 177
Interior Lighting
Instrument Panel Illumination
Control . . . . . . . . . . . . . . . . . . . . . . 178
Dome Lamps . . . . . . . . . . . . . . . . . 178
Reading Lamps . . . . . . . . . . . . . . 178
Lighting Features
Entry Lighting . . . . . . . . . . . . . . . . 179 Exit Lighting . . . . . . . . . . . . . . . . . . 179
Battery Load Management . . . 179
Battery Power Protection . . . . . 180
Exterior Lighting Battery
Saver . . . . . . . . . . . . . . . . . . . . . . . 180
Exterior Lighting
Exterior Lamp Controls
The exterior lamp control is on the
instrument panel to the left of the
steering wheel.
O: Turns off the automatic
headlamps and Daytime Running
Lamps (DRL). Turn the headlamp
control to
Oagain to turn the
automatic headlamps or DRL
back on.
For vehicles first sold in Canada, off
will only work when the vehicle is in
P (Park).
Page 173 of 489

Chevrolet Silverado LD 1500 and Silverado 2500/3500 Owner Manual (GMNA-
Localizing-U.S./Canada-12162993) - 2019 - crc - 4/4/18
172 Lighting
AUTO :Automatically turns on the
headlamps, parking lamps,
taillamps, instrument panel lights,
roof marker lamps (if equipped),
front/rear sidemarker lamps, and
license plate lamps.
When the vehicle is turned off and
the headlamps are in AUTO, the
headlamps turn off. When the key is
removed, they automatically turn on
for a set time. The time of the delay
can be changed using the DIC.
See Driver Information Center (DIC)
(Base Level) 0154 orDriver
Information Center (DIC) (Uplevel)
0 156.
;:Turns on the parking lamps
including all lamps, except the
headlamps.
2: Turns on the headlamps
together with the parking lamps and
instrument panel lights.
When the headlamps are turned on
while the vehicle is on, the
headlamps turn off automatically
10 minutes after the ignition is
turned off. When the headlamps are
turned on while the vehicle is off, the headlamps will stay on for
10 minutes before turning off to
prevent the battery from being
drained. Turn the headlamp control
off and then back to the headlamp
on position to make the headlamps
stay on for an additional 10 minutes.
To keep the lamps on for more than
10 minutes, the ignition must be on
or in ACC/ACCESSORY.
#:
If equipped, turns on the fog
lamps. See Fog Lamps0176.
IntelliBeam System
If equipped, this system turns the
vehicle's high-beam headlamps on
and off according to surrounding
traffic conditions.
The system turns the high-beam
headlamps on when it is dark
enough and there is no other traffic
present.
This light comes on in the
instrument cluster when the
IntelliBeam system is enabled.
Turning On and Enabling
IntelliBeam
To enable the IntelliBeam system,
with the turn signal lever in the
neutral position, turn the exterior
lamp control to AUTO. The blue
high-beam on light appears on the
instrument cluster when the high
beams are on.
Driving with IntelliBeam
The system only activates the high
beams when driving over 40 km/h
(25 mph).
There is a sensor near the top
center of the windshield that
automatically controls the system.
Keep this area of the windshield
clear of debris to allow for best
system performance.
The high-beam headlamps remain
on, under the automatic control,
until one of the following situations
occurs:
Page 174 of 489
Chevrolet Silverado LD 1500 and Silverado 2500/3500 Owner Manual (GMNA-
Localizing-U.S./Canada-12162993) - 2019 - crc - 4/4/18
Lighting 173
.The system detects an
approaching vehicle's
headlamps.
. The system detects a preceding
vehicle's taillamps.
. The outside light is bright
enough that high-beam
headlamps are not required.
. The vehicle's speed drops below
20 km/h (12 mph).
. The IntelliBeam system can be
disabled by the high/low-beam
changer or the flash-to-pass
feature. If this happens, the high/
low-beam changer must be
activated on then off within
two seconds to reactivate the
IntelliBeam system. The
instrument cluster light will come
on to indicate the IntelliBeam is
reactivated.
See Headlamp High/Low-Beam
Changer 0173 and
Flash-to-Pass 0174.
The high beams may not turn off
automatically if the system cannot
detect another vehicle's lamps
because of any of the following: .
The other vehicle's lamps are
missing, damaged, obstructed
from view, or otherwise
undetected.
. The other vehicle's lamps are
covered with dirt, snow, and/or
road spray.
. The other vehicle's lamps cannot
be detected due to dense
exhaust, smoke, fog, snow, road
spray, mist, or other airborne
obstructions.
. The vehicle's windshield is dirty,
cracked, or obstructed by
something that blocks the view
of the light sensor.
. The vehicle is loaded such that
the front end points upward,
causing the light sensor to aim
high and not detect headlamps
and taillamps.
. Driving on winding or hilly roads.
The automatic high-beam
headlamps may need to be disabled
if any of the above conditions exist.Exterior Lamps Off
Reminder
A reminder chime sounds when the
headlamps or parking lamps are
manually turned on, the ignition is
off, and a door is open. To disable
the chime, turn the lamps off.
Headlamp High/
Low-Beam Changer
Push the turn signal lever toward
the instrument panel to change the
headlamps from low to high beam.
Pull the turn signal lever toward you
and release it to return to low-beam
headlamps.
When the high-beam headlamps are
on, this indicator light on the
instrument cluster will also be on.