2019 CHEVROLET SILVERADO 3500 odometer
[x] Cancel search: odometerPage 159 of 489

Chevrolet Silverado LD 1500 and Silverado 2500/3500 Owner Manual (GMNA-
Localizing-U.S./Canada-12162993) - 2019 - crc - 4/4/18
158 Instruments and Controls
distance is displayed at the top of
the page as“last xxx mi/km.” Next
to the odometer, the Active Fuel
Management displays the number of
cylinders the vehicle is running on.
See Active Fuel Management
0 254.
Press
pto select the distance or
reset best value. Use
wandxto
choose the distance and press
V.
Press
wandxto select “Reset
Best Score.” Press
Vto reset the
best average fuel economy. After
reset, the momentary average fuel
economy will display.
The display provides information on
how current driving behavior affects
the running average and how well
recent driving compares to the best
that has been achieved for the
selected distance.
Timer : This display can be used as
a timer. To start the timer, press
V
while this display is active. The
display will show the amount of time
that has passed since the timer was
last reset. To stop the timer, press
V
briefly while this display is active
and the timer is running. To reset
the timer to zero, press and hold
V
while this display is active, or presspand select reset.
Speed Limit (If Equipped) : Shows
sign information, which comes from
a roadway database in the onboard
navigation.
Engine Hours : Shows the total
number of hours the engine has run.
Transmission Fluid
Temperature : Shows the
temperature of the automatic
transmission fluid in either degrees
Celsius (°C) or degrees
Fahrenheit (°F).
Trailer Brake (If Equipped) : On
vehicles with the Integrated Trailer
Brake Control (ITBC) system, the
trailer brake display appears in
the DIC.
TRAILER GAIN shows the trailer
gain setting. This setting can be
adjusted from 0.0 to 10.0 with either
a trailer connected or disconnected. TRAILER OUTPUT shows the
power output to the trailer anytime a
trailer with electric brakes is
connected. Output is displayed as a
bar graph. Dashes may appear in
the OUTPUT display if a trailer is
not connected.
Off Road :
Displays vehicle pitch
and roll information, road wheel
angle, and four-wheel drive (4WD)
status.
Blank Page : Shows no
information.
Page 335 of 489

Chevrolet Silverado LD 1500 and Silverado 2500/3500 Owner Manual (GMNA-
Localizing-U.S./Canada-12162993) - 2019 - crc - 4/4/18
334 Vehicle Care
include engine revolutions, engine
temperature, and miles driven.
Based on driving conditions, the
mileage at which an oil change is
indicated can vary considerably. For
the oil life system to work properly,
the system must be reset every time
the oil is changed.
On some vehicles, when the system
has calculated that oil life has been
diminished, a CHANGE ENGINE
OIL SOON message comes on to
indicate that an oil change is
necessary. Change the oil as soon
as possible within the next 1 000 km
(600 mi). It is possible that, if driving
under the best conditions, the oil life
system might indicate that an oil
change is not necessary for up to a
year. The engine oil and filter must
be changed at least once a year
and, at this time, the system must
be reset. For vehicles without the
CHANGE ENGINE OIL SOON
message, an oil change is needed
when the OIL LIFE REMAINING
percentage is near 0%. Your dealer
has trained service people who will
perform this work and reset the
system. It is also important to checkthe oil regularly over the course of
an oil drain interval and keep it at
the proper level.
If the system is ever reset
accidentally, the oil must be
changed at 5 000 km (3,000 mi)
since the last oil change.
Remember to reset the oil life
system whenever the oil is changed.
How to Reset the Engine Oil
Life System
Reset the system whenever the
engine oil is changed so that the
system can calculate the next
engine oil change. Always reset the
engine oil life to 100% after every oil
change. It will not reset itself. To
reset the engine oil life system:
1. Display the OIL LIFE REMAINING on the DIC. If the
vehicle does not have DIC
buttons, the vehicle must be in
P (Park) to access this display.
See Driver Information Center
(DIC) (Base Level) 0154 or
Driver Information Center (DIC)
(Uplevel) 0156. 2. Press and hold
V, or the trip
odometer reset stem if the
vehicle does not have DIC
buttons, for several seconds.
The oil life will change
to 100%.
The oil life system can also be reset
as follows: 1. Display the OIL LIFE REMAINING on the DIC.
See Driver Information Center
(DIC) (Base Level) 0154 or
Driver Information Center (DIC)
(Uplevel) 0156.
2. Fully press the accelerator pedal slowly three times within
five seconds.
3. Display the OIL LIFE REMAINING on the DIC. If the
display shows 100%, the
system is reset.
If the vehicle has a CHANGE
ENGINE OIL SOON message and it
comes back on when the vehicle is
started and/or the OIL LIFE
REMAINING is near 0%, the engine
oil life system has not been reset.
Repeat the procedure.
Page 385 of 489

Chevrolet Silverado LD 1500 and Silverado 2500/3500 Owner Manual (GMNA-
Localizing-U.S./Canada-12162993) - 2019 - crc - 4/4/18
384 Vehicle Care
.There is interference from an
external device or transmitter.
. The air pressure from the
inflation device is not sufficient
to inflate the tire.
. There is a malfunction in
the TPMS.
. There is a malfunction in the
horn or turn signal lamps.
. The identification code of the
TPMS sensor is not registered to
the system.
. The battery of the TPMS sensor
is low.
If the tire fill alert does not operate
due to TPMS interference, move the
vehicle about 1 m (3 ft) back or
forward and try again. If the tire fill
alert feature is not working, use a
tire pressure gauge.
TPMS Sensor Matching
Process
Each TPMS sensor has a unique
identification code. The identification
code needs to be matched to a new
tire/wheel position after rotating the vehicle’s tires or replacing one or
more of the TPMS sensors. Also,
the TPMS sensor matching process
should be performed after replacing
a spare tire with a road tire
containing the TPMS sensor. The
malfunction light and the DIC
message should go off at the next
ignition cycle. The sensors are
matched to the tire/wheel positions,
using a TPMS relearn tool, in the
following order: driver side front tire,
passenger side front tire, passenger
side rear tire, and driver side rear.
See your dealer for service or to
purchase a relearn tool. A TPMS
relearn tool can also be purchased.
See Tire Pressure Monitor Sensor
Activation Tool at
www.gmtoolsandequipment.com or
call 1-800-GM TOOLS
(1-800-468-6657).
There are two minutes to match the
first tire/wheel position, and
five minutes overall to match all four
tire/wheel positions. If it takes
longer, the matching process stops
and must be restarted.
The TPMS sensor matching
process is:
1. Set the parking brake.
2. Turn the ignition on without starting the vehicle.
3. Uplevel DIC Only: Make sure the Tire Pressure info page
option is turned on. The info
pages on the DIC can be
turned on and off through the
Settings menu.
See Driver Information Center
(DIC) (Base Level) 0154 or
Driver Information Center (DIC)
(Uplevel) 0156.
4. If the vehicle has an uplevel DIC, use the DIC controls on
the right side of the steering
wheel to scroll to the Tire
Pressure screen under the DIC
info page.
If the vehicle has a base level
DIC, use the trip odometer
reset stem to scroll to the Tire
Pressure screen.
Page 386 of 489

Chevrolet Silverado LD 1500 and Silverado 2500/3500 Owner Manual (GMNA-
Localizing-U.S./Canada-12162993) - 2019 - crc - 4/4/18
Vehicle Care 385
5. If the vehicle has an uplevelDIC, press and hold the
V
(Set/Reset) button located in
the center of the DIC controls.
If the vehicle has a base level
DIC, press and hold the trip
odometer reset stem for about
five seconds. A message
asking if the process should
begin should appear. Select
yes and press the trip
odometer reset stem to confirm
the selection.
The horn sounds twice to
signal the receiver is in relearn
mode and the TIRE
LEARNING ACTIVE message
displays on the DIC screen.
6. Start with the driver side front tire.
7. Place the relearn tool against the tire sidewall, near the valve
stem. Then press the button to
activate the TPMS sensor.
A horn chirp confirms that the
sensor identification code has
been matched to this tire and
wheel position. 8. Proceed to the passenger side
front tire, and repeat the
procedure in Step 7.
9. Proceed to the passenger side rear tire, and repeat the
procedure in Step 7.
10. Proceed to the driver side rear tire, and repeat the procedure
in Step 7. The horn sounds two
times to indicate the sensor
identification code has been
matched to the driver side rear
tire, and the TPMS sensor
matching process is no longer
active. The TIRE LEARNING
ACTIVE message on the DIC
display screen goes off.
11. Turn the vehicle off.
12. Set all four tires to the recommended air pressure
level as indicated on the Tire
and Loading Information label.
Tire Inspection
We recommend that the tires,
including the spare tire, if the
vehicle has one, be inspected
for signs of wear or damage at
least once a month.
Replace the tire if:
.The indicators at three or
more places around the tire
can be seen.
.There is cord or fabric
showing through the tire's
rubber.
.The tread or sidewall is
cracked, cut, or snagged
deep enough to show cord or
fabric.
.The tire has a bump, bulge,
or split.
.The tire has a puncture, cut,
or other damage that cannot
be repaired well because of
the size or location of the
damage.
Page 394 of 489

Chevrolet Silverado LD 1500 and Silverado 2500/3500 Owner Manual (GMNA-
Localizing-U.S./Canada-12162993) - 2019 - crc - 4/4/18
Vehicle Care 393
Wheel Replacement
Replace any wheel that is bent,
cracked, or badly rusted or
corroded. If wheel nuts keep coming
loose, the wheel, wheel bolts and
wheel nuts should be replaced.
If the wheel leaks air, replace it.
Some aluminum wheels can be
repaired. See your dealer if any of
these conditions exist.
Your dealer will know the kind of
wheel that is needed.
Each new wheel should have the
same load-carrying capacity,
diameter, width, offset and be
mounted the same way as the one it
replaces.
Replace wheels, wheel bolts, wheel
nuts, or Tire Pressure Monitor
System (TPMS) sensors with new
GM original equipment parts.{Warning
Using the wrong replacement
wheels, wheel bolts, or wheel
nuts can be dangerous. It could
affect the braking and handling of
the vehicle. Tires can lose air,
and cause loss of control, causing
a crash. Always use the correct
wheel, wheel bolts, and wheel
nuts for replacement.
Caution
The wrong wheel can also cause
problems with bearing life, brake
cooling, speedometer or
odometer calibration, headlamp
aim, bumper height, vehicle
ground clearance, and tire or tire
chain clearance to the body and
chassis.
Whenever a wheel, wheel bolt,
or wheel nut is replaced on a dual
wheel setup, check the wheel nut
torque after 160,1 600, and 10 000 km (100,1,000, and
6,000 mi) of driving. For proper
torque, see
“Wheel Nut Torque”
under Capacities and Specifications
0 446.
See If a Tire Goes Flat 0394 for
more information.
Used Replacement Wheels
{Warning
Replacing a wheel with a used
one is dangerous. How it has
been used or how far it has been
driven may be unknown. It could
fail suddenly and cause a crash.
When replacing wheels, use a
new GM original equipment
wheel.
Page 445 of 489

Chevrolet Silverado LD 1500 and Silverado 2500/3500 Owner Manual (GMNA-
Localizing-U.S./Canada-12162993) - 2019 - crc - 4/4/18
444 Service and Maintenance
Maintenance Records
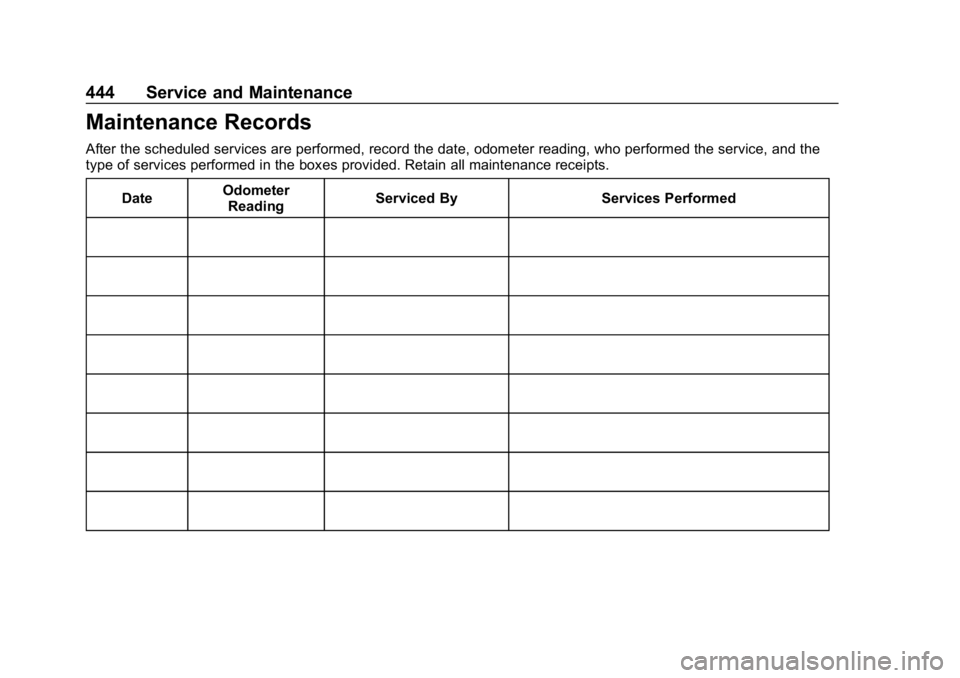
After the scheduled services are performed, record the date, odometer reading, who performed the service, and the
type of services performed in the boxes provided. Retain all maintenance receipts.Date Odometer
Reading Serviced By Services Performed
Page 454 of 489

Chevrolet Silverado LD 1500 and Silverado 2500/3500 Owner Manual (GMNA-
Localizing-U.S./Canada-12162993) - 2019 - crc - 4/4/18
Customer Information 453
.Locate owner resources such as
lease-end, financing, and
warranty information.
. Retrieve your favorite articles,
quizzes, tips, and multimedia
galleries organized into the
Featured Articles and Auto Care
Sections.
. Download owner ’s manuals.
. Find the
Chevrolet-recommended
maintenance services.
GM Mobility
Reimbursement Program
This program is available to
qualified applicants for cost
reimbursement, up to certain limits,
of eligible aftermarket adaptive
equipment required for the vehicle, such as hand controls or a
wheelchair/scooter lift for the
vehicle.
To learn about the GM Mobility
program, see www.gmmobility.com
or call the GM Mobility Assistance
Center at 1-800-323-9935. Text
Telephone (TTY) users, call
1-800-833-9935.
General Motors of Canada also has
a Mobility program. See www.gm.ca
or call 1-800-GM-DRIVE
(800-463-7483) for details. TTY
users call 1-800-263-3830.
Roadside Assistance
Program
For U.S.-purchased vehicles, call
1-800-243-8872. (Text Telephone
(TTY): 1-888-889-2438.)
For Canadian-purchased vehicles,
call 1-800-268-6800.
Service is available 24 hours a day,
365 days a year.
Calling for Assistance
When calling Roadside Assistance,
have the following information
ready:
.
Your name, home address, and
home telephone number
. Telephone number of your
location
. Location of the vehicle
. Model, year, color, and license
plate number of the vehicle
. Odometer reading, Vehicle
Identification Number (VIN), and
delivery date of the vehicle
. Description of the problem
Coverage
Services are provided for the
duration of the vehicle’s powertrain
warranty.
In the U.S., anyone driving the
vehicle is covered. In Canada, a
person driving the vehicle without
permission from the owner is not
covered.
Page 480 of 489

Chevrolet Silverado LD 1500 and Silverado 2500/3500 Owner Manual (GMNA-
Localizing-U.S./Canada-12162993) - 2019 - crc - 4/4/18
Index 479
Extender, Seat Belt . . . . . . . . . . . . . . 74
Exterior Cargo Lamps . . . . . . . . . . 177
Exterior Lamp Controls . . . . . . . . . 171
Exterior Lamps Off Reminder . . . 173
Exterior Lighting BatterySaver . . . . . . . . . . . . . . . . . . . . . . . . . 180
F
FanEngine . . . . . . . . . . . . . . . . . . . . . . . . 345
Fast Idle System . . . . . . . . . . . . . . . . 250
Features Memory . . . . . . . . . . . . . . . . . . . . . . . . . 13
Filter, Engine Air Cleaner . . . . . . . . . . . 338
Fixed Mast Antenna . . . . . . . . . . . . 189
Flash-to-Pass . . . . . . . . . . . . . . . . . . . 174
Flashers, Hazard Warning . . . . . . 175
Flat Tire . . . . . . . . . . . . . . . . . . . . . . . . 394 Changing . . . . . . . . . . . . . . . . . . . . . 396
FlexFuel
E85 . . . . . . . . . . . . . . . . . . . . . . . . . . . 291
Floor Console Storage . . . . . . . . . . 124
Floor Mats . . . . . . . . . . . . . . . . . . . . . . 426
Fluid Automatic
Transmission . . . . . . . . . . . 335, 337
Brakes . . . . . . . . . . . . . . . . . . . . . . . . 348 Fluid (cont'd)
Four-Wheel Drive
Transfer Case . . . . . . . . . . . . . . . 262
Power Steering . . . . . . . . . . . . . . . 345
Washer . . . . . . . . . . . . . . . . . . . . . . . 346
Fog Lamps . . . . . . . . . . . . . . . . . . . . . 176 Bulb Replacement . . . . . . . . . . . . 359
Folding Mirrors . . . . . . . . . . . . . . . . . . 47
Forward Automatic Braking . . . . . 285
Forward Collision Alert (FCA) System . . . . . . . . . . . . . . . . . 282
Four-Wheel Drive . . . . . . . . . . 262, 350
Four-Wheel-Drive Light . . . . . . . . . 150
Frequency Statement Radio . . . . . . . . . . . . . . . . . . . . . . . . . 459
Front Axle . . . . . . . . . . . . . . . . . . . . . . 350
Front Fog Lamp Light . . . . . . . . . . . . . . . . . . . . . . . . . . 153
Front Seats Adjustment . . . . . . . . . . . . . . . . . . . . . 57
Heated and Ventilated . . . . . . . . . . 63
Fuel Additives . . . . . . . . . . . . . . . . . . . . . 290
Economy Driving . . . . . . . . . . . . . . . 32
Filling a Portable Fuel
Container . . . . . . . . . . . . . . . . . . . 293
Filling the Tank . . . . . . . . . . . . . . . 291
Foreign Countries . . . . . . . . . . . . 290 Fuel (cont'd)
Gauge . . . . . . . . . . . . . . . . . . . . . . . . 139
Low Fuel Warning Light . . . . . . . 153
Management, Active . . . . . . . . . . 254
Prohibited Fuels . . . . . . . . . . . . . . 290
Recommended . . . . . . . . . . . . . . . 290
Top Tier . . . . . . . . . . . . . . . . . . . . . . 289
Full-Size Spare Tire . . . . . . . . . . . . 407
Fuses Engine Compartment FuseBlock . . . . . . . . . . . . . . . . . . . . . . . . 362
Fuses and Circuit Breakers . . . 362
Instrument Panel Fuse Block . . . . . . . . . . . . . . . . . . . 366, 367
G
Garage Door Opener . . . . . . . . . . . 167
Programming . . . . . . . . . . . . . . . . . 167
Gas Strut(s) . . . . . . . . . . . . . . . . . . . . 356
Gauges
Engine CoolantTemperature . . . . . . . . . . . . . . . . 141
Engine Oil Pressure . . . . . . . . . . 140
Fuel . . . . . . . . . . . . . . . . . . . . . . . . . . 139
Odometer . . . . . . . . . . . . . . . . . . . . . 139
Speedometer . . . . . . . . . . . . . . . . . 139
Tachometer . . . . . . . . . . . . . . . . . . . 139
Trip Odometer . . . . . . . . . . . . . . . . 139