2019 CHEVROLET SILVERADO 1500 LD auxiliary battery
[x] Cancel search: auxiliary batteryPage 172 of 490

Chevrolet Silverado LD 1500 and Silverado 2500/3500 Owner Manual (GMNA-
Localizing-U.S./Canada-12162993) - 2019 - crc - 7/30/18
Lighting 171
Lighting
Exterior Lighting
Exterior Lamp Controls . . . . . . . 171
Exterior Lamps OffReminder . . . . . . . . . . . . . . . . . . . 173
Headlamp High/Low-Beam Changer . . . . . . . . . . . . . . . . . . . . 173
Flash-to-Pass . . . . . . . . . . . . . . . . 174
Daytime Running Lamps (DRL) . . . . . . . . . . . . . . . 174
Automatic Headlamp System . . . . . . . . . . . . . . . . . . . . . . 174
Hazard Warning Flashers . . . . . 175
Turn and Lane-Change Signals . . . . . . . . . . . . . . . . . . . . . . 175
Fog Lamps . . . . . . . . . . . . . . . . . . . 176
Auxiliary Roof-Mounted Lamp . . . . . . . . 176
Exterior Cargo Lamps . . . . . . . . 177
Interior Lighting
Instrument Panel Illumination
Control . . . . . . . . . . . . . . . . . . . . . . 178
Dome Lamps . . . . . . . . . . . . . . . . . 178
Reading Lamps . . . . . . . . . . . . . . 178
Lighting Features
Entry Lighting . . . . . . . . . . . . . . . . 179
Exit Lighting . . . . . . . . . . . . . . . . . . 179
Battery Load Management . . . 179
Battery Power Protection . . . . . 180
Exterior Lighting Battery Saver . . . . . . . . . . . . . . . . . . . . . . . 180Exterior Lighting
Exterior Lamp Controls
The exterior lamp control is on the
instrument panel to the left of the
steering wheel.
O: Turns off the automatic
headlamps and Daytime Running
Lamps (DRL). Turn the headlamp
control to
Oagain to turn the
automatic headlamps or DRL
back on.
For vehicles first sold in Canada, off
will only work when the vehicle is in
P (Park).
Page 191 of 490
Chevrolet Silverado LD 1500 and Silverado 2500/3500 Owner Manual (GMNA-
Localizing-U.S./Canada-12162993) - 2019 - crc - 7/30/18
190 Infotainment System
Audio Players
Avoiding Untrusted Media
Devices
When using media devices such as
CDs, DVDs, Blu-ray Discs, SD
cards, USB devices, and mobile
devices, consider the source.
Untrusted media devices could
contain files that affect system
operation or performance. Avoid use
if the content or origin cannot be
trusted.
USB Port
Using the USB Port
The infotainment system can play
music by connecting an auxiliary
device to the USB port.
USB Support
If equipped, there may be USB
ports in the center stack below the
climate controls, in the center
console storage, and at the rear of
the center console. All ports use the
USB 2.0 standard.USB Supported Devices
.
USB flash drives
. Portable USB hard drives
Not all iPods and USB drives are
compatible with the USB port.
Make sure the iPod has the latest
firmware from Apple for proper
operation. iPod firmware can be
updated using the latest iTunes
application. See www.apple.com/
itunes.
For help with identifying your iPod,
go to www.apple.com/support.
The USB port can play both lower
and upper case .mp3, .wma, .ogg,
and .wav files stored on a USB
storage device.
Supported Apple Devices
To view supported devices in U.S.,
see my.chevrolet.com\learn.
To view supported devices in
Canada, see
www.chevroletowner.ca. USB Supported File and Folder
Structure
The infotainment system supports:
.
FAT16.
. FAT32.
. exFAT.
Connecting a USB Storage
Device or iPod/iPhone
To connect a USB storage device,
connect the device to the USB port.
To connect an iPod/iPhone, connect
one end of the device’ s cable to the
iPod/iPhone and the other end to
the USB port.
The iPod/iPhone charges while it is
connected to the vehicle if the
ignition is on or in ACC/
ACCESSORY. See Ignition
Positions 0247. When the vehicle is
turned off, the iPod/iPhone
automatically powers off and will not
charge or draw power from the
vehicle's battery.
For more information on USB
usage, see “Audio System
Information” following.
Page 310 of 490
Chevrolet Silverado LD 1500 and Silverado 2500/3500 Owner Manual (GMNA-
Localizing-U.S./Canada-12162993) - 2019 - crc - 7/30/18
Driving and Operating 309
if it becomes separated from the
hitch. Always leave enough slack in
the safety chains to allow the
combination to turn. Never allow
safety chains to drag on the ground.
Trailer Brakes
Loaded trailers over 900 kg
(2,000 lb) must be equipped with
brake systems and with brakes for
each axle. Trailer braking equipment
conforming to Canadian Standards
Association (CSA) requirement
CAN3-D313, or its equivalent, is
recommended.
State or local regulations may
require trailers to have their own
braking system if the loaded weight
of the trailer exceeds certain
minimums that can vary from state
to state. Read and follow the
instructions for the trailer brakes so
they are installed, adjusted, and
maintained properly. Never attempt
to tap into your vehicle's hydraulic
brake system. If you do, both the
vehicle anti-lock brakes and the
trailer brakes may not function,
which could result in a crash.
Auxiliary Battery
If equipped, the vehicle's auxiliary
battery can be used to supply
electrical power to additional
equipment that may be added, such
as a slide-in camper.
Locate the auxiliary battery
connector under the hood on the
driver's side of the vehicle, next to
the underhood electrical center.
Follow the proper installation
instructions included with any
electrical equipment that is installed.
Caution
To prevent draining the auxiliary
battery, always turn off electrical
equipment when not in use and
do not use any equipment that
may exceed the
maximum amperage rating of
30 amps.
Trailer Wiring Harness
Basic Trailer Wiring
If the vehicle is not equipped with a
trailer connector on the rear bumper,
a 7-wire trailering harness is tied to
the vehicles frame. The harness
requires the installation of a trailer
connector, which is available
through your dealer.
Use only a round, seven-wire
connector with flat blade terminals
meeting SAE J2863 specifications
for proper electrical connectivity.
The seven-wire harness contains
the following trailer circuits:Stop/Turn
Signal Left Yellow/Blue
Stop/Turn
Signal Right Green/Brown
Tail/Parking
Lamps Gray/Brown
Reverse Lamps White/Green
Page 320 of 490
Chevrolet Silverado LD 1500 and Silverado 2500/3500 Owner Manual (GMNA-
Localizing-U.S./Canada-12162993) - 2019 - crc - 7/30/18
Driving and Operating 319
Caution
Some electrical equipment can
damage the vehicle or cause
components to not work and
would not be covered by the
vehicle warranty. Always check
with your dealer before adding
electrical equipment.
Add-on equipment can drain the
vehicle's 12-volt battery, even if the
vehicle is not operating.
The vehicle has an airbag system.
Before attempting to add anything
electrical to the vehicle, see
Servicing the Airbag-Equipped
Vehicle 088 and Adding Equipment
to the Airbag-Equipped Vehicle
0 89.
For information on wiring auxiliary
switches, see www.gmupfitter.com
or contact your dealer.
Snow Plow Prep Wiring
Package
These wiring provisions are
included with RPO VYU (Snow Plow
Prep Package) only. These
provisions are for use with a snow
plow installed. The harness should
be installed by your dealer or
qualified service center.
Adding a Snow Plow or
Similar Equipment
Caution
Do not exceed 72 km/h (45 mph)
with a snow plow mounted to the
vehicle. The vehicle could
overheat and be damaged. Before installing a snow plow on the
vehicle, follow these guidelines:
Caution
If the vehicle does not have the
snow plow prep package, RPO
VYU, adding a plow can damage
the vehicle, and the repairs would
not be covered by the vehicle
warranty. Unless the vehicle was
built to carry a snow plow, do not
add one to the vehicle. If the
vehicle has RPO VYU, then the
payload the vehicle can carry will
be reduced when a snow plow is
installed. The vehicle can be
damaged if either the front or rear
axle ratings or the Gross Vehicle
Weight Rating (GVWR) are
exceeded.
Page 333 of 490
Chevrolet Silverado LD 1500 and Silverado 2500/3500 Owner Manual (GMNA-
Localizing-U.S./Canada-12162993) - 2019 - crc - 7/30/18
332 Vehicle Care
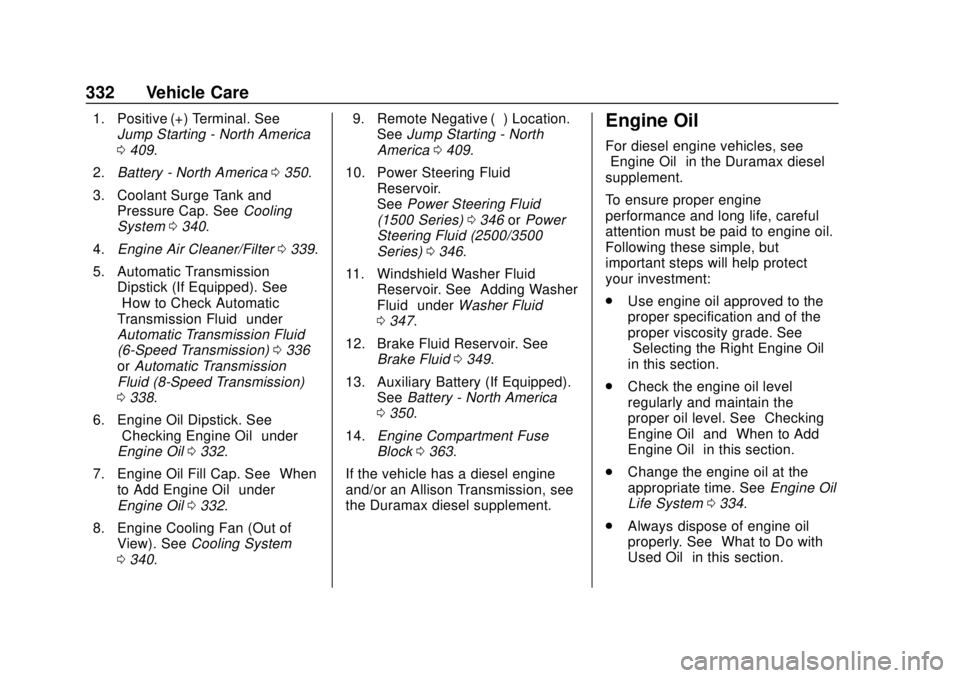
1. Positive (+) Terminal. SeeJump Starting - North America
0409.
2. Battery - North America 0350.
3. Coolant Surge Tank and Pressure Cap. See Cooling
System 0340.
4. Engine Air Cleaner/Filter 0339.
5. Automatic Transmission Dipstick (If Equipped). See
“How to Check Automatic
Transmission Fluid” under
Automatic Transmission Fluid
(6-Speed Transmission) 0336
or Automatic Transmission
Fluid (8-Speed Transmission)
0 338.
6. Engine Oil Dipstick. See “Checking Engine Oil” under
Engine Oil 0332.
7. Engine Oil Fill Cap. See “When
to Add Engine Oil” under
Engine Oil 0332.
8. Engine Cooling Fan (Out of View). See Cooling System
0 340. 9. Remote Negative (–) Location.
See Jump Starting - North
America 0409.
10. Power Steering Fluid Reservoir.
SeePower Steering Fluid
(1500 Series) 0346 orPower
Steering Fluid (2500/3500
Series) 0346.
11. Windshield Washer Fluid Reservoir. See “Adding Washer
Fluid” under Washer Fluid
0 347.
12. Brake Fluid Reservoir. See Brake Fluid 0349.
13. Auxiliary Battery (If Equipped). SeeBattery - North America
0 350.
14. Engine Compartment Fuse
Block 0363.
If the vehicle has a diesel engine
and/or an Allison Transmission, see
the Duramax diesel supplement.Engine Oil
For diesel engine vehicles, see
“Engine Oil” in the Duramax diesel
supplement.
To ensure proper engine
performance and long life, careful
attention must be paid to engine oil.
Following these simple, but
important steps will help protect
your investment:
. Use engine oil approved to the
proper specification and of the
proper viscosity grade. See
“Selecting the Right Engine Oil”
in this section.
. Check the engine oil level
regularly and maintain the
proper oil level. See “Checking
Engine Oil” and“When to Add
Engine Oil” in this section.
. Change the engine oil at the
appropriate time. See Engine Oil
Life System 0334.
. Always dispose of engine oil
properly. See “What to Do with
Used Oil” in this section.
Page 360 of 490
Chevrolet Silverado LD 1500 and Silverado 2500/3500 Owner Manual (GMNA-
Localizing-U.S./Canada-12162993) - 2019 - crc - 7/30/18
Vehicle Care 359
High Intensity Discharge
(HID) Lighting
{Warning
The High Intensity Discharge
(HID) lighting system operates at
a very high voltage. If you try to
service any of the system
components, you could be
seriously injured. Have your
dealer or a qualified technician
service them.
After an HID headlamp bulb has
been replaced, the beam might be a
slightly different shade than it was
originally. This is normal.
LED Lighting
This vehicle has several LED lamps.
For replacement of any LED lighting
assembly, contact your dealer.
Headlamps, Front Turn
Signal, Sidemarker, and
Parking Lamps
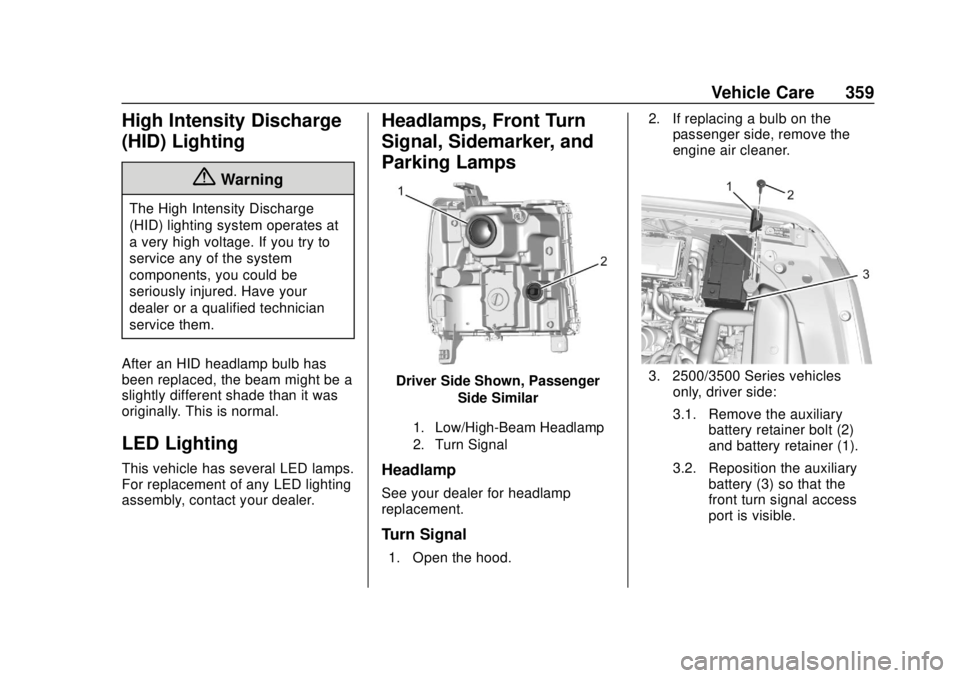
Driver Side Shown, Passenger Side Similar
1. Low/High-Beam Headlamp
2. Turn Signal
Headlamp
See your dealer for headlamp
replacement.
Turn Signal
1. Open the hood. 2. If replacing a bulb on the
passenger side, remove the
engine air cleaner.
3. 2500/3500 Series vehicles
only, driver side:
3.1. Remove the auxiliary battery retainer bolt (2)
and battery retainer (1).
3.2. Reposition the auxiliary battery (3) so that the
front turn signal access
port is visible.
Page 361 of 490
Chevrolet Silverado LD 1500 and Silverado 2500/3500 Owner Manual (GMNA-
Localizing-U.S./Canada-12162993) - 2019 - crc - 7/30/18
360 Vehicle Care
4. Turn the bulb socketcounterclockwise to remove it
from the headlamp assembly
and pull it straight out.
5. Remove the bulb by pulling it straight out of the bulb socket.
6. Install the new bulb into the bulb socket.
7. Turn the bulb socket clockwise to install it in the headlamp
assembly.
8. 2500/3500 Series vehicles only, driver side:
8.1. Reposition the auxiliary
battery (3).
8.2. Install the auxiliary battery retainer (1) and
battery retainer bolt (2).
9. If replacing a bulb on the passenger side, reinstall the
engine air cleaner.
10. Close the hood.
Fog Lamps
To replace the front fog lamp bulb: 1. Locate the fog lamp in the front
bumper.
2. Disconnect the electrical connector from the fog lamp
bulb assembly by pressing the
connector release.
3. Remove the bulb from the housing by squeezing the two
release tabs and pulling it
straight out of the assembly.
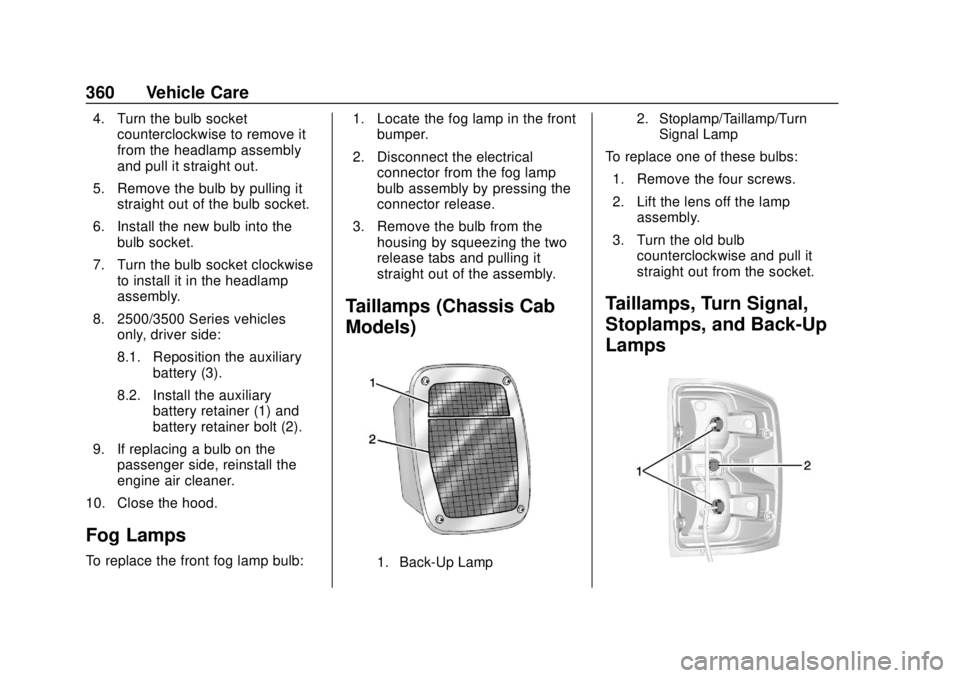
Taillamps (Chassis Cab
Models)
1. Back-Up Lamp 2. Stoplamp/Taillamp/Turn
Signal Lamp
To replace one of these bulbs:
1. Remove the four screws.
2. Lift the lens off the lamp assembly.
3. Turn the old bulb counterclockwise and pull it
straight out from the socket.
Taillamps, Turn Signal,
Stoplamps, and Back-Up
Lamps
Page 413 of 490
Chevrolet Silverado LD 1500 and Silverado 2500/3500 Owner Manual (GMNA-
Localizing-U.S./Canada-12162993) - 2019 - crc - 7/30/18
412 Vehicle Care
Do not let the other end touch
anything until the next step.
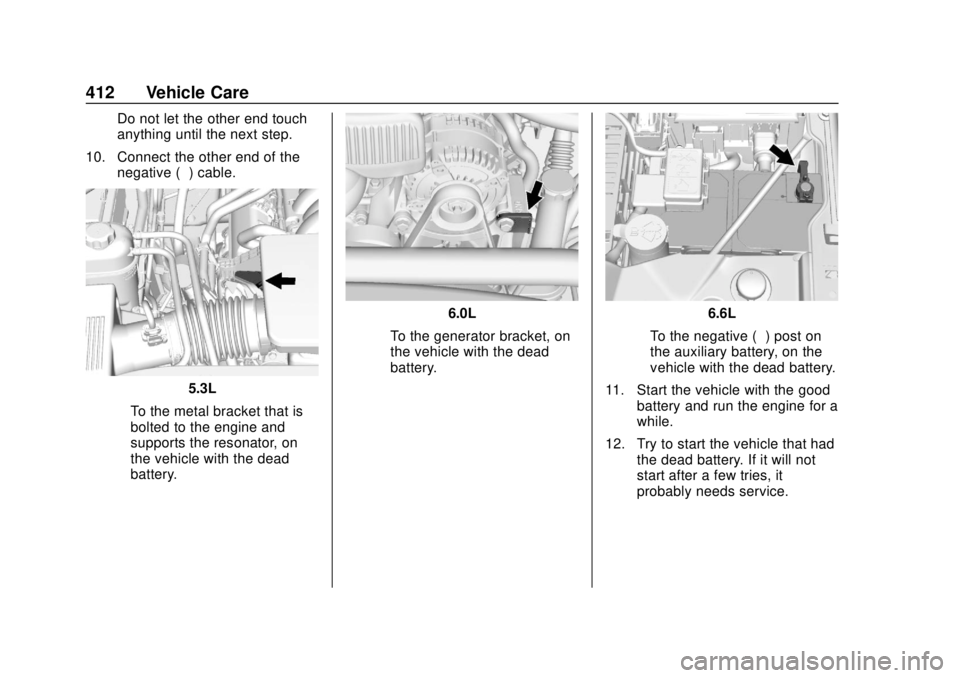
10. Connect the other end of the negative (−) cable.
5.3L
‐ To the metal bracket that is
bolted to the engine and
supports the resonator, on
the vehicle with the dead
battery.
6.0L
‐ To the generator bracket, on
the vehicle with the dead
battery.6.6L
‐ To the negative (−) post on
the auxiliary battery, on the
vehicle with the dead battery.
11. Start the vehicle with the good battery and run the engine for a
while.
12. Try to start the vehicle that had the dead battery. If it will not
start after a few tries, it
probably needs service.