2019 CHEVROLET SILVERADO 1500 LD warning light
[x] Cancel search: warning lightPage 273 of 490
Chevrolet Silverado LD 1500 and Silverado 2500/3500 Owner Manual (GMNA-
Localizing-U.S./Canada-12162993) - 2019 - crc - 7/30/18
272 Driving and Operating
A chime sounds and the warning
light flashes when the parking brake
is applied and the vehicle is moving
at least 8 km/h (5 mph).
To release the parking brake, hold
the regular brake pedal down. Then
pull the bottom edge of the lever
with the parking brake symbol,
located to the right of the steering
column.
If the ignition is on when the parking
brake is released, the brake system
warning light goes off.
Caution
Driving with the parking brake on
can overheat the brake system
and cause premature wear or
damage to brake system parts.
Make sure that the parking brake
is fully released and the brake
warning light is off before driving.
If you are towing a trailer and are
parking on any hill see Driving
Characteristics and Towing Tips
0 294.
Brake Assist
The Brake Assist feature is
designed to assist the driver in
stopping or decreasing vehicle
speed in emergency driving
conditions. This feature uses the
stability system hydraulic brake
control module to supplement the
power brake system under
conditions where the driver has
quickly and forcefully applied the
brake pedal in an attempt to quickly
stop or slow down the vehicle. The
stability system hydraulic brake
control module increases brake
pressure at each corner of the
vehicle until the ABS activates.
Minor brake pedal pulsation or
pedal movement during this time is
normal and the driver should
continue to apply the brake pedal as
the driving situation dictates The
Brake Assist feature will
automatically disengage when the
brake pedal is released or brake
pedal pressure is quickly
decreased.
Hill Start Assist (HSA)
This vehicle has a Hill Start Assist
(HSA) feature, which may be useful
when the vehicle is stopped on a
grade. This feature is designed to
prevent the vehicle from rolling,
either forward or rearward, during
vehicle drive off. After you
completely stop and hold the vehicle
in a complete standstill on a grade,
HSA will automatically activate.
During the transition period between
when you release the brake pedal
and start to accelerate to drive off
on a grade, HSA holds the braking
pressure for a maximum of
two seconds to ensure that there is
no rolling. The brakes will
automatically release when the
accelerator pedal is applied within
the two-second window. If the
vehicle is equipped with the
Integrated Trailer Brake Control
(ITBC) system, HSA may also apply
the trailer brakes. It will not activate
if the vehicle is in a drive gear and
facing downhill or if the vehicle is
facing uphill and in R (Reverse).
Page 283 of 490
Chevrolet Silverado LD 1500 and Silverado 2500/3500 Owner Manual (GMNA-
Localizing-U.S./Canada-12162993) - 2019 - crc - 7/30/18
282 Driving and Operating
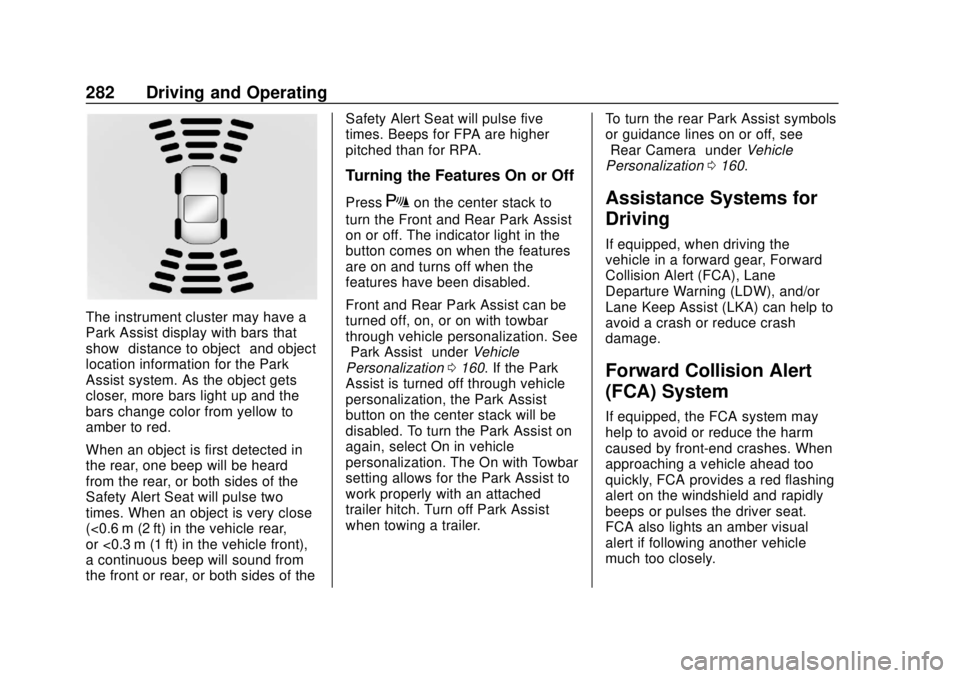
The instrument cluster may have a
Park Assist display with bars that
show“distance to object” and object
location information for the Park
Assist system. As the object gets
closer, more bars light up and the
bars change color from yellow to
amber to red.
When an object is first detected in
the rear, one beep will be heard
from the rear, or both sides of the
Safety Alert Seat will pulse two
times. When an object is very close
(<0.6 m (2 ft) in the vehicle rear,
or <0.3 m (1 ft) in the vehicle front),
a continuous beep will sound from
the front or rear, or both sides of the Safety Alert Seat will pulse five
times. Beeps for FPA are higher
pitched than for RPA.
Turning the Features On or Off
PressXon the center stack to
turn the Front and Rear Park Assist
on or off. The indicator light in the
button comes on when the features
are on and turns off when the
features have been disabled.
Front and Rear Park Assist can be
turned off, on, or on with towbar
through vehicle personalization. See
“Park Assist” underVehicle
Personalization 0160. If the Park
Assist is turned off through vehicle
personalization, the Park Assist
button on the center stack will be
disabled. To turn the Park Assist on
again, select On in vehicle
personalization. The On with Towbar
setting allows for the Park Assist to
work properly with an attached
trailer hitch. Turn off Park Assist
when towing a trailer. To turn the rear Park Assist symbols
or guidance lines on or off, see
“Rear Camera”
underVehicle
Personalization 0160.Assistance Systems for
Driving
If equipped, when driving the
vehicle in a forward gear, Forward
Collision Alert (FCA), Lane
Departure Warning (LDW), and/or
Lane Keep Assist (LKA) can help to
avoid a crash or reduce crash
damage.
Forward Collision Alert
(FCA) System
If equipped, the FCA system may
help to avoid or reduce the harm
caused by front-end crashes. When
approaching a vehicle ahead too
quickly, FCA provides a red flashing
alert on the windshield and rapidly
beeps or pulses the driver seat.
FCA also lights an amber visual
alert if following another vehicle
much too closely.
Page 288 of 490
Chevrolet Silverado LD 1500 and Silverado 2500/3500 Owner Manual (GMNA-
Localizing-U.S./Canada-12162993) - 2019 - crc - 7/30/18
Driving and Operating 287
Warning (Continued)
If LDW only detects lane
markings on one side of the road,
it will only warn you when
departing the lane on the side
where it has detected a lane
marking. Always keep your
attention on the road and
maintain proper vehicle position
within the lane, or vehicle
damage, injury, or death could
occur. Always keep the
windshield, headlamps, and
camera sensors clean and in
good repair. Do not use LDW in
bad weather conditions.
How the System Works
The LDW camera sensor is on the
windshield ahead of the rearview
mirror.
To turn LDW on and off, press
@on
the center stack. The control
indicator will light when LDW is on.
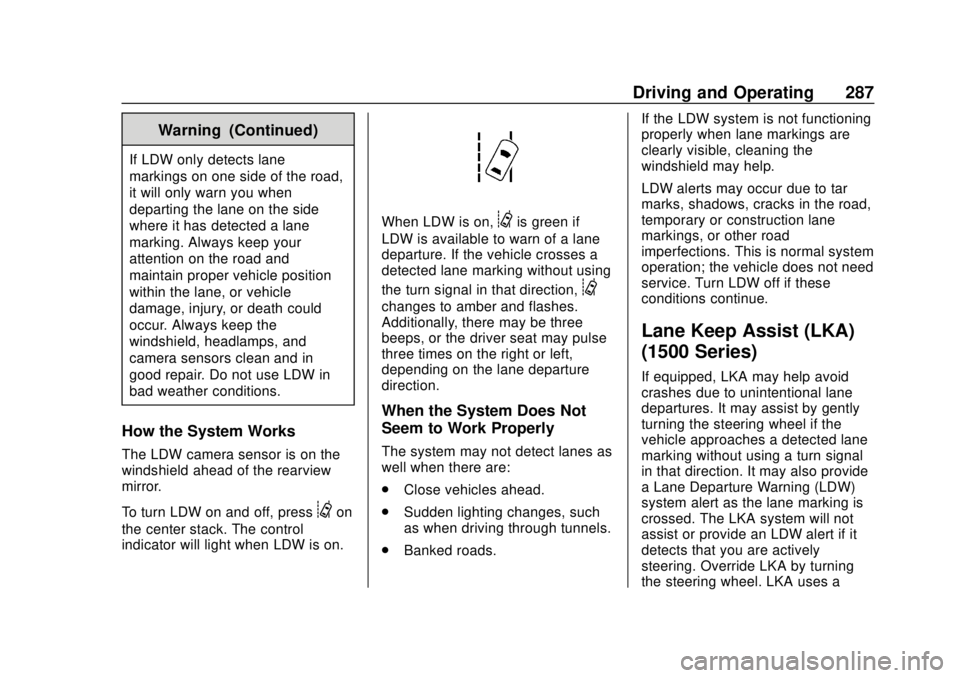
When LDW is on,@is green if
LDW is available to warn of a lane
departure. If the vehicle crosses a
detected lane marking without using
the turn signal in that direction,
@
changes to amber and flashes.
Additionally, there may be three
beeps, or the driver seat may pulse
three times on the right or left,
depending on the lane departure
direction.
When the System Does Not
Seem to Work Properly
The system may not detect lanes as
well when there are:
. Close vehicles ahead.
. Sudden lighting changes, such
as when driving through tunnels.
. Banked roads. If the LDW system is not functioning
properly when lane markings are
clearly visible, cleaning the
windshield may help.
LDW alerts may occur due to tar
marks, shadows, cracks in the road,
temporary or construction lane
markings, or other road
imperfections. This is normal system
operation; the vehicle does not need
service. Turn LDW off if these
conditions continue.
Lane Keep Assist (LKA)
(1500 Series)
If equipped, LKA may help avoid
crashes due to unintentional lane
departures. It may assist by gently
turning the steering wheel if the
vehicle approaches a detected lane
marking without using a turn signal
in that direction. It may also provide
a Lane Departure Warning (LDW)
system alert as the lane marking is
crossed. The LKA system will not
assist or provide an LDW alert if it
detects that you are actively
steering. Override LKA by turning
the steering wheel. LKA uses a
Page 317 of 490
Chevrolet Silverado LD 1500 and Silverado 2500/3500 Owner Manual (GMNA-
Localizing-U.S./Canada-12162993) - 2019 - crc - 7/30/18
316 Driving and Operating
If the CHECK TRAILER WIRING
message only reappears when
connecting the trailer wiring harness
to the vehicle, the electrical fault is
on the trailer side.
SERVICE TRAILER BRAKE
SYSTEM: This message will display
when there is a problem with the
ITBC system. If this message
continues over multiple ignition
cycles, have the vehicle serviced.
If either the CHECK TRAILER
WIRING or SERVICE TRAILER
BRAKE SYSTEM message displays
while driving, the ITBC system may
not be fully functional or may not
function at all. When traffic
conditions allow, carefully pull the
vehicle over to the side of the road
and turn the ignition off. Check the
wiring connection to the trailer and
turn the ignition back on. If either of
these messages continues, either
the vehicle or trailer needs service.
A GM dealer may be able to
diagnose and repair problems with
the trailer. However, any diagnosis
and repair of the trailer is not
covered under the vehicle warranty.Contact your trailer dealer for
assistance with trailer repairs and
trailer warranty information.
Trailer Sway
Control (TSC)
Vehicles with StabiliTrak have a
Trailer Sway Control (TSC) feature.
Trailer sway is unintended
side-to-side motion of a trailer while
towing. If the vehicle is towing a
trailer and the TSC detects that
sway is increasing, the vehicle
brakes are selectively applied at
each wheel, to help reduce
excessive trailer sway. If equipped
with the Integrated Trailer Brake
Control (ITBC) system, and the
trailer has an electric brake system,
StabiliTrak may also apply the trailer
brakes.If TSC is enabled, the Traction
Control System (TCS)/StabiliTrak
warning light will flash on the
instrument cluster. Reduce vehicle
speed by gradually removing your
foot from the accelerator. If trailer
sway continues, StabiliTrak can
reduce engine torque to help slow
the vehicle. TSC will not function if
StabiliTrak is turned off. See
Traction Control/Electronic Stability
Control.
{Warning
Trailer sway can result in a crash
and in serious injury or death,
even if the vehicle is equipped
with TSC.
(Continued)
Page 325 of 490
Chevrolet Silverado LD 1500 and Silverado 2500/3500 Owner Manual (GMNA-
Localizing-U.S./Canada-12162993) - 2019 - crc - 7/30/18
324 Vehicle Care
Vehicle Care
General Information
General Information . . . . . . . . . . 325
California Proposition65 Warning . . . . . . . . . . . . . . . . . 326
California Perchlorate Materials Requirements . . . . . 326
Accessories and Modifications . . . . . . . . . . . . . . . . 326
Vehicle Checks
Doing Your OwnService Work . . . . . . . . . . . . . . . 327
Hood . . . . . . . . . . . . . . . . . . . . . . . . . 327
Engine Compartment Overview . . . . . . . . . . . . . . . . . . . . 329
Engine Oil . . . . . . . . . . . . . . . . . . . . 332
Engine Oil Life System . . . . . . . 334
Automatic Transmission Fluid (6-Speed Transmission) . . . . . 336
Automatic Transmission Fluid (8-Speed Transmission) . . . . . 338
Engine Air Cleaner/Filter . . . . . . 339
Cooling System . . . . . . . . . . . . . . 340
Engine Overheating . . . . . . . . . . 344
Overheated Engine Protection Operating Mode . . . . . . . . . . . . . 345
Engine Fan . . . . . . . . . . . . . . . . . . . 346 Power Steering Fluid (1500
Series) . . . . . . . . . . . . . . . . . . . . . . 346
Power Steering Fluid (2500/ 3500 Series) . . . . . . . . . . . . . . . . 346
Washer Fluid . . . . . . . . . . . . . . . . . 347
Brakes . . . . . . . . . . . . . . . . . . . . . . . 348
Brake Fluid . . . . . . . . . . . . . . . . . . . 349
Battery - North America . . . . . . 350
Four-Wheel Drive . . . . . . . . . . . . . 351
Front Axle . . . . . . . . . . . . . . . . . . . . 351
Rear Axle . . . . . . . . . . . . . . . . . . . . 352
Noise Control System . . . . . . . . 353
Starter Switch Check . . . . . . . . . 355
Automatic Transmission Shift
Lock Control Function
Check . . . . . . . . . . . . . . . . . . . . . . . 355
Ignition Transmission Lock Check . . . . . . . . . . . . . . . . . . . . . . . 355
Park Brake and P (Park) Mechanism Check . . . . . . . . . . 355
Wiper Blade Replacement . . . . 356
Windshield Replacement . . . . . 357
Gas Strut(s) . . . . . . . . . . . . . . . . . . 357
Headlamp Aiming
Headlamp Aiming . . . . . . . . . . . . 358
Bulb Replacement
Bulb Replacement . . . . . . . . . . . . 358
Halogen Bulbs . . . . . . . . . . . . . . . . 358 High Intensity Discharge (HID)
Lighting . . . . . . . . . . . . . . . . . . . . . 359
LED Lighting . . . . . . . . . . . . . . . . . 359
Headlamps, Front Turn Signal, Sidemarker, and Parking
Lamps . . . . . . . . . . . . . . . . . . . . . . 359
Fog Lamps . . . . . . . . . . . . . . . . . . . 360
Taillamps (Chassis Cab Models) . . . . . . . . . . . . . . . . . . . . . 360
Taillamps, Turn Signal, Stoplamps, and Back-Up
Lamps . . . . . . . . . . . . . . . . . . . . . . 360
Center High-Mounted Stoplamp (CHMSL) and
Cargo Lamp . . . . . . . . . . . . . . . . . 362
Electrical System
Electrical System Overload . . . 362
Fuses and Circuit Breakers . . . 363
Engine Compartment FuseBlock . . . . . . . . . . . . . . . . . . . . . . . . 363
Instrument Panel Fuse Block (Right) . . . . . . . . . . . . . . . . . . . . . . 367
Instrument Panel Fuse Block (Left) . . . . . . . . . . . . . . . . . 368
Wheels and Tires
Tires . . . . . . . . . . . . . . . . . . . . . . . . . . 371
All-Season Tires . . . . . . . . . . . . . . 371
Winter Tires . . . . . . . . . . . . . . . . . . 372
Low-Profile Tires . . . . . . . . . . . . . 372
Page 344 of 490
Chevrolet Silverado LD 1500 and Silverado 2500/3500 Owner Manual (GMNA-
Localizing-U.S./Canada-12162993) - 2019 - crc - 7/30/18
Vehicle Care 343
{Warning
Plain water, or other liquids such
as alcohol, can boil before the
proper coolant mixture will. With
plain water or the wrong mixture,
the engine could get too hot but
there would not be an overheat
warning. The engine could catch
fire and you or others could be
burned.
{Warning
Steam and scalding liquids from a
hot cooling system are under
pressure. Turning the pressure
cap, even a little, can cause them
to come out at high speed and
you could be burned. Never turn
the cap when the cooling system,
including the pressure cap, is hot.
Wait for the cooling system and
pressure cap to cool.
Caution
Failure to follow the specific
coolant fill procedure could cause
the engine to overheat and could
cause system damage. If coolant
is not visible in the surge tank,
contact your dealer.
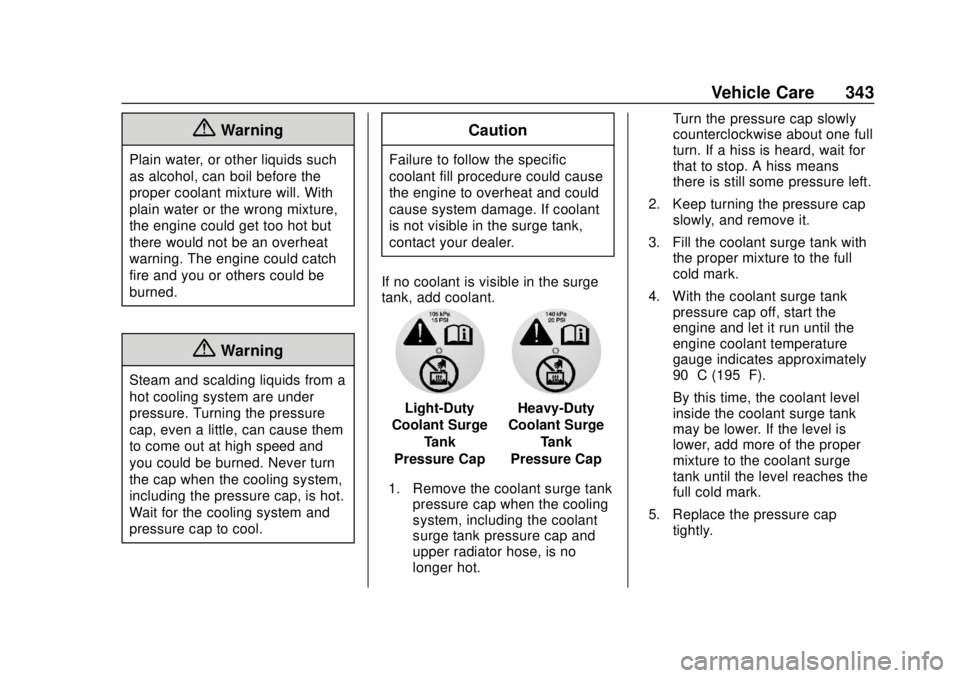
If no coolant is visible in the surge
tank, add coolant.
Light-Duty
Coolant Surge
Tank
Pressure CapHeavy-Duty
Coolant Surge
Tank
Pressure Cap
1. Remove the coolant surge tank pressure cap when the cooling
system, including the coolant
surge tank pressure cap and
upper radiator hose, is no
longer hot. Turn the pressure cap slowly
counterclockwise about one full
turn. If a hiss is heard, wait for
that to stop. A hiss means
there is still some pressure left.
2. Keep turning the pressure cap slowly, and remove it.
3. Fill the coolant surge tank with the proper mixture to the full
cold mark.
4. With the coolant surge tank pressure cap off, start the
engine and let it run until the
engine coolant temperature
gauge indicates approximately
90 °C (195 °F).
By this time, the coolant level
inside the coolant surge tank
may be lower. If the level is
lower, add more of the proper
mixture to the coolant surge
tank until the level reaches the
full cold mark.
5. Replace the pressure cap tightly.
Page 349 of 490
Chevrolet Silverado LD 1500 and Silverado 2500/3500 Owner Manual (GMNA-
Localizing-U.S./Canada-12162993) - 2019 - crc - 7/30/18
348 Vehicle Care
Caution
.Do not use washer fluid that
contains any type of water
repellent coating. This can
cause the wiper blades to
chatter or skip.
. Do not use engine coolant
(antifreeze) in the
windshield washer. It can
damage the windshield
washer system and paint.
. Do not mix water with
ready-to-use washer fluid.
Water can cause the
solution to freeze and
damage the washer fluid
tank and other parts of the
washer system.
. When using concentrated
washer fluid, follow the
manufacturer instructions for
adding water.
. Fill the washer fluid tank
only three-quarters full when
it is very cold. This allows
(Continued)
Caution (Continued)
for fluid expansion if
freezing occurs, which could
damage the tank if it is
completely full.
Brakes
Disc brake pads have built-in wear
indicators that make a high-pitched
warning sound when the brake pads
are worn and new pads are needed.
The sound can come and go or be
heard all the time the vehicle is
moving, except when applying the
brake pedal firmly.
{Warning
The brake wear warning sound
means that soon the brakes will
not work well. That could lead to
a crash. When the brake wear
warning sound is heard, have the
vehicle serviced.
Caution
Continuing to drive with worn-out
brake pads could result in costly
brake repair.
Some driving conditions or climates
can cause a brake squeal when the
brakes are first applied or lightly
applied. This does not mean
something is wrong with the brakes.
Properly torqued wheel nuts are
necessary to help prevent brake
pulsation. When tires are rotated,
inspect brake pads for wear and
evenly tighten wheel nuts in the
proper sequence to torque
specifications in Capacities and
Specifications 0447.
Brake linings should always be
replaced as complete axle sets.
Brake Pedal Travel
See your dealer if the brake pedal
does not return to normal height,
or if there is a rapid increase in
pedal travel. This could be a sign
that brake service may be required.
Page 350 of 490
Chevrolet Silverado LD 1500 and Silverado 2500/3500 Owner Manual (GMNA-
Localizing-U.S./Canada-12162993) - 2019 - crc - 7/30/18
Vehicle Care 349
Replacing Brake System Parts
Always replace brake system parts
with new, approved replacement
parts. If this is not done, the brakes
may not work properly. The braking
performance expected can change
in many other ways if the wrong
replacement brake parts are
installed or parts are improperly
installed.
Brake Fluid
The brake master cylinder reservoir
is filled with DOT 3 brake fluid. See
Engine Compartment Overview
0329 for the location of the
reservoir.
There are only two reasons why the
brake fluid level in the reservoir may
go down: .
Normal brake lining wear. When
new linings are installed, the
fluid level goes back up.
. A fluid leak in the brake
hydraulic system. Have the
brake hydraulic system fixed.
With a leak, the brakes will not
work well.
Always clean the brake fluid
reservoir cap and the area around
the cap before removing it.
Do not top off the brake fluid.
Adding fluid does not correct a leak.
If fluid is added when the linings are
worn, there will be too much fluid
when new brake linings are
installed. Add or remove fluid, as
necessary, only when work is done
on the brake hydraulic system.
{Warning
If too much brake fluid is added, it
can spill on the engine and burn,
if the engine is hot enough. You
or others could be burned, and
the vehicle could be damaged. (Continued)
Warning (Continued)
Add brake fluid only when work is
done on the brake hydraulic
system.
When the brake fluid falls to a low
level, the brake warning light comes
on. See Brake System Warning
Light 0148.
Brake fluid absorbs water over time.
Replace brake fluid at the specified
intervals to prevent increased
stopping distance. See Maintenance
Schedule 0431.
Checking Brake Fluid
Check brake fluid by looking at the
brake fluid reservoir. See Engine
Compartment Overview 0329.