2019 CHEVROLET SILVERADO 1500 LD parking brake
[x] Cancel search: parking brakePage 298 of 490
Chevrolet Silverado LD 1500 and Silverado 2500/3500 Owner Manual (GMNA-
Localizing-U.S./Canada-12162993) - 2019 - crc - 7/30/18
Driving and Operating 297
The vehicle can tow in D (Drive).
Shift the transmission to a lower
gear if the transmission shifts too
often under heavy loads and/or hilly
conditions.
When towing at higher altitudes,
engine coolant will boil at a lower
temperature than at lower altitudes.
If the engine is turned off
immediately after towing at high
altitude on steep uphill grades, the
vehicle could show signs similar to
engine overheating. To avoid this,
let the engine run, preferably on
level ground, with the transmission
in P (Park) for a few minutes before
turning the engine off. If the
overheat warning comes on, see
Engine Overheating0344.
Parking on Hills
{Warning
To prevent serious injury or death,
always park your vehicle and
trailer on a level surface when
possible. When parking your vehicle and your
trailer on a hill:
1. Press the brake pedal, but do not shift into P (Park) yet. Turn
the wheels into the curb if
facing downhill or into traffic if
facing uphill.
2. Have someone place chocks under the trailer wheels.
3. When the wheel chocks are in place, gradually release the
brake pedal to allow the chocks
to absorb the load of the trailer.
4. Reapply the brake pedal. Then apply the parking brake and
shift into P (Park).
5. Release the brake pedal.
Leaving After Parking on a Hill
1. Apply and hold the brake pedal.
.Start the engine.
. Shift into a gear.
. Release the parking brake.
2. Let up on the brake pedal. 3. Drive slowly until the trailer is
clear of the chocks.
4. Stop and have someone pick up and store the chocks.
Maintenance when Trailer
Towing
The vehicle needs service more
often when used to tow trailers. See
Maintenance Schedule 0431. It is
especially important to check the
automatic transmission fluid, engine
oil, axle lubricant, belts, cooling
system, and brake system before
and during each trip.
Check periodically that all nuts and
bolts on the trailer hitch are tight.
Engine Cooling When Trailer
Towing
The cooling system may temporarily
overheat during severe operating
conditions. See Engine Overheating
0 344.
Page 310 of 490
Chevrolet Silverado LD 1500 and Silverado 2500/3500 Owner Manual (GMNA-
Localizing-U.S./Canada-12162993) - 2019 - crc - 7/30/18
Driving and Operating 309
if it becomes separated from the
hitch. Always leave enough slack in
the safety chains to allow the
combination to turn. Never allow
safety chains to drag on the ground.
Trailer Brakes
Loaded trailers over 900 kg
(2,000 lb) must be equipped with
brake systems and with brakes for
each axle. Trailer braking equipment
conforming to Canadian Standards
Association (CSA) requirement
CAN3-D313, or its equivalent, is
recommended.
State or local regulations may
require trailers to have their own
braking system if the loaded weight
of the trailer exceeds certain
minimums that can vary from state
to state. Read and follow the
instructions for the trailer brakes so
they are installed, adjusted, and
maintained properly. Never attempt
to tap into your vehicle's hydraulic
brake system. If you do, both the
vehicle anti-lock brakes and the
trailer brakes may not function,
which could result in a crash.
Auxiliary Battery
If equipped, the vehicle's auxiliary
battery can be used to supply
electrical power to additional
equipment that may be added, such
as a slide-in camper.
Locate the auxiliary battery
connector under the hood on the
driver's side of the vehicle, next to
the underhood electrical center.
Follow the proper installation
instructions included with any
electrical equipment that is installed.
Caution
To prevent draining the auxiliary
battery, always turn off electrical
equipment when not in use and
do not use any equipment that
may exceed the
maximum amperage rating of
30 amps.
Trailer Wiring Harness
Basic Trailer Wiring
If the vehicle is not equipped with a
trailer connector on the rear bumper,
a 7-wire trailering harness is tied to
the vehicles frame. The harness
requires the installation of a trailer
connector, which is available
through your dealer.
Use only a round, seven-wire
connector with flat blade terminals
meeting SAE J2863 specifications
for proper electrical connectivity.
The seven-wire harness contains
the following trailer circuits:Stop/Turn
Signal Left Yellow/Blue
Stop/Turn
Signal Right Green/Brown
Tail/Parking
Lamps Gray/Brown
Reverse Lamps White/Green
Page 312 of 490
Chevrolet Silverado LD 1500 and Silverado 2500/3500 Owner Manual (GMNA-
Localizing-U.S./Canada-12162993) - 2019 - crc - 7/30/18
Driving and Operating 311
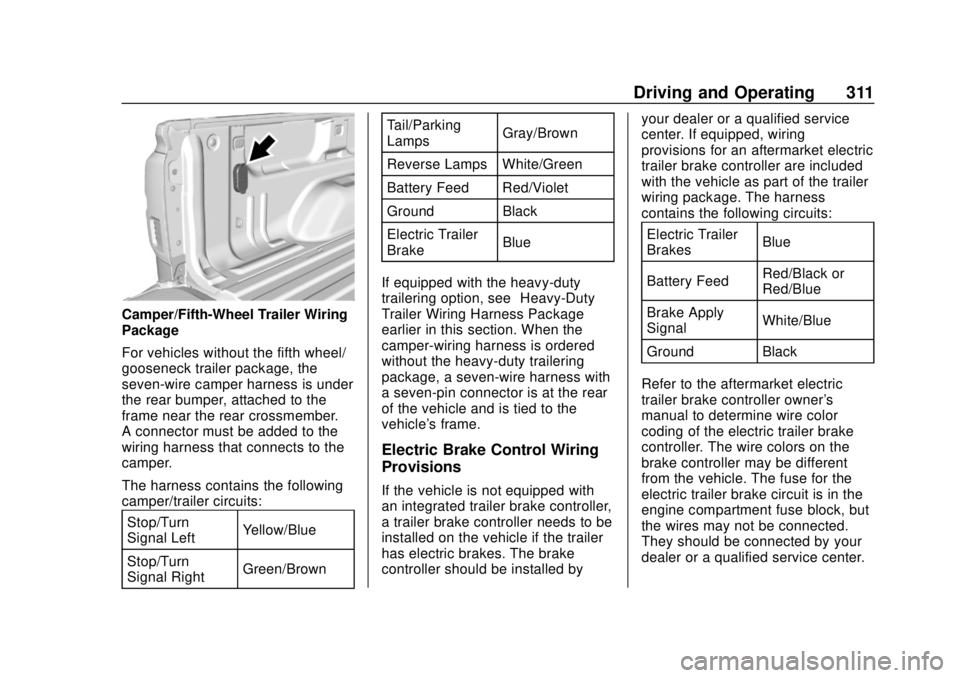
Camper/Fifth-Wheel Trailer Wiring
Package
For vehicles without the fifth wheel/
gooseneck trailer package, the
seven-wire camper harness is under
the rear bumper, attached to the
frame near the rear crossmember.
A connector must be added to the
wiring harness that connects to the
camper.
The harness contains the following
camper/trailer circuits:Stop/Turn
Signal Left Yellow/Blue
Stop/Turn
Signal Right Green/Brown Tail/Parking
Lamps
Gray/Brown
Reverse Lamps White/Green
Battery Feed Red/Violet
Ground Black
Electric Trailer
Brake Blue
If equipped with the heavy-duty
trailering option, see “Heavy-Duty
Trailer Wiring Harness Package”
earlier in this section. When the
camper-wiring harness is ordered
without the heavy-duty trailering
package, a seven-wire harness with
a seven-pin connector is at the rear
of the vehicle and is tied to the
vehicle's frame.
Electric Brake Control Wiring
Provisions
If the vehicle is not equipped with
an integrated trailer brake controller,
a trailer brake controller needs to be
installed on the vehicle if the trailer
has electric brakes. The brake
controller should be installed by your dealer or a qualified service
center. If equipped, wiring
provisions for an aftermarket electric
trailer brake controller are included
with the vehicle as part of the trailer
wiring package. The harness
contains the following circuits:
Electric Trailer
Brakes Blue
Battery Feed Red/Black or
Red/Blue
Brake Apply
Signal White/Blue
Ground Black
Refer to the aftermarket electric
trailer brake controller owner's
manual to determine wire color
coding of the electric trailer brake
controller. The wire colors on the
brake controller may be different
from the vehicle. The fuse for the
electric trailer brake circuit is in the
engine compartment fuse block, but
the wires may not be connected.
They should be connected by your
dealer or a qualified service center.
Page 313 of 490
Chevrolet Silverado LD 1500 and Silverado 2500/3500 Owner Manual (GMNA-
Localizing-U.S./Canada-12162993) - 2019 - crc - 7/30/18
312 Driving and Operating
Trailer Lamps
Always check all trailer lamps are
working at the beginning of each
trip, and periodically on longer trips.
Turn Signals When Towing a
Trailer
When properly connected, the trailer
turn signals should will illuminate to
indicate the vehicle is turning,
changing lanes, or stopping. When
towing a trailer, the arrows on the
instrument cluster will illuminate
even if the trailer is not properly
connected or the bulbs are
burned out.
Tow/Haul Mode
For instructions on how to enter
Tow/Haul mode, seeTow/Haul
Mode 0261.
Tow/Haul assists when pulling a
heavy trailer or a large or
heavy load.
Tow/Haul Mode is designed to be
most effective when the vehicle and
trailer combined weight is at least
75% of the vehicle's Gross Combined Weight Rating (GCWR).
See
“Weight of the Trailer” under
Trailer Towing 0298.
Tow/Haul Mode is most useful when
towing a heavy trailer or carrying a
large or heavy load:
. through rolling terrain.
. in stop-and-go traffic.
. in busy parking lots.
Operating the vehicle in Tow/Haul
Mode when lightly loaded or not
towing will not cause damage;
however, it is not recommended and
may result in unpleasant engine and
transmission driving characteristics
and reduced fuel economy.Integrated Trailer Brake
Control System
TThe vehicle may have an
Integrated Trailer Brake Control
(ITBC) system for use with electric
trailer brakes or most electric over
hydraulic trailer brake system
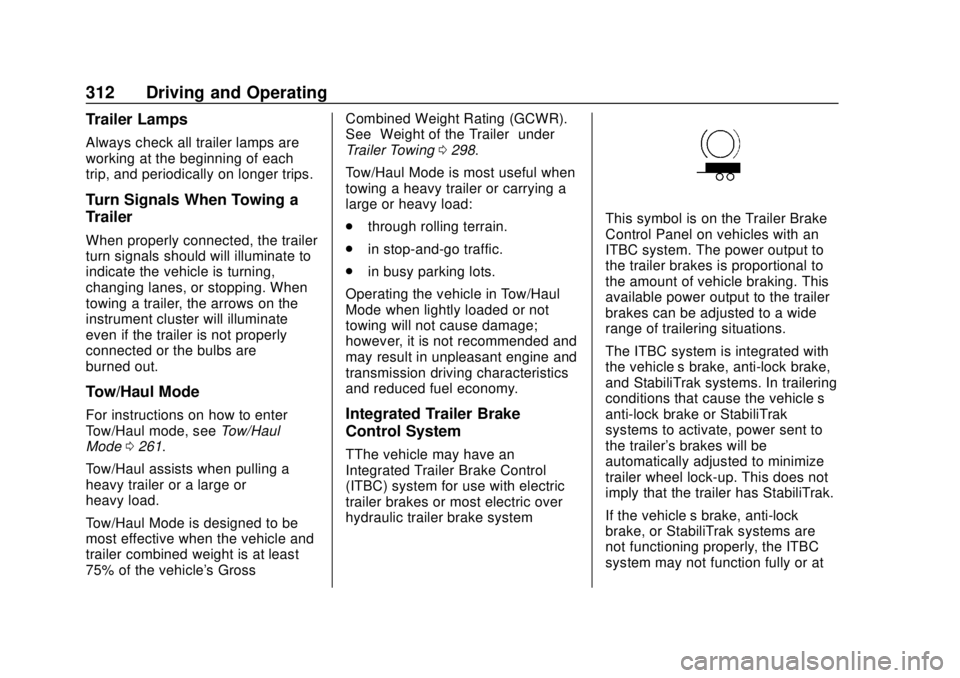
This symbol is on the Trailer Brake
Control Panel on vehicles with an
ITBC system. The power output to
the trailer brakes is proportional to
the amount of vehicle braking. This
available power output to the trailer
brakes can be adjusted to a wide
range of trailering situations.
The ITBC system is integrated with
the vehicle’ s brake, anti-lock brake,
and StabiliTrak systems. In trailering
conditions that cause the vehicle’s
anti-lock brake or StabiliTrak
systems to activate, power sent to
the trailer's brakes will be
automatically adjusted to minimize
trailer wheel lock-up. This does not
imply that the trailer has StabiliTrak.
If the vehicle’s brake, anti-lock
brake, or StabiliTrak systems are
not functioning properly, the ITBC
system may not function fully or at
Page 325 of 490
Chevrolet Silverado LD 1500 and Silverado 2500/3500 Owner Manual (GMNA-
Localizing-U.S./Canada-12162993) - 2019 - crc - 7/30/18
324 Vehicle Care
Vehicle Care
General Information
General Information . . . . . . . . . . 325
California Proposition65 Warning . . . . . . . . . . . . . . . . . 326
California Perchlorate Materials Requirements . . . . . 326
Accessories and Modifications . . . . . . . . . . . . . . . . 326
Vehicle Checks
Doing Your OwnService Work . . . . . . . . . . . . . . . 327
Hood . . . . . . . . . . . . . . . . . . . . . . . . . 327
Engine Compartment Overview . . . . . . . . . . . . . . . . . . . . 329
Engine Oil . . . . . . . . . . . . . . . . . . . . 332
Engine Oil Life System . . . . . . . 334
Automatic Transmission Fluid (6-Speed Transmission) . . . . . 336
Automatic Transmission Fluid (8-Speed Transmission) . . . . . 338
Engine Air Cleaner/Filter . . . . . . 339
Cooling System . . . . . . . . . . . . . . 340
Engine Overheating . . . . . . . . . . 344
Overheated Engine Protection Operating Mode . . . . . . . . . . . . . 345
Engine Fan . . . . . . . . . . . . . . . . . . . 346 Power Steering Fluid (1500
Series) . . . . . . . . . . . . . . . . . . . . . . 346
Power Steering Fluid (2500/ 3500 Series) . . . . . . . . . . . . . . . . 346
Washer Fluid . . . . . . . . . . . . . . . . . 347
Brakes . . . . . . . . . . . . . . . . . . . . . . . 348
Brake Fluid . . . . . . . . . . . . . . . . . . . 349
Battery - North America . . . . . . 350
Four-Wheel Drive . . . . . . . . . . . . . 351
Front Axle . . . . . . . . . . . . . . . . . . . . 351
Rear Axle . . . . . . . . . . . . . . . . . . . . 352
Noise Control System . . . . . . . . 353
Starter Switch Check . . . . . . . . . 355
Automatic Transmission Shift
Lock Control Function
Check . . . . . . . . . . . . . . . . . . . . . . . 355
Ignition Transmission Lock Check . . . . . . . . . . . . . . . . . . . . . . . 355
Park Brake and P (Park) Mechanism Check . . . . . . . . . . 355
Wiper Blade Replacement . . . . 356
Windshield Replacement . . . . . 357
Gas Strut(s) . . . . . . . . . . . . . . . . . . 357
Headlamp Aiming
Headlamp Aiming . . . . . . . . . . . . 358
Bulb Replacement
Bulb Replacement . . . . . . . . . . . . 358
Halogen Bulbs . . . . . . . . . . . . . . . . 358 High Intensity Discharge (HID)
Lighting . . . . . . . . . . . . . . . . . . . . . 359
LED Lighting . . . . . . . . . . . . . . . . . 359
Headlamps, Front Turn Signal, Sidemarker, and Parking
Lamps . . . . . . . . . . . . . . . . . . . . . . 359
Fog Lamps . . . . . . . . . . . . . . . . . . . 360
Taillamps (Chassis Cab Models) . . . . . . . . . . . . . . . . . . . . . 360
Taillamps, Turn Signal, Stoplamps, and Back-Up
Lamps . . . . . . . . . . . . . . . . . . . . . . 360
Center High-Mounted Stoplamp (CHMSL) and
Cargo Lamp . . . . . . . . . . . . . . . . . 362
Electrical System
Electrical System Overload . . . 362
Fuses and Circuit Breakers . . . 363
Engine Compartment FuseBlock . . . . . . . . . . . . . . . . . . . . . . . . 363
Instrument Panel Fuse Block (Right) . . . . . . . . . . . . . . . . . . . . . . 367
Instrument Panel Fuse Block (Left) . . . . . . . . . . . . . . . . . 368
Wheels and Tires
Tires . . . . . . . . . . . . . . . . . . . . . . . . . . 371
All-Season Tires . . . . . . . . . . . . . . 371
Winter Tires . . . . . . . . . . . . . . . . . . 372
Low-Profile Tires . . . . . . . . . . . . . 372
Page 337 of 490
Chevrolet Silverado LD 1500 and Silverado 2500/3500 Owner Manual (GMNA-
Localizing-U.S./Canada-12162993) - 2019 - crc - 7/30/18
336 Vehicle Care
Automatic Transmission
Fluid (6-Speed
Transmission)
When to Check and Change
Automatic Transmission Fluid
It is usually not necessary to check
the transmission fluid level. The only
reason for fluid loss is a
transmission leak or overheated
transmission. If a small leak is
suspected, then use the following
checking procedures to check the
fluid level. However, if there is a
large leak, then it may be necessary
to have the vehicle towed to a
dealer service department and have
it repaired before driving the vehicle
further.
Caution
Use of the incorrect automatic
transmission fluid may damage
the vehicle, and the damage may
not be covered by the vehicle
warranty. Always use the(Continued)
Caution (Continued)
automatic transmission fluid listed
inRecommended Fluids and
Lubricants 0441.
Change the fluid and filter at the
scheduled maintenance intervals
listed in Maintenance Schedule
0 431. Be sure to use the
transmission fluid listed in
Recommended Fluids and
Lubricants 0441.
How to Check Automatic
Transmission Fluid
Caution
Too much or too little fluid can
damage the transmission. Too
much can mean that some of the
fluid could come out and fall on
hot engine parts or exhaust
system parts, starting a fire. Too
little fluid could cause the (Continued)
Caution (Continued)
transmission to overheat. Be sure
to get an accurate reading if
checking the transmission fluid.
Before checking the fluid level,
prepare the vehicle: 1. Start the engine and park the vehicle on a level surface.
Keep the engine running.
2. Apply the parking brake and place the shift lever in P (Park).
3. With your foot on the brake pedal, move the shift lever
through each gear range,
pausing for about
three seconds in each range.
Then, move the shift lever back
to P (Park).
4. Allow the engine to idle (500– 800 rpm) for at least
one minute. Slowly release the
brake pedal.
5. Keep the engine running and check the transmission fluid
temperature on the Driver
Page 356 of 490
Chevrolet Silverado LD 1500 and Silverado 2500/3500 Owner Manual (GMNA-
Localizing-U.S./Canada-12162993) - 2019 - crc - 7/30/18
Vehicle Care 355
Starter Switch Check
{Warning
When you are doing this
inspection, the vehicle could
move suddenly. If the vehicle
moves, you or others could be
injured.
1. Before starting this check, be sure there is enough room
around the vehicle.
2. Apply both the parking brake and the regular brake.
Do not use the accelerator
pedal, and be ready to turn off
the engine immediately if it
starts.
3. Try to start the engine in each gear. The vehicle should start
only in P (Park) or N (Neutral).
If the vehicle starts in any other
position, contact your dealer for
service.
Automatic Transmission
Shift Lock Control
Function Check
{Warning
When you are doing this
inspection, the vehicle could
move suddenly. If the vehicle
moves, you or others could be
injured.
1. Before starting this check, be sure there is enough room
around the vehicle. It should be
parked on a level surface.
2. Apply the parking brake. Be ready to apply the regular
brake immediately if the vehicle
begins to move.
3. With the engine off, turn the ignition on, but do not start the
engine. Without applying the
regular brake, try to move the
shift lever out of P (Park) with normal effort. If the shift lever
moves out of P (Park), contact
your dealer for service.
Ignition Transmission
Lock Check
While parked and with the parking
brake set, try to turn the ignition off
in each shift lever position.
.
The ignition should turn off only
when the shift lever is in
P (Park).
. The ignition key should come
out only when the ignition is off.
Contact your dealer if service is
required.
Park Brake and P (Park)
Mechanism Check
{Warning
When you are doing this check,
the vehicle could begin to move.
You or others could be injured (Continued)
Page 357 of 490
Chevrolet Silverado LD 1500 and Silverado 2500/3500 Owner Manual (GMNA-
Localizing-U.S./Canada-12162993) - 2019 - crc - 7/30/18
356 Vehicle Care
Warning (Continued)
and property could be damaged.
Make sure there is room in front
of the vehicle in case it begins to
roll. Be ready to apply the regular
brake at once should the vehicle
begin to move.
Park on a fairly steep hill, with the
vehicle facing downhill. Keeping
your foot on the regular brake, set
the parking brake.
. To check the parking brake's
holding ability: With the engine
running and the transmission in
N (Neutral), slowly remove foot
pressure from the regular brake
pedal. Do this until the vehicle is
held by the parking brake only.
. To check the P (Park)
mechanism's holding ability:
With the engine running, shift to
P (Park). Then release the
parking brake followed by the
regular brake. Contact your dealer if service is
required.Wiper Blade Replacement
Windshield wiper blades should be
replaced periodically. See
Maintenance Schedule
0431.
Replacement blades come in
different types and are removed in
different ways. For proper type and
length, see Maintenance
Replacement Parts 0443.
Caution
Allowing the wiper arm to touch
the windshield when no wiper
blade is installed could damage
the windshield. Any damage that
occurs would not be covered by
the vehicle warranty. Do not allow
the wiper arm to touch the
windshield.
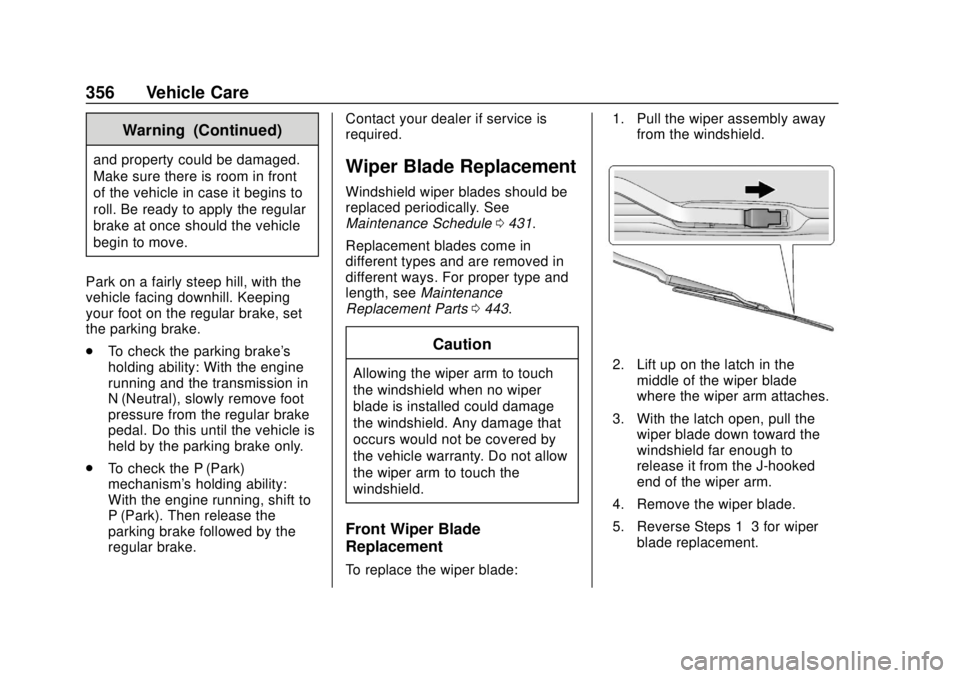
Front Wiper Blade
Replacement
To replace the wiper blade: 1. Pull the wiper assembly away
from the windshield.
2. Lift up on the latch in themiddle of the wiper blade
where the wiper arm attaches.
3. With the latch open, pull the wiper blade down toward the
windshield far enough to
release it from the J-hooked
end of the wiper arm.
4. Remove the wiper blade.
5. Reverse Steps 1–3 for wiper blade replacement.