2019 CHEVROLET SILVERADO 1500 LD manual transmission
[x] Cancel search: manual transmissionPage 160 of 490
Chevrolet Silverado LD 1500 and Silverado 2500/3500 Owner Manual (GMNA-
Localizing-U.S./Canada-12162993) - 2019 - crc - 7/30/18
Instruments and Controls 159
Vehicle Messages
Messages displayed on the DIC
indicate the status of the vehicle or
some action that may be needed to
correct a condition. Multiple
messages may appear one after
another.
The messages that do not require
immediate action can be
acknowledged and cleared by
pressing
V. The messages that
require immediate action cannot be
cleared until that action is
performed.
All messages should be taken
seriously; clearing the message
does not correct the problem.
If a SERVICE message appears,
see your dealer.
Follow the instructions given in the
messages. The system displays
messages regarding the following
topics:
. Service Messages
. Fluid Levels
. Vehicle Security .
Brakes
. Steering
. Ride Control Systems
. Driver Assistance Systems
. Cruise Control
. Lighting and Bulb Replacement
. Wiper/Washer Systems
. Doors and Windows
. Seat Belts
. Airbag Systems
. Engine and Transmission
. Tire Pressure
. Battery
Engine Power Messages
ENGINE POWER IS REDUCED
This message displays when the
vehicle's propulsion power is
reduced. A reduction in propulsion
power can affect the vehicle's ability
to accelerate. If this message is on,
but there is no observed reduction
in performance, proceed to your
destination. The performance may be reduced the next time the vehicle
is driven. The vehicle may be driven
while this message is on, but
maximum acceleration and speed
may be reduced. Anytime this
message stays on, or displays
repeatedly, the vehicle should be
taken to your dealer for service as
soon as possible.
Vehicle Speed Messages
SPEED LIMITED TO XXX
KM/H (MPH)
This message shows that the
vehicle speed has been limited to
the speed displayed. The limited
speed is a protection for various
propulsion and vehicle systems,
such as lubrication, thermal,
suspension, Teen Driver if
equipped, or tires.
Page 169 of 490
Chevrolet Silverado LD 1500 and Silverado 2500/3500 Owner Manual (GMNA-
Localizing-U.S./Canada-12162993) - 2019 - crc - 7/30/18
168 Instruments and Controls
Make sure the hand-held transmitter
has a new battery for quicker and
more accurate transmission of the
radio-frequency signal.
Programming the Universal
Remote System
For questions or programming help,
see www.homelink.com/gm or call
1-800-355-3515. For calls placed
outside the U.S.A, Canada,
or Puerto Rico, international rates
will apply and may differ based on
landline or mobile phone.
Programming involves
time-sensitive actions, and may time
out causing the procedure to be
repeated.
To program up to three devices:1. Hold the end of the hand-held transmitter about 3 to 8 cm (1
to 3 in) away from the
Universal Remote system
buttons with the indicator light
in view. The hand-held
transmitter was supplied by the
manufacturer of the garage
door opener receiver. 2. At the same time, press and
hold both the hand-held
transmitter button and one of
the three Universal Remote
system buttons to be used to
operate the garage door. Do
not release either button until
the indicator light changes from
a slow to a rapid flash. Then
release both buttons.
Some garage door openers
may require substitution of
Step 2 with the procedure
under “Radio Signals for Some
Gate Operators” later in this
section.
3. Press and hold the newly programmed Universal Remote
system button for five seconds
while watching the indicator
light and garage door
activation.
.If the indicator light stays on
continuously or the garage
door moves when the
button is pressed, then
programming is complete.
There is no need to
complete Steps 4–6. .
If the indicator light does
not come on or the garage
door does not move, a
second button press may
be required. For a second
time, press and hold the
newly programmed button
for five seconds. If the light
stays on or the garage door
moves, programming is
complete.
. If the indicator light blinks
rapidly for two seconds,
then changes to a solid light
and the garage door does
not move, continue with
programming Steps 4–6.
Page 170 of 490
Chevrolet Silverado LD 1500 and Silverado 2500/3500 Owner Manual (GMNA-
Localizing-U.S./Canada-12162993) - 2019 - crc - 7/30/18
Instruments and Controls 169
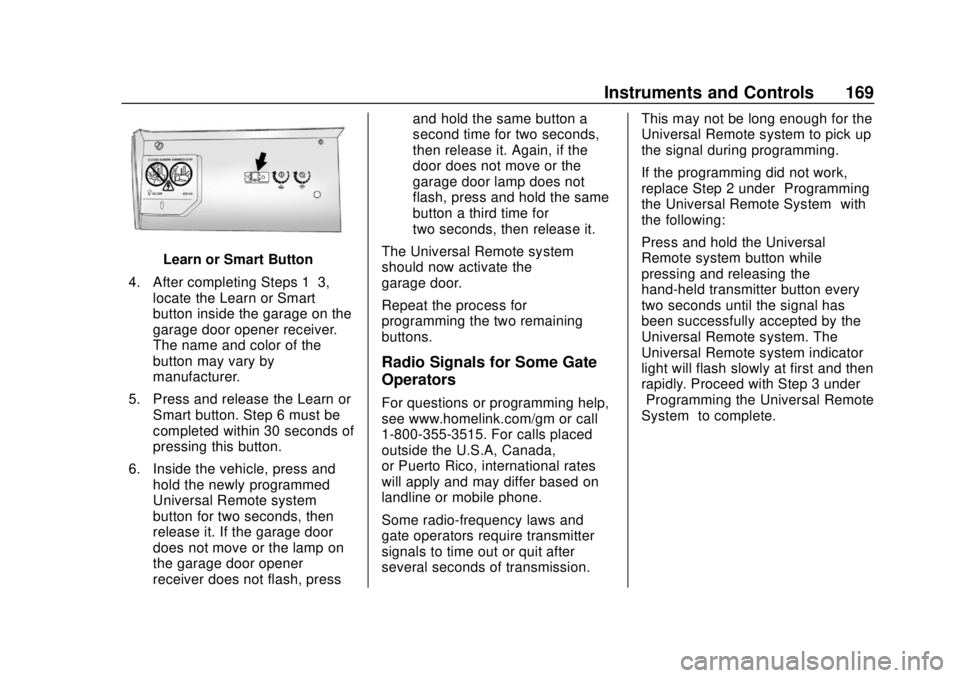
Learn or Smart Button
4. After completing Steps 1–3, locate the Learn or Smart
button inside the garage on the
garage door opener receiver.
The name and color of the
button may vary by
manufacturer.
5. Press and release the Learn or Smart button. Step 6 must be
completed within 30 seconds of
pressing this button.
6. Inside the vehicle, press and hold the newly programmed
Universal Remote system
button for two seconds, then
release it. If the garage door
does not move or the lamp on
the garage door opener
receiver does not flash, press and hold the same button a
second time for two seconds,
then release it. Again, if the
door does not move or the
garage door lamp does not
flash, press and hold the same
button a third time for
two seconds, then release it.
The Universal Remote system
should now activate the
garage door.
Repeat the process for
programming the two remaining
buttons.
Radio Signals for Some Gate
Operators
For questions or programming help,
see www.homelink.com/gm or call
1-800-355-3515. For calls placed
outside the U.S.A, Canada,
or Puerto Rico, international rates
will apply and may differ based on
landline or mobile phone.
Some radio-frequency laws and
gate operators require transmitter
signals to time out or quit after
several seconds of transmission. This may not be long enough for the
Universal Remote system to pick up
the signal during programming.
If the programming did not work,
replace Step 2 under
“Programming
the Universal Remote System” with
the following:
Press and hold the Universal
Remote system button while
pressing and releasing the
hand-held transmitter button every
two seconds until the signal has
been successfully accepted by the
Universal Remote system. The
Universal Remote system indicator
light will flash slowly at first and then
rapidly. Proceed with Step 3 under
“Programming the Universal Remote
System” to complete.
Page 175 of 490
Chevrolet Silverado LD 1500 and Silverado 2500/3500 Owner Manual (GMNA-
Localizing-U.S./Canada-12162993) - 2019 - crc - 7/30/18
174 Lighting
When the high-beam headlamps are
on, this indicator light on the
instrument cluster will also be on.
Flash-to-Pass
This feature lets you use the
high-beam headlamps to signal a
driver in front of you that you want
to pass. It works even if the
headlamps are in the automatic
position.
To use it, pull the turn signal lever
toward you, then release it.
If the headlamps are in the
automatic position or on low beam,
the high-beam headlamps will turn
on. Depending on the type of
headlamp, they will either turn off
after a short duration or stay on as
long as you hold the lever toward
you. The high-beam indicator on the
instrument cluster will come on.
Release the lever to return to
normal operation.
Daytime Running
Lamps (DRL)
DRL can make it easier for others to
see the front of the vehicle during
the day. Fully functional DRL are
required on all vehicles first sold in
Canada.
The DRL system comes on when
the following conditions are met:
.The ignition is on.
. The exterior lamp control is
in AUTO.
. The transmission is not in
P (Park).
. The light sensor determines it is
daytime.
When the DRL system is on, only
the DRL are on. The taillamps,
sidemarker lamps, instrument panel
lights, and other lamps will not
be on.
When it begins to get dark, the
automatic headlamp system
switches from DRL to the
headlamps. To turn off the DRL, turn the exterior
lamp control to
Oand then release.
For vehicles first sold in Canada, off
will only work when the vehicle is
parked.
Automatic Headlamp
System
When the exterior lamp control is
set to AUTO and it is dark enough
outside, the headlamps come on
automatically.
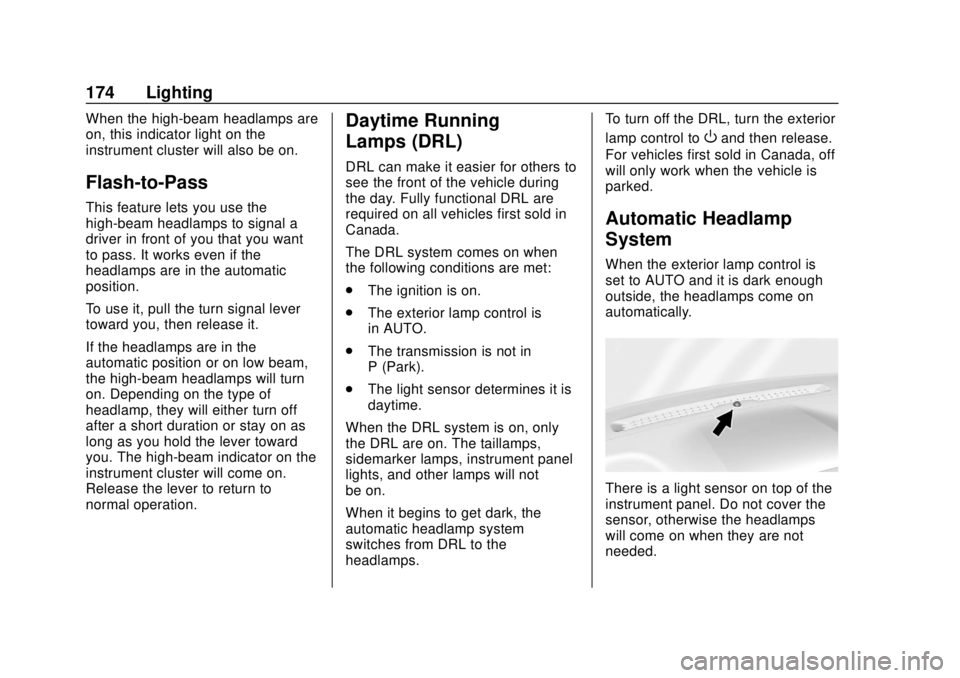
There is a light sensor on top of the
instrument panel. Do not cover the
sensor, otherwise the headlamps
will come on when they are not
needed.
Page 226 of 490
Chevrolet Silverado LD 1500 and Silverado 2500/3500 Owner Manual (GMNA-
Localizing-U.S./Canada-12162993) - 2019 - crc - 7/30/18
Driving and Operating 225
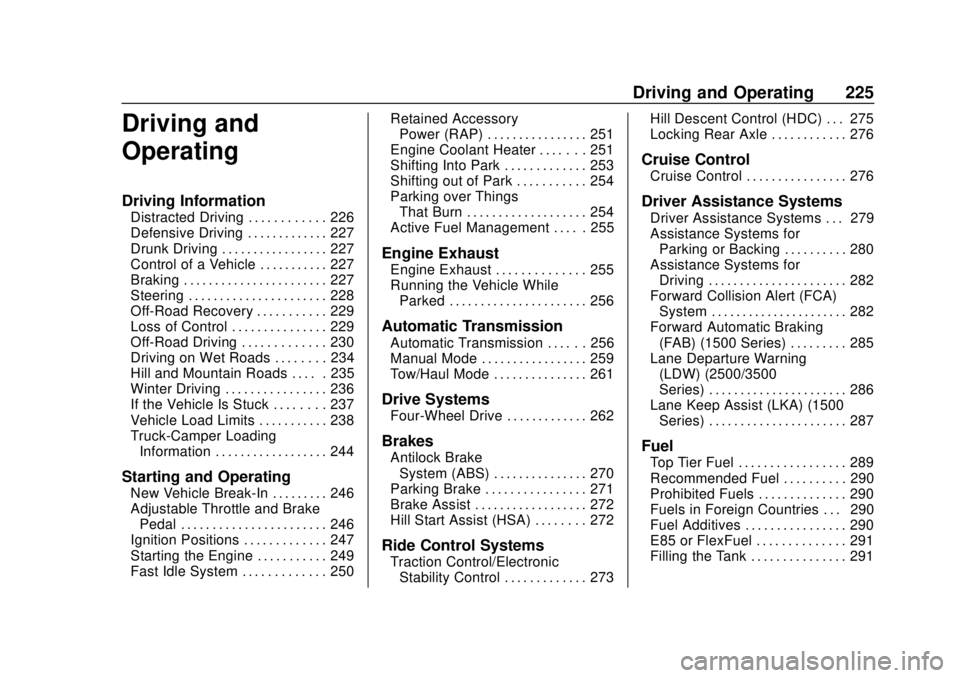
Driving and
Operating
Driving Information
Distracted Driving . . . . . . . . . . . . 226
Defensive Driving . . . . . . . . . . . . . 227
Drunk Driving . . . . . . . . . . . . . . . . . 227
Control of a Vehicle . . . . . . . . . . . 227
Braking . . . . . . . . . . . . . . . . . . . . . . . 227
Steering . . . . . . . . . . . . . . . . . . . . . . 228
Off-Road Recovery . . . . . . . . . . . 229
Loss of Control . . . . . . . . . . . . . . . 229
Off-Road Driving . . . . . . . . . . . . . 230
Driving on Wet Roads . . . . . . . . 234
Hill and Mountain Roads . . . . . 235
Winter Driving . . . . . . . . . . . . . . . . 236
If the Vehicle Is Stuck . . . . . . . . 237
Vehicle Load Limits . . . . . . . . . . . 238
Truck-Camper LoadingInformation . . . . . . . . . . . . . . . . . . 244
Starting and Operating
New Vehicle Break-In . . . . . . . . . 246
Adjustable Throttle and BrakePedal . . . . . . . . . . . . . . . . . . . . . . . 246
Ignition Positions . . . . . . . . . . . . . 247
Starting the Engine . . . . . . . . . . . 249
Fast Idle System . . . . . . . . . . . . . 250 Retained Accessory
Power (RAP) . . . . . . . . . . . . . . . . 251
Engine Coolant Heater . . . . . . . 251
Shifting Into Park . . . . . . . . . . . . . 253
Shifting out of Park . . . . . . . . . . . 254
Parking over Things That Burn . . . . . . . . . . . . . . . . . . . 254
Active Fuel Management . . . . . 255
Engine Exhaust
Engine Exhaust . . . . . . . . . . . . . . 255
Running the Vehicle While Parked . . . . . . . . . . . . . . . . . . . . . . 256
Automatic Transmission
Automatic Transmission . . . . . . 256
Manual Mode . . . . . . . . . . . . . . . . . 259
Tow/Haul Mode . . . . . . . . . . . . . . . 261
Drive Systems
Four-Wheel Drive . . . . . . . . . . . . . 262
Brakes
Antilock BrakeSystem (ABS) . . . . . . . . . . . . . . . 270
Parking Brake . . . . . . . . . . . . . . . . 271
Brake Assist . . . . . . . . . . . . . . . . . . 272
Hill Start Assist (HSA) . . . . . . . . 272
Ride Control Systems
Traction Control/Electronic Stability Control . . . . . . . . . . . . . 273 Hill Descent Control (HDC) . . . 275
Locking Rear Axle . . . . . . . . . . . . 276
Cruise Control
Cruise Control . . . . . . . . . . . . . . . . 276
Driver Assistance Systems
Driver Assistance Systems . . . 279
Assistance Systems for
Parking or Backing . . . . . . . . . . 280
Assistance Systems for Driving . . . . . . . . . . . . . . . . . . . . . . 282
Forward Collision Alert (FCA) System . . . . . . . . . . . . . . . . . . . . . . 282
Forward Automatic Braking (FAB) (1500 Series) . . . . . . . . . 285
Lane Departure Warning (LDW) (2500/3500
Series) . . . . . . . . . . . . . . . . . . . . . . 286
Lane Keep Assist (LKA) (1500 Series) . . . . . . . . . . . . . . . . . . . . . . 287
Fuel
Top Tier Fuel . . . . . . . . . . . . . . . . . 289
Recommended Fuel . . . . . . . . . . 290
Prohibited Fuels . . . . . . . . . . . . . . 290
Fuels in Foreign Countries . . . 290
Fuel Additives . . . . . . . . . . . . . . . . 290
E85 or FlexFuel . . . . . . . . . . . . . . 291
Filling the Tank . . . . . . . . . . . . . . . 291
Page 233 of 490
Chevrolet Silverado LD 1500 and Silverado 2500/3500 Owner Manual (GMNA-
Localizing-U.S./Canada-12162993) - 2019 - crc - 7/30/18
232 Driving and Operating
.Use a low gear and keep a firm
grip on the steering wheel.
. Maintain a slow speed.
. When possible, drive straight up
or down the hill.
. Slow down when approaching
the top of the hill.
. Use headlamps even during the
day to make the vehicle more
visible.
{Warning
Driving to the top of a hill at high
speed can cause a crash. There
could be a drop-off, embankment,
cliff, or even another vehicle. You
could be seriously injured or
killed. As you near the top of a
hill, slow down and stay alert.
. Never go downhill forward or
backward with either the
transmission or transfer case in
N (Neutral). The brakes could
overheat and you could lose
control.
{Warning
If the vehicle has the two-speed
automatic or electronic transfer
case, shifting the transfer case to
N (Neutral) can cause your
vehicle to roll even if the
transmission is in P (Park). This is
because the N (Neutral) position
on the transfer case overrides the
transmission. You or someone
else could be injured. If leaving
the vehicle, set the parking brake
and shift the transmission to
P (Park). Shift the transfer case to
any position but N (Neutral).
. When driving down a hill, keep
the vehicle headed straight
down. Use a low gear because
the engine will work with the
brakes to slow the vehicle and
help keep the vehicle under
control.
{Warning
Heavy braking when going down
a hill can cause your brakes to
overheat and fade. This could
cause loss of control and you or
others could be injured or killed.
Apply the brakes lightly when
descending a hill and use a low
gear to keep vehicle speed under
control.
If the vehicle stalls on a hill: 1. Apply the brakes to stop the vehicle, and then apply the
parking brake.
2. Shift into P (Park) and then restart the engine.
.If driving uphill when the
vehicle stalls, shift to
R (Reverse), release the
parking brake, and back
straight down.
Page 236 of 490
Chevrolet Silverado LD 1500 and Silverado 2500/3500 Owner Manual (GMNA-
Localizing-U.S./Canada-12162993) - 2019 - crc - 7/30/18
Driving and Operating 235
of driving conditions and avoid
driving through large puddles and
deep-standing or flowing water.
{Warning
Wet brakes can cause crashes.
They might not work as well in a
quick stop and could cause
pulling to one side. You could
lose control of the vehicle.
After driving through a large
puddle of water or a car/vehicle
wash, lightly apply the brake
pedal until the brakes work
normally.
Flowing or rushing water creates
strong forces. Driving through
flowing water could cause the
vehicle to be carried away. If this
happens, you and other vehicle
occupants could drown. Do not
ignore police warnings and be
very cautious about trying to drive
through flowing water.
Hydroplaning
Hydroplaning is dangerous. Water
can build up under the vehicle's
tires so they actually ride on the
water. This can happen if the road is
wet enough and you are going fast
enough. When the vehicle is
hydroplaning, it has little or no
contact with the road.
There is no hard and fast rule about
hydroplaning. The best advice is to
slow down when the road is wet.
Other Rainy Weather Tips
Besides slowing down, other wet
weather driving tips include:
.Allow extra following distance.
. Pass with caution.
. Keep windshield wiping
equipment in good shape.
. Keep the windshield washer fluid
reservoir filled.
. Have good tires with proper
tread depth. See Tires0371.
. Turn off cruise control.
Hill and Mountain Roads
Driving on steep hills or through
mountains is different than driving
on flat or rolling terrain. Tips include:
.Keep the vehicle serviced and in
good shape.
. Check all fluid levels and brakes,
tires, cooling system, and
transmission.
. Shift to a lower gear when going
down steep or long hills.
{Warning
Using the brakes to slow the
vehicle on a long downhill slope
can cause brake overheating, can
reduce brake performance, and
could result in a loss of braking.
Shift the transmission to a lower
gear to let the engine assist the
brakes on a steep downhill slope.
Page 239 of 490
Chevrolet Silverado LD 1500 and Silverado 2500/3500 Owner Manual (GMNA-
Localizing-U.S./Canada-12162993) - 2019 - crc - 7/30/18
238 Driving and Operating
Rocking the Vehicle to Get
It Out
Turn the steering wheel left and
right to clear the area around the
front wheels. For four-wheel-drive
vehicles, shift into Four-Wheel Drive
High. Turn the TCS off. Shift back
and forth between R (Reverse) and
a forward gear, spinning the wheels
as little as possible. To prevent
transmission wear, wait until the
wheels stop spinning before shifting
gears. Slowly spinning the wheels in
the forward and reverse directions
causes a rocking motion that could
free the vehicle. If that does not get
the vehicle out after a few tries, it
might need to be towed out. See
Towing the Vehicle0413. Recovery
hooks can be used, if the vehicle
has them.
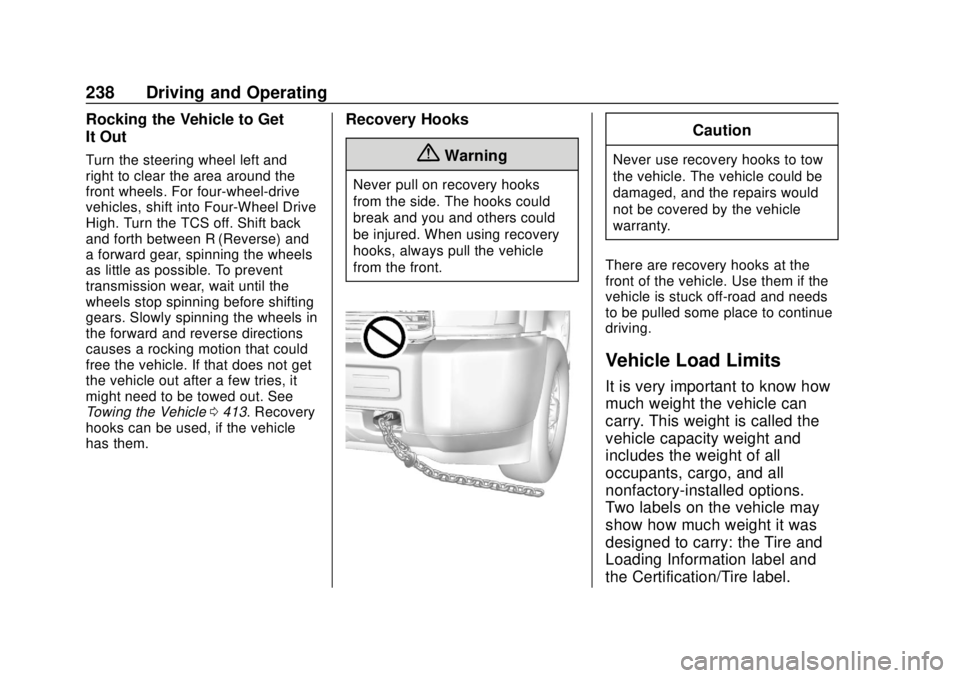
Recovery Hooks
{Warning
Never pull on recovery hooks
from the side. The hooks could
break and you and others could
be injured. When using recovery
hooks, always pull the vehicle
from the front.
Caution
Never use recovery hooks to tow
the vehicle. The vehicle could be
damaged, and the repairs would
not be covered by the vehicle
warranty.
There are recovery hooks at the
front of the vehicle. Use them if the
vehicle is stuck off-road and needs
to be pulled some place to continue
driving.
Vehicle Load Limits
It is very important to know how
much weight the vehicle can
carry. This weight is called the
vehicle capacity weight and
includes the weight of all
occupants, cargo, and all
nonfactory-installed options.
Two labels on the vehicle may
show how much weight it was
designed to carry: the Tire and
Loading Information label and
the Certification/Tire label.