2019 CHEVROLET SILVERADO 1500 LD wheel
[x] Cancel search: wheelPage 322 of 490
Chevrolet Silverado LD 1500 and Silverado 2500/3500 Owner Manual (GMNA-
Localizing-U.S./Canada-12162993) - 2019 - crc - 7/30/18
Driving and Operating 321
Front axle reserve capacity is the
difference between the Gross Axle
Weight Rating (GAWR) and the front
axle weight of the vehicle with full
fuel and passengers. This is the
amount of weight that can be added
to the front axle before reaching the
front GAWR.
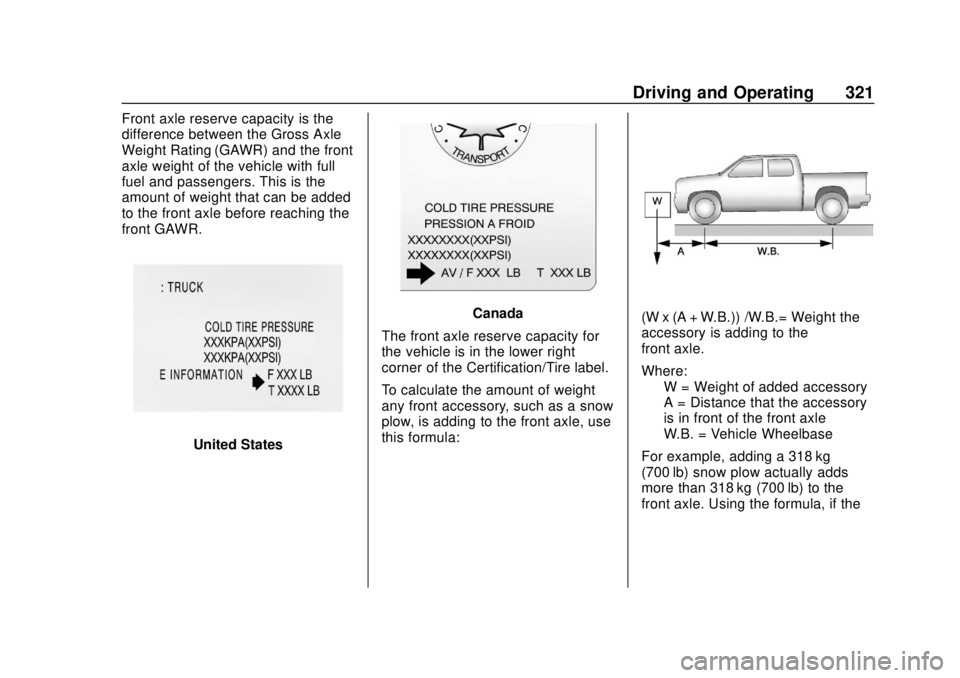
United States
Canada
The front axle reserve capacity for
the vehicle is in the lower right
corner of the Certification/Tire label.
To calculate the amount of weight
any front accessory, such as a snow
plow, is adding to the front axle, use
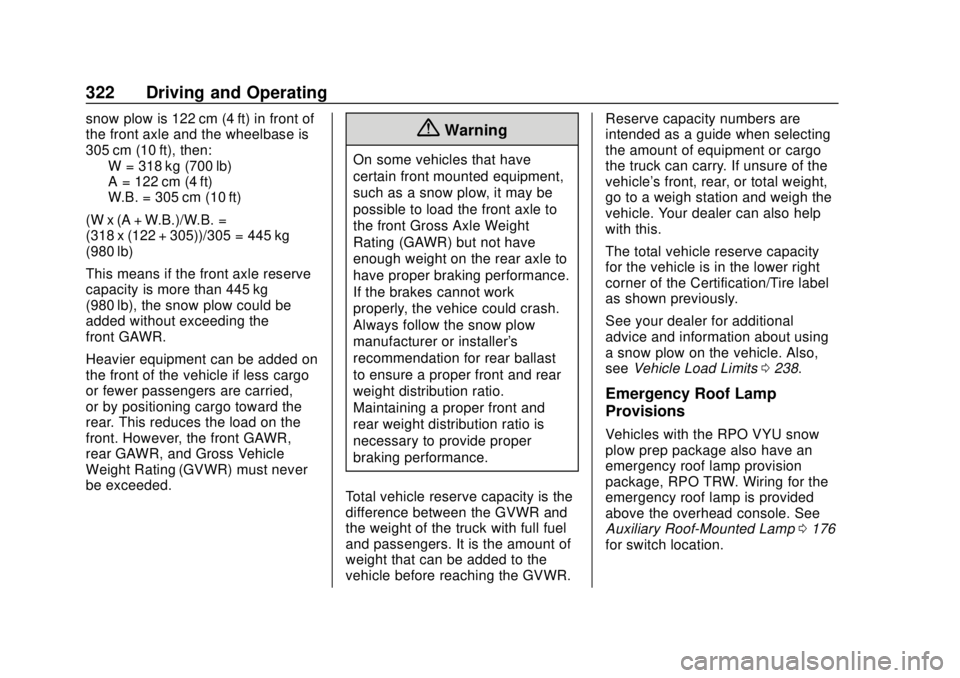
this formula:(W x (A + W.B.)) /W.B.= Weight the
accessory is adding to the
front axle.
Where: W = Weight of added accessory
A = Distance that the accessory
is in front of the front axle
W.B. = Vehicle Wheelbase
For example, adding a 318 kg
(700 lb) snow plow actually adds
more than 318 kg (700 lb) to the
front axle. Using the formula, if the
Page 323 of 490
Chevrolet Silverado LD 1500 and Silverado 2500/3500 Owner Manual (GMNA-
Localizing-U.S./Canada-12162993) - 2019 - crc - 7/30/18
322 Driving and Operating
snow plow is 122 cm (4 ft) in front of
the front axle and the wheelbase is
305 cm (10 ft), then:W = 318 kg (700 lb)
A = 122 cm (4 ft)
W.B. = 305 cm (10 ft)
(W x (A + W.B.)/W.B. =
(318 x (122 + 305))/305 = 445 kg
(980 lb)
This means if the front axle reserve
capacity is more than 445 kg
(980 lb), the snow plow could be
added without exceeding the
front GAWR.
Heavier equipment can be added on
the front of the vehicle if less cargo
or fewer passengers are carried,
or by positioning cargo toward the
rear. This reduces the load on the
front. However, the front GAWR,
rear GAWR, and Gross Vehicle
Weight Rating (GVWR) must never
be exceeded.{Warning
On some vehicles that have
certain front mounted equipment,
such as a snow plow, it may be
possible to load the front axle to
the front Gross Axle Weight
Rating (GAWR) but not have
enough weight on the rear axle to
have proper braking performance.
If the brakes cannot work
properly, the vehice could crash.
Always follow the snow plow
manufacturer or installer's
recommendation for rear ballast
to ensure a proper front and rear
weight distribution ratio.
Maintaining a proper front and
rear weight distribution ratio is
necessary to provide proper
braking performance.
Total vehicle reserve capacity is the
difference between the GVWR and
the weight of the truck with full fuel
and passengers. It is the amount of
weight that can be added to the
vehicle before reaching the GVWR. Reserve capacity numbers are
intended as a guide when selecting
the amount of equipment or cargo
the truck can carry. If unsure of the
vehicle's front, rear, or total weight,
go to a weigh station and weigh the
vehicle. Your dealer can also help
with this.
The total vehicle reserve capacity
for the vehicle is in the lower right
corner of the Certification/Tire label
as shown previously.
See your dealer for additional
advice and information about using
a snow plow on the vehicle. Also,
see
Vehicle Load Limits 0238.
Emergency Roof Lamp
Provisions
Vehicles with the RPO VYU snow
plow prep package also have an
emergency roof lamp provision
package, RPO TRW. Wiring for the
emergency roof lamp is provided
above the overhead console. See
Auxiliary Roof-Mounted Lamp 0176
for switch location.
Page 325 of 490
Chevrolet Silverado LD 1500 and Silverado 2500/3500 Owner Manual (GMNA-
Localizing-U.S./Canada-12162993) - 2019 - crc - 7/30/18
324 Vehicle Care
Vehicle Care
General Information
General Information . . . . . . . . . . 325
California Proposition65 Warning . . . . . . . . . . . . . . . . . 326
California Perchlorate Materials Requirements . . . . . 326
Accessories and Modifications . . . . . . . . . . . . . . . . 326
Vehicle Checks
Doing Your OwnService Work . . . . . . . . . . . . . . . 327
Hood . . . . . . . . . . . . . . . . . . . . . . . . . 327
Engine Compartment Overview . . . . . . . . . . . . . . . . . . . . 329
Engine Oil . . . . . . . . . . . . . . . . . . . . 332
Engine Oil Life System . . . . . . . 334
Automatic Transmission Fluid (6-Speed Transmission) . . . . . 336
Automatic Transmission Fluid (8-Speed Transmission) . . . . . 338
Engine Air Cleaner/Filter . . . . . . 339
Cooling System . . . . . . . . . . . . . . 340
Engine Overheating . . . . . . . . . . 344
Overheated Engine Protection Operating Mode . . . . . . . . . . . . . 345
Engine Fan . . . . . . . . . . . . . . . . . . . 346 Power Steering Fluid (1500
Series) . . . . . . . . . . . . . . . . . . . . . . 346
Power Steering Fluid (2500/ 3500 Series) . . . . . . . . . . . . . . . . 346
Washer Fluid . . . . . . . . . . . . . . . . . 347
Brakes . . . . . . . . . . . . . . . . . . . . . . . 348
Brake Fluid . . . . . . . . . . . . . . . . . . . 349
Battery - North America . . . . . . 350
Four-Wheel Drive . . . . . . . . . . . . . 351
Front Axle . . . . . . . . . . . . . . . . . . . . 351
Rear Axle . . . . . . . . . . . . . . . . . . . . 352
Noise Control System . . . . . . . . 353
Starter Switch Check . . . . . . . . . 355
Automatic Transmission Shift
Lock Control Function
Check . . . . . . . . . . . . . . . . . . . . . . . 355
Ignition Transmission Lock Check . . . . . . . . . . . . . . . . . . . . . . . 355
Park Brake and P (Park) Mechanism Check . . . . . . . . . . 355
Wiper Blade Replacement . . . . 356
Windshield Replacement . . . . . 357
Gas Strut(s) . . . . . . . . . . . . . . . . . . 357
Headlamp Aiming
Headlamp Aiming . . . . . . . . . . . . 358
Bulb Replacement
Bulb Replacement . . . . . . . . . . . . 358
Halogen Bulbs . . . . . . . . . . . . . . . . 358 High Intensity Discharge (HID)
Lighting . . . . . . . . . . . . . . . . . . . . . 359
LED Lighting . . . . . . . . . . . . . . . . . 359
Headlamps, Front Turn Signal, Sidemarker, and Parking
Lamps . . . . . . . . . . . . . . . . . . . . . . 359
Fog Lamps . . . . . . . . . . . . . . . . . . . 360
Taillamps (Chassis Cab Models) . . . . . . . . . . . . . . . . . . . . . 360
Taillamps, Turn Signal, Stoplamps, and Back-Up
Lamps . . . . . . . . . . . . . . . . . . . . . . 360
Center High-Mounted Stoplamp (CHMSL) and
Cargo Lamp . . . . . . . . . . . . . . . . . 362
Electrical System
Electrical System Overload . . . 362
Fuses and Circuit Breakers . . . 363
Engine Compartment FuseBlock . . . . . . . . . . . . . . . . . . . . . . . . 363
Instrument Panel Fuse Block (Right) . . . . . . . . . . . . . . . . . . . . . . 367
Instrument Panel Fuse Block (Left) . . . . . . . . . . . . . . . . . 368
Wheels and Tires
Tires . . . . . . . . . . . . . . . . . . . . . . . . . . 371
All-Season Tires . . . . . . . . . . . . . . 371
Winter Tires . . . . . . . . . . . . . . . . . . 372
Low-Profile Tires . . . . . . . . . . . . . 372
Page 326 of 490
Chevrolet Silverado LD 1500 and Silverado 2500/3500 Owner Manual (GMNA-
Localizing-U.S./Canada-12162993) - 2019 - crc - 7/30/18
Vehicle Care 325
All-Terrain Tires . . . . . . . . . . . . . . . 373
Tire Sidewall Labeling . . . . . . . . 373
Tire Designations . . . . . . . . . . . . . 375
Tire Terminology andDefinitions . . . . . . . . . . . . . . . . . . 377
Tire Pressure . . . . . . . . . . . . . . . . . 379
Tire Pressure for High-Speed Operation . . . . . . . . . . . . . . . . . . . 381
Tire Pressure Monitor System . . . . . . . . . . . . . . . . . . . . . . 381
Tire Pressure Monitor Operation . . . . . . . . . . . . . . . . . . . 382
Tire Inspection . . . . . . . . . . . . . . . . 386
Tire Rotation . . . . . . . . . . . . . . . . . 387
When It Is Time for New Tires . . . . . . . . . . . . . . . . . . . . . . . . 389
Buying New Tires . . . . . . . . . . . . . 390
Different Size Tires and Wheels . . . . . . . . . . . . . . . . . . . . . . 391
Uniform Tire Quality Grading . . . . . . . . . . . . . . . . . . . . . 392
Wheel Alignment and Tire Balance . . . . . . . . . . . . . . . . . . . . . 393
Wheel Replacement . . . . . . . . . . 394
Tire Chains . . . . . . . . . . . . . . . . . . . 395
If a Tire Goes Flat . . . . . . . . . . . . 395
Tire Changing . . . . . . . . . . . . . . . . 397
Full-Size Spare Tire . . . . . . . . . . 408Jump Starting
Jump Starting - North America . . . . . . . . . . . . . . . . . . . . . 409
Towing the Vehicle
Towing the Vehicle . . . . . . . . . . . 413
Recreational VehicleTowing . . . . . . . . . . . . . . . . . . . . . . 413
Appearance Care
Exterior Care . . . . . . . . . . . . . . . . . 419
Interior Care . . . . . . . . . . . . . . . . . . 424
Floor Mats . . . . . . . . . . . . . . . . . . . . 427
General Information
For service and parts needs, visit
your dealer. You will receive
genuine GM parts and GM-trained
and supported service people.
Genuine GM parts have one of
these marks:
Page 328 of 490
Chevrolet Silverado LD 1500 and Silverado 2500/3500 Owner Manual (GMNA-
Localizing-U.S./Canada-12162993) - 2019 - crc - 7/30/18
Vehicle Care 327
Vehicle Checks
Doing Your Own
Service Work
{Warning
It can be dangerous to work on
your vehicle if you do not have
the proper knowledge, service
manual, tools, or parts. Always
follow owner’s manual procedures
and consult the service manual
for your vehicle before doing any
service work.
If doing some of your own service
work, use the proper service
manual. It tells you much more
about how to service the vehicle
than this manual can. To order the
proper service manual, see
Publication Ordering Information
0 459.
This vehicle has an airbag system.
Before attempting to do your own
service work, see Servicing the
Airbag-Equipped Vehicle 088. If equipped with remote vehicle
start, open the hood before
performing any service work to
prevent remote starting the vehicle
accidentally. See
Remote Vehicle
Start 038.
Keep a record with all parts receipts
and list the mileage and the date of
any service work performed. See
Maintenance Records 0445.
Caution
Even small amounts of
contamination can cause damage
to vehicle systems. Do not allow
contaminants to contact the fluids,
reservoir caps, or dipsticks.
Hood
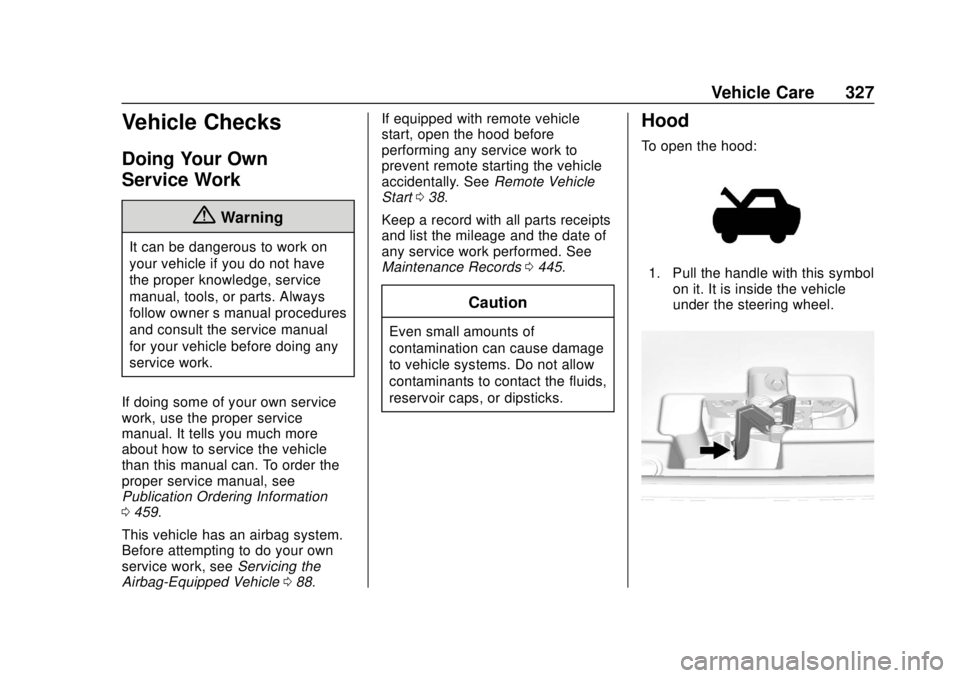
To open the hood:
1. Pull the handle with this symbol
on it. It is inside the vehicle
under the steering wheel.
Page 349 of 490
Chevrolet Silverado LD 1500 and Silverado 2500/3500 Owner Manual (GMNA-
Localizing-U.S./Canada-12162993) - 2019 - crc - 7/30/18
348 Vehicle Care
Caution
.Do not use washer fluid that
contains any type of water
repellent coating. This can
cause the wiper blades to
chatter or skip.
. Do not use engine coolant
(antifreeze) in the
windshield washer. It can
damage the windshield
washer system and paint.
. Do not mix water with
ready-to-use washer fluid.
Water can cause the
solution to freeze and
damage the washer fluid
tank and other parts of the
washer system.
. When using concentrated
washer fluid, follow the
manufacturer instructions for
adding water.
. Fill the washer fluid tank
only three-quarters full when
it is very cold. This allows
(Continued)
Caution (Continued)
for fluid expansion if
freezing occurs, which could
damage the tank if it is
completely full.
Brakes
Disc brake pads have built-in wear
indicators that make a high-pitched
warning sound when the brake pads
are worn and new pads are needed.
The sound can come and go or be
heard all the time the vehicle is
moving, except when applying the
brake pedal firmly.
{Warning
The brake wear warning sound
means that soon the brakes will
not work well. That could lead to
a crash. When the brake wear
warning sound is heard, have the
vehicle serviced.
Caution
Continuing to drive with worn-out
brake pads could result in costly
brake repair.
Some driving conditions or climates
can cause a brake squeal when the
brakes are first applied or lightly
applied. This does not mean
something is wrong with the brakes.
Properly torqued wheel nuts are
necessary to help prevent brake
pulsation. When tires are rotated,
inspect brake pads for wear and
evenly tighten wheel nuts in the
proper sequence to torque
specifications in Capacities and
Specifications 0447.
Brake linings should always be
replaced as complete axle sets.
Brake Pedal Travel
See your dealer if the brake pedal
does not return to normal height,
or if there is a rapid increase in
pedal travel. This could be a sign
that brake service may be required.
Page 352 of 490
Chevrolet Silverado LD 1500 and Silverado 2500/3500 Owner Manual (GMNA-
Localizing-U.S./Canada-12162993) - 2019 - crc - 7/30/18
Vehicle Care 351
Warning (Continued)
not careful. SeeJump Starting -
North America 0409 for tips on
working around a battery without
getting hurt.
Infrequent Usage: Remove the
black, negative (−) cable from the
battery to keep the battery from
running down.
Extended Storage: Remove the
black, negative (−) cable from the
battery or use a battery trickle
charger.
Four-Wheel Drive
Transfer Case
When to Check Lubricant
Refer to Maintenance Schedule
0 431 to determine when to check
the lubricant.
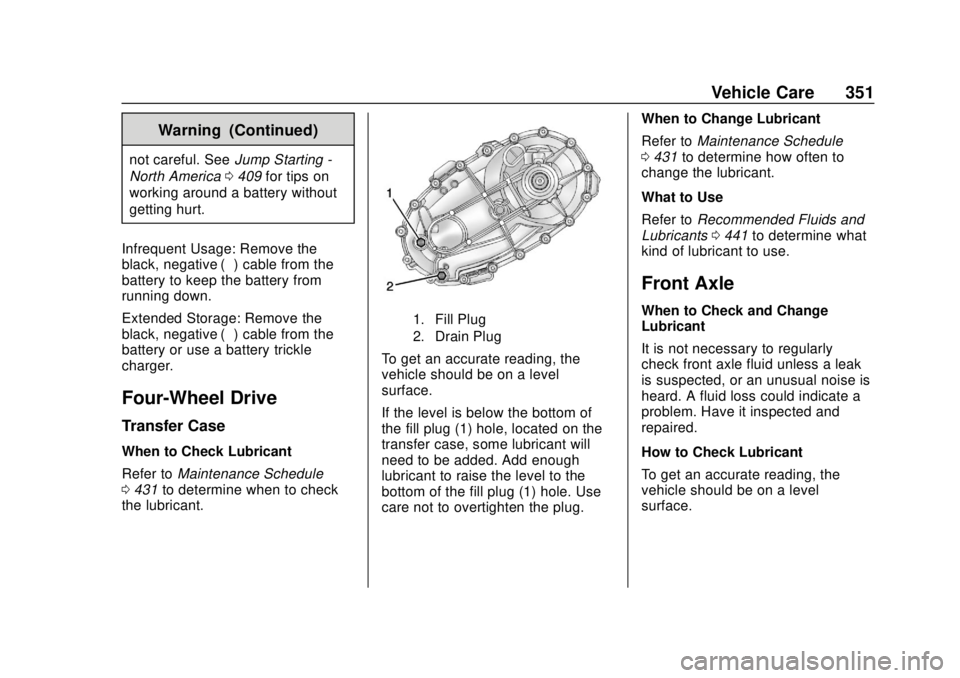
1. Fill Plug
2. Drain Plug
To get an accurate reading, the
vehicle should be on a level
surface.
If the level is below the bottom of
the fill plug (1) hole, located on the
transfer case, some lubricant will
need to be added. Add enough
lubricant to raise the level to the
bottom of the fill plug (1) hole. Use
care not to overtighten the plug. When to Change Lubricant
Refer to
Maintenance Schedule
0 431 to determine how often to
change the lubricant.
What to Use
Refer to Recommended Fluids and
Lubricants 0441 to determine what
kind of lubricant to use.
Front Axle
When to Check and Change
Lubricant
It is not necessary to regularly
check front axle fluid unless a leak
is suspected, or an unusual noise is
heard. A fluid loss could indicate a
problem. Have it inspected and
repaired.
How to Check Lubricant
To get an accurate reading, the
vehicle should be on a level
surface.
Page 369 of 490
Chevrolet Silverado LD 1500 and Silverado 2500/3500 Owner Manual (GMNA-
Localizing-U.S./Canada-12162993) - 2019 - crc - 7/30/18
368 Vehicle Care
FusesUsage
2 Accessory power outlet 4
7 Body control module 4
8 Body control module 8
9 Rear seat entertainment
10 Cargo lamp
15 Steering wheel controls
18 Radio
19 –
20 Sunroof
23 Airbag/Info
26 Export/Power take off/ Special equipment
option/Battery 1
27 Obstacle detection/ USB ports
28 Body control module 2
32 Special equipment option/Battery 2 Fuses
Usage
35 Air conditioning inverter
36 Amplifier
37 Battery system
39 Rear sliding window
42 Right door window motor
43 Front blower
44 Special equipment option
45 Body control module 6
46 Body control module 7
47 Passenger seat
Relays Usage
50 Retained accessory power
51 Rear sliding window open
52 Rear sliding window closeInstrument Panel Fuse
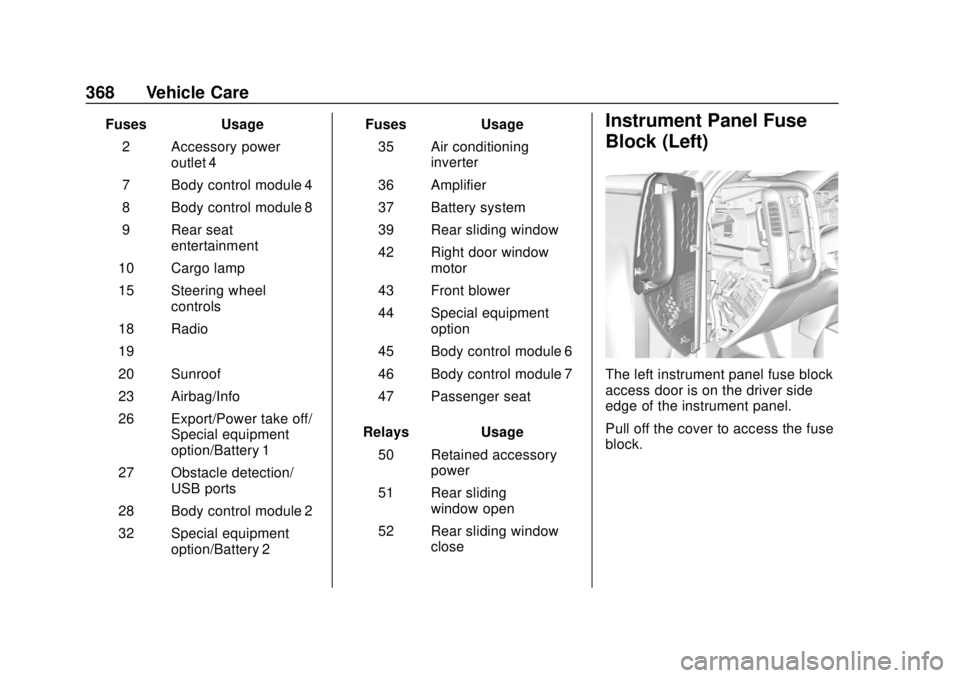
Block (Left)
The left instrument panel fuse block
access door is on the driver side
edge of the instrument panel.
Pull off the cover to access the fuse
block.