2019 CHEVROLET EQUINOX engine service
[x] Cancel search: engine servicePage 14 of 426
Chevrolet Equinox Owner Manual (GMNA-Localizing-U.S./Canada/Mexico-
12145779) - 2019 - CRC - 7/30/18
In Brief 13
Before saving, adjust all available
memory feature positions. Turn the
ignition on and then press and
release SET; a beep will sound.
Then immediately press and hold 1,
2, or
B(Exit) until two beeps
sound. To manually recall these
positions, press and hold 1, 2, or
B
until the saved position is reached.
When Seat Entry Memory is
enabled in vehicle personalization,
positions previously saved to
memory buttons 1 and 2 are
recalled when the ignition is
changed from off to on or ACC/
ACCESSORY.
When Seat Exit Memory is enabled
in vehicle personalization, the
feature automatically recalls the
previously saved exit position when
exiting the vehicle.
Memory adjustments may not be
available upon delivery or after
service until steps in “Saving
Memory Positions” section are
performed. See Memory Seats061.
Heated and Ventilated
Seats
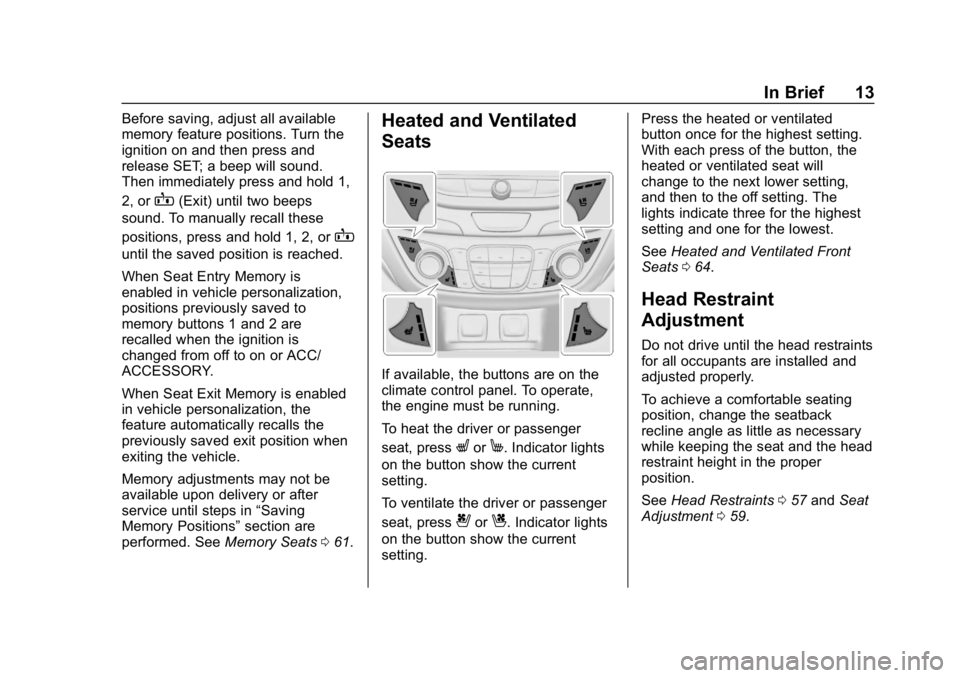
If available, the buttons are on the
climate control panel. To operate,
the engine must be running.
To heat the driver or passenger
seat, press
LorM. Indicator lights
on the button show the current
setting.
To ventilate the driver or passenger
seat, press
{orC. Indicator lights
on the button show the current
setting. Press the heated or ventilated
button once for the highest setting.
With each press of the button, the
heated or ventilated seat will
change to the next lower setting,
and then to the off setting. The
lights indicate three for the highest
setting and one for the lowest.
See
Heated and Ventilated Front
Seats 064.
Head Restraint
Adjustment
Do not drive until the head restraints
for all occupants are installed and
adjusted properly.
To achieve a comfortable seating
position, change the seatback
recline angle as little as necessary
while keeping the seat and the head
restraint height in the proper
position.
See Head Restraints 057 and Seat
Adjustment 059.
Page 28 of 426
Chevrolet Equinox Owner Manual (GMNA-Localizing-U.S./Canada/Mexico-
12145779) - 2019 - CRC - 7/30/18
In Brief 27
Resetting the Oil Life System1. Display REMAINING OIL LIFE on the DIC menu. See Driver
Information Center (DIC) (Base
Level and Midlevel) 0141 or
Driver Information Center (DIC)
(Uplevel) 0146.
2. Press and hold
Vfor several
seconds while the Oil Life
display is active to reset the Oil
Life system.
3. REMAINING OIL LIFE 100% will be displayed when the oil
life system is successfully
reset.
The oil life system can also be reset
as follows: 1. Place the ignition in Service Mode. See Ignition Positions
0 194.
2. Display REMAINING OIL LIFE on the DIC menu. See Driver
Information Center (DIC) (Base
Level and Midlevel) 0141 or
Driver Information Center (DIC)
(Uplevel) 0146. 3. Fully press and release the
accelerator pedal three times
within five seconds.
4. If the display changes to 100%, the system is reset.
See Engine Oil Life System 0289.Driving for Better Fuel
Economy
Driving habits can affect fuel
mileage. Here are some driving tips
to get the best fuel economy
possible:
.
Set the climate controls to the
desired temperature after the
engine is started, or turn them
off when not required.
. Avoid fast starts and accelerate
smoothly.
. Brake gradually and avoid
abrupt stops.
. Avoid idling the engine for long
periods of time.
. When road and weather
conditions are appropriate, use
cruise control. .
Always follow posted speed
limits or drive more slowly when
conditions require.
. Keep vehicle tires properly
inflated.
. Combine several trips into a
single trip.
. Replace the vehicle's tires with
the same TPC Spec number
molded into the tire's sidewall
near the size.
. Follow recommended scheduled
maintenance.
Diesel Particulate Filter
The engine is equipped with a
Diesel Particulate Filter (DPF) that
will filter or trap particulates. The
DPF is under the vehicle in the
exhaust system.
Depending on a number of factors
monitored by the engine computer,
the DPF will need to be cleaned of
accumulated solids. When a
cleaning is needed, the engine
computer will initiate a cleaning
action by warming the exhaust gas
Page 50 of 426

Chevrolet Equinox Owner Manual (GMNA-Localizing-U.S./Canada/Mexico-
12145779) - 2019 - CRC - 7/30/18
Keys, Doors, and Windows 49
Immobilizer Operation
This vehicle has a passive
theft-deterrent system.
The system does not have to be
manually armed or disarmed.
The vehicle is automatically
immobilized when the vehicle is
turned off.
The immobilization system is
disarmed when the vehicle is
started or the ignition is in ACC/
ACCESSORY and a valid
transmitter is present in the vehicle.
The security light, in the instrument
cluster, comes on if there is a
problem with arming or disarming
the theft-deterrent system.The system has one or more RKE
transmitters matched to an
immobilizer control unit in your
vehicle. Only a correctly matched
RKE transmitter will start the
vehicle. If the transmitter is ever
damaged, you may not be able to
start your vehicle.
When trying to start the vehicle, the
security light may come on briefly
when the ignition is turned on.
If the engine does not start and the
security light stays on, there is a
problem with the system. Turn the
ignition off and try again.
If the vehicle will not change ignition
modes, and the RKE transmitter
appears to be undamaged, try
another transmitter. Refer to
“Starting the Vehicle with a Low
Transmitter Battery”
inRemote
Keyless Entry (RKE) System
Operation 030. Or, you may try
placing the transmitter in the
cupholder. If the ignition mode will not change
with the other transmitter or in the
cupholder, your vehicle needs
service. If the ignition does change
modes, the first transmitter may be
faulty. See your dealer who can
service the theft-deterrent system
and have a new RKE transmitter
programmed to the vehicle.
It is possible for the immobilizer
system to learn new or replacement
RKE transmitters. Up to eight
transmitters can be programmed for
the vehicle. To program additional
transmitters, see
“Programming
Transmitters to the Vehicle” under
Remote Keyless Entry (RKE)
System Operation 030.
Do not leave the transmitter or
device that disarms or deactivates
the theft-deterrent system in the
vehicle.
Page 65 of 426
Chevrolet Equinox Owner Manual (GMNA-Localizing-U.S./Canada/Mexico-
12145779) - 2019 - CRC - 7/30/18
64 Seats and Restraints
(1 or 2) may not match the memory
button number that positions were
saved to. Try saving the position to
the other memory button or try the
other RKE transmitter.
Seat Exit Memory
Seat Exit Memory is not linked to an
RKE transmitter. The position saved
to
Bis used for all drivers. To turn
Seat Exit Memory on or off, see
"Vehicle Personalization Settings"
previously in this section and
Vehicle Personalization 0151.
If turned on, the position saved to
Bis automatically recalled when
one of the following occurs:
. The vehicle is turned off and the
driver door is opened within a
short time.
. The vehicle is turned off with the
driver door open.
To stop Seat Exit Memory
movement, press any of the
following memory controls:
. Power seat
. Memory SET, 1, 2, or
B
.
Power mirror, with the driver or
passenger side mirror selected
. Power steering wheel,
if equipped
Obstructions
If something has blocked the driver
seat and/or power steering wheel
while recalling a memory position,
the recall may stop. Remove the
obstruction and try the recall again.
If the memory position still does not
recall, see your dealer for service.
Heated and Ventilated
Front Seats
{Warning
If temperature change or pain to
the skin cannot be felt, the seat
heater may cause burns. To
reduce the risk of burns, use care
when using the seat heater,
especially for long periods of
time. Do not place anything on
the seat that insulates against (Continued)
Warning (Continued)
heat, such as a blanket, cushion,
cover, or similar item. This may
cause the seat heater to
overheat. An overheated seat
heater may cause a burn or may
damage the seat.
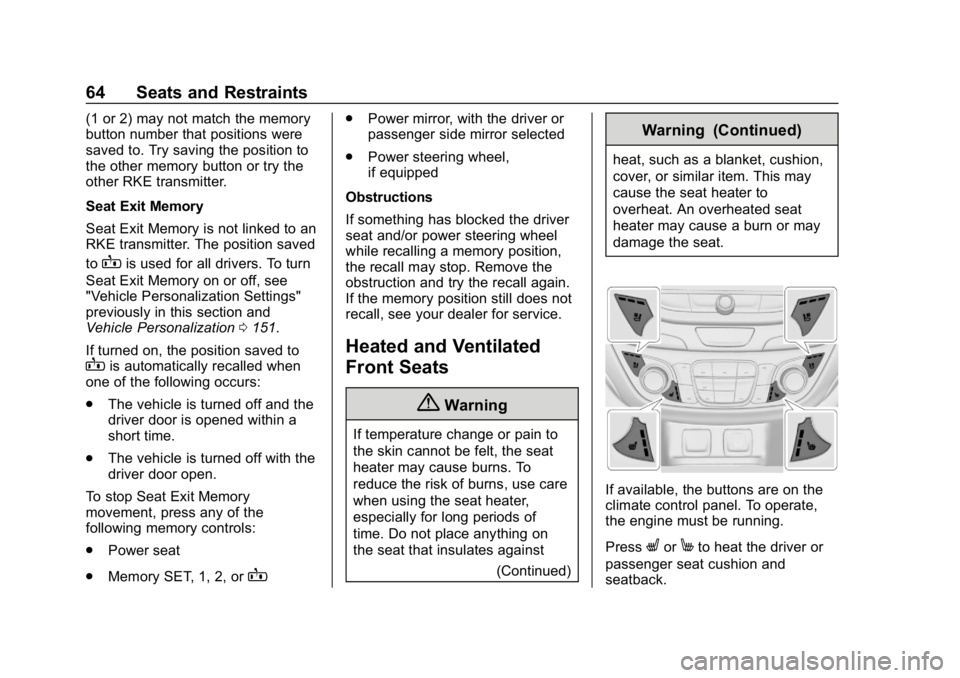
If available, the buttons are on the
climate control panel. To operate,
the engine must be running.
Press
LorMto heat the driver or
passenger seat cushion and
seatback.
Page 84 of 426

Chevrolet Equinox Owner Manual (GMNA-Localizing-U.S./Canada/Mexico-
12145779) - 2019 - CRC - 7/30/18
Seats and Restraints 83
Warning (Continued)
Use caution if you should attempt
to restart the engine after a crash
has occurred.
In many crashes severe enough to
inflate the airbag, windshields are
broken by vehicle deformation.
Additional windshield breakage may
also occur from the front outboard
passenger airbag.
. Airbags are designed to inflate
only once. After an airbag
inflates, you will need some new
parts for the airbag system.
If you do not get them, the
airbag system will not be there
to help protect you in another
crash. A new system will include
airbag modules and possibly
other parts. The service manual
for the vehicle covers the need
to replace other parts. .
The vehicle has a crash sensing
and diagnostic module which
records information after a
crash. See Vehicle Data
Recording and Privacy 0399
and Event Data Recorders
0 399.
. Let only qualified technicians
work on the airbag systems.
Improper service can mean that
an airbag system will not work
properly. See your dealer for
service.
Passenger Sensing
System
The vehicle has a passenger
sensing system for the front
outboard passenger position. The
passenger airbag status indicator
will light on the overhead console
when the vehicle is started.
The words ON and OFF will be
visible during the system check.
When the system check is
complete, either the word ON or
OFF will be visible. See Passenger
Airbag Status Indicator 0130.
The passenger sensing system
turns off the front outboard
passenger frontal airbag under
certain conditions. No other airbag
is affected by the passenger
sensing system.
The passenger sensing system
works with sensors that are part of
the front outboard passenger seat
and seat belt. The sensors are
designed to detect the presence of
a properly seated occupant and
determine if the front outboard
passenger frontal airbag should be
allowed to inflate or not.
Page 112 of 426
Chevrolet Equinox Owner Manual (GMNA-Localizing-U.S./Canada/Mexico-
12145779) - 2019 - CRC - 7/30/18
Instruments and Controls 111
Instruments and
Controls
Controls
Steering Wheel Adjustment . . . 112
Steering Wheel Controls . . . . . . 112
Heated Steering Wheel . . . . . . . 112
Horn . . . . . . . . . . . . . . . . . . . . . . . . . . 112
Windshield Wiper/Washer . . . . 112
Rear Window Wiper/Washer . . . . . . . . . . . . . . . . . . . . . . 113
Compass . . . . . . . . . . . . . . . . . . . . . 114
Clock . . . . . . . . . . . . . . . . . . . . . . . . . 114
Power Outlets . . . . . . . . . . . . . . . . 115
Wireless Charging . . . . . . . . . . . . 116
Warning Lights, Gauges, and
Indicators
Warning Lights, Gauges, and Indicators . . . . . . . . . . . . . . . . . . . 119
Instrument Cluster (Base and
Midlevel) . . . . . . . . . . . . . . . . . . . . 120
Instrument Cluster (Uplevel) . . . . . . . . . . . . . . . . . . . . 124
Speedometer . . . . . . . . . . . . . . . . . 127
Odometer . . . . . . . . . . . . . . . . . . . . . 127
Trip Odometer . . . . . . . . . . . . . . . . 127
Tachometer . . . . . . . . . . . . . . . . . . . 127 Fuel Gauge . . . . . . . . . . . . . . . . . . . 128
Engine Coolant Temperature
Gauge . . . . . . . . . . . . . . . . . . . . . . 129
Seat Belt Reminders . . . . . . . . . 129
Airbag Readiness Light . . . . . . . 130
Passenger Airbag Status Indicator . . . . . . . . . . . . . . . . . . . . 130
Charging System Light . . . . . . . 131
Malfunction Indicator Lamp (Check Engine Light) . . . . . . . . 132
Brake System Warning Light . . . . . . . . . . . . . . . . . . . . . . . . 134
Electric Parking Brake Light . . . . . . . . . . . . . . . . . . . . . . . . 134
Service Electric Parking Brake Light . . . . . . . . . . . . . . . . . . . . . . . . 135
Antilock Brake System (ABS) Warning Light . . . . . . . . . . . . . . . 135
Tow/Haul Mode Light . . . . . . . . . 135
Lane Keep Assist (LKA) Light . . . . . . . . . . . . . . . . . . . . . . . . 136
Vehicle Ahead Indicator . . . . . . 136
Pedestrian Ahead Indicator . . . 136
Traction Off Light . . . . . . . . . . . . . 136
StabiliTrak OFF Light . . . . . . . . . 137
Traction Control System (TCS)/ StabiliTrak Light . . . . . . . . . . . . . 137
Wait-to-Start Light . . . . . . . . . . . . 137
Tire Pressure Light . . . . . . . . . . . 138
Engine Oil Pressure Light . . . . 138 Low Fuel Warning Light . . . . . . 139
Diesel Exhaust Fluid (DEF)
Warning Light . . . . . . . . . . . . . . . 139
Security Light . . . . . . . . . . . . . . . . . 139
High-Beam On Light . . . . . . . . . . 140
Front Fog Lamp Light . . . . . . . . . 140
Lamps On Reminder . . . . . . . . . 140
Cruise Control Light . . . . . . . . . . 140
Information Displays
Driver Information Center (DIC) (Base Level and Midlevel) . . . 141
Driver Information Center (DIC) (Uplevel) . . . . . . . . . . . . . . . . . . . . 146
Vehicle Messages
Vehicle Messages . . . . . . . . . . . . 150
Engine Power Messages . . . . . 151
Vehicle Speed Messages . . . . . 151
Vehicle Personalization
Vehicle Personalization . . . . . . . 151
Universal Remote System
Universal Remote System . . . . 156
Universal Remote SystemProgramming . . . . . . . . . . . . . . . 156
Universal Remote System Operation . . . . . . . . . . . . . . . . . . . 159
Page 129 of 426

Chevrolet Equinox Owner Manual (GMNA-Localizing-U.S./Canada/Mexico-
12145779) - 2019 - CRC - 7/30/18
128 Instruments and Controls
For vehicles with the Stop/Start
system, when the ignition is on, the
tachometer indicates the vehicle
status. When pointing to AUTO
STOP, the engine is off but the
vehicle is on and can move. The
engine could auto start at any time.
When the indicator points to OFF,
the vehicle is off.
When the engine is on, the
tachometer will indicate the engine’s
revolutions per minute (rpm). The
tachometer may vary by several
hundred rpm’s, during Auto Stop
mode, when the engine is shutting
off and restarting.Fuel Gauge
Metric Uplevel
English UplevelWhen the ignition is on, the fuel
gauge indicates about how much
fuel is left in the tank.
An arrow on the fuel gauge
indicates the side of the vehicle the
fuel door is on.
When the indicator nears empty, the
low fuel light comes on. There is a
small amount of fuel left, but the fuel
tank should be filled soon.
Here are four things that some
owners ask about. None of these
show a problem with the fuel gauge:
.
At the service station, the fuel
pump shuts off before the gauge
reads full.
. It takes a little more or less fuel
to fill up than the gauge
indicated. For example, the
gauge indicated the tank was
half full, but it actually took a
little more or less than half the
tank's capacity to fill the tank.
. The gauge moves a little while
turning a corner or speeding up.
Page 132 of 426
Chevrolet Equinox Owner Manual (GMNA-Localizing-U.S./Canada/Mexico-
12145779) - 2019 - CRC - 7/30/18
Instruments and Controls 131
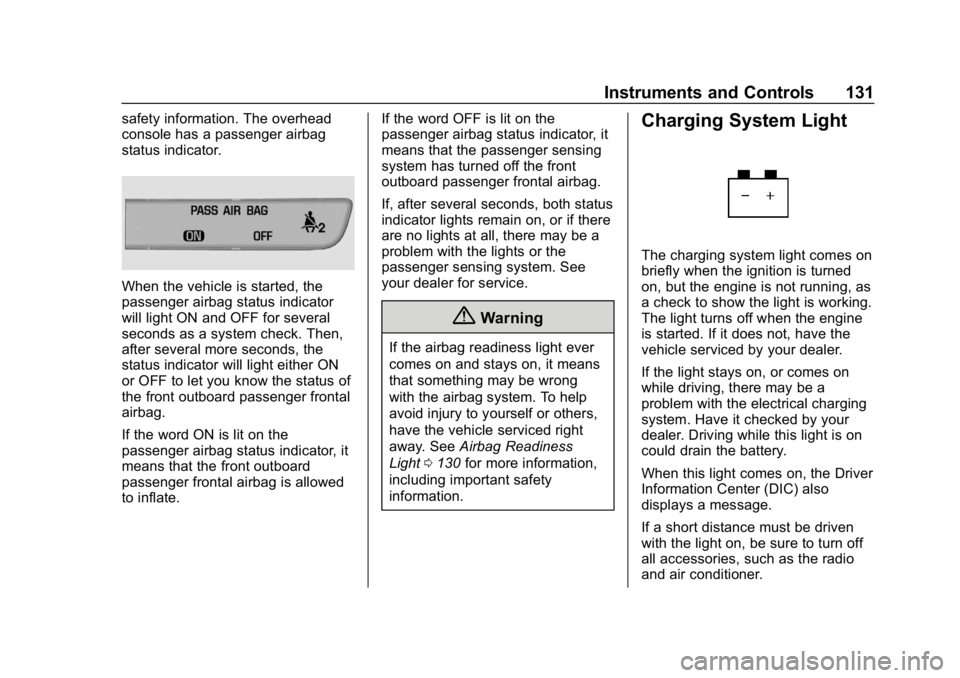
safety information. The overhead
console has a passenger airbag
status indicator.
When the vehicle is started, the
passenger airbag status indicator
will light ON and OFF for several
seconds as a system check. Then,
after several more seconds, the
status indicator will light either ON
or OFF to let you know the status of
the front outboard passenger frontal
airbag.
If the word ON is lit on the
passenger airbag status indicator, it
means that the front outboard
passenger frontal airbag is allowed
to inflate.If the word OFF is lit on the
passenger airbag status indicator, it
means that the passenger sensing
system has turned off the front
outboard passenger frontal airbag.
If, after several seconds, both status
indicator lights remain on, or if there
are no lights at all, there may be a
problem with the lights or the
passenger sensing system. See
your dealer for service.
{Warning
If the airbag readiness light ever
comes on and stays on, it means
that something may be wrong
with the airbag system. To help
avoid injury to yourself or others,
have the vehicle serviced right
away. See
Airbag Readiness
Light 0130 for more information,
including important safety
information.
Charging System Light
The charging system light comes on
briefly when the ignition is turned
on, but the engine is not running, as
a check to show the light is working.
The light turns off when the engine
is started. If it does not, have the
vehicle serviced by your dealer.
If the light stays on, or comes on
while driving, there may be a
problem with the electrical charging
system. Have it checked by your
dealer. Driving while this light is on
could drain the battery.
When this light comes on, the Driver
Information Center (DIC) also
displays a message.
If a short distance must be driven
with the light on, be sure to turn off
all accessories, such as the radio
and air conditioner.