2019 CHEVROLET EQUINOX turn signal
[x] Cancel search: turn signalPage 307 of 426
Chevrolet Equinox Owner Manual (GMNA-Localizing-U.S./Canada/Mexico-
12145779) - 2019 - CRC - 7/30/18
306 Vehicle Care
Headlamps
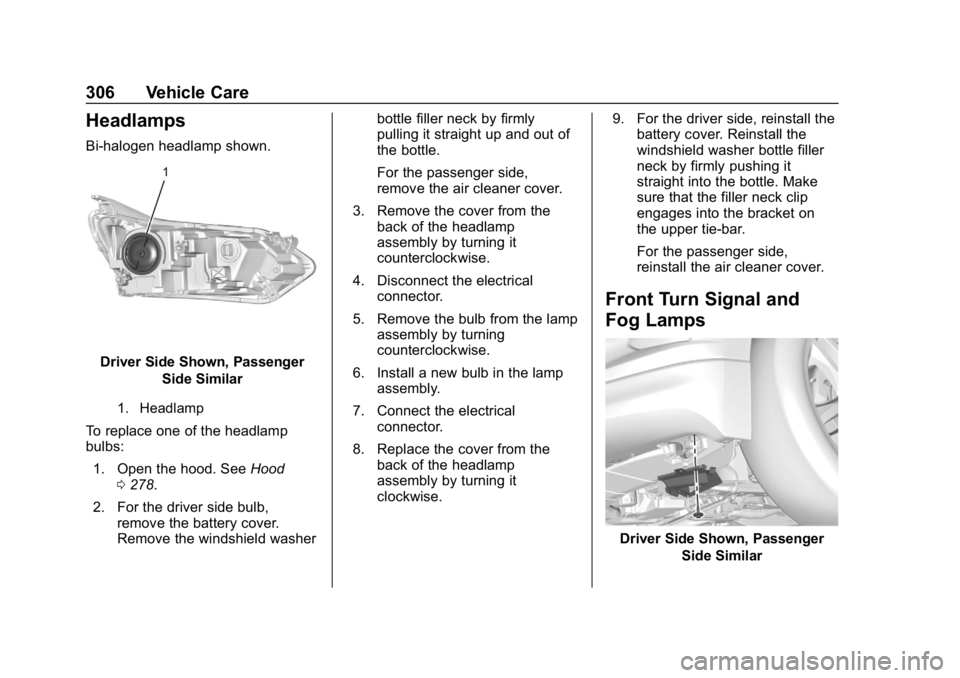
Bi-halogen headlamp shown.
Driver Side Shown, PassengerSide Similar
1. Headlamp
To replace one of the headlamp
bulbs:
1. Open the hood. See Hood
0 278.
2. For the driver side bulb, remove the battery cover.
Remove the windshield washer bottle filler neck by firmly
pulling it straight up and out of
the bottle.
For the passenger side,
remove the air cleaner cover.
3. Remove the cover from the back of the headlamp
assembly by turning it
counterclockwise.
4. Disconnect the electrical connector.
5. Remove the bulb from the lamp assembly by turning
counterclockwise.
6. Install a new bulb in the lamp assembly.
7. Connect the electrical connector.
8. Replace the cover from the back of the headlamp
assembly by turning it
clockwise. 9. For the driver side, reinstall the
battery cover. Reinstall the
windshield washer bottle filler
neck by firmly pushing it
straight into the bottle. Make
sure that the filler neck clip
engages into the bracket on
the upper tie-bar.
For the passenger side,
reinstall the air cleaner cover.
Front Turn Signal and
Fog Lamps
Driver Side Shown, Passenger
Side Similar
Page 308 of 426
Chevrolet Equinox Owner Manual (GMNA-Localizing-U.S./Canada/Mexico-
12145779) - 2019 - CRC - 7/30/18
Vehicle Care 307
To replace one of these lamps:1. Remove the fastener to remove the access panel.
2. Access the lamp through the hole in the underbody air
deflector.
3. Disconnect the electrical connector from the bulb
assembly.
4. Turn the bulb socket counterclockwise and pull the
bulb straight out of the socket.
5. Replace the bulb and reverse Steps 1–4 to reinstall.Taillamps
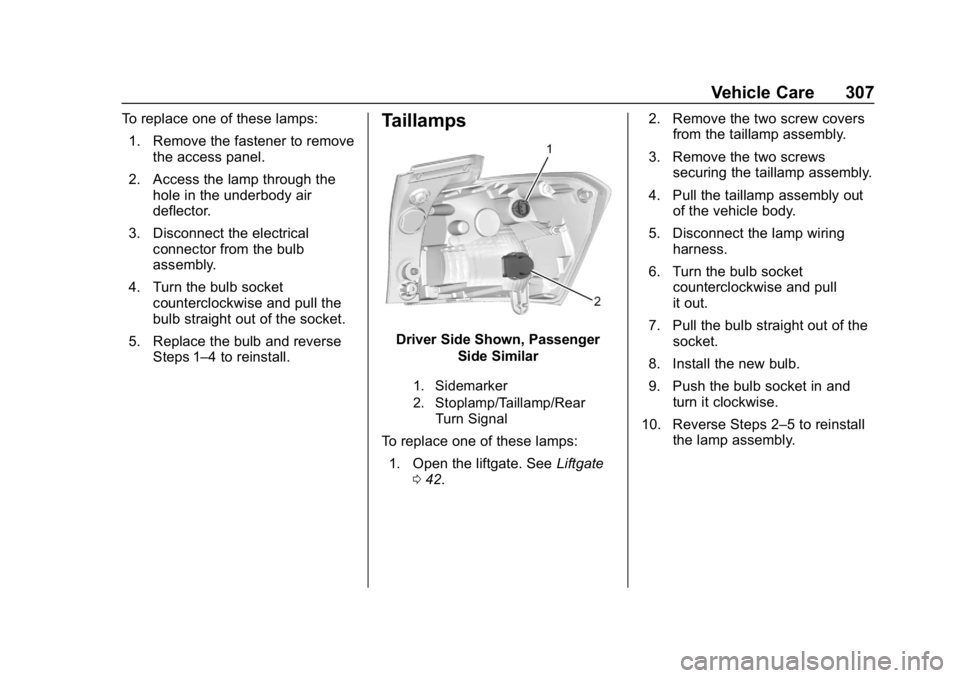
Driver Side Shown, Passenger
Side Similar
1. Sidemarker
2. Stoplamp/Taillamp/RearTurn Signal
To replace one of these lamps:
1. Open the liftgate. See Liftgate
0 42. 2. Remove the two screw covers
from the taillamp assembly.
3. Remove the two screws securing the taillamp assembly.
4. Pull the taillamp assembly out of the vehicle body.
5. Disconnect the lamp wiring harness.
6. Turn the bulb socket counterclockwise and pull
it out.
7. Pull the bulb straight out of the socket.
8. Install the new bulb.
9. Push the bulb socket in and turn it clockwise.
10. Reverse Steps 2–5 to reinstall the lamp assembly.
Page 317 of 426
Chevrolet Equinox Owner Manual (GMNA-Localizing-U.S./Canada/Mexico-
12145779) - 2019 - CRC - 7/30/18
316 Vehicle Care
FusesUsage
F14 Right trailer stoplamp/Turn
signal lamp
F15 Left parking lamp
F16 Right parking lamp
F17 Video processing module
F18 Left trailer stoplamp/Turn
signal lamp
F19 All-wheel drive
F20 Lumbar
F21 Rear auxiliary power outlet
F22 Rear drive unit Relays
Usage
K1 Right trailer stoplamp/Turn
signal lamp
K2 Trailer reverse lamps
K3 Left trailer stoplamp/Turn
signal lamp
K4 Park lamps
K5 Exhaust fuel heater/Selective
catalytic reduction
power module
(diesel only)Wheels and Tires
Tires
Every new GM vehicle has
high-quality tires made by a
leading tire manufacturer. See
the warranty manual for
information regarding the tire
warranty and where to get
service. For additional
information refer to the tire
manufacturer.
{Warning
.Poorly maintained and
improperly used tires are
dangerous.
.Overloading the tires can
cause overheating as a
result of too much
flexing. There could be a
blowout and a serious
crash. See Vehicle Load
Limits 0190.
(Continued)
Page 327 of 426
Chevrolet Equinox Owner Manual (GMNA-Localizing-U.S./Canada/Mexico-
12145779) - 2019 - CRC - 7/30/18
326 Vehicle Care
combined with the low tire pressure
telltale. When the system detects a
malfunction, the telltale will flash for
approximately one minute and then
remain continuously illuminated.
This sequence will continue upon
subsequent vehicle start-ups as
long as the malfunction exists.
When the malfunction indicator is
illuminated, the system may not be
able to detect or signal low tire
pressure as intended. TPMS
malfunctions may occur for a variety
of reasons, including the installation
of replacement or alternate tires or
wheels on the vehicle that prevent
the TPMS from functioning properly.
Always check the TPMS malfunction
telltale after replacing one or more
tires or wheels on your vehicle to
ensure that the replacement or
alternate tires and wheels allow the
TPMS to continue to function
properly.
SeeTire Pressure Monitor
Operation 0326.
See Radio Frequency Statement
0 397.Tire Pressure Monitor
Operation
This vehicle may have a Tire
Pressure Monitor System (TPMS).
The TPMS is designed to warn the
driver when a low tire pressure
condition exists. TPMS sensors are
mounted onto each tire and wheel
assembly, excluding the spare tire
and wheel assembly. The TPMS
sensors monitor the air pressure in
the tires and transmit the tire
pressure readings to a receiver
located in the vehicle.
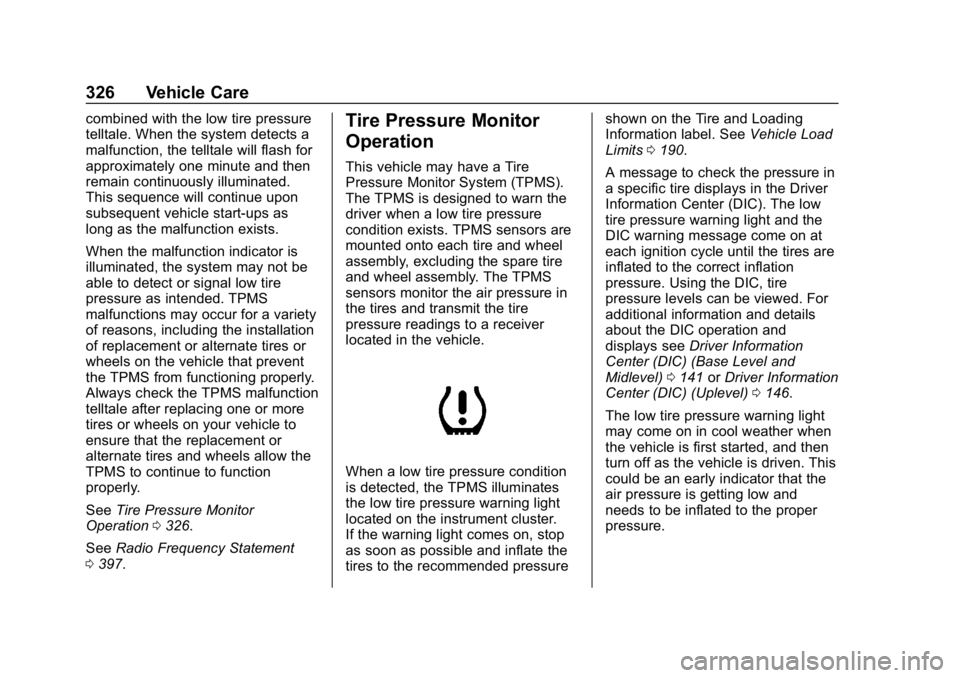
When a low tire pressure condition
is detected, the TPMS illuminates
the low tire pressure warning light
located on the instrument cluster.
If the warning light comes on, stop
as soon as possible and inflate the
tires to the recommended pressure shown on the Tire and Loading
Information label. See
Vehicle Load
Limits 0190.
A message to check the pressure in
a specific tire displays in the Driver
Information Center (DIC). The low
tire pressure warning light and the
DIC warning message come on at
each ignition cycle until the tires are
inflated to the correct inflation
pressure. Using the DIC, tire
pressure levels can be viewed. For
additional information and details
about the DIC operation and
displays see Driver Information
Center (DIC) (Base Level and
Midlevel) 0141 orDriver Information
Center (DIC) (Uplevel) 0146.
The low tire pressure warning light
may come on in cool weather when
the vehicle is first started, and then
turn off as the vehicle is driven. This
could be an early indicator that the
air pressure is getting low and
needs to be inflated to the proper
pressure.
Page 329 of 426

Chevrolet Equinox Owner Manual (GMNA-Localizing-U.S./Canada/Mexico-
12145779) - 2019 - CRC - 7/30/18
328 Vehicle Care
.One or more TPMS sensors are
missing or damaged. The
malfunction light and the DIC
message should go off when the
TPMS sensors are installed and
the sensor matching process is
performed successfully. See
your dealer for service.
. Replacement tires or wheels do
not match the original equipment
tires or wheels. Tires and wheels
other than those recommended
could prevent the TPMS from
functioning properly. See Buying
New Tires 0332.
. Operating electronic devices or
being near facilities using radio
wave frequencies similar to the
TPMS could cause the TPMS
sensors to malfunction.
If the TPMS is not functioning
properly it cannot detect or signal a
low tire pressure condition. See
your dealer for service if the TPMS
malfunction light and DIC message
come on and stay on.Tire Fill Alert (If Equipped)
This feature provides visual and
audible alerts outside the vehicle to
help when inflating an underinflated
tire to the recommended cold tire
pressure.
When the low tire pressure warning
light comes on: 1. Park the vehicle in a safe, level place.
2. Set the parking brake firmly.
3. Place the vehicle in P (Park).
4. Add air to the tire that is underinflated. The turn signal
lamp will flash.
When the recommended
pressure is reached, the horn
sounds once and the turn
signal lamp will stop flashing
and briefly turn solid.
Repeat these steps for all
underinflated tires that have
illuminated the low tire pressure
warning light.{Warning
Overinflating a tire could cause
the tire to rupture and you or
others could be injured. Do not
exceed the maximum pressure
listed on the tire sidewall.
See Tire Sidewall Labeling 0318
and Vehicle Load Limits 0190.
If the tire is overinflated by more
than 35 kPa (5 psi), the horn will
sound multiple times and the turn
signal lamp will continue to flash for
several seconds after filling stops.
To release and correct the pressure,
while the turn signal lamp is still
flashing, briefly press the center of
the valve stem. When the
recommended pressure is reached,
the horn sounds once.
If the turn signal lamp does not flash
within 15 seconds after starting to
inflate the tire, the tire fill alert has
not been activated or is not working.
If the hazard warning flashers are
on, the tire fill alert visual feedback
will not work properly.
Page 330 of 426
Chevrolet Equinox Owner Manual (GMNA-Localizing-U.S./Canada/Mexico-
12145779) - 2019 - CRC - 7/30/18
Vehicle Care 329
The TPMS will not activate the tire
fill alert properly under the following
conditions:
.There is interference from an
external device or transmitter.
. The air pressure from the
inflation device is not sufficient
to inflate the tire.
. There is a malfunction in
the TPMS.
. There is a malfunction in the
horn or turn signal lamps.
. The identification code of the
TPMS sensor is not registered to
the system.
. The battery of the TPMS sensor
is low.
If the tire fill alert does not operate
due to TPMS interference, move the
vehicle about 1 m (3 ft) back or
forward and try again. If the tire fill
alert feature is not working, use a
tire pressure gauge.TPMS Sensor Matching
Process
Each TPMS sensor has a unique
identification code. The identification
code needs to be matched to a new
tire/wheel position after rotating the
vehicle’s tires or replacing one or
more of the TPMS sensors. The
TPMS sensor matching process
should also be performed after
replacing a spare tire with a road
tire containing the TPMS sensor.
The malfunction light and the DIC
message should go off at the next
ignition cycle. The sensors are
matched to the tire/wheel positions,
using a TPMS relearn tool, in the
following order: driver side front tire,
passenger side front tire, passenger
side rear tire, and driver side rear
tire. See your dealer for service or
to purchase a relearn tool. A TPMS
relearn tool can also be purchased.
See Tire Pressure Monitor Sensor
Activation Tool at
www.gmtoolsandequipment.com or
call 1-800-GM TOOLS
(1-800-468-6657). There are two minutes to match the
first tire/wheel position, and
five minutes overall to match all four
tire/wheel positions. If it takes
longer, the matching process stops
and must be restarted.
The TPMS sensor matching
process is:
1. Set the parking brake.
2. Place the vehicle in Service Mode. See Ignition Positions
0 194.
3. Make sure the Tire Pressure info page option is turned on.
The info pages on the DIC can
be turned on and off through
the Options menu. See Driver
Information Center (DIC) (Base
Level and Midlevel) 0141 or
Driver Information Center (DIC)
(Uplevel) 0146.
4. Use the DIC controls on the right side of the steering wheel
to scroll to the Tire Pressure
screen under the DIC
info page.
Page 331 of 426
Chevrolet Equinox Owner Manual (GMNA-Localizing-U.S./Canada/Mexico-
12145779) - 2019 - CRC - 7/30/18
330 Vehicle Care
5. Press and holdVin the center
of the DIC controls.
The horn sounds twice to
signal the receiver is in relearn
mode and the TIRE
LEARNING ACTIVE message
displays on the DIC display.
6. Start with the driver side front tire.
7. Place the relearn tool against the tire sidewall, near the valve
stem. Then press the button to
activate the TPMS sensor.
A horn chirp confirms that the
sensor identification code has
been matched to this tire and
wheel position.
8. Proceed to the passenger side front tire, and repeat the
procedure in Step 7.
9. Proceed to the passenger side rear tire, and repeat the
procedure in Step 7.
10. Proceed to the driver side rear tire, and repeat the procedure
in Step 7. The horn sounds two
times to indicate the sensor identification code has been
matched to the driver side rear
tire, and the TPMS sensor
matching process is no longer
active. The TIRE LEARNING
ACTIVE message on the DIC
display goes off.
11. Turn the vehicle off.
12. Set all four tires to the recommended air pressure
level as indicated on the Tire
and Loading Information label.
Tire Inspection
We recommend that the tires,
including the spare tire, if the
vehicle has one, be inspected
for signs of wear or damage at
least once a month.
Replace the tire if:
.The indicators at three or
more places around the tire
can be seen.
.There is cord or fabric
showing through the tire's
rubber.
.The tread or sidewall is
cracked, cut, or snagged
deep enough to show cord or
fabric.
.The tire has a bump, bulge,
or split.
.The tire has a puncture, cut,
or other damage that cannot
be repaired well because of
the size or location of the
damage.
Tire Rotation
Tires should be rotated every
12 000 km (7,500 mi). See
Maintenance Schedule 0370.
Tires are rotated to achieve a
more uniform wear for all tires.
The first rotation is the most
important.
Page 405 of 426
Chevrolet Equinox Owner Manual (GMNA-Localizing-U.S./Canada/Mexico-
12145779) - 2019 - CRC - 7/30/18
404 OnStar
.PressQto speak with an
Advisor.
OnStar or connected services
cannot work unless the vehicle is in
a place where OnStar has an
agreement with a wireless service
provider for service in that area. The
wireless service provider must also
have coverage, network capacity,
reception, and technology
compatible with OnStar or
connected services. Service
involving location information about
the vehicle cannot work unless GPS
signals are available, unobstructed,
and compatible with the OnStar
hardware. OnStar or connected
services may not work if the OnStar
equipment is not properly installed
or it has not been properly
maintained. If equipment or software
is added, connected, or modified,
OnStar or connected services may
not work. Other problems beyond
the control of OnStar —such as
hills, tall buildings, tunnels, weather,
electrical system design and
architecture of the vehicle, damage to the vehicle in a crash, or wireless
phone network congestion or
jamming
—may prevent service.
See Radio Frequency Statement
0 397.
Services for People with
Disabilities
Advisors provide services to help
with physical disabilities and
medical conditions.
Press
Qto help:
. Locate a gas station with an
attendant to pump gas.
. Find a hotel, restaurant, etc.,
that meets accessibility needs.
. Provide directions to the closest
hospital or pharmacy in urgent
situations.
TTY Users
OnStar has the ability to
communicate to deaf,
hard-of-hearing, or speech-impaired
customers while in the vehicle. The
available dealer-installed TTY
system can provide in-vehicle access to all OnStar services,
except Virtual Advisor and OnStar
Turn-by-Turn Navigation.
If equipped, TTY mode can be
turned on or off by touching
Settings, then Apps, and then
Phone. When TTY mode is on,
phone calls can be made or
received with OnStar using the
infotainment display.
OnStar Personal Identification
Number (PIN)
A PIN is needed to access some
OnStar services. The PIN will need
to be changed the first time when
speaking with an Advisor. To
change the OnStar PIN, contact an
OnStar Advisor by pressing
Qor
calling 1-888-4ONSTAR.
Warranty
OnStar equipment may be
warranted as part of the vehicle
warranty.