2019 CHEVROLET EQUINOX latch
[x] Cancel search: latchPage 103 of 426
Chevrolet Equinox Owner Manual (GMNA-Localizing-U.S./Canada/Mexico-
12145779) - 2019 - CRC - 7/30/18
102 Seats and Restraints
Securing Child Restraints
(With the Seat Belt in the
Rear Seat)
When securing a child restraint with
the seat belts in a rear seat position,
study the instructions that came with
the child restraint to make sure it is
compatible with this vehicle.
If the child restraint has the LATCH
system, seeLower Anchors and
Tethers for Children (LATCH
System) 096 for how and where to
install the child restraint using
LATCH. If a child restraint is
secured in the vehicle using a seat
belt and it uses a top tether, see
Lower Anchors and Tethers for
Children (LATCH System) 096 for
top tether anchor locations.
Do not secure a child seat in a
position without a top tether anchor
if a national or local law requires
that the top tether be anchored, or if
the instructions that come with the
child restraint say that the top tether
must be anchored. In Canada, the law requires that
forward-facing child restraints have
a top tether, and that the tether be
attached.
If the child restraint or vehicle seat
position does not have the LATCH
system, you will be using the seat
belt to secure the child restraint. Be
sure to follow the instructions that
came with the child restraint.
If more than one child restraint
needs to be installed in the rear
seat, be sure to read
Where to Put
the Restraint 095.
1. Put the child restraint on the seat.
2. Pick up the latch plate, and run the lap and shoulder portions
of the vehicle's seat belt
through or around the child
restraint. The child restraint
instructions will show you how.
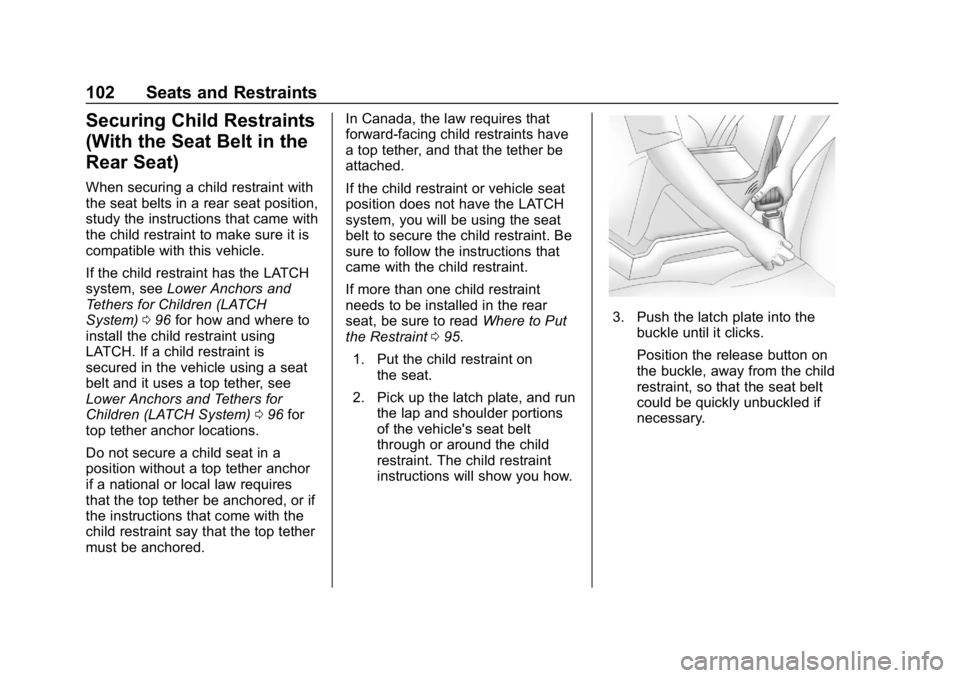
3. Push the latch plate into thebuckle until it clicks.
Position the release button on
the buckle, away from the child
restraint, so that the seat belt
could be quickly unbuckled if
necessary.
Page 104 of 426
Chevrolet Equinox Owner Manual (GMNA-Localizing-U.S./Canada/Mexico-
12145779) - 2019 - CRC - 7/30/18
Seats and Restraints 103
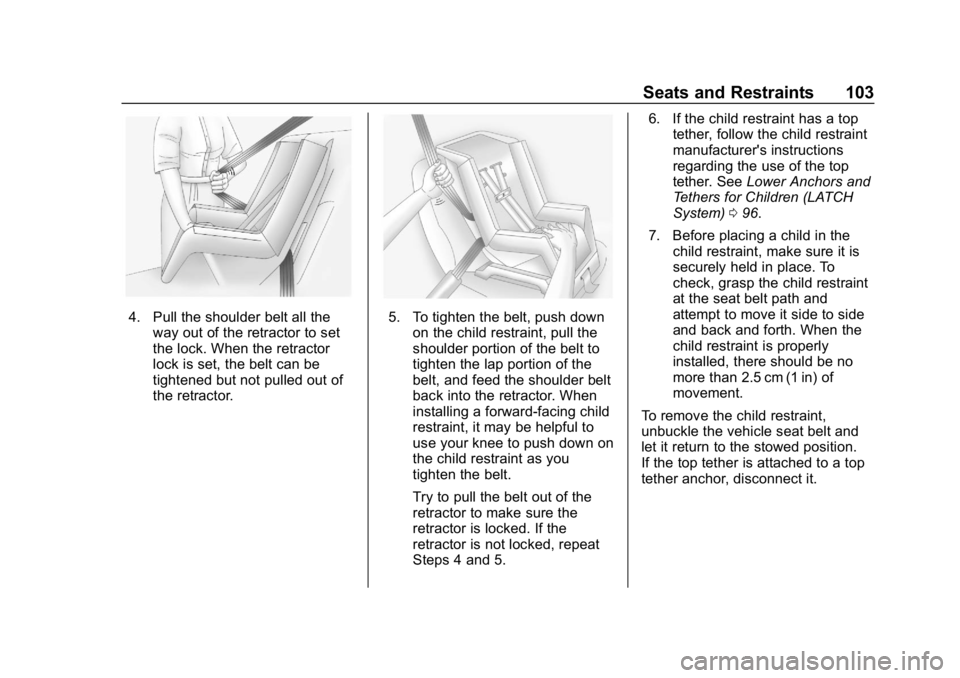
4. Pull the shoulder belt all theway out of the retractor to set
the lock. When the retractor
lock is set, the belt can be
tightened but not pulled out of
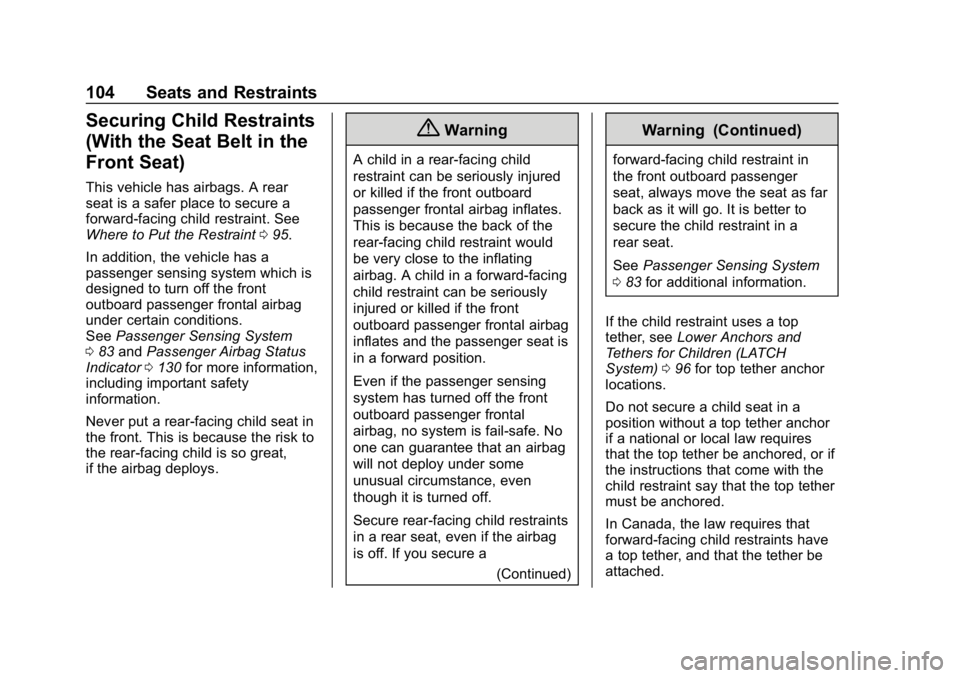
the retractor.5. To tighten the belt, push downon the child restraint, pull the
shoulder portion of the belt to
tighten the lap portion of the
belt, and feed the shoulder belt
back into the retractor. When
installing a forward-facing child
restraint, it may be helpful to
use your knee to push down on
the child restraint as you
tighten the belt.
Try to pull the belt out of the
retractor to make sure the
retractor is locked. If the
retractor is not locked, repeat
Steps 4 and 5. 6. If the child restraint has a top
tether, follow the child restraint
manufacturer's instructions
regarding the use of the top
tether. See Lower Anchors and
Tethers for Children (LATCH
System) 096.
7. Before placing a child in the child restraint, make sure it is
securely held in place. To
check, grasp the child restraint
at the seat belt path and
attempt to move it side to side
and back and forth. When the
child restraint is properly
installed, there should be no
more than 2.5 cm (1 in) of
movement.
To remove the child restraint,
unbuckle the vehicle seat belt and
let it return to the stowed position.
If the top tether is attached to a top
tether anchor, disconnect it.
Page 105 of 426
Chevrolet Equinox Owner Manual (GMNA-Localizing-U.S./Canada/Mexico-
12145779) - 2019 - CRC - 7/30/18
104 Seats and Restraints
Securing Child Restraints
(With the Seat Belt in the
Front Seat)
This vehicle has airbags. A rear
seat is a safer place to secure a
forward-facing child restraint. See
Where to Put the Restraint095.
In addition, the vehicle has a
passenger sensing system which is
designed to turn off the front
outboard passenger frontal airbag
under certain conditions.
See Passenger Sensing System
0 83 and Passenger Airbag Status
Indicator 0130 for more information,
including important safety
information.
Never put a rear-facing child seat in
the front. This is because the risk to
the rear-facing child is so great,
if the airbag deploys.
{Warning
A child in a rear-facing child
restraint can be seriously injured
or killed if the front outboard
passenger frontal airbag inflates.
This is because the back of the
rear-facing child restraint would
be very close to the inflating
airbag. A child in a forward-facing
child restraint can be seriously
injured or killed if the front
outboard passenger frontal airbag
inflates and the passenger seat is
in a forward position.
Even if the passenger sensing
system has turned off the front
outboard passenger frontal
airbag, no system is fail-safe. No
one can guarantee that an airbag
will not deploy under some
unusual circumstance, even
though it is turned off.
Secure rear-facing child restraints
in a rear seat, even if the airbag
is off. If you secure a
(Continued)
Warning (Continued)
forward-facing child restraint in
the front outboard passenger
seat, always move the seat as far
back as it will go. It is better to
secure the child restraint in a
rear seat.
SeePassenger Sensing System
0 83 for additional information.
If the child restraint uses a top
tether, see Lower Anchors and
Tethers for Children (LATCH
System) 096 for top tether anchor
locations.
Do not secure a child seat in a
position without a top tether anchor
if a national or local law requires
that the top tether be anchored, or if
the instructions that come with the
child restraint say that the top tether
must be anchored.
In Canada, the law requires that
forward-facing child restraints have
a top tether, and that the tether be
attached.
Page 106 of 426
Chevrolet Equinox Owner Manual (GMNA-Localizing-U.S./Canada/Mexico-
12145779) - 2019 - CRC - 7/30/18
Seats and Restraints 105
When using the lap-shoulder belt to
secure the child restraint in this
position, follow the instructions that
came with the child restraint and the
following instructions:1. Move the seat as far back as it will go before securing the
forward-facing child restraint.
Move the seat upward or the
seatback to an upright position,
if needed, to get a tight
installation of the child
restraint.
When the passenger sensing
system has turned off the front
outboard passenger frontal
airbag, the OFF indicator on
the passenger airbag status
indicator should light and stay
lit when you start the vehicle.
See Passenger Airbag Status
Indicator 0130. 2. Put the child restraint on
the seat.
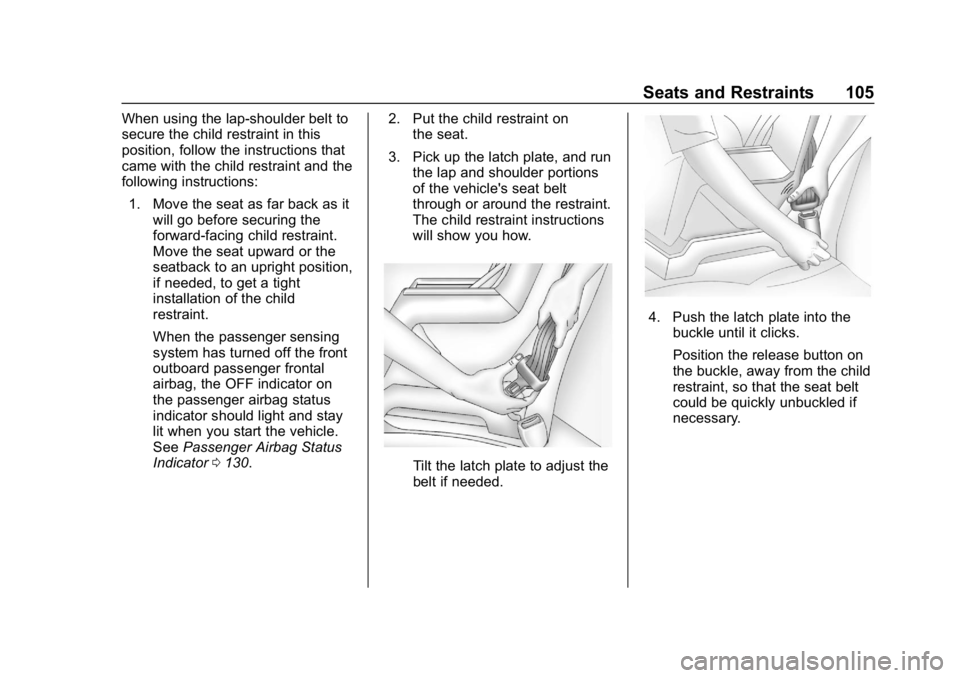
3. Pick up the latch plate, and run the lap and shoulder portions
of the vehicle's seat belt
through or around the restraint.
The child restraint instructions
will show you how.
Tilt the latch plate to adjust the
belt if needed.
4. Push the latch plate into thebuckle until it clicks.
Position the release button on
the buckle, away from the child
restraint, so that the seat belt
could be quickly unbuckled if
necessary.
Page 177 of 426
Chevrolet Equinox Owner Manual (GMNA-Localizing-U.S./Canada/Mexico-
12145779) - 2019 - CRC - 7/30/18
176 Climate Controls
4. Remove the two screwssecuring the door.
5. Press the latches on either side of the service door inward to
release. Open the service door
and remove the old filter.
6. Install the new air filter.
7. Close the service door completely.
8. Reverse the steps to reinstall the glove box.
See your dealer if additional
assistance is needed.
Service
All vehicles have a label underhood
that identifies the refrigerant used in
the vehicle. The refrigerant system
should only be serviced by trained
and certified technicians. The air
conditioning evaporator should
never be repaired or replaced by
one from a salvage vehicle.
It should only be replaced by a new
evaporator to ensure proper and
safe operation. During service, all refrigerants
should be reclaimed with proper
equipment. Venting refrigerants
directly to the atmosphere is harmful
to the environment and may also
create unsafe conditions based on
inhalation, combustion, frostbite,
or other health-based concerns.
The air conditioning system requires
periodic maintenance. See
Maintenance Schedule
0370.
Page 261 of 426
Chevrolet Equinox Owner Manual (GMNA-Localizing-U.S./Canada/Mexico-
12145779) - 2019 - CRC - 7/30/18
260 Driving and Operating
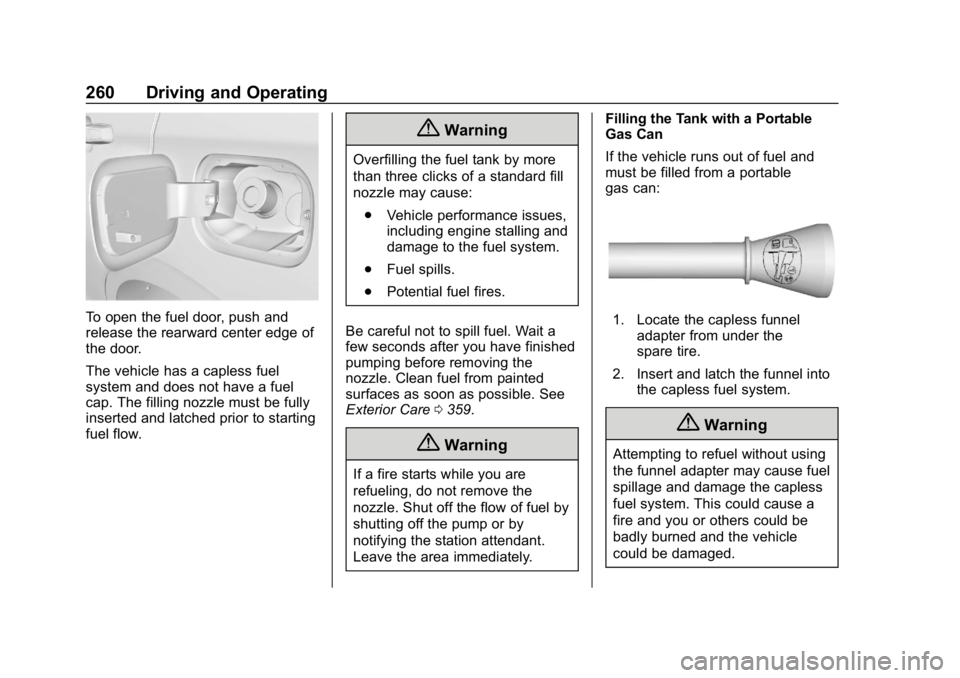
To open the fuel door, push and
release the rearward center edge of
the door.
The vehicle has a capless fuel
system and does not have a fuel
cap. The filling nozzle must be fully
inserted and latched prior to starting
fuel flow.
{Warning
Overfilling the fuel tank by more
than three clicks of a standard fill
nozzle may cause:. Vehicle performance issues,
including engine stalling and
damage to the fuel system.
. Fuel spills.
. Potential fuel fires.
Be careful not to spill fuel. Wait a
few seconds after you have finished
pumping before removing the
nozzle. Clean fuel from painted
surfaces as soon as possible. See
Exterior Care 0359.
{Warning
If a fire starts while you are
refueling, do not remove the
nozzle. Shut off the flow of fuel by
shutting off the pump or by
notifying the station attendant.
Leave the area immediately. Filling the Tank with a Portable
Gas Can
If the vehicle runs out of fuel and
must be filled from a portable
gas can:
1. Locate the capless funnel
adapter from under the
spare tire.
2. Insert and latch the funnel into the capless fuel system.
{Warning
Attempting to refuel without using
the funnel adapter may cause fuel
spillage and damage the capless
fuel system. This could cause a
fire and you or others could be
badly burned and the vehicle
could be damaged.
Page 272 of 426
Chevrolet Equinox Owner Manual (GMNA-Localizing-U.S./Canada/Mexico-
12145779) - 2019 - CRC - 7/30/18
Driving and Operating 271
Trailer Load Balance
The correct trailer load balance
must be maintained to ensure trailer
stability. Incorrect load balance is a
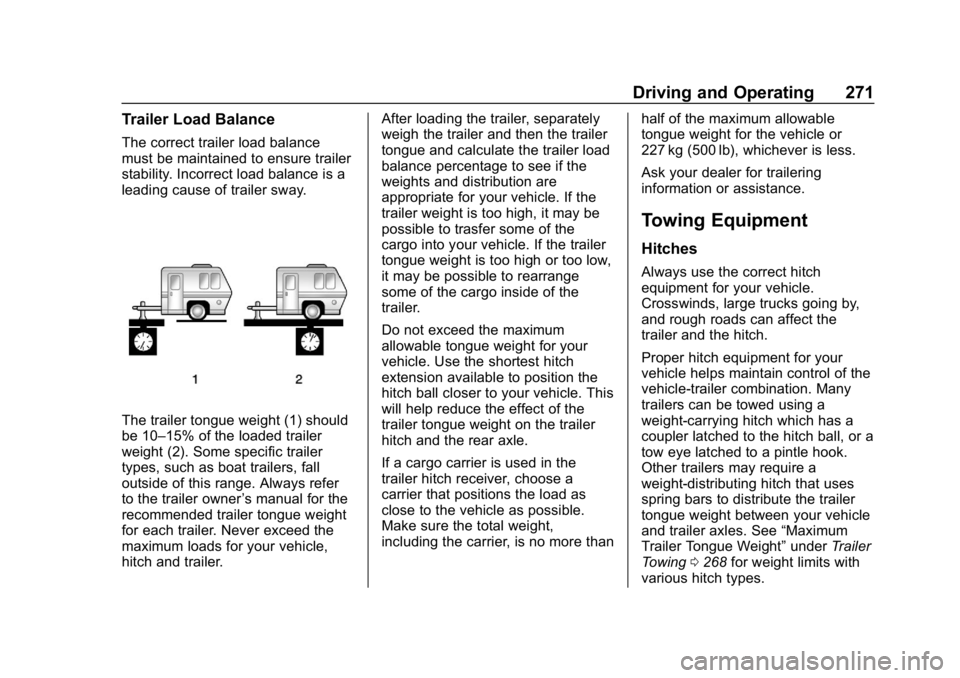
leading cause of trailer sway.
The trailer tongue weight (1) should
be 10–15% of the loaded trailer
weight (2). Some specific trailer
types, such as boat trailers, fall
outside of this range. Always refer
to the trailer owner’s manual for the
recommended trailer tongue weight
for each trailer. Never exceed the
maximum loads for your vehicle,
hitch and trailer. After loading the trailer, separately
weigh the trailer and then the trailer
tongue and calculate the trailer load
balance percentage to see if the
weights and distribution are
appropriate for your vehicle. If the
trailer weight is too high, it may be
possible to trasfer some of the
cargo into your vehicle. If the trailer
tongue weight is too high or too low,
it may be possible to rearrange
some of the cargo inside of the
trailer.
Do not exceed the maximum
allowable tongue weight for your
vehicle. Use the shortest hitch
extension available to position the
hitch ball closer to your vehicle. This
will help reduce the effect of the
trailer tongue weight on the trailer
hitch and the rear axle.
If a cargo carrier is used in the
trailer hitch receiver, choose a
carrier that positions the load as
close to the vehicle as possible.
Make sure the total weight,
including the carrier, is no more than
half of the maximum allowable
tongue weight for the vehicle or
227 kg (500 lb), whichever is less.
Ask your dealer for trailering
information or assistance.
Towing Equipment
Hitches
Always use the correct hitch
equipment for your vehicle.
Crosswinds, large trucks going by,
and rough roads can affect the
trailer and the hitch.
Proper hitch equipment for your
vehicle helps maintain control of the
vehicle-trailer combination. Many
trailers can be towed using a
weight-carrying hitch which has a
coupler latched to the hitch ball, or a
tow eye latched to a pintle hook.
Other trailers may require a
weight-distributing hitch that uses
spring bars to distribute the trailer
tongue weight between your vehicle
and trailer axles. See
“Maximum
Trailer Tongue Weight” underTrailer
Towing 0268 for weight limits with
various hitch types.
Page 280 of 426
Chevrolet Equinox Owner Manual (GMNA-Localizing-U.S./Canada/Mexico-
12145779) - 2019 - CRC - 7/30/18
Vehicle Care 279
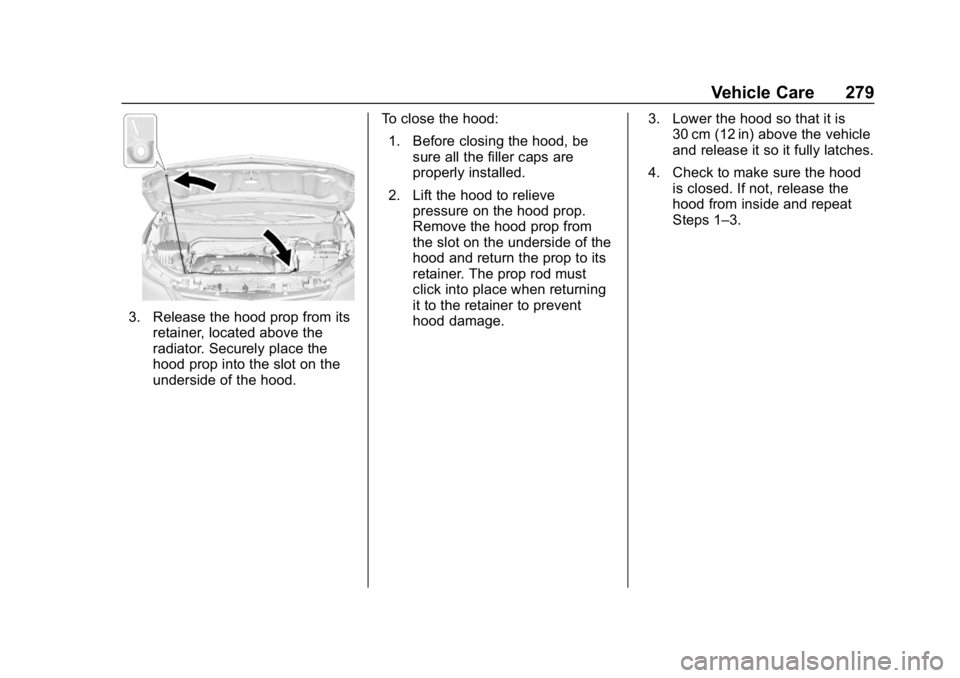
3. Release the hood prop from itsretainer, located above the
radiator. Securely place the
hood prop into the slot on the
underside of the hood. To close the hood:
1. Before closing the hood, be sure all the filler caps are
properly installed.
2. Lift the hood to relieve pressure on the hood prop.
Remove the hood prop from
the slot on the underside of the
hood and return the prop to its
retainer. The prop rod must
click into place when returning
it to the retainer to prevent
hood damage. 3. Lower the hood so that it is
30 cm (12 in) above the vehicle
and release it so it fully latches.
4. Check to make sure the hood is closed. If not, release the
hood from inside and repeat
Steps 1–3.