Page 297 of 367

Chevrolet Corvette Owner Manual (GMNA-Localizing-U.S./Canada/Mexico-
12032182) - 2019 - crc - 5/8/18
296 Vehicle Care
Caution
Ignoring these steps could result
in costly damage to the vehicle
that would not be covered by the
vehicle warranty. Trying to start
the vehicle by pushing or pulling it
will not work, and it could damage
the vehicle.
The battery is under a battery cover
in the hatch/trunk area on the
passenger side under the carpet.
Before you connect the cables, here
are some basic things you should
know. Positive (+) will go to the
positive (+) terminal. Negative (−)
will go the negative (−) terminal.
1. Discharged Battery Positive (+) Terminal
2. Discharged Battery Negative (−) Terminal
3. Good Battery Negative (−) Terminal
4. Good Battery Positive (+) Terminal
1. Check the other vehicle. It must have a 12-volt battery
with a negative ground system.
Caution
If the other vehicle does not have
a 12-volt system with a negative
ground, both vehicles can be
damaged. Only use a vehicle that
has a 12-volt system with a
negative ground for jump starting.
2. Get the vehicles close enough so the jumper cables can
reach, but be sure the vehicles
are not touching each other.
If they are, it could cause a
ground connection you do not
want. You would not be able to
start the vehicle, and the bad
grounding could damage the
electrical systems.
To avoid the possibility of the
vehicles rolling, set the parking
brake firmly on both vehicles
involved in the jump start
procedure. Put an automatic
transmission in P (Park) or a
manual transmission in Neutral
before setting the parking
brakes.
Page 298 of 367

Chevrolet Corvette Owner Manual (GMNA-Localizing-U.S./Canada/Mexico-
12032182) - 2019 - crc - 5/8/18
Vehicle Care 297
Caution
If any accessories are left on or
plugged in during the jump
starting procedure, they could be
damaged. The repairs would not
be covered by the vehicle
warranty. Whenever possible, turn
off or unplug all accessories on
either vehicle when jump starting.
3. Turn off the ignition on both vehicles. Unplug unnecessary
accessories plugged into the
cigarette lighter or the
accessory power outlet. Turn
off the radio and all lamps that
are not needed. This will avoid
sparks and help save both
batteries. And it could save the
radio!
4. Open the hatch/trunk and liftthe carpet on the passenger
side of the vehicle to gain
access to the battery cover.
5. Remove the left elastic loop forthe cargo cover, then remove
the battery cover and locate
the positive (+) and negative
(−) terminals.
6. Check that the jumper cables do not have loose or missing
insulation. If they do, you could
get a shock. The vehicles
could be damaged too.
7. Open the positive terminal trim cover and connect the red
positive (+) cable to the
positive (+) terminal (1) of the
dead battery.
8. Do not let the other end touch metal. Connect it to the
positive (+) terminal (4) of the
good battery.
9. Now connect the black negative (−) cable to the
negative (−) terminal (3) of the
good battery.
Do not let the other end touch
anything until the next step.
Page 300 of 367

Chevrolet Corvette Owner Manual (GMNA-Localizing-U.S./Canada/Mexico-
12032182) - 2019 - crc - 5/8/18
Vehicle Care 299
Caution
Improper use of the tow eye can
cause vehicle damage. Use
caution and low speeds to
prevent damage to the vehicle.
If the vehicle is equipped with a tow
eye, only use the tow eye to pull the
vehicle onto a flatbed car carrier
from a flat road surface. Do not use
the tow eye to pull the vehicle from
snow, mud, or sand.
If necessary, the tow eye can be
obtained from your dealer.
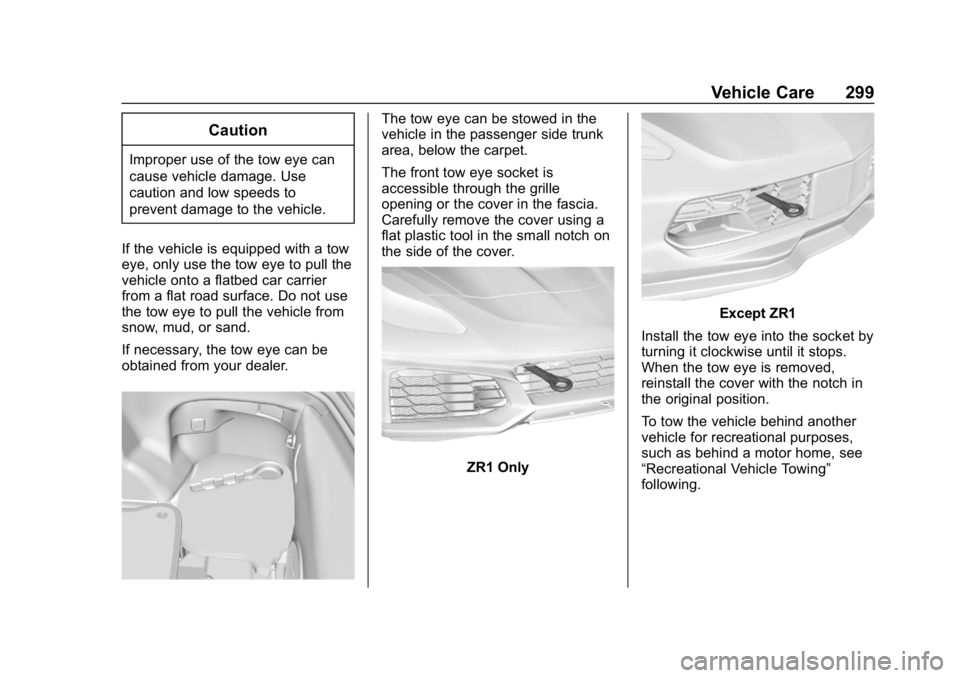
The tow eye can be stowed in the
vehicle in the passenger side trunk
area, below the carpet.
The front tow eye socket is
accessible through the grille
opening or the cover in the fascia.
Carefully remove the cover using a
flat plastic tool in the small notch on
the side of the cover.
ZR1 Only
Except ZR1
Install the tow eye into the socket by
turning it clockwise until it stops.
When the tow eye is removed,
reinstall the cover with the notch in
the original position.
To tow the vehicle behind another
vehicle for recreational purposes,
such as behind a motor home, see
“Recreational Vehicle Towing”
following.
Page 326 of 367

Chevrolet Corvette Owner Manual (GMNA-Localizing-U.S./Canada/Mexico-
12032182) - 2019 - crc - 5/8/18
Technical Data 325
Technical Data
Vehicle Identification
Vehicle IdentificationNumber (VIN) . . . . . . . . . . . . . . . 325
Service Parts Identification Label . . . . . . . . . . . . . . . . . . . . . . . . 325
Vehicle Data
Capacities andSpecifications . . . . . . . . . . . . . . . 326
Engine Drive Belt Routing . . . . 329
Vehicle Identification
Vehicle Identification
Number (VIN)
This legal identifier is in the front
corner of the instrument panel, on
the driver side of the vehicle. It can
be seen through the windshield from
outside. The Vehicle Identification
Number (VIN) also appears on the
Vehicle Certification and Service
Parts labels and certificates of title
and registration.
Engine Identification
The eighth character in the VIN is
the engine code. This code
identifies the vehicle's engine,
specifications, and replacement parts. See
“Engine Specifications”
under Capacities and Specifications
0 326 for the vehicle's engine code.
Service Parts
Identification Label
There may be a label under the
carpet in the hatch/trunk area on the
passenger side, that contains the
following information:
.
Vehicle Identification
Number (VIN)
. Model designation
. Paint information
. Production options and special
equipment
If there is no label, there is a
barcode on the certification label on
the center (B) pillar to scan for this
same information.