Page 179 of 375

Chevrolet Camaro Owner Manual (GMNA-Localizing-U.S./Canada/Mexico-
12461811) - 2019 - crc - 11/5/18
178 Driving and Operating
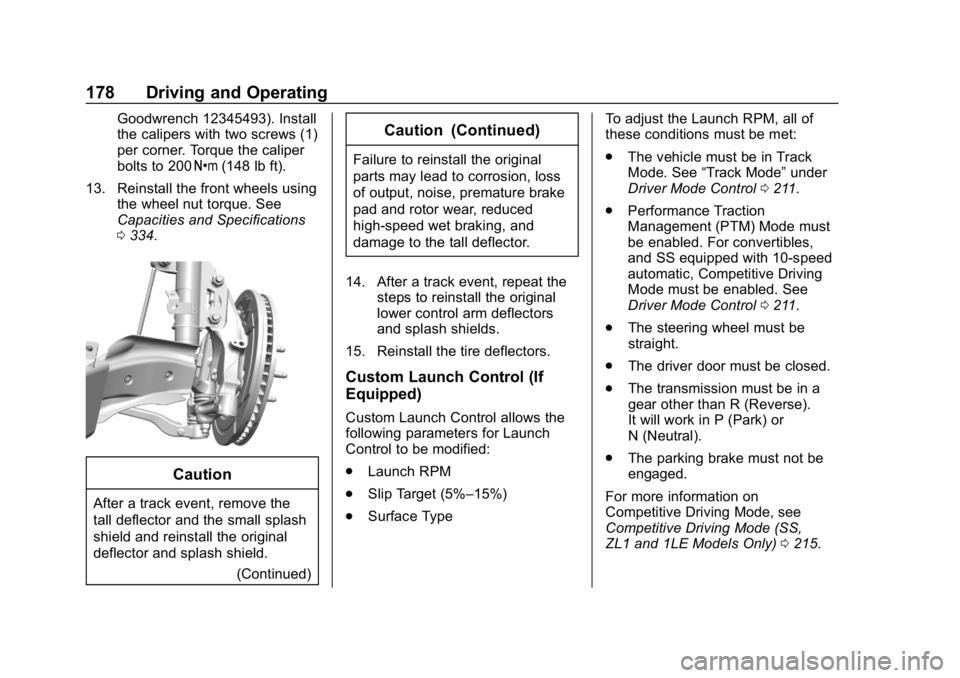
Goodwrench 12345493). Install
the calipers with two screws (1)
per corner. Torque the caliper
bolts to 200Y(148 lb ft).
13. Reinstall the front wheels using the wheel nut torque. See
Capacities and Specifications
0334.
Caution
After a track event, remove the
tall deflector and the small splash
shield and reinstall the original
deflector and splash shield.
(Continued)
Caution (Continued)
Failure to reinstall the original
parts may lead to corrosion, loss
of output, noise, premature brake
pad and rotor wear, reduced
high-speed wet braking, and
damage to the tall deflector.
14. After a track event, repeat the steps to reinstall the original
lower control arm deflectors
and splash shields.
15. Reinstall the tire deflectors.
Custom Launch Control (If
Equipped)
Custom Launch Control allows the
following parameters for Launch
Control to be modified:
. Launch RPM
. Slip Target (5%–15%)
. Surface Type To adjust the Launch RPM, all of
these conditions must be met:
.
The vehicle must be in Track
Mode. See “Track Mode” under
Driver Mode Control 0211.
. Performance Traction
Management (PTM) Mode must
be enabled. For convertibles,
and SS equipped with 10-speed
automatic, Competitive Driving
Mode must be enabled. See
Driver Mode Control 0211.
. The steering wheel must be
straight.
. The driver door must be closed.
. The transmission must be in a
gear other than R (Reverse).
It will work in P (Park) or
N (Neutral).
. The parking brake must not be
engaged.
For more information on
Competitive Driving Mode, see
Competitive Driving Mode (SS,
ZL1 and 1LE Models Only) 0215.
Page 259 of 375

Chevrolet Camaro Owner Manual (GMNA-Localizing-U.S./Canada/Mexico-
12461811) - 2019 - crc - 11/5/18
258 Vehicle Care
{Warning
The brake wear warning sound
means that soon the brakes will
not work well. That could lead to
a crash. When the brake wear
warning sound is heard, have the
vehicle serviced.
Caution
Continuing to drive with worn-out
brake pads could result in costly
brake repair.
Some driving conditions or climates
can cause a brake squeal when the
brakes are first applied or lightly
applied. This does not mean
something is wrong with the brakes.
If equipped with high performance
brake linings, there could be an
increased build-up of brake dust as
well as minor noises as compared
to standard brake linings. Properly torqued wheel nuts are
necessary to help prevent brake
pulsation. When tires are rotated,
inspect brake pads for wear and
evenly tighten wheel nuts in the
proper sequence to torque
specifications. See
Capacities and
Specifications 0334.
Brake pads should be replaced as
complete sets.
Brake Pedal Travel
See your dealer if the brake pedal
does not return to normal height,
or if there is a rapid increase in
pedal travel. This could be a sign
that brake service may be required.
Replacing Brake System Parts
Always replace brake system parts
with new, approved replacement
parts. If this is not done, the brakes
may not work properly. The braking
performance expected can change
in many other ways if the wrong
replacement brake parts are
installed or if parts are improperly
installed.
Cold Weather Brake Operation
(SS Model)
High performance brake
components may bind and clunk
when moving the vehicle. This may
be noticeable after parking when the
brakes have been wet, such as
when driving in the rain or after a
car wash. This is normal for brakes
with high friction pads and does not
affect the operation of the brakes.
Apply the brakes several times until
the binding or clunking stops. Drive
the vehicle and apply the brakes
several times if it is washed before
long-term storage.
Brake Fluid
The brake/clutch master cylinder
reservoir is filled with GM approved
DOT 3 brake fluid as indicated on
Page 290 of 375

Chevrolet Camaro Owner Manual (GMNA-Localizing-U.S./Canada/Mexico-
12461811) - 2019 - crc - 11/5/18
Vehicle Care 289
the tires have been rotated.
SeeTire Pressure 0282 and
Vehicle Load Limits 0186.
Reset the Tire Pressure Monitor
System. See Tire Pressure
Monitor Operation 0284.
Check that all wheel nuts are
properly tightened. See “Wheel
Nut Torque” underCapacities
and Specifications 0334.
{Warning
Rust or dirt on a wheel, or on the
parts to which it is fastened, can
make wheel nuts become loose
after time. The wheel could come
off and cause a crash. When
changing a wheel, remove any
rust or dirt from places where the
wheel attaches to the vehicle. In
an emergency, a cloth or a paper
towel can be used; however, use
a scraper or wire brush later to
remove all rust or dirt.
Lightly coat the center of the
wheel hub with wheel bearing
grease after a wheel change or
tire rotation to prevent corrosion
or rust build-up. Do not get
grease on the flat wheel
mounting surface or on the
wheel nuts or bolts.
When It Is Time for New
Tires
Factors such as maintenance,
temperatures, driving speeds,
vehicle loading, and road conditions
affect the wear rate of the tires.
Treadwear indicators are one way to
tell when it is time for new tires.
Treadwear indicators appear when
the tires have only 1.6 mm (1/16 in)
or less of tread remaining.
See Tire Inspection 0287 andTire
Rotation 0288.
The rubber in tires ages over time.
This also applies to the spare tire,
if the vehicle has one, even if it is
never used. Multiple factors
including temperatures, loading
conditions, and inflation pressure
maintenance affect how fast aging
takes place. GM recommends that
tires, including the spare if
equipped, be replaced after six
years, regardless of tread wear. The
tire manufacture date is the last four
digits of the DOT Tire Identification
Number (TIN) which is molded into
one side of the tire sidewall. The
first two digits represent the week
(01–52) and the last two digits, the
year. For example, the third week of
the year 2010 would have a
four-digit DOT date of 0310.