2019 CHEVROLET BLAZER check engine light
[x] Cancel search: check engine lightPage 186 of 404

Chevrolet Blazer (GMNA-Localizing-U.S./Canada/Mexico-12461541) - 2019 -
CRC - 3/11/19
Driving and Operating 185
of driving conditions and avoid
driving through large puddles and
deep-standing or flowing water.
{Warning
Wet brakes can cause crashes.
They might not work as well in a
quick stop and could cause
pulling to one side. You could
lose control of the vehicle.
After driving through a large
puddle of water or a car/vehicle
wash, lightly apply the brake
pedal until the brakes work
normally.
Flowing or rushing water creates
strong forces. Driving through
flowing water could cause the
vehicle to be carried away. If this
happens, you and other vehicle
occupants could drown. Do not
ignore police warnings and be
very cautious about trying to drive
through flowing water.
Hydroplaning
Hydroplaning is dangerous. Water
can build up under the vehicle's
tires so they actually ride on the
water. This can happen if the road is
wet enough and you are going fast
enough. When the vehicle is
hydroplaning, it has little or no
contact with the road.
There is no hard and fast rule about
hydroplaning. The best advice is to
slow down when the road is wet.
Other Rainy Weather Tips
Besides slowing down, other wet
weather driving tips include:
.Allow extra following distance.
. Pass with caution.
. Keep windshield wiping
equipment in good shape.
. Keep the windshield washer fluid
reservoir filled.
. Have good tires with proper
tread depth. See Tires0295.
. Turn off cruise control. .
Activate All-Wheel Drive (AWD)
mode. See Driver Mode Control
0 210.
Hill and Mountain Roads
Driving on steep hills or through
mountains is different than driving
on flat or rolling terrain. Tips include:
.
Keep the vehicle serviced and in
good shape.
. Check all fluid levels and brakes,
tires, cooling system, and
transmission.
. Shift to a lower gear when going
down steep or long hills.
{Warning
Using the brakes to slow the
vehicle on a long downhill slope
can cause brake overheating, can
reduce brake performance, and
could result in a loss of braking.
Shift the transmission to a lower
gear to let the engine assist the
brakes on a steep downhill slope.
Page 207 of 404

Chevrolet Blazer (GMNA-Localizing-U.S./Canada/Mexico-12461541) - 2019 -
CRC - 3/11/19
206 Driving and Operating
Using ABS
Do not pump the brakes. Just hold
the brake pedal down firmly and let
ABS work. You may hear the ABS
pump or motor operating and feel
the brake pedal pulsate. This is
normal.
Braking in Emergencies
ABS allows you to steer and brake
at the same time. In many
emergencies, steering can help
more than even the very best
braking.
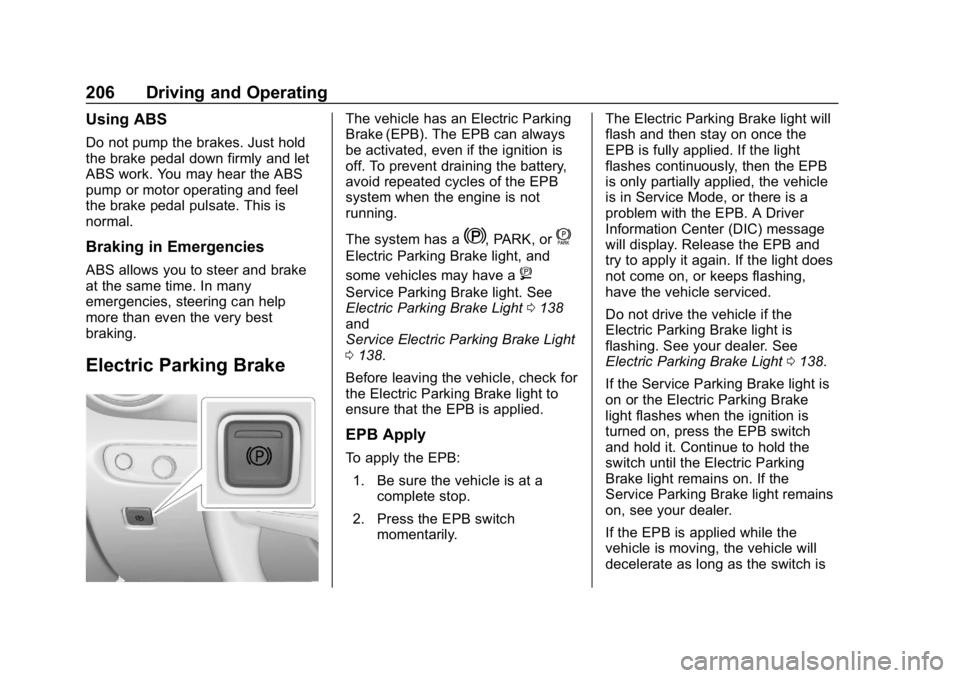
Electric Parking Brake
The vehicle has an Electric Parking
Brake (EPB). The EPB can always
be activated, even if the ignition is
off. To prevent draining the battery,
avoid repeated cycles of the EPB
system when the engine is not
running.
The system has a
Y, PARK, orf
Electric Parking Brake light, and
some vehicles may have a
8
Service Parking Brake light. See
Electric Parking Brake Light0138
and
Service Electric Parking Brake Light
0 138.
Before leaving the vehicle, check for
the Electric Parking Brake light to
ensure that the EPB is applied.
EPB Apply
To apply the EPB: 1. Be sure the vehicle is at a complete stop.
2. Press the EPB switch momentarily. The Electric Parking Brake light will
flash and then stay on once the
EPB is fully applied. If the light
flashes continuously, then the EPB
is only partially applied, the vehicle
is in Service Mode, or there is a
problem with the EPB. A Driver
Information Center (DIC) message
will display. Release the EPB and
try to apply it again. If the light does
not come on, or keeps flashing,
have the vehicle serviced.
Do not drive the vehicle if the
Electric Parking Brake light is
flashing. See your dealer. See
Electric Parking Brake Light
0138.
If the Service Parking Brake light is
on or the Electric Parking Brake
light flashes when the ignition is
turned on, press the EPB switch
and hold it. Continue to hold the
switch until the Electric Parking
Brake light remains on. If the
Service Parking Brake light remains
on, see your dealer.
If the EPB is applied while the
vehicle is moving, the vehicle will
decelerate as long as the switch is
Page 210 of 404

Chevrolet Blazer (GMNA-Localizing-U.S./Canada/Mexico-12461541) - 2019 -
CRC - 3/11/19
Driving and Operating 209
vehicle wheel brakes to assist the
driver in keeping the vehicle on the
intended path.
If cruise control is being used and
TCS or StabiliTrak/ESC begins to
limit wheel spin, cruise control will
disengage. Cruise control may be
turned back on when road
conditions allow. TCS and
StabiliTrak/ESC will automatically
turn on when cruise control is set.
Both systems come on
automatically when the vehicle is
started and begins to move. The
systems may be heard or felt while
they are operating or while
performing diagnostic checks. This
is normal and does not mean there
is a problem with the vehicle.
It is recommended to leave both
systems on for normal driving
conditions, but it may be necessary
to turn TCS off if the vehicle gets
stuck in sand, mud, ice, or snow.
SeeIf the Vehicle Is Stuck 0187
and “Turning the Systems Off and
On” later in this section.
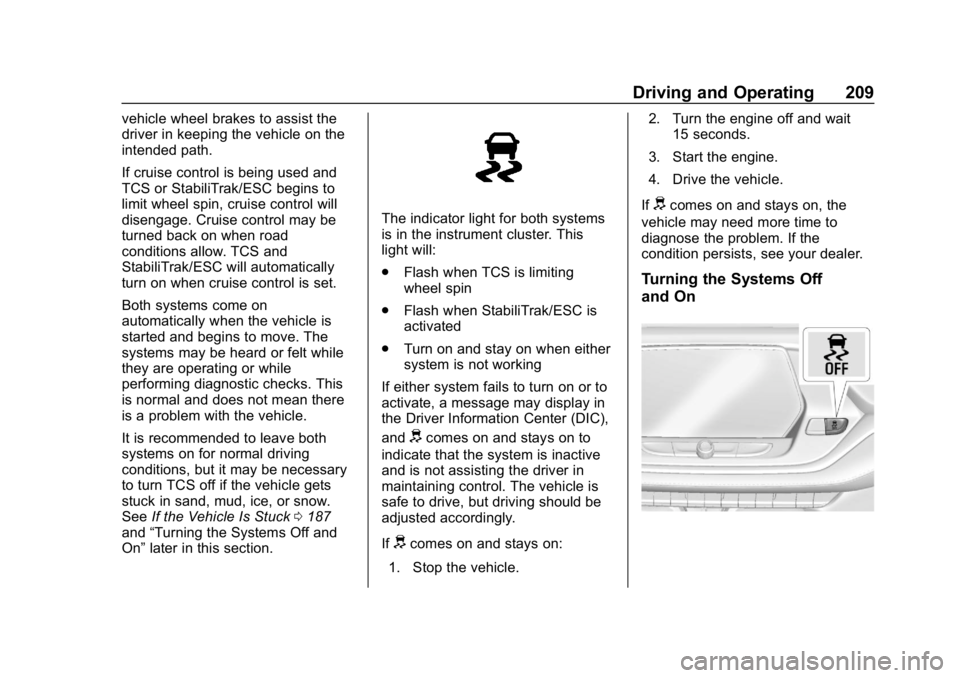
The indicator light for both systems
is in the instrument cluster. This
light will:
.
Flash when TCS is limiting
wheel spin
. Flash when StabiliTrak/ESC is
activated
. Turn on and stay on when either
system is not working
If either system fails to turn on or to
activate, a message may display in
the Driver Information Center (DIC),
and
dcomes on and stays on to
indicate that the system is inactive
and is not assisting the driver in
maintaining control. The vehicle is
safe to drive, but driving should be
adjusted accordingly.
If
dcomes on and stays on:
1. Stop the vehicle. 2. Turn the engine off and wait
15 seconds.
3. Start the engine.
4. Drive the vehicle.
If
dcomes on and stays on, the
vehicle may need more time to
diagnose the problem. If the
condition persists, see your dealer.
Turning the Systems Off
and On
Page 255 of 404

Chevrolet Blazer (GMNA-Localizing-U.S./Canada/Mexico-12461541) - 2019 -
CRC - 3/11/19
254 Driving and Operating
Electric Trailer Brake Control
Wiring Provisions
Wiring provisions for an aftermarket
electric trailer brake controller are
included with the vehicle as part of
the trailer wiring package. The
harness contains the following
circuits:
These wiring provisions for an
electric trailer brake controller are
included with the vehicle as part of
the trailer wiring package. The body
harness, inside the front driver side
instrument panel, contains blunt cut
wires below the headlamp switch for
the electric trailer brake controller.
The harness contains the following
wires:
.Blue: Electric Trailer Brakes
. Blue: Battery Feed
. White/Blue: Brake Apply Signal
. Black: Ground
Refer to the aftermarket electric
trailer brake controller owner's
manual to determine wire color
coding of the electric trailer brake
controller. The wire colors on the brake controller may be different
from the vehicle. The electric trailer
brake controller should be installed
by your dealer or a qualified service
center.
Trailer Lamps
Always check all trailer lamps are
working at the beginning of each
trip, and periodically on longer trips.
Turn Signals When Towing a
Trailer
When properly connected, the trailer
turn signals will illuminate to indicate
the vehicle is turning, changing
lanes, or stopping. When towing a
trailer, the arrows on the instrument
cluster will illuminate even if the
trailer is not properly connected or
the bulbs are burned out.
Tow/Haul Mode
For instructions on how to enter
Tow/Haul Mode, see
Driver Mode
Control 0210.
Tow/Haul assists when pulling a
heavy trailer or a large or heavy
load. See Tow/Haul Mode 0204. Tow/Haul Mode is designed to be
most effective when the vehicle and
trailer combined weight is at least
75% of the vehicle's Gross
Combined Weight Rating (GCWR).
See
“Weight of the Trailer” under
Trailer Towing 0247. Tow/Haul
Mode is most useful when towing a
heavy trailer or carrying a large or
heavy load:
. Through rolling terrain.
. In stop-and-go traffic.
. In busy parking lots.
Operating the vehicle in Tow/Haul
Mode when lightly loaded or not
towing will not cause damage;
however, it is not recommended and
may result in unpleasant engine and
transmission driving characteristics
and reduced fuel economy.Trailer Sway
Control (TSC)
Vehicles with StabiliTrak/Electronic
Stability Control (ESC) have a
Trailer Sway Control (TSC) feature.
Trailer sway is unintended
Page 256 of 404

Chevrolet Blazer (GMNA-Localizing-U.S./Canada/Mexico-12461541) - 2019 -
CRC - 3/11/19
Driving and Operating 255
side-to-side motion of a trailer while
towing. If the vehicle is towing a
trailer and the TSC detects that
sway is increasing, the vehicle
brakes are selectively applied at
each wheel, to help reduce
excessive trailer sway. If equipped
with the Integrated Trailer Brake
Control (ITBC) system, and the
trailer has an electric brake system,
StabiliTrak/ESC may also apply the
trailer brakes.
If TSC is enabled, the Traction
Control System (TCS)/StabiliTrak
light will flash on the instrument
cluster. Reduce vehicle speed by
gradually removing your foot from
the accelerator. If trailer sway
continues, StabiliTrak/ESC can
reduce engine torque to help slow
the vehicle. TSC will not function ifStabiliTrak/ESC is turned off. See
Traction Control/Electronic Stability
Control
0208.
{Warning
Trailer sway can result in a crash
and in serious injury or death,
even if the vehicle is equipped
with TSC.
If the trailer begins to sway,
reduce vehicle speed by
gradually removing your foot from
the accelerator. Then pull over to
check the trailer and vehicle to
help correct possible causes,
including an improperly or
overloaded trailer, unrestrained
cargo, improper trailer hitch
configuration, or improperly
inflated or incorrect vehicle or
trailer tires. See Towing
Equipment 0251 for trailer ratings
and hitch setup
recommendations.
Trailer Tires
Special Trailer (ST) tires differ from
vehicle tires. Trailer tires are
designed with stiff sidewalls to help
prevent sway and to support heavy
loads. These features can make it
difficult to determine if the trailer tire
pressures are low only based on a
visual inspection.
Always check all trailer tire
pressures before each trip when the
tires are cool. Low trailer tire
pressure is a leading cause of trailer
tire blowouts.
Trailer tires deteriorate over time.
The trailer tire sidewall will show the
week and year the tire was
manufactured. Many trailer tire
manufacturers recommend
replacing tires more than six
years old.
Overloading is another leading
cause of trailer tire blowouts. Never
load your trailer with more weight
than the tires are designed to
support. The load rating is on the
trailer tire sidewall.
Page 257 of 404

Chevrolet Blazer (GMNA-Localizing-U.S./Canada/Mexico-12461541) - 2019 -
CRC - 3/11/19
256 Driving and Operating
Always know the maximum speed
rating for the trailer tires before
driving. This may be significantly
lower than the vehicle tire speed
rating. The speed rating may be on
the trailer tire sidewall. If the speed
rating is not shown, the default
trailer tire speed rating is 105 km/h
(65 mph).Conversions and
Add-Ons
Add-On Electrical
Equipment
{Warning
The Data Link Connector (DLC) is
used for vehicle service and
Emission Inspection/Maintenance
testing. SeeMalfunction
Indicator Lamp (Check Engine
Light) 0135. A device connected
to the DLC —such as an
aftermarket fleet or
driver-behavior tracking device —
may interfere with vehicle
systems. This could affect vehicle
operation and cause a crash.
Such devices may also access
information stored in the vehicle’s
systems.
Caution
Some electrical equipment can
damage the vehicle or cause
components to not work and
would not be covered by the
vehicle warranty. Always check
with your dealer before adding
electrical equipment.
Add-on equipment can drain the
vehicle's 12-volt battery, even if the
vehicle is not operating.
The vehicle has an airbag system.
Before attempting to add anything
electrical to the vehicle, see
Servicing the Airbag-Equipped
Vehicle 089 and
Adding Equipment to the
Airbag-Equipped Vehicle 089.
Page 258 of 404

Chevrolet Blazer (GMNA-Localizing-U.S./Canada/Mexico-12461541) - 2019 -
CRC - 3/11/19
Vehicle Care 257
Vehicle Care
General Information
General Information . . . . . . . . . . 258
California Proposition65 Warning . . . . . . . . . . . . . . . . . 258
California Perchlorate Materials Requirements . . . . . 259
Accessories and Modifications . . . . . . . . . . . . . . . . 259
Vehicle Checks
Doing Your OwnService Work . . . . . . . . . . . . . . . 259
Hood . . . . . . . . . . . . . . . . . . . . . . . . . 260
Engine Compartment Overview . . . . . . . . . . . . . . . . . . . . 262
Engine Oil . . . . . . . . . . . . . . . . . . . . 265
Engine Oil Life System . . . . . . . 267
Automatic Transmission Fluid . . . . . . . . . . . . . . . . . . . . . . . . 268
Engine Air Filter Life System . . . . . . . . . . . . . . . . . . . . . . 269
Engine Air Cleaner/Filter . . . . . . 269
Cooling System . . . . . . . . . . . . . . 271
Engine Overheating . . . . . . . . . . 275
Washer Fluid . . . . . . . . . . . . . . . . . 276
Brakes . . . . . . . . . . . . . . . . . . . . . . . 277
Brake Fluid . . . . . . . . . . . . . . . . . . . 278 Battery - North America . . . . . . 279
All-Wheel Drive . . . . . . . . . . . . . . . 280
Starter Switch Check . . . . . . . . . 280
Automatic Transmission Shift
Lock Control Function
Check . . . . . . . . . . . . . . . . . . . . . . . 280
Park Brake and P (Park) Mechanism Check . . . . . . . . . . 280
Wiper Blade Replacement . . . . 281
Windshield Replacement . . . . . 282
Gas Strut(s) . . . . . . . . . . . . . . . . . . 282
Headlamp Aiming
Headlamp Aiming . . . . . . . . . . . . 284
Bulb Replacement
Bulb Replacement . . . . . . . . . . . . 284
High Intensity Discharge (HID) Lighting . . . . . . . . . . . . . . . . . . . . . 284
LED Lighting . . . . . . . . . . . . . . . . . 284
Back-Up Lamps . . . . . . . . . . . . . . 284
Electrical System
High Voltage Devices and Wiring . . . . . . . . . . . . . . . . . . . . . . . 285
Electrical System Overload . . . 286
Fuses and Circuit Breakers . . . 286
Engine Compartment Fuse Block . . . . . . . . . . . . . . . . . . . . . . . . 287
Instrument Panel Fuse Block . . . . . . . . . . . . . . . . . . . . . . . . 291 Rear Compartment Fuse
Block . . . . . . . . . . . . . . . . . . . . . . . . 293
Wheels and Tires
Tires . . . . . . . . . . . . . . . . . . . . . . . . . . 295
All-Season Tires . . . . . . . . . . . . . . 296
Winter Tires . . . . . . . . . . . . . . . . . . 297
Summer Tires . . . . . . . . . . . . . . . . 297
Tire Sidewall Labeling . . . . . . . . 298
Tire Designations . . . . . . . . . . . . . 300
Tire Terminology andDefinitions . . . . . . . . . . . . . . . . . . 300
Tire Pressure . . . . . . . . . . . . . . . . . 303
Tire Pressure for High-Speed Operation . . . . . . . . . . . . . . . . . . . 304
Tire Pressure Monitor System . . . . . . . . . . . . . . . . . . . . . . 305
Tire Pressure Monitor Operation . . . . . . . . . . . . . . . . . . . 306
Tire Inspection . . . . . . . . . . . . . . . . 310
Tire Rotation . . . . . . . . . . . . . . . . . 310
When It Is Time for New Tires . . . . . . . . . . . . . . . . . . . . . . . . 311
Buying New Tires . . . . . . . . . . . . . 312
Different Size Tires and Wheels . . . . . . . . . . . . . . . . . . . . . . 313
Uniform Tire Quality Grading . . . . . . . . . . . . . . . . . . . . . 314
Wheel Alignment and Tire Balance . . . . . . . . . . . . . . . . . . . . . 315
Wheel Replacement . . . . . . . . . . 316
Page 279 of 404

Chevrolet Blazer (GMNA-Localizing-U.S./Canada/Mexico-12461541) - 2019 -
CRC - 3/11/19
278 Vehicle Care
Brake Fluid
The brake master cylinder reservoir
is filled with GM approved DOT 3
brake fluid as indicated on the
reservoir cap. SeeEngine
Compartment Overview 0262 for
the location of the reservoir.
Checking Brake Fluid
With the vehicle in P (Park) on a
level surface, the brake fluid level
should be between the minimum
and maximum marks on the brake
fluid reservoir.
There are only two reasons why the
brake fluid level in the reservoir may
go down:
. Normal brake lining wear. When
new linings are installed, the
fluid level goes back up. .
A fluid leak in the brake
hydraulic system. Have the
brake hydraulic system fixed.
With a leak, the brakes will not
work well.
Always clean the brake fluid
reservoir cap and the area around
the cap before removing it.
Do not top off the brake fluid.
Adding fluid does not correct a leak.
If fluid is added when the linings are
worn, there will be too much fluid
when new brake linings are
installed. Add or remove fluid, as
necessary, only when work is done
on the brake hydraulic system.
{Warning
If too much brake fluid is added, it
can spill on the engine and burn,
if the engine is hot enough. You
or others could be burned, and
the vehicle could be damaged.
Add brake fluid only when work is
done on the brake hydraulic
system. When the brake fluid falls to a low
level, the brake warning light comes
on. See
Brake System Warning
Light 0137.
Brake fluid absorbs water over time
which degrades the effectiveness of
the brake fluid. Replace brake fluid
at the specified intervals to prevent
increased stopping distance. See
Maintenance Schedule 0350.
What to Add
Use only GM approved DOT 3
brake fluid from a clean, sealed
container. See Recommended
Fluids and Lubricants 0359.
{Warning
The wrong or contaminated brake
fluid could result in damage to the
brake system. This could result in
the loss of braking leading to a
possible injury. Always use the
proper GM approved brake fluid.