2019 BUICK REGAL SPORTBACK service
[x] Cancel search: servicePage 233 of 391
Buick Regal Owner Manual (GMNA-Localizing-U.S./Canada-12163021) -
2019 - CRC - 11/14/18
232 Driving and Operating
Recommended Fuel (2.0L
Turbo Engine)
Do not use any fuel labeled E85 or
FlexFuel. Do not use gasoline with
ethanol levels greater than 15% by
volume.
Premium unleaded gasoline
meeting ASTM specification D4814
with a posted octane rating of 93 is
highly recommended for best
performance and fuel economy.
Unleaded gasoline with an octane
rated as low as 87 can be used.
Using unleaded gasoline rated
below 93 octane, however, will lead
to reduced acceleration and fuel
economy. If knocking occurs, use a
gasoline rated at 93 octane as soon
as possible, otherwise, the engine
could be damaged. If heavy
knocking is heard when using
gasoline with a 93 octane rating, the
engine needs service.
Recommended Fuel (3.6L
Engine)
Do not use any fuel labeled E85 or
FlexFuel. Do not use gasoline with
ethanol levels greater than 15% by
volume.
Use regular unleaded gasoline
meeting ASTM specification D4814
with a posted octane rating of 87 or
higher. Do not use gasoline with a
posted octane rating of less than 87,
as this may cause engine knock and
will lower fuel economy.
Prohibited Fuels
Caution
Do not use fuels with any of the
following conditions; doing so
may damage the vehicle and void
its warranty:. For vehicles that are not
FlexFuel, fuel labeled
greater than 15% ethanol by
(Continued)
Caution (Continued)
volume, such as mid-level
ethanol blends (16–50%
ethanol), E85, or FlexFuel.
. Fuel with any amount of
methanol, methylal,
ferrocene, and aniline.
These fuels can corrode
metal fuel system parts or
damage plastic and rubber
parts.
. Fuel containing metals such
as methylcyclopentadienyl
manganese tricarbonyl
(MMT), which can damage
the emissions control
system and spark plugs.
. Fuel with a posted octane
rating of less than the
recommended fuel. Using
this fuel will lower fuel
economy and performance,
and may decrease the life of
the emissions catalyst.
Page 240 of 391
Buick Regal Owner Manual (GMNA-Localizing-U.S./Canada-12163021) -
2019 - CRC - 11/14/18
Driving and Operating 239
When parking your vehicle and your
trailer on a hill:1. Press the brake pedal, but do not shift into P (Park) yet. Turn
the wheels into the curb if
facing downhill or into traffic if
facing uphill.
2. Have someone place chocks under the trailer wheels.
3. When the wheel chocks are in place, gradually release the
brake pedal to allow the chocks
to absorb the load of the trailer.
4. Reapply the brake pedal. Then apply the parking brake and
shift into P (Park).
5. Release the brake pedal.
Leaving After Parking on a Hill
1. Apply and hold the brake pedal.
.Start the engine.
. Shift into a gear.
. Release the parking brake.
2. Let up on the brake pedal. 3. Drive slowly until the trailer is
clear of the chocks.
4. Stop and have someone pick up and store the chocks.
Maintenance When Trailer
Towing
The vehicle needs service more
often when used to tow trailers. See
Maintenance Schedule 0336. It is
especially important to check the
automatic transmission fluid, engine
oil, axle lubricant, belts, cooling
system, and brake system before
and during each trip.
Check periodically that all nuts and
bolts on the trailer hitch are tight.
Engine Cooling When Trailer
Towing
The cooling system may temporarily
overheat during severe operating
conditions. See Engine Overheating
0 260.
Trailer Towing
Caution
Towing a trailer improperly can
damage the vehicle and result in
costly repairs not covered by the
vehicle warranty. To tow a trailer
correctly, follow the directions in
this section and see your dealer
for important information about
towing a trailer with the vehicle.
Trailer Weight
{Warning
Never exceed the towing capacity
for your vehicle.
Safe trailering requires monitoring
the weight, speed, altitude, road
grades, outside temperature,
dimensions of the front of the trailer,
and how frequently the vehicle is
used to tow a trailer.
Page 244 of 391
Buick Regal Owner Manual (GMNA-Localizing-U.S./Canada-12163021) -
2019 - CRC - 11/14/18
Driving and Operating 243
Overloading is another leading
cause of trailer tire blow-outs. Never
load your trailer with more weight
than the tires are designed to
support. The load rating is located
on the trailer tire sidewall.
Always know the maximum speed
rating for the trailer tires before
driving. This may be significantly
lower than the vehicle tire speed
rating. The speed rating may be on
the trailer tire sidewall. If the speed
rating is not shown, the default
trailer tire speed rating is 105 km/h
(65 mph).Conversions and
Add-Ons
Add-On Electrical
Equipment
{Warning
The Data Link Connector (DLC) is
used for vehicle service
and Emission Inspection/
Maintenance testing. See
Malfunction Indicator Lamp
(Check Engine Light)0135.
A device connected to the DLC —
such as an aftermarket fleet or
driver-behavior tracking device —
may interfere with vehicle
systems. This could affect vehicle
operation and cause a crash.
Such devices may also access
information stored in the vehicle’s
systems.
Caution
Some electrical equipment can
damage the vehicle or cause
components to not work and
would not be covered by the
vehicle warranty. Always check
with your dealer before adding
electrical equipment.
Add-on equipment can drain the
vehicle's 12-volt battery, even if the
vehicle is not operating.
The vehicle has an airbag system.
Before attempting to add anything
electrical to the vehicle, see
Servicing the Airbag-Equipped
Vehicle 088 and Adding Equipment
to the Airbag-Equipped Vehicle
0 88.
Page 245 of 391
Buick Regal Owner Manual (GMNA-Localizing-U.S./Canada-12163021) -
2019 - CRC - 11/14/18
244 Vehicle Care
Vehicle Care
General Information
General Information . . . . . . . . . . 245
California Proposition65 Warning . . . . . . . . . . . . . . . . . 245
California Perchlorate Materials Requirements . . . . . 246
Accessories and Modifications . . . . . . . . . . . . . . . . 246
Vehicle Checks
Doing Your OwnService Work . . . . . . . . . . . . . . . 246
Hood . . . . . . . . . . . . . . . . . . . . . . . . . 247
Engine Compartment Overview . . . . . . . . . . . . . . . . . . . . 248
Engine Oil . . . . . . . . . . . . . . . . . . . . 251
Engine Oil Life System . . . . . . . 253
Automatic Transmission Fluid . . . . . . . . . . . . . . . . . . . . . . . . 254
Engine Air Cleaner/Filter . . . . . . 255
Cooling System . . . . . . . . . . . . . . 256
Engine Overheating . . . . . . . . . . 260
Washer Fluid . . . . . . . . . . . . . . . . . 261
Brakes . . . . . . . . . . . . . . . . . . . . . . . 262
Brake Fluid . . . . . . . . . . . . . . . . . . . 263
Battery - North America . . . . . . 264
All-Wheel Drive . . . . . . . . . . . . . . . 265 Starter Switch Check . . . . . . . . . 265
Automatic Transmission Shift
Lock Control Function
Check . . . . . . . . . . . . . . . . . . . . . . . 265
Park Brake and P (Park)
Mechanism Check . . . . . . . . . . 265
Wiper Blade Replacement . . . . 266
Windshield Replacement . . . . . 267
Gas Strut(s) . . . . . . . . . . . . . . . . . . 267
Headlamp Aiming
Headlamp Aiming . . . . . . . . . . . . 268
Bulb Replacement
Bulb Replacement . . . . . . . . . . . . 269
Halogen Bulbs . . . . . . . . . . . . . . . . 269
High Intensity Discharge (HID) Lighting . . . . . . . . . . . . . . . . . . . . . 269
LED Lighting . . . . . . . . . . . . . . . . . 269
Headlamps . . . . . . . . . . . . . . . . . . . 269
Fog Lamps . . . . . . . . . . . . . . . . . . . 270
Front Turn Signal Lamps . . . . . 270
Taillamps, Turn Signal, Stoplamps, and Back-Up
Lamps . . . . . . . . . . . . . . . . . . . . . . 270
Electrical System
Electrical System Overload . . . 271
Fuses and Circuit Breakers . . . 272
Engine Compartment FuseBlock . . . . . . . . . . . . . . . . . . . . . . . . 273 Instrument Panel Fuse
Block . . . . . . . . . . . . . . . . . . . . . . . . 276
Wheels and Tires
Tires . . . . . . . . . . . . . . . . . . . . . . . . . . 278
All-Season Tires . . . . . . . . . . . . . . 279
Winter Tires . . . . . . . . . . . . . . . . . . 279
Low-Profile Tires . . . . . . . . . . . . . 279
Tire Sidewall Labeling . . . . . . . . 280
Tire Designations . . . . . . . . . . . . . 282
Tire Terminology andDefinitions . . . . . . . . . . . . . . . . . . 282
Tire Pressure . . . . . . . . . . . . . . . . . 285
Tire Pressure for High-Speed Operation . . . . . . . . . . . . . . . . . . . 286
Tire Pressure Monitor System . . . . . . . . . . . . . . . . . . . . . . 287
Tire Pressure Monitor Operation . . . . . . . . . . . . . . . . . . . 288
Tire Inspection . . . . . . . . . . . . . . . . 291
Tire Rotation . . . . . . . . . . . . . . . . . 291
When It Is Time for New Tires . . . . . . . . . . . . . . . . . . . . . . . . 292
Buying New Tires . . . . . . . . . . . . . 293
Different Size Tires and Wheels . . . . . . . . . . . . . . . . . . . . . . 295
Uniform Tire Quality Grading . . . . . . . . . . . . . . . . . . . . . 295
Wheel Alignment and Tire Balance . . . . . . . . . . . . . . . . . . . . . 297
Wheel Replacement . . . . . . . . . . 297
Page 246 of 391
Buick Regal Owner Manual (GMNA-Localizing-U.S./Canada-12163021) -
2019 - CRC - 11/14/18
Vehicle Care 245
Tire Chains . . . . . . . . . . . . . . . . . . . 298
If a Tire Goes Flat . . . . . . . . . . . . 298
Tire Sealant andCompressor Kit . . . . . . . . . . . . . 300
Tire Sealant and
Compressor Kit . . . . . . . . . . . . . 306
Storing the Tire Sealant and Compressor Kit (With
Subwoofer) . . . . . . . . . . . . . . . . . 313
Storing the Tire Sealant and Compressor Kit (Without
Subwoofer) . . . . . . . . . . . . . . . . . 313
Tire Changing . . . . . . . . . . . . . . . . 313
Compact Spare Tire . . . . . . . . . . 318
Jump Starting
Jump Starting - North America . . . . . . . . . . . . . . . . . . . . . 319
Towing the Vehicle
Towing the Vehicle . . . . . . . . . . . 322
Recreational VehicleTowing . . . . . . . . . . . . . . . . . . . . . . 322
Appearance Care
Exterior Care . . . . . . . . . . . . . . . . . 325
Interior Care . . . . . . . . . . . . . . . . . . 330
Floor Mats . . . . . . . . . . . . . . . . . . . . 333
General Information
For service and parts needs, visit
your dealer. You will receive
genuine GM parts and GM-trained
and supported service people.
Genuine GM parts have one of
these marks:
California Proposition
65 Warning
{Warning
Most motor vehicles, including
this one, as well as many of its
service parts and fluids, contain
and/or emit chemicals known to
the State of California to cause
cancer and birth defects or other
reproductive harm. Engine
exhaust, many parts and
systems, many fluids, and some
component wear by-products
contain and/or emit these
chemicals. For more information
go to www.P65Warnings.ca.gov/
passenger-vehicle.
See Battery - North America 0264
and Jump Starting - North America
0 319 and the back cover.
Page 247 of 391

Buick Regal Owner Manual (GMNA-Localizing-U.S./Canada-12163021) -
2019 - CRC - 11/14/18
246 Vehicle Care
California Perchlorate
Materials Requirements
Certain types of automotive
applications, such as airbag
initiators, seat belt pretensioners,
and lithium batteries contained in
Remote Keyless Entry transmitters,
may contain perchlorate materials.
Special handling may be necessary.
For additional information, see
www.dtsc.ca.gov/hazardouswaste/
perchlorate.
Accessories and
Modifications
Adding non-dealer accessories or
making modifications to the vehicle
can affect vehicle performance and
safety, including such things as
airbags, braking, stability, ride and
handling, emissions systems,
aerodynamics, durability, and
electronic systems like antilock
brakes, traction control, and stability
control. These accessories or
modifications could even cause
malfunction or damage not covered
by the vehicle warranty.Damage to suspension components
caused by modifying vehicle height
outside of factory settings will not be
covered by the vehicle warranty.
Damage to vehicle components
resulting from modifications or the
installation or use of non-GM
certified parts, including control
module or software modifications, is
not covered under the terms of the
vehicle warranty and may affect
remaining warranty coverage for
affected parts.
GM Accessories are designed to
complement and function with other
systems on the vehicle. See your
dealer to accessorize the vehicle
using genuine GM Accessories
installed by a dealer technician.
Also, see
Adding Equipment to the
Airbag-Equipped Vehicle 088.
Vehicle Checks
Doing Your Own
Service Work
{Warning
It can be dangerous to work on
your vehicle if you do not have
the proper knowledge, service
manual, tools, or parts. Always
follow owner ’s manual procedures
and consult the service manual
for your vehicle before doing any
service work.
If doing some of your own service
work, use the proper service
manual. It tells you much more
about how to service the vehicle
than this manual can. To order the
proper service manual, see
Publication Ordering Information
0 361.
This vehicle has an airbag system.
Before attempting to do your own
service work, see Servicing the
Airbag-Equipped Vehicle 088.
Page 248 of 391
Buick Regal Owner Manual (GMNA-Localizing-U.S./Canada-12163021) -
2019 - CRC - 11/14/18
Vehicle Care 247
If equipped with remote vehicle
start, open the hood before
performing any service work to
prevent remote starting the vehicle
accidentally. SeeRemote Vehicle
Start 035.
Keep a record with all parts receipts
and list the mileage and the date of
any service work performed. See
Maintenance Records 0347.
Caution
Even small amounts of
contamination can cause damage
to vehicle systems. Do not allow
contaminants to contact the fluids,
reservoir caps, or dipsticks.
Hood
To open the hood:
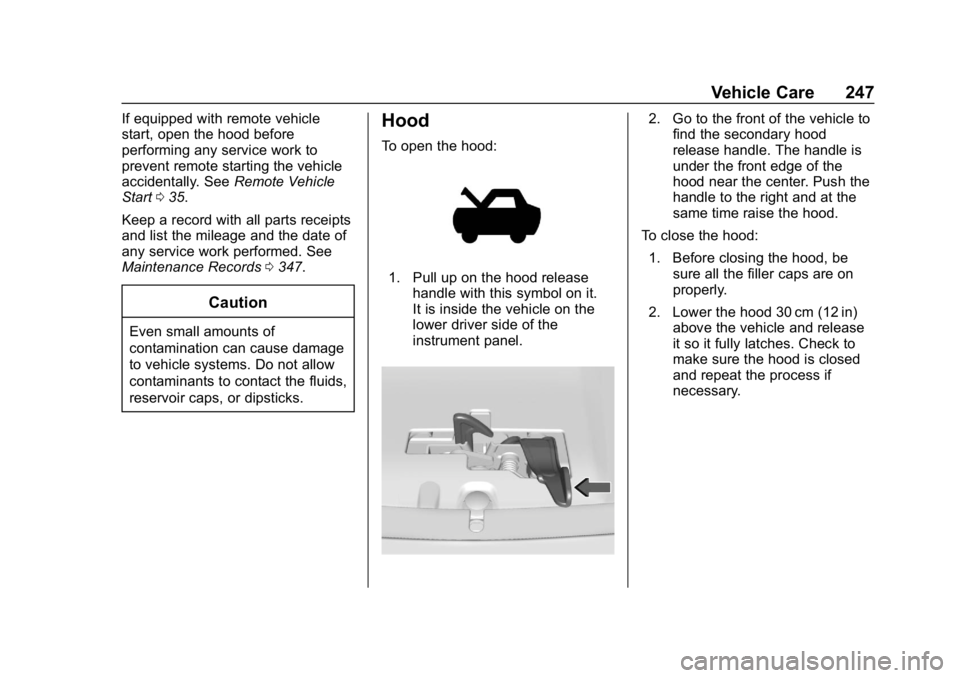
1. Pull up on the hood release
handle with this symbol on it.
It is inside the vehicle on the
lower driver side of the
instrument panel.
2. Go to the front of the vehicle tofind the secondary hood
release handle. The handle is
under the front edge of the
hood near the center. Push the
handle to the right and at the
same time raise the hood.
To close the hood: 1. Before closing the hood, be sure all the filler caps are on
properly.
2. Lower the hood 30 cm (12 in) above the vehicle and release
it so it fully latches. Check to
make sure the hood is closed
and repeat the process if
necessary.
Page 253 of 391

Buick Regal Owner Manual (GMNA-Localizing-U.S./Canada-12163021) -
2019 - CRC - 11/14/18
252 Vehicle Care
checking a cold engine prior to
starting. Remove the dipstick
and check the level.
. If unable to wait two hours, the
engine must be off for at least
15 minutes if the engine is
warm, or at least 30 minutes if
the engine is not warm. Pull out
the dipstick, wipe it with a clean
paper towel or cloth, then push it
back in all the way. Remove it
again, keeping the tip down, and
check the level.
When to Add Engine Oil
V6 Engine Shown, L4 Engine
Similar
If the oil is below the cross-hatched
area at the tip of the dipstick and
the engine has been off for at least 15 minutes, add 1 L (1 qt) of the
recommended oil and then recheck
the level. See
“Selecting the Right
Engine Oil” later in this section for
an explanation of what kind of oil to
use. For engine oil crankcase
capacity, see Capacities and
Specifications 0349.
Caution
Do not add too much oil. Oil
levels above or below the
acceptable operating range
shown on the dipstick are harmful
to the engine. If the oil level is
above the operating range (i.e.,
the engine has so much oil that
the oil level gets above the
cross-hatched area that shows
the proper operating range), the
engine could be damaged. Drain
the excess oil or limit driving of
the vehicle, and seek a service
professional to remove the
excess oil. See
Engine Compartment Overview
0 248 for the location of the engine
oil fill cap.
Add enough oil to put the level
somewhere in the proper operating
range. Push the dipstick all the way
back in when through.
Selecting the Right Engine Oil
Selecting the right engine oil
depends on both the proper oil
specification and viscosity grade.
See Recommended Fluids and
Lubricants 0345.
Specification
Use full synthetic engine oils that
meet the dexos1 specification.
Engine oils that have been
approved by GM as meeting the
dexos1 specification are marked
with the dexos1 approved logo. See
www.gmdexos.com.