2019 BUICK REGAL SPORTBACK remote start
[x] Cancel search: remote startPage 66 of 391
Buick Regal Owner Manual (GMNA-Localizing-U.S./Canada-12163021) -
2019 - CRC - 11/14/18
Seats and Restraints 65
Identifying Driver Number
To identify the driver number:
To identify the driver number, start
the vehicle with a key or RKE
transmitter. The DIC will display the
driver number, either 1 or 2. The
other key or RKE transmitter will
correspond to the driver number that
was not displayed.
Saving Memory Positions
Read these instructions completely
before saving memory positions.
To save preferred driving positions
1 and 2:1. Turn the ignition on or to ACC/ ACCESSORY.
A DIC welcome message may
be displayed indicating number
1 or 2 for memory recalls.
2. Adjust all available memory features to the desired driving
position.
3. Press and release MEM; a beep will sound. 4. Immediately press and hold the
1 or 2 memory button matching
the above DIC welcome
message until two beeps
sound.
If too much time passes
between releasing MEM and
pressing 1, the memory
position will not be saved and
two beeps will not sound.
Repeat Steps 3 and 4.
1 or 2 corresponds to the driver
number. See “Identifying Driver
Number” previously in this
section.
5. Repeat Steps 1–4 for a second driver using the other 1 or
2 memory button.
Positions are not saved for the Seat
Exit Memory feature, which moves
the driver seat rearward.
Save preferred memory feature
positions to both 1 and 2 if you are
the only driver. Manually Recalling Memory
Positions
Press and hold 1 or 2 to recall the
previously saved memory positions.
To stop Manual Memory Recall
movement, release 1 or 2 or press
any of the following controls:
.
Power seat
. Memory MEM
. Power mirror, with the driver or
passenger side mirror selected
. Power steering wheel,
if equipped
Seat Entry Memory Recall
The vehicle identifies the number of
the current driver ’s RKE transmitter
(1–8). See Remote Keyless Entry
(RKE) System Operation 029. If the
RKE transmitter is 1 or 2, and Seat
Entry Memory is programmed on in
vehicle personalization, the
positions saved to the same
memory button number 1 or 2 are
automatically recalled when the
ignition is turned on, or turned from
Page 69 of 391
Buick Regal Owner Manual (GMNA-Localizing-U.S./Canada-12163021) -
2019 - CRC - 11/14/18
68 Seats and Restraints
Remote Start Heated and
Ventilated Seats
If equipped, the heated seats will
turn on automatically during a
remote start if it is cold outside and
the ventilated seats will turn on
automatically if it is hot outside. The
heated and ventilated seat
indicators may not come on during
this operation.
The heated and ventilated seats
may cancel when the vehicle is
started. These features can be
manually selected after the ignition
is turned on.
The temperature performance of an
unoccupied seat may be reduced.
This is normal.
The heated or ventilated seats will
not turn on during a remote start
unless they are enabled in the
vehicle personalization menu.
SeeRemote Vehicle Start 035 and
Vehicle Personalization 0153.Massage
If equipped, the ignition must be on
to use the massage feature.
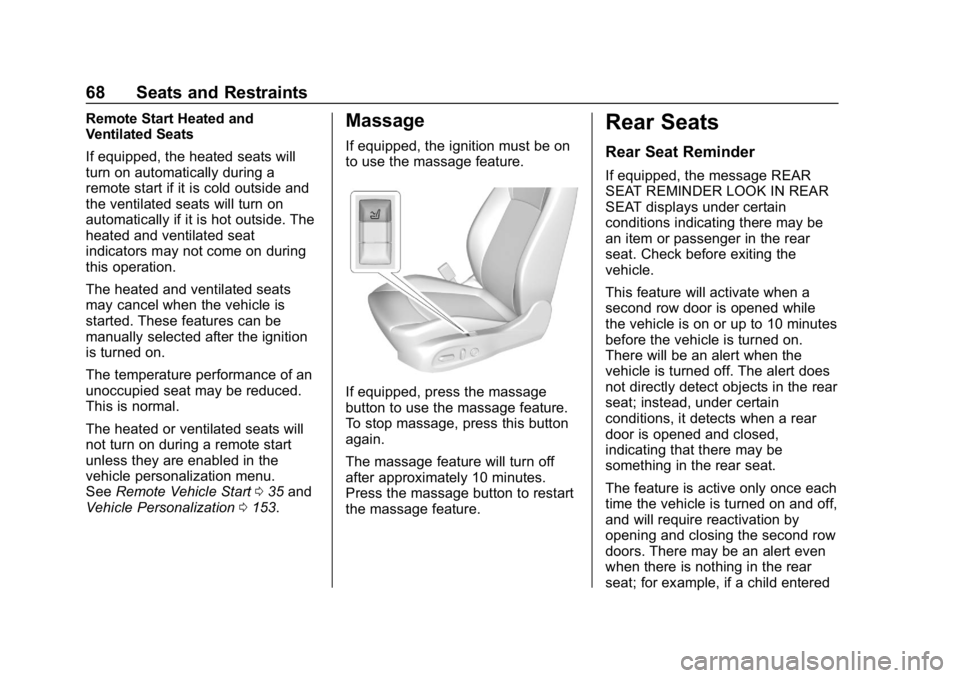
If equipped, press the massage
button to use the massage feature.
To stop massage, press this button
again.
The massage feature will turn off
after approximately 10 minutes.
Press the massage button to restart
the massage feature.
Rear Seats
Rear Seat Reminder
If equipped, the message REAR
SEAT REMINDER LOOK IN REAR
SEAT displays under certain
conditions indicating there may be
an item or passenger in the rear
seat. Check before exiting the
vehicle.
This feature will activate when a
second row door is opened while
the vehicle is on or up to 10 minutes
before the vehicle is turned on.
There will be an alert when the
vehicle is turned off. The alert does
not directly detect objects in the rear
seat; instead, under certain
conditions, it detects when a rear
door is opened and closed,
indicating that there may be
something in the rear seat.
The feature is active only once each
time the vehicle is turned on and off,
and will require reactivation by
opening and closing the second row
doors. There may be an alert even
when there is nothing in the rear
seat; for example, if a child entered
Page 157 of 391
Buick Regal Owner Manual (GMNA-Localizing-U.S./Canada-12163021) -
2019 - CRC - 11/14/18
156 Instruments and Controls
Touch Off or On.
Extended Hill Start Assist
This allows the duration of the Hill
Start Assist to be changed. SeeHill
Start Assist (HSA) 0204.
Touch Extended Hold or
Standard Hold.
Lighting
Touch and the following may
display:
. Vehicle Locator Lights
. Exit Lighting
. Left or Right Hand Traffic
. Adaptive Forward Lighting
Vehicle Locator Lights
This feature will flash the exterior
lamps and allows some of the
exterior lamps and most of the
interior lamps to turn on briefly
when
Kon the Remote Keyless
Entry (RKE) transmitter is pressed
to locate the vehicle.
Touch Off or On. Exit Lighting
This allows the selection of how
long the exterior lamps stay on
when leaving the vehicle when it is
dark outside.
Touch Off, 30 Seconds, 60 Seconds,
or 120 Seconds.
Left or Right Hand Traffic
This setting adjusts the behavior of
the Adaptive Forward Lighting
feature based on what side of the
road the vehicle drives on.
Touch Left Hand Traffic or Right
Hand Traffic.
Adaptive Forward Lighting
This feature allows the headlamps
to pivot horizontally to provide
greater road illumination while
turning. See
Adaptive Forward
Lighting (AFL) 0164.
Touch Off, Corner and Curve
Lighting, or Intelligent Light
Distribution.
Power Door Locks
Touch and the following may
display:
. Open Door Anti Lockout
. Auto Door Unlock
. Delayed Door Lock
Open Door Anti Lock Out
When on, this feature will keep the
driver door from locking when the
door is open. If Off is selected, the
Delayed Door Lock menu will be
available.
Touch Off or On.
Auto Door Unlock
This allows selection of which of the
doors will automatically unlock when
the vehicle is shifted into P (Park).
Touch Off, All Doors, or Driver Door.
Delayed Door Lock
When on, this feature will delay the
locking of the doors. To override the
delay, press the power door lock
switch on the door.
Touch Off or On.
Page 158 of 391
Buick Regal Owner Manual (GMNA-Localizing-U.S./Canada-12163021) -
2019 - CRC - 11/14/18
Instruments and Controls 157
Remote Lock, Unlock, Start
Touch and the following may
display:
.Remote Unlock Light Feedback
. Remote Lock Feedback
. Remote Door Unlock
. Remote Start Auto Cool Seats
. Remote Start Auto Heat Seats
. Passive Door Unlock
. Passive Door Lock
. Remote Left in Vehicle Alert
Remote Unlock Light Feedback
When on, the exterior lamps will
flash when unlocking the vehicle
with the RKE transmitter.
Touch Off or Flash Lights.
Remote Lock Feedback
This allows selection of what type of
feedback is given when locking the
vehicle with the RKE transmitter.
Touch Off, Lights and Horn, Lights
Only, or Horn Only. Remote Door Unlock
This allows selection of which doors
will unlock when pressing
Kon the
RKE transmitter.
Touch All Doors or Driver Door.
Remote Start Auto Cool Seats
If equipped and turned on, this
feature will turn on the ventilated
seats when using remote start on
warm days. See Heated and
Ventilated Front Seats 066 and
Remote Vehicle Start 035.
Touch Off or On.
Remote Start Auto Heat Seats
If equipped and turned on, this
feature will turn on the heated seats
when using remote start on
cold days. See Heated and
Ventilated Front Seats 066 and
Remote Vehicle Start 035.
Touch Off or On. Passive Door Unlock
This allows the selection of what
doors will unlock when using the
button on the driver door to unlock
the vehicle.
Touch All Doors or Driver Door.
Passive Door Lock
This allows passive locking to be
turned on or off and selects
feedback. See
Remote Keyless
Entry (RKE) System Operation 029.
Touch Off, On with Horn
Chirp, or On.
Remote Left in Vehicle Alert
This feature sounds an alert when
the RKE transmitter is left in the
vehicle. This menu also enables the
Remote No Longer In Vehicle Alert.
Touch Off or On.
Seating Position
Touch and the following may
display:
. Seat Entry Memory
. Seat Exit Memory
Page 176 of 391
Buick Regal Owner Manual (GMNA-Localizing-U.S./Canada-12163021) -
2019 - CRC - 11/14/18
Climate Controls 175
Rear Window Defogger
K:Press to turn the rear window
defogger on or off. An indicator light
on the control comes on to show
that the rear window defogger is on.
The rear window defogger only
works when the engine is running.
It turns off when the ignition is
turned off or in ACC/ACCESSORY.
The rear window defogger can be
set to automatic operation. See
“Climate and Air Quality” under
Vehicle Personalization 0153.
When Auto Rear Defog is selected,
the rear window defogger turns on
automatically when the interior
temperature is cold and the outside
temperature is about 4 °C (40 °F)
and below. The auto rear defogger
turns off automatically after about
10 minutes, or after five minutes if
the outside temperature is not
as cold.
The upper gridlines on the rear
window are antenna lines and are
not intended to heat when the
defogger is activated. The heated outside mirrors turn on
when the rear window defogger
control is on and help to clear fog or
frost from the surface of the mirror.
See
Heated Mirrors 052.
Caution
Do not try to clear frost or other
material from the inside of the
front windshield and rear window
with a razor blade or anything
else that is sharp. This may
damage the rear window
defogger grid and affect the
radio's ability to pick up stations
clearly. The repairs would not be
covered by the vehicle warranty.
Heated and Ventilated Seats
LorM:If equipped, pressLorMto heat the driver or passenger seat.
{orC:If equipped, press{orCto ventilate the driver or
passenger seat. See Heated and
Ventilated Seats 013. Remote Start Climate Control
Operation :
If equipped with remote
start, the climate control system
may run when the vehicle is started
remotely. If equipped with heated or
ventilated seats, they may come on
during a remote start. See Remote
Vehicle Start 035 and Heated and
Ventilated Seats 013.
Sensors
The solar sensor, on top of the
instrument panel near the
windshield, monitors the solar heat.
Do not cover the solar sensor or the
system will not work properly.
The climate control system uses the
sensor information to adjust the
temperature, fan speed,
recirculation, and air delivery mode
for best comfort.
Do not cover the sensor; otherwise
the automatic climate control system
may not work properly.
Page 191 of 391
Buick Regal Owner Manual (GMNA-Localizing-U.S./Canada-12163021) -
2019 - CRC - 11/14/18
190 Driving and Operating
Starting and
Operating
New Vehicle Break-In
Caution
The vehicle does not need an
elaborate break-in. But it will
perform better in the long run if
you follow these guidelines:. Do not drive at any one
constant speed, fast or slow,
for the first 805 km (500 mi).
Do not make full-throttle
starts. Avoid downshifting to
brake or slow the vehicle.
. Avoid making hard stops for
the first 322 km (200 mi) or
so. During this time the new
brake linings are not yet
broken in. Hard stops with
new linings can mean
premature wear and earlier
replacement. Follow this
(Continued)
Caution (Continued)
breaking-in guideline every
time you get new brake
linings.
Following break-in, engine speed
and load can be gradually
increased.
Ignition Positions
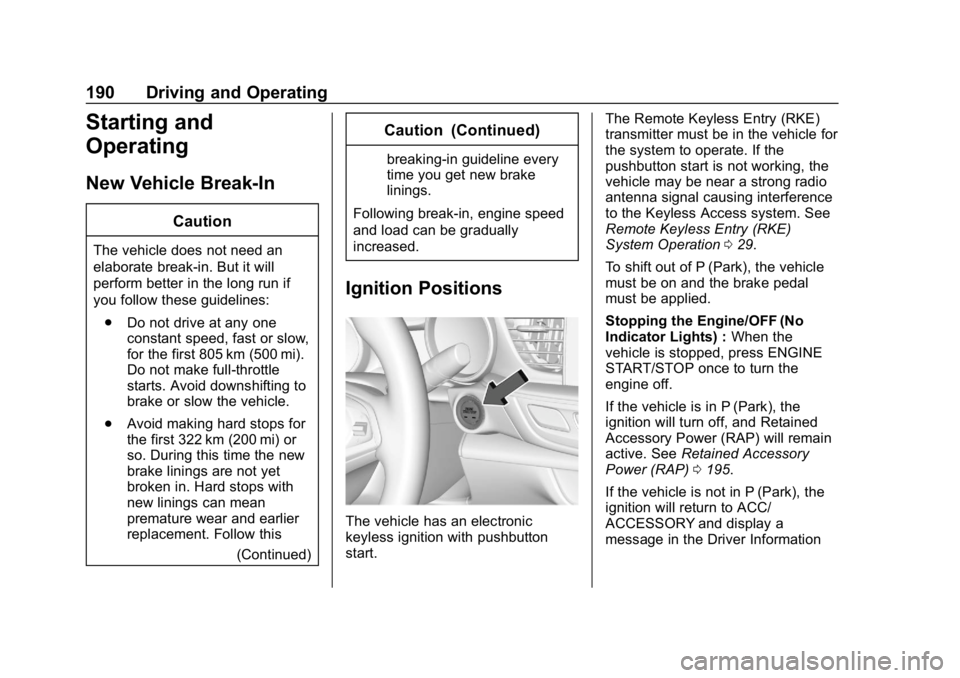
The vehicle has an electronic
keyless ignition with pushbutton
start. The Remote Keyless Entry (RKE)
transmitter must be in the vehicle for
the system to operate. If the
pushbutton start is not working, the
vehicle may be near a strong radio
antenna signal causing interference
to the Keyless Access system. See
Remote Keyless Entry (RKE)
System Operation
029.
To shift out of P (Park), the vehicle
must be on and the brake pedal
must be applied.
Stopping the Engine/OFF (No
Indicator Lights) : When the
vehicle is stopped, press ENGINE
START/STOP once to turn the
engine off.
If the vehicle is in P (Park), the
ignition will turn off, and Retained
Accessory Power (RAP) will remain
active. See Retained Accessory
Power (RAP) 0195.
If the vehicle is not in P (Park), the
ignition will return to ACC/
ACCESSORY and display a
message in the Driver Information
Page 193 of 391
Buick Regal Owner Manual (GMNA-Localizing-U.S./Canada-12163021) -
2019 - CRC - 11/14/18
192 Driving and Operating
will not start in Service Mode. Press
ENGINE START/STOP again to turn
the vehicle off.
Starting the Engine
Place the transmission in the
proper gear.
Caution
If you add electrical parts or
accessories, you could change
the way the engine operates. Any
resulting damage would not be
covered by the vehicle warranty.
SeeAdd-On Electrical Equipment
0 243.
Move the shift lever to P (Park) or
N (Neutral). To restart the vehicle
when it is already moving, use
N (Neutral) only.
Caution
Do not try to shift to P (Park) if the
vehicle is moving. If you do, you
could damage the transmission.
Shift to P (Park) only when the
vehicle is stopped.
Starting Procedure
1. With the Keyless Access system, the RKE transmitter
must be in the vehicle. Press
ENGINE START/STOP with the
brake pedal applied. When the
engine begins cranking, let go
of the button.
The idle speed will go down as
the engine gets warm. Do not
race the engine immediately
after starting it.
If the RKE transmitter is not in
the vehicle, if there is
interference, or if the RKE
battery is low, the Driver
Information Center (DIC) will display a message. See
Remote Keyless Entry (RKE)
System Operation
029.
Caution
Cranking the engine for long
periods of time, by pressing
ENGINE START/STOP
immediately after cranking has
ended, can overheat and damage
the cranking motor, and drain the
battery. Wait at least 15 seconds
between each try, to let the
cranking motor cool down.
2. If the engine does not start after five to 10 seconds,
especially in very cold weather
(below −18 °C or 0 °F), it could
be flooded with too much
gasoline. Try pushing the
accelerator pedal all the way to
the floor and holding it there as
you press ENGINE START/
STOP, for up to a maximum of
15 seconds. Wait at least
15 seconds between each try,
to allow the cranking motor to
Page 248 of 391
Buick Regal Owner Manual (GMNA-Localizing-U.S./Canada-12163021) -
2019 - CRC - 11/14/18
Vehicle Care 247
If equipped with remote vehicle
start, open the hood before
performing any service work to
prevent remote starting the vehicle
accidentally. SeeRemote Vehicle
Start 035.
Keep a record with all parts receipts
and list the mileage and the date of
any service work performed. See
Maintenance Records 0347.
Caution
Even small amounts of
contamination can cause damage
to vehicle systems. Do not allow
contaminants to contact the fluids,
reservoir caps, or dipsticks.
Hood
To open the hood:
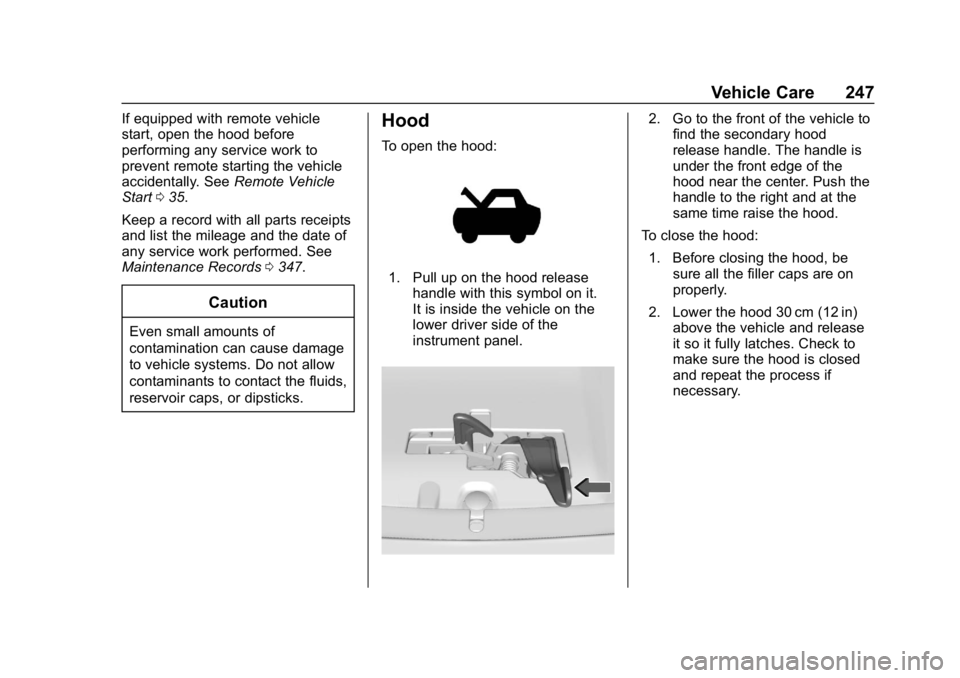
1. Pull up on the hood release
handle with this symbol on it.
It is inside the vehicle on the
lower driver side of the
instrument panel.
2. Go to the front of the vehicle tofind the secondary hood
release handle. The handle is
under the front edge of the
hood near the center. Push the
handle to the right and at the
same time raise the hood.
To close the hood: 1. Before closing the hood, be sure all the filler caps are on
properly.
2. Lower the hood 30 cm (12 in) above the vehicle and release
it so it fully latches. Check to
make sure the hood is closed
and repeat the process if
necessary.