2019 BUICK LACROSSE lock
[x] Cancel search: lockPage 300 of 374

Buick LaCrosse Owner Manual (GMNA-Localizing-U.S./Canada-12032549) -
2019 - crc - 8/20/18
Vehicle Care 299
{Warning
Never use oil or grease on bolts
or nuts because the nuts might
come loose. The vehicle's wheel
could fall off, causing a crash.
15. Reinstall the wheel nuts. Tighten each nut by hand until
the wheel is held against
the hub.
16. Lower the vehicle by turning the jack handle
counterclockwise.
{Warning
Wheel nuts that are improperly or
incorrectly tightened can cause
the wheels to become loose or
come off. The wheel nuts should
be tightened with a torque wrench
to the proper torque specification
after replacing. Follow the torque
specification supplied by the
aftermarket manufacturer when
(Continued)
Warning (Continued)
using accessory locking wheel
nuts. SeeCapacities and
Specifications 0333 for original
equipment wheel nut torque
specifications.
Caution
Improperly tightened wheel nuts
can lead to brake pulsation and
rotor damage. To avoid expensive
brake repairs, evenly tighten the
wheel nuts in the proper
sequence and to the proper
torque specification. See
Capacities and Specifications
0 333 for the wheel nut torque
specification.17. Tighten the wheel nuts firmly in a crisscross sequence, as
shown.
18. Lower the jack all the way and remove the jack from under the
vehicle.
19. Tighten the wheel nuts firmly with the wheel wrench.
When reinstalling the wheel cover or
center cap on the full-size tire,
tighten all five plastic caps hand
snug, then tighten them with the
wheel wrench an additional
one-quarter turn.
Page 301 of 374

Buick LaCrosse Owner Manual (GMNA-Localizing-U.S./Canada-12032549) -
2019 - crc - 8/20/18
300 Vehicle Care
Caution
Wheel covers will not fit on the
vehicle's compact spare. If you try
to put a wheel cover on the
compact spare, the cover or the
spare could be damaged.
Storing a Flat or Spare Tire
and Tools
{Warning
Storing a jack, a tire, or other
equipment in the passenger
compartment of the vehicle could
cause injury. In a sudden stop or
collision, loose equipment could
strike someone. Store all these in
the proper place.
Storing a Flat or Spare Tire and
Tools with a Screw in Fastener 1. Remove the extension bolt from the foam holder.
2. Screw the extension bolt ontothe end of the spare tire stow
bolt by hand.
3. Replace the foam, jack and tools, and the tire in their
original storage location.
4. Remove the insulator pad and place it over the foam holder to
protect the wheel of the flat tire
from the jack.
5. Place the tire facing down over the extension bolt.
6. Turn the retainer nut clockwise to secure the tire. 7. Place the floor cover on the
wheel.
The compact spare is for temporary
use only. Replace the compact
spare tire with a full-size tire as
soon as you can.
Compact Spare Tire
{Warning
Driving with more than one
compact spare tire at a time could
result in loss of braking and
handling. This could lead to a
crash and you or others could be
injured. Use only one compact
spare tire at a time.
If this vehicle has a compact spare
tire, it was fully inflated when new;
however, it can lose air over time.
Check the inflation pressure
regularly. It should be 420 kPa
(60 psi).
Stop as soon as possible and check
that the spare tire is correctly
inflated after being installed on the
Page 306 of 374

Buick LaCrosse Owner Manual (GMNA-Localizing-U.S./Canada-12032549) -
2019 - crc - 8/20/18
Vehicle Care 305
6. Connect the other end of thered positive (+) cable to the
positive (+) terminal of the good
battery.
7. Connect one end of the black negative (–) cable to the
negative (–) terminal of the
good battery.
8. Connect the other end of the black negative (–) cable to the
remote negative (–) ground
terminal for the discharged
battery.
9. Start the engine in the vehicle with the good battery and run
the engine at idle speed for at
least four minutes.
10. Try to start the vehicle that had the dead battery. If it will not
start after a few tries, it
probably needs service.Caution
If the jumper cables are
connected or removed in the
wrong order, electrical shorting
may occur and damage the
vehicle. The repairs would not be
covered by the vehicle warranty.
Always connect and remove the
jumper cables in the correct order,
making sure that the cables do
not touch each other or other
metal.
Jumper Cable Removal
Reverse the sequence exactly when
removing the jumper cables.
After starting the disabled vehicle
and removing the jumper cables,
allow it to idle for several minutes.
Towing the Vehicle
Caution
Incorrectly towing a disabled
vehicle may cause damage. The
damage would not be covered by
the vehicle warranty. Do not lash
or hook to suspension
components. Use the proper
straps around the tires to secure
the vehicle. Do not drag a locked
wheel/tire while loading the
vehicle. Do not use a sling type
lift to tow the vehicle. This could
damage the vehicle.
GM recommends a flatbed tow truck
to transport a disabled vehicle. Use
ramps to help reduce approach
angles, if necessary. A towed
vehicle should have its drive wheels
off the ground. Contact Roadside
Assistance or a professional towing
service if the disabled vehicle must
be towed.
Page 308 of 374

Buick LaCrosse Owner Manual (GMNA-Localizing-U.S./Canada-12032549) -
2019 - crc - 8/20/18
Vehicle Care 307
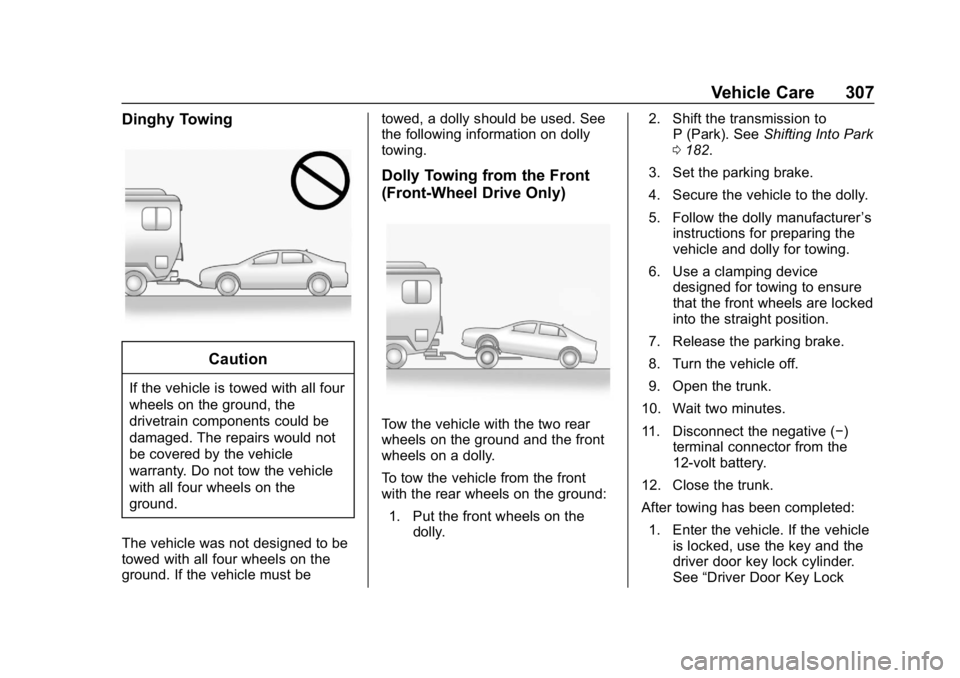
Dinghy Towing
Caution
If the vehicle is towed with all four
wheels on the ground, the
drivetrain components could be
damaged. The repairs would not
be covered by the vehicle
warranty. Do not tow the vehicle
with all four wheels on the
ground.
The vehicle was not designed to be
towed with all four wheels on the
ground. If the vehicle must be towed, a dolly should be used. See
the following information on dolly
towing.
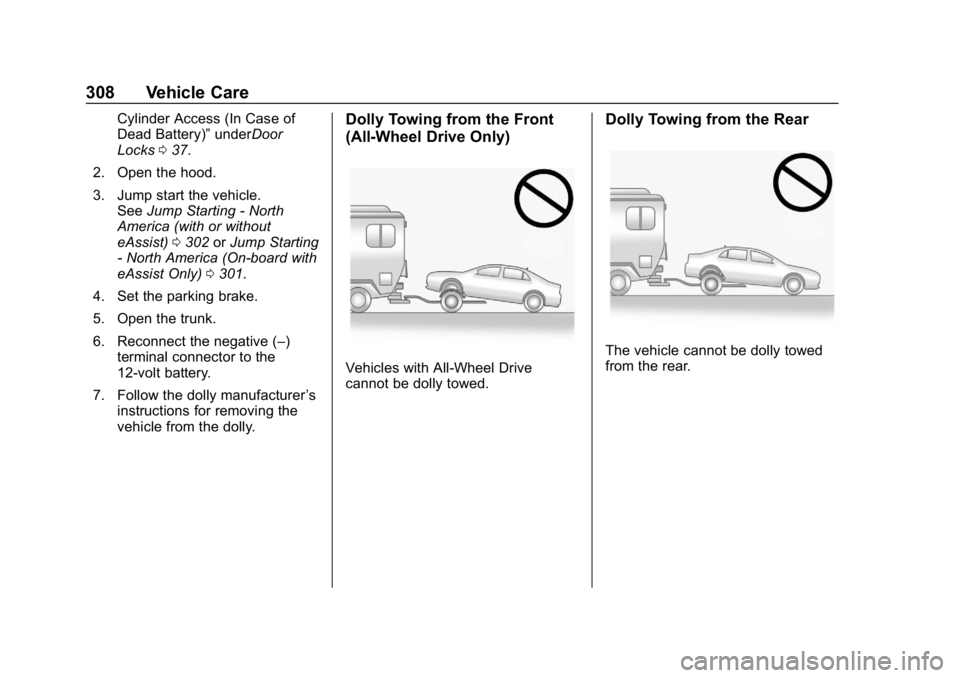
Dolly Towing from the Front
(Front-Wheel Drive Only)
Tow the vehicle with the two rear
wheels on the ground and the front
wheels on a dolly.
To tow the vehicle from the front
with the rear wheels on the ground:
1. Put the front wheels on the dolly. 2. Shift the transmission to
P (Park). See Shifting Into Park
0 182.
3. Set the parking brake.
4. Secure the vehicle to the dolly.
5. Follow the dolly manufacturer ’s
instructions for preparing the
vehicle and dolly for towing.
6. Use a clamping device designed for towing to ensure
that the front wheels are locked
into the straight position.
7. Release the parking brake.
8. Turn the vehicle off.
9. Open the trunk.
10. Wait two minutes.
11. Disconnect the negative (−) terminal connector from the
12-volt battery.
12. Close the trunk.
After towing has been completed:
1. Enter the vehicle. If the vehicle is locked, use the key and the
driver door key lock cylinder.
See “Driver Door Key Lock
Page 309 of 374

Buick LaCrosse Owner Manual (GMNA-Localizing-U.S./Canada-12032549) -
2019 - crc - 8/20/18
308 Vehicle Care
Cylinder Access (In Case of
Dead Battery)”underDoor
Locks 037.
2. Open the hood.
3. Jump start the vehicle. See Jump Starting - North
America (with or without
eAssist) 0302 orJump Starting
- North America (On-board with
eAssist Only) 0301.
4. Set the parking brake.
5. Open the trunk.
6. Reconnect the negative (–) terminal connector to the
12-volt battery.
7. Follow the dolly manufacturer ’s
instructions for removing the
vehicle from the dolly.Dolly Towing from the Front
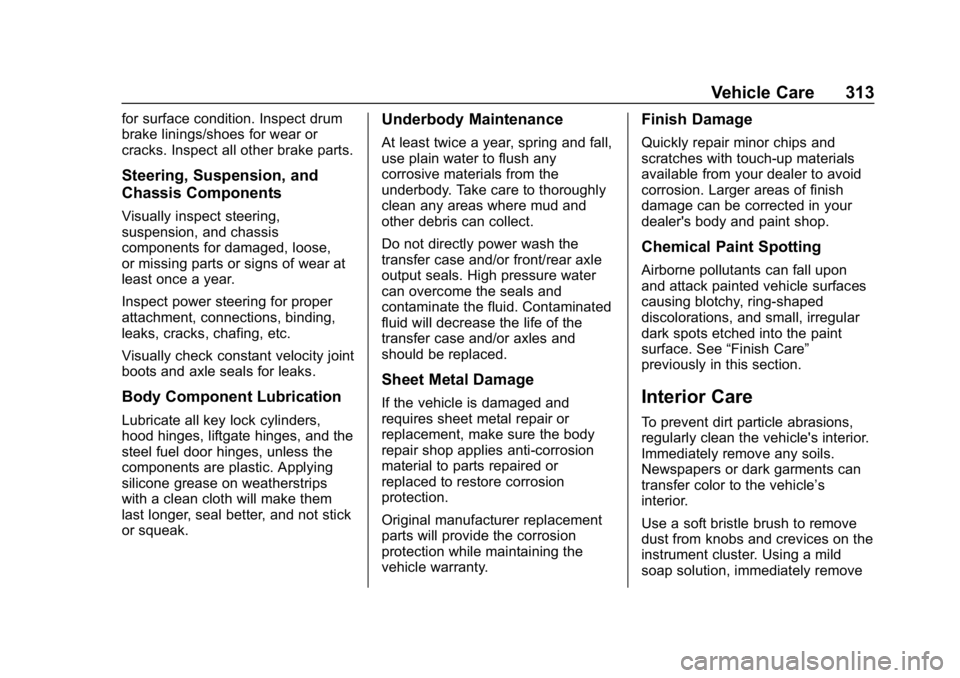
(All-Wheel Drive Only)
Vehicles with All-Wheel Drive
cannot be dolly towed.
Dolly Towing from the Rear
The vehicle cannot be dolly towed
from the rear.
Page 310 of 374

Buick LaCrosse Owner Manual (GMNA-Localizing-U.S./Canada-12032549) -
2019 - crc - 8/20/18
Vehicle Care 309
Appearance Care
Exterior Care
Locks
Locks are lubricated at the factory.
Use a de-icing agent only when
absolutely necessary, and have the
locks greased after using. See
Recommended Fluids and
Lubricants0329.
Washing the Vehicle
To preserve the vehicle's finish,
wash it often and out of direct
sunlight.
Caution
Do not use petroleum-based,
acidic, or abrasive cleaning
agents as they can damage the
vehicle's paint, metal, or plastic
parts. If damage occurs, it would
not be covered by the vehicle
warranty. Approved cleaning
products can be obtained from
(Continued)
Caution (Continued)
your dealer. Follow all
manufacturer directions regarding
correct product usage, necessary
safety precautions, and
appropriate disposal of any
vehicle care product.
Caution
Avoid using high-pressure
washes closer than 30 cm (12 in)
to the surface of the vehicle. Use
of power washers exceeding
8,274 kPa (1,200 psi) can result
in damage or removal of paint
and decals.
Caution
Do not power wash any
component under the hood that
has this
esymbol.
(Continued)
Caution (Continued)
This could cause damage that
would not be covered by the
vehicle warranty.
If using an automatic car wash,
follow the car wash instructions. The
windshield wiper and rear window
wiper, if equipped, must be off.
Remove any accessories that may
be damaged or interfere with the car
wash equipment.
Rinse the vehicle well, before
washing and after, to remove all
cleaning agents completely. If they
are allowed to dry on the surface,
they could stain.
Dry the finish with a soft, clean
chamois or an all-cotton towel to
avoid surface scratches and water
spotting.
Finish Care
Application of aftermarket clearcoat
sealant/wax materials is not
recommended. If painted surfaces
are damaged, see your dealer to
Page 314 of 374

Buick LaCrosse Owner Manual (GMNA-Localizing-U.S./Canada-12032549) -
2019 - crc - 8/20/18
Vehicle Care 313
for surface condition. Inspect drum
brake linings/shoes for wear or
cracks. Inspect all other brake parts.
Steering, Suspension, and
Chassis Components
Visually inspect steering,
suspension, and chassis
components for damaged, loose,
or missing parts or signs of wear at
least once a year.
Inspect power steering for proper
attachment, connections, binding,
leaks, cracks, chafing, etc.
Visually check constant velocity joint
boots and axle seals for leaks.
Body Component Lubrication
Lubricate all key lock cylinders,
hood hinges, liftgate hinges, and the
steel fuel door hinges, unless the
components are plastic. Applying
silicone grease on weatherstrips
with a clean cloth will make them
last longer, seal better, and not stick
or squeak.
Underbody Maintenance
At least twice a year, spring and fall,
use plain water to flush any
corrosive materials from the
underbody. Take care to thoroughly
clean any areas where mud and
other debris can collect.
Do not directly power wash the
transfer case and/or front/rear axle
output seals. High pressure water
can overcome the seals and
contaminate the fluid. Contaminated
fluid will decrease the life of the
transfer case and/or axles and
should be replaced.
Sheet Metal Damage
If the vehicle is damaged and
requires sheet metal repair or
replacement, make sure the body
repair shop applies anti-corrosion
material to parts repaired or
replaced to restore corrosion
protection.
Original manufacturer replacement
parts will provide the corrosion
protection while maintaining the
vehicle warranty.
Finish Damage
Quickly repair minor chips and
scratches with touch-up materials
available from your dealer to avoid
corrosion. Larger areas of finish
damage can be corrected in your
dealer's body and paint shop.
Chemical Paint Spotting
Airborne pollutants can fall upon
and attack painted vehicle surfaces
causing blotchy, ring-shaped
discolorations, and small, irregular
dark spots etched into the paint
surface. See“Finish Care”
previously in this section.
Interior Care
To prevent dirt particle abrasions,
regularly clean the vehicle's interior.
Immediately remove any soils.
Newspapers or dark garments can
transfer color to the vehicle’s
interior.
Use a soft bristle brush to remove
dust from knobs and crevices on the
instrument cluster. Using a mild
soap solution, immediately remove
Page 318 of 374

Buick LaCrosse Owner Manual (GMNA-Localizing-U.S./Canada-12032549) -
2019 - crc - 8/20/18
Vehicle Care 317
Floor Mats
{Warning
If a floor mat is the wrong size or
is not properly installed, it can
interfere with the pedals.
Interference with the pedals can
cause unintended acceleration
and/or increased stopping
distance which can cause a crash
and injury. Make sure the floor
mat does not interfere with the
pedals.
Use the following guidelines for
proper floor mat usage:
. The original equipment floor
mats were designed for your
vehicle. If the floor mats need
replacing, it is recommended
that GM certified floor mats be
purchased. Non-GM floor mats
may not fit properly and may
interfere with the accelerator or
brake pedal. Always check that
the floor mats do not interfere
with the pedals. .
Do not use a floor mat if the
vehicle is not equipped with a
floor mat retainer on the driver
side floor.
. Use the floor mat with the
correct side up. Do not turn
it over.
. Do not place anything on top of
the driver side floor mat.
. Use only a single floor mat on
the driver side.
. Do not place one floor mat on
top of another.
Removing and Replacing the
Floor Mats
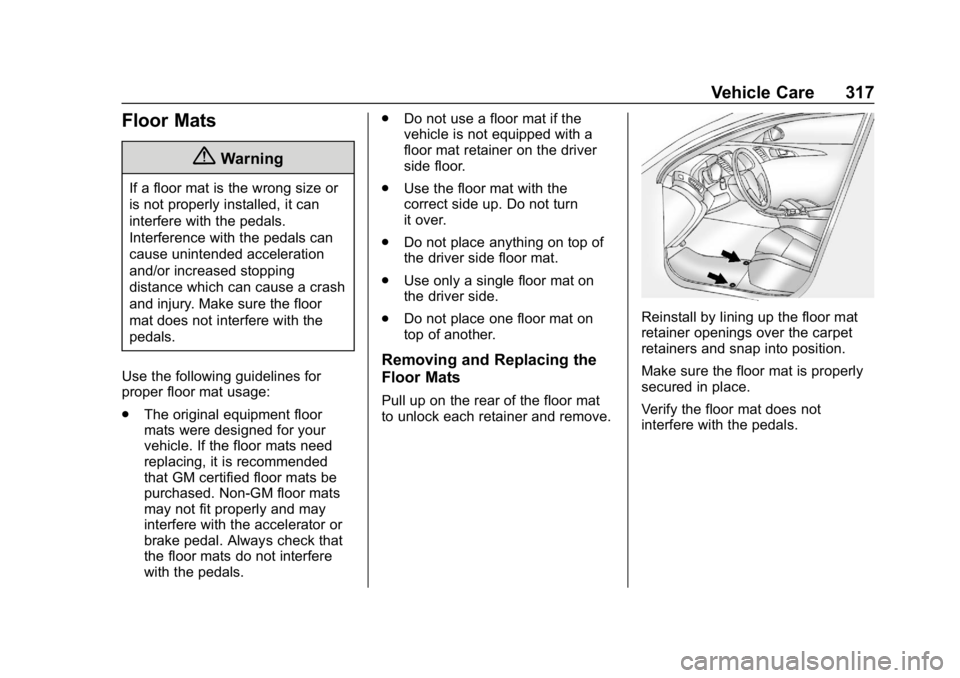
Pull up on the rear of the floor mat
to unlock each retainer and remove.
Reinstall by lining up the floor mat
retainer openings over the carpet
retainers and snap into position.
Make sure the floor mat is properly
secured in place.
Verify the floor mat does not
interfere with the pedals.