Page 2 of 20
2
Power Liftgate Control
Power Mirror/ Window Controls
INSTRUMENT PANEL
Driver Information Center Controls/ Audio Steering Wheel Controls
Engine Start/Stop Button
Cruise Control/Forward Collision AlertF/Heated Steering WheelF/Voice Recognition Buttons
Tilt/Telescoping Steering Wheel Lever
Head-Up Display ControlsF
Symbols
Check Engine
Engine Oil Pressure
Lane Keep Assist
Airbag Readiness
Cruise Control Set
Service Electric Parking Brake
Traction Control Off
Traction Control/StabiliTrak Active
Charging System
Security
Engine Coolant Temperature
Brake System Warning
P ARK Electric Parking Brake
Low Fuel Warning
Power Door Lock ButtonsTurn Signal Lever
Driver Information Center
Hazard Warning Flashers ButtonWindshield Wipers Lever
Memory Seat ButtonsF
Exterior/ Interior Lamp Controls
Page 6 of 20

6
FRONT SEATS
Memory SeatsF
Set Memory Seat Positions
With the ignition On or in Accessory mode:
1. Adjust the seat and power outside mirrors to the desired positions.
2. Press and release the SET button on the driver’s door. A beep will sound.
3. Immediately press and hold button 1 until two beeps sound.
Repeat these steps using button 2 for a second driver.
To store a seat position for more clearance when exiting the vehicle, repeat these steps using the Exit button instead of button 1 or 2.
Recall Memory Seat Positions
Press and hold button 1, 2 or Exit until the seat and mirrors reach the set position.
The memory/exit positions can be programmed to be recalled automatically.
To set the Auto Memory Recall or Easy Exit options, go to Settings > Vehicle > Comfort and Convenience.
See Seats and Restraints in your Owner’s Manual.
Power Seat Adjustments
A. Seat Adjustment
Move the horizontal control to move the seat forward or rearward and to tilt, raise or lower the seat.
B. Seatback Recline Adjustment
Move the vertical control to recline or raise the seatback.
C. Lumbar Support Adjustment
Press the rear control to adjust the amount of lumbar support.
STEERING WHEEL ADJUSTMENT
With the vehicle parked, push down the lever under the steering column to adjust the steering wheel. The steering wheel can then be moved up or down and in or out. Pull up the lever to lock the steering wheel in place.
See Instruments and Controls in your Owner’s Manual.
AC
B
F Optional equipment
Page 14 of 20

14F Optional equipment
AUTOMATIC CLIMATE CONTROLS
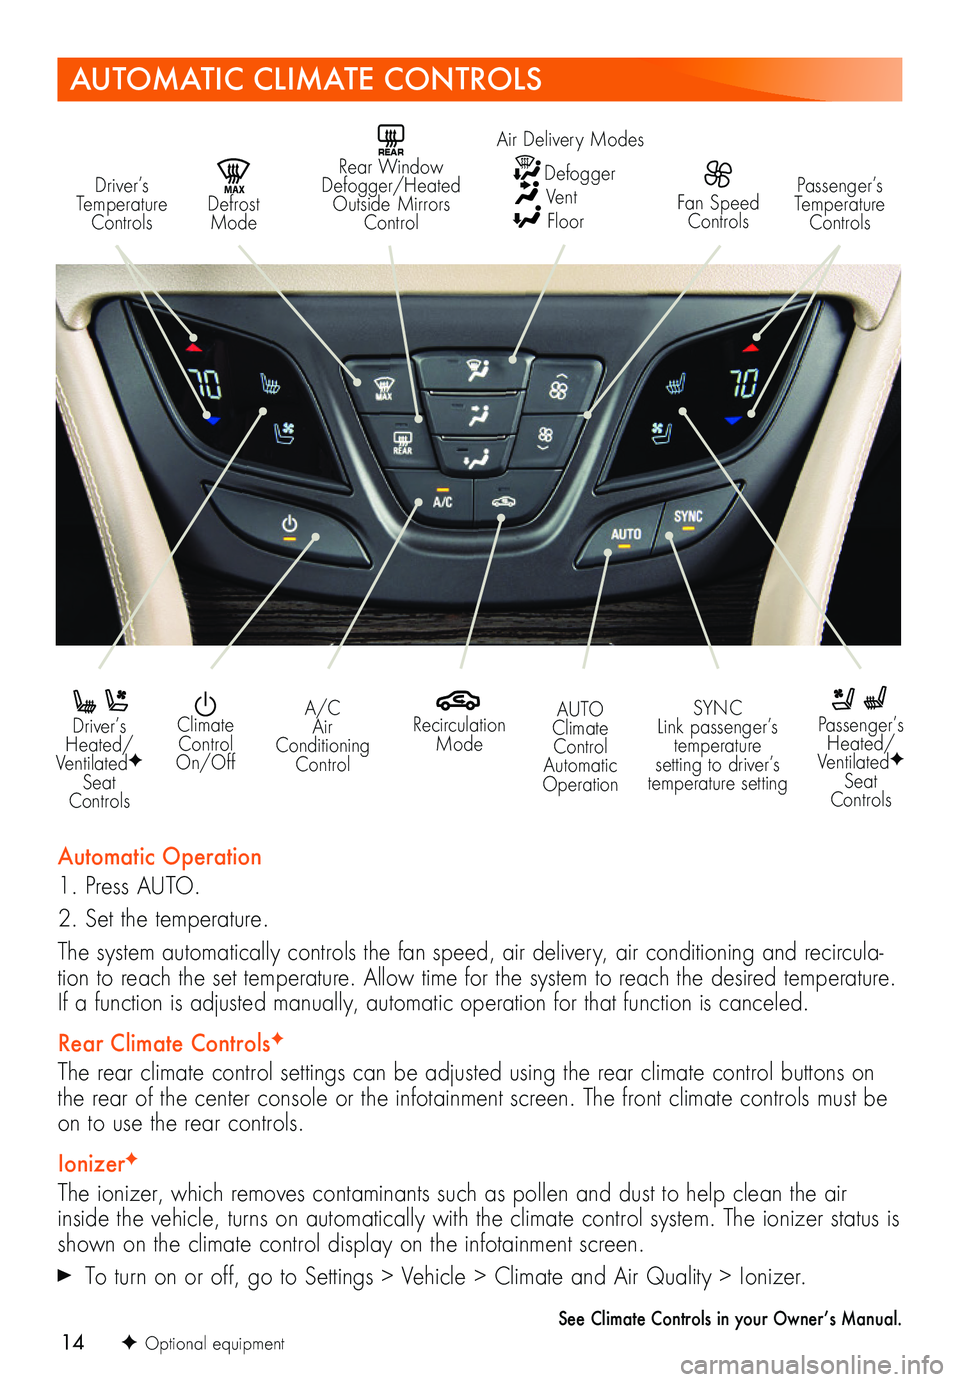
Driver’s Temperature Controls
REAR Rear Window Defogger/Heated Outside Mirrors Control
MAX Defrost Mode
Passenger’s Temperature Controls
Driver’s Heated/VentilatedF Seat Controls
Passenger’s Heated/VentilatedF Seat Controls
Recirculation Mode
Climate Control On/Off
A/C Air Conditioning Control
SYNC Link passenger’s temperature setting to driver’s temperature setting
AUTO Climate Control Automatic Operation
Automatic Operation
1. Press AUTO.
2. Set the temperature.
The system automatically controls the fan speed, air delivery, air conditioning and recircula-tion to reach the set temperature. Allow time for the system to reach the desired temperature. If a function is adjusted manually, automatic operation for that function is canceled.
Rear Climate ControlsF
The rear climate control settings can be adjusted using the rear climate control buttons on the rear of the center console or the infotainment screen. The front climate controls must be on to use the rear controls.
IonizerF
The ionizer, which removes contaminants such as pollen and dust to help clean the air inside the vehicle, turns on automatically with the climate control system. The ionizer status is shown on the climate control display on the infotainment screen.
To turn on or off, go to Settings > Vehicle > Climate and Air Quality > Ionizer.
See Climate Controls in your Owner’s Manual.
Fan Speed Controls
Air Delivery Modes
Defogger Vent Floor
Page 18 of 20

18
DRIVER ASSISTANCE SYSTEMS
Safety or Driver Assistance features are not a substitute for the driver’s responsibility to operate the vehicle in a safe manner. Refer to your Owner’s Manual for important feature limitations and information.
Safety Alert SeatF
The driver’s seat pulses — left side, right side or simultaneously — to alert the driver of the direction of potential hazards.
Audible alerts or seat pulsing alerts may be selected. To change the alert settings, go to Settings > Vehicle > Collision/Detection Systems > Alert Type.
Lane Change Alert with Side Blind Zone AlertF
While driving, the system displays a warning symbol on the left or right side mirror when a vehicle is detected in that side blind zone area or rapidly approaching that area. The warning symbol flashes if a turn signal is activated when a vehicle has been detected on the same side.
To turn the system on or off, go to Settings > Vehicle > Collision/Detection Systems > Lane Change Alert.
Lane Keep Assist with Lane Departure WarningF
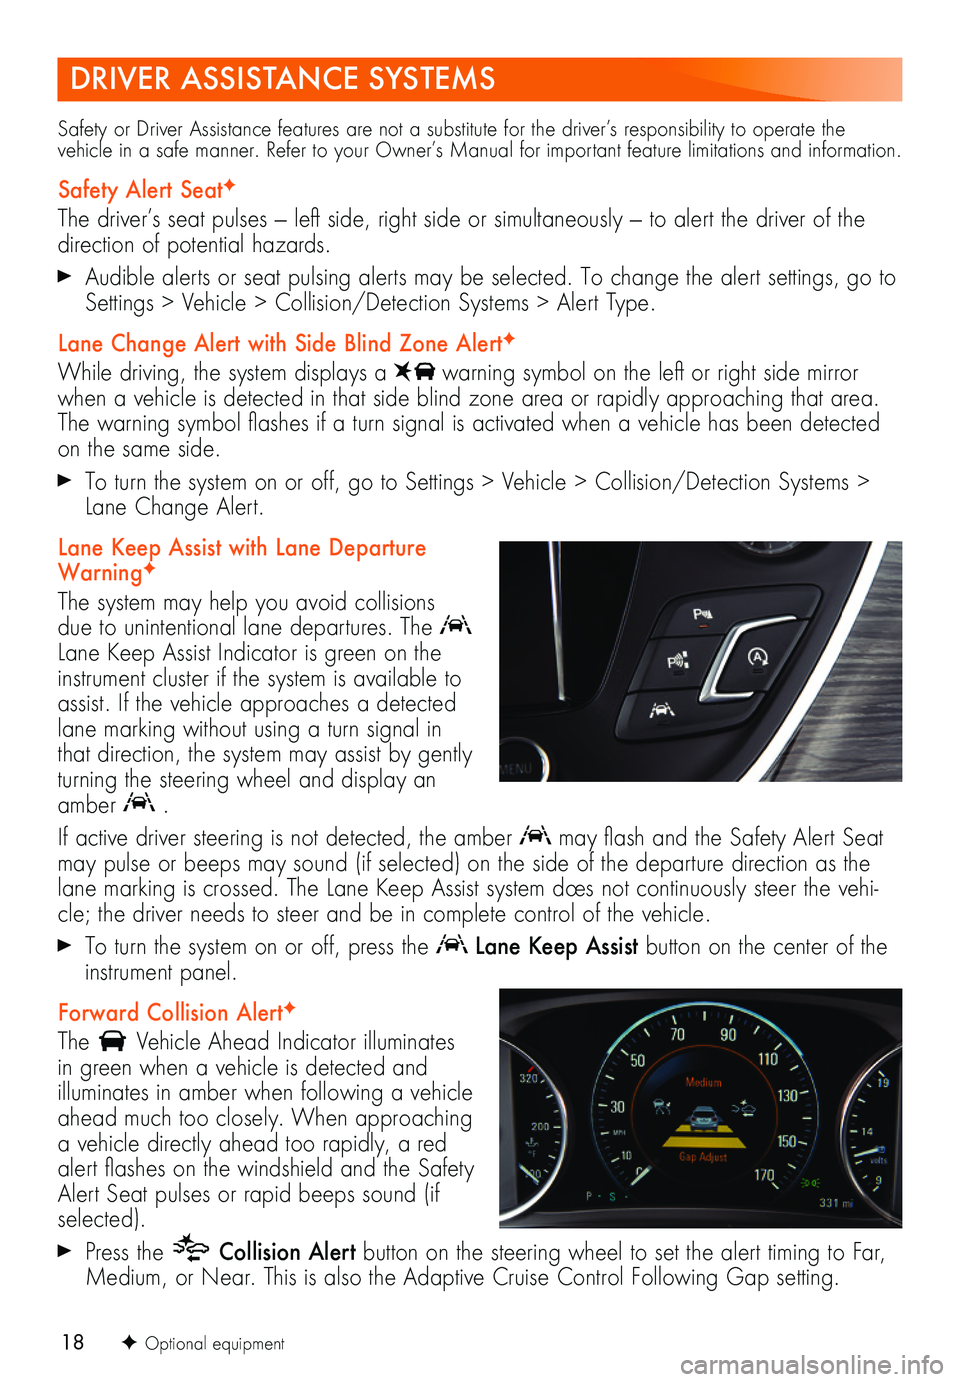
The system may help you avoid collisions due to unintentional lane departures. The Lane Keep Assist Indicator is green on the instrument cluster if the system is available to assist. If the vehicle approaches a detected lane marking without using a turn signal in that direction, the system may assist by gently turning the steering wheel and display an amber .
If active driver steering is not detected, the amber may flash and the Safety Alert Seat may pulse or beeps may sound (if selected) on the side of the departure direction as the lane marking is crossed. The Lane Keep Assist system does not continuously steer the vehi-cle; the driver needs to steer and be in complete control of the vehicle.
To turn the system on or off, press the Lane Keep Assist button on the center of the instrument panel.
Forward Collision AlertF
The Vehicle Ahead Indicator illuminates in green when a vehicle is detected and illuminates in amber when following a vehicle ahead much too closely. When approaching a vehicle directly ahead too rapidly, a red alert flashes on the windshield and the Safety Alert Seat pulses or rapid beeps sound (if selected).
Press the Collision Alert button on the steering wheel to set the alert timing to Far, Medium, or Near. This is also the Adaptive Cruise Control Following Gap setting.
F Optional equipment