2019.75 VAUXHALL GRANDLAND X ABS
[x] Cancel search: ABSPage 80 of 271

78Instruments and controlsInstruments and
controlsControls ....................................... 79
Steering wheel adjustment ........79
Steering wheel controls .............79
Heated steering wheel ...............79
Horn ........................................... 80
Windscreen wiper and washer ..80
Rear window wiper and washer ...................................... 82
Outside temperature ..................82
Clock ......................................... 83
Power outlets ............................. 84
Inductive charging .....................86
Cigarette lighter ......................... 86
Ashtrays .................................... 87
Warning lights, gauges and indi‐ cators ........................................... 87
Instrument cluster ......................87
Speedometer ............................. 88
Odometer .................................. 88
Trip odometer ............................ 88
Tachometer ............................... 89
Fuel gauge ................................ 89
Engine coolant temperature gauge ....................................... 89Engine oil level monitor.............90
Service display .......................... 90
Control indicators ......................91
Turn lights .................................. 91
Seat belt reminder .....................91
Airbag and belt tensioners .........92
Airbag deactivation ....................92
Charging system .......................92
Malfunction indicator light ..........92
Service vehicle soon .................93
Stop engine ............................... 93
System check ............................ 93
Brake and clutch system ...........93
Electric parking brake ................93
Electric parking brake fault ........94
Antilock brake system (ABS) .....94
Gear shifting .............................. 94
Lane departure warning ............94
Lane keep assist .......................94
Electronic Stability Control and Traction Control system ...........95
Engine coolant temperature ......95
Preheating ................................. 95
Exhaust filter .............................. 95
AdBlue ....................................... 95
Deflation detection system ........96
Engine oil pressure ....................96
Low fuel ..................................... 96
Autostop .................................... 96
Exterior light .............................. 96Low beam.................................. 97
High beam ................................. 97
High beam assist .......................97
LED headlights .......................... 97
Front fog lights ........................... 97
Rear fog light ............................. 97
Rain sensor ............................... 97
Cruise control ............................ 97
Adaptive cruise control ..............97
Vehicle detected ahead .............97
Side blind spot alert ...................97
Active emergency braking .........98
Speed limiter ............................. 98
Door open .................................. 98
Displays ....................................... 98
Driver Information Centre ..........98
Info Display .............................. 100
Vehicle messages ......................102
Warning chimes .......................102
Vehicle personalisation ..............103
Telematics services ...................106
Vauxhall Connect ....................106
Page 86 of 271

84Instruments and controls
Select Setting the time-date .
To change the time and date formats, select the respective tabs and then
select the desired formats.
By default the displayed time and
date are automatically adjusted by
the system.
To manually adjust the displayed time
and date:
Select the Time tab.
Set Synchronization with GPS (UTC)
to Off and then select the Time field
to set the desired time.
Select the Date tab and then select
the Date: field to set the desired date.
Power outlets
A 12 V power outlet is located behind
the storage cover. Press cover to
open.
A 12 V power outlets is also located
in the rear console.
At the left sidewall in the load
compartment, another 12 V power
outlet is located.
Do not exceed the maximum power
consumption of 120 W.
Page 89 of 271

Instruments and controls87Press in cigarette lighter. It switches
off automatically once the element is
glowing. Pull out cigarette lighter.
AshtraysCaution
To be used only for ash and not for combustible rubbish.
A portable ashtray can be placed in
the cupholders.
Warning lights, gauges
and indicators
Instrument cluster
The following instrument cluster is
available:
Overview
OTurn lights 3 91XSeat belt reminder 3 91vAirbag and belt tensioners
3 92VAirbag deactivation 3 92pCharging system 3 92ZMalfunction indicator light
3 92CService vehicle soon 3 93STOPStop engine 3 93JSystem check 3 93RBrake and clutch system
3 93m ,
oElectric parking brake
3 93EElectric parking brake fault
3 94uAntilock brake system (ABS)
3 94RGear shifting 3 94)Lane departure warning
3 94LLane keep assist 3 94bElectronic Stability Control
and Traction Control system
3 95
Page 96 of 271

94Instruments and controls9Warning
Have the cause of the fault
remedied immediately by a
workshop.
o illuminates yellow.
Illuminates Automatic operation is deactivated or
faulty. Activate automatic operation
again or have the cause remedied by
a workshop in the event of a fault.
Automatic operation 3 146.
Electric parking brake fault
E illuminates yellow.
Illuminates
Electric parking brake has a fault
3 146.
9 Warning
Have the cause of the fault
remedied immediately by a
workshop.
Antilock brake system
(ABS)
u illuminates yellow.
Illuminates for a few seconds after the ignition is switched on. The system is
ready for operation when the control
indicator extinguishes.
If the control indicator does not
extinguish after a few seconds, or if it illuminates while driving, there is a
fault in the ABS. The brake system
remains operational but without ABS
regulation.
Antilock brake system 3 145.
Gear shifting R with the number of a higher gear is
indicated, when upshifting is
recommended for fuel saving
reasons.
Lane departure warning ) illuminates green or flashes yellow.Illuminates green
System is switched on and ready to
operate.
Flashes yellow System recognises an unintended
lane change.
Lane departure warning 3 183.
Lane keep assist a illuminates green or yellow, or
flashes yellow.
Illuminates green
The system is switched on and ready
to operate.
Illuminates yellow
The system approaches a detected
lane marking without using the turn
light in that direction.
Flashes yellow
The system recognizes that the lane
is departed significantly.
Lane keep assist 3 184.
Page 147 of 271

Driving and operating145Manual transmission
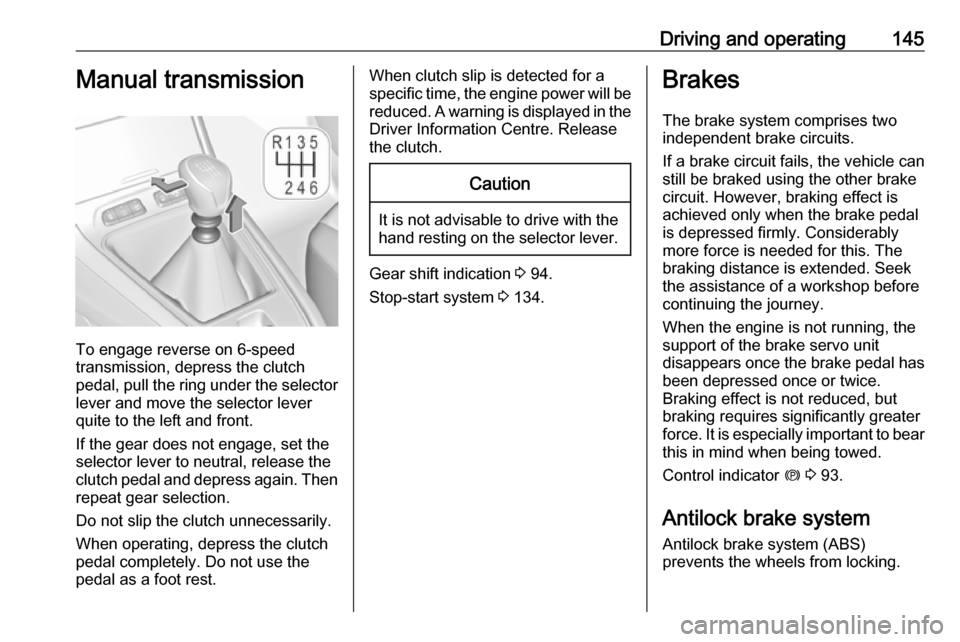
To engage reverse on 6-speed
transmission, depress the clutch
pedal, pull the ring under the selector
lever and move the selector lever
quite to the left and front.
If the gear does not engage, set the
selector lever to neutral, release the
clutch pedal and depress again. Then
repeat gear selection.
Do not slip the clutch unnecessarily.
When operating, depress the clutch
pedal completely. Do not use the
pedal as a foot rest.
When clutch slip is detected for a specific time, the engine power will be reduced. A warning is displayed in the
Driver Information Centre. Release
the clutch.Caution
It is not advisable to drive with the hand resting on the selector lever.
Gear shift indication 3 94.
Stop-start system 3 134.
Brakes
The brake system comprises two
independent brake circuits.
If a brake circuit fails, the vehicle can
still be braked using the other brake
circuit. However, braking effect is
achieved only when the brake pedal
is depressed firmly. Considerably
more force is needed for this. The
braking distance is extended. Seek
the assistance of a workshop before
continuing the journey.
When the engine is not running, the
support of the brake servo unit
disappears once the brake pedal has been depressed once or twice.
Braking effect is not reduced, but
braking requires significantly greater
force. It is especially important to bear this in mind when being towed.
Control indicator m 3 93.
Antilock brake system
Antilock brake system (ABS)
prevents the wheels from locking.
Page 148 of 271

146Driving and operatingABS starts to regulate brake pressureas soon as a wheel shows a tendency to lock. The vehicle remains
steerable, even during hard braking.
ABS control is made apparent
through a pulse in the brake pedal
and the noise of the regulation
process.
For optimum braking, keep the brake
pedal fully depressed throughout the
braking process, despite the fact that
the pedal is pulsating. Do not reduce
the pressure on the pedal.
When braking in an emergency, the
hazard warning flashers are switched
on automatically depending on the
force of deceleration. They are
switched off automatically the first
time you accelerate.
After starting off, the system performs a self-test which may be audible.
Control indicator u 3 94.
Fault9 Warning
If there is a fault in the ABS, the
wheels may be liable to lock due
to braking that is heavier than
normal. The advantages of ABS are no longer available. During
hard braking, the vehicle can no longer be steered and may
swerve.
Have the cause of the fault remedied
by a workshop.
Parking brake
9 Warning
Before leaving the vehicle, check
parking brake status. Control
indicator m must illuminate
constantly.
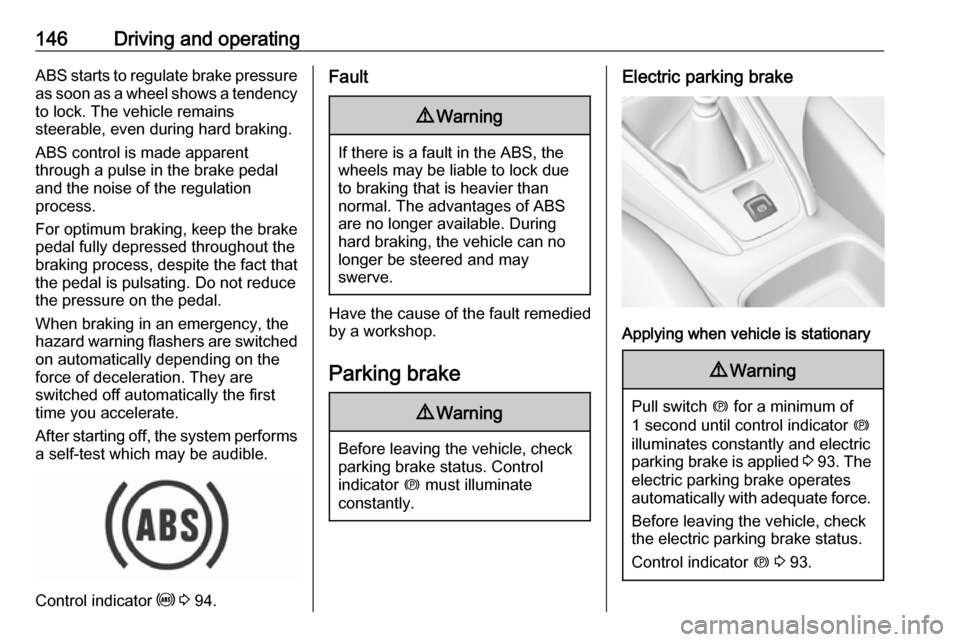
Electric parking brake
Applying when vehicle is stationary
9 Warning
Pull switch m for a minimum of
1 second until control indicator m
illuminates constantly and electric
parking brake is applied 3 93 . The
electric parking brake operates automatically with adequate force.
Before leaving the vehicle, check
the electric parking brake status.
Control indicator m 3 93.
Page 220 of 271

218Vehicle careinformation label and tyre pressure
chart are valid for cold tyres, which means at 20 °C.
The pressure increases by nearly
1.5 psi for a 10 °C temperature
increase. This must be considered
when warm tyres are checked.
Tyre deflation detectionsystem
The tyre deflation detection system
continually checks the rotation speed
of all four wheels and warns on low
tyre pressure condition once vehicle
is driving. This is achieved by
comparing tyre rolling circumference
with reference values and further
signals.
If a tyre loses pressure the control
indicator w illuminates and a warning
message is displayed in the Driver
Information Centre.
In this case reduce speed, avoid
sharp cornering and strong braking.
Stop at next safe opportunity and
check tyre pressure.
Control indicator w 3 96.After adjusting tyre pressure initialise
system to extinguish the control
indicator and restart system.Caution
Deflation detection system warns
just about low tyre pressure
condition and does not replace
regular tyre maintenance by the
driver.
In case of a system malfunction a
message is displayed in the Driver
Information Centre. Set correct tyre
pressure and reinitialise system. If the
failure continues to be displayed,
contact a workshop. The system is
inoperable when ABS or ESC has a
malfunction or a temporary spare
wheel is used. Once the road tyre has
been refitted, check the tyre pressure with cold tyres and initialise the
system.
System initialisation
After tyre pressure correction or
wheel change, the system must be
initialised to learn new circumference reference values:
1. Always ensure that all four tyres have correct tyre pressure3 252.
2. Apply parking brake. 3. Press w to reset deflation
detection system.
4. Reset is confirmed by pop-up indication.
Page 234 of 271

232Vehicle careAppearance careExterior care
Locks The locks are lubricated at the factoryusing a high quality lock cylinder
grease. Use a de-icing agent only
when absolutely necessary, as this
has a degreasing effect and impairs
lock function. After using a de-icing
agent, have the locks regreased by a
workshop.
WashingThe paintwork of your vehicle is
exposed to environmental influences.
Wash and wax your vehicle regularly.
When using automatic vehicle
washes, select a programme that
includes waxing.
Bird droppings, dead insects, resin,
pollen and the like should be cleaned
off immediately, as they contain
aggressive constituents which can
cause paint damage.If using a vehicle wash, comply with
the vehicle wash manufacturer's instructions. The windscreen wiperand rear window wiper must be
switched off. Remove antenna and
external accessories such as roof
racks etc.
If you wash your vehicle by hand,
make sure that the insides of the
wheel housings are also thoroughly
rinsed out.
Wax painted parts of the vehicle
regularly.
Clean edges and folds on opened
doors and the bonnet as well as the
areas they cover.
Clean bright metal mouldings with a
cleaning solution approved for
aluminium to avoid damages.Caution
Always use a cleaning agent with
a pH value of 4 to 9.
Do not use cleaning agents on hot surfaces.
Do not clean the engine compartmentwith a steam-jet or high-pressure jet
cleaner.
Thoroughly rinse and leather-off the vehicle. Rinse leather frequently. Use
separate leathers for painted and
glass surfaces: remnants of wax on
the windows will impair vision.
Have the door hinges of all doors
greased by a workshop.
Exterior lights
Headlight and other light covers are
made of plastic. Do not use any
abrasive or caustic agents, do not use an ice scraper, and do not clean them
dry.
Polishing and waxing
Wax the vehicle regularly at the latest
when water no longer beads.
Otherwise, the paintwork will dry out.
Polishing is necessary only if the paint
has become dull or if solid deposits
have become attached to it.
Paintwork polish with silicone forms a
protective film, making waxing
unnecessary.