2019.75 VAUXHALL CROSSLAND X clock
[x] Cancel search: clockPage 30 of 247

28Keys, doors and windows
To lock the other doors, first remove
the black cover by inserting a key and turning clockwise.
Insert key into the recess and move
latch sideways.
Remove key and attach the black cover.
The fuel filler flap and tailgate are
possibly not locked.
Automatic locking Automatic locking after driving off This system allows automatic locking
as soon as the speed of the vehicle
exceeds 6 mph.
If the vehicle is not closed properly,
the automatic locking does not take
place. This is signalled by the sound
of the locks rebounding,
accompanied by illumination of h in
the instrument panel, an audible signal and the display of an alert
message.
Activation or deactivation
With the ignition on, press Q until an
audible signal starts and a
corresponding message is displayed.
The state of the system stays in
memory when switching off the
ignition.
Automatic relock after unlocking
This feature automatically relocks the
vehicle a short time after unlocking
with the remote control or electronic
key, provided vehicle has not been
opened.
Child locks9 Warning
Use the child locks whenever
children are occupying the rear
seats.
Mechanical child locks
Page 71 of 247

Instruments and controls69Instruments and
controlsControls ....................................... 70
Steering wheel adjustment ........70
Steering wheel controls .............70
Heated steering wheel ...............70
Horn ........................................... 71
Windscreen wiper and washer ..71
Rear window wiper and washer ...................................... 73
Outside temperature ..................73
Clock ......................................... 74
Power outlets ............................. 74
Inductive charging .....................75
Cigarette lighter ......................... 76
Ashtrays .................................... 76
Warning lights, gauges and indi‐ cators ........................................... 76
Instrument cluster ......................76
Speedometer ............................. 77
Odometer .................................. 78
Trip odometer ............................ 78
Tachometer ............................... 78
Fuel gauge ................................ 79
Engine coolant temperature gauge ....................................... 79Engine oil level monitor.............79
Service display .......................... 80
Control indicators ......................81
Turn lights .................................. 81
Seat belt reminder .....................81
Airbag and belt tensioners .........82
Airbag deactivation ....................82
Charging system .......................82
Malfunction indicator light ..........82
Service vehicle soon .................83
Stop engine ............................... 83
System check ............................ 83
Brake and clutch system ...........83
Parking brake ............................ 83
Antilock brake system (ABS) .....83
Gear shifting .............................. 84
Lane departure warning ............84
Electronic Stability Control and Traction Control system ...........84
Electronic Stability Control and Traction Control system off ......84
Engine coolant temperature ......84
Preheating ................................. 85
Exhaust filter .............................. 85
AdBlue ....................................... 85
Deflation detection system ........85
Engine oil pressure ....................85
Low fuel ..................................... 86
Autostop .................................... 86
Exterior light .............................. 86Low beam.................................. 86
High beam ................................. 86
High beam assist .......................86
Front fog lights ........................... 86
Rear fog light ............................. 86
Rain sensor ............................... 86
Cruise control ............................ 87
Side blind spot alert ...................87
Active emergency braking .........87
Speed limiter ............................. 87
Door open .................................. 87
Displays ....................................... 87
Driver Information Centre ..........87
Info Display ................................ 90
Head-up display ........................92
Vehicle messages ........................93
Warning chimes .........................94
Vehicle personalisation ................94
Telematics services .....................97
Vauxhall Connect ......................97
Page 76 of 247

74Instruments and controlsClockDate and time are shown in the
Info Display 3 90.
Setting date and time, see
Infotainment manual.
Power outlets
A 12 V power outlet is located in the
centre console.
Another power outlet is located in the
console between the front seats.
Do not exceed the maximum power
consumption of 120 W.
With ignition off, the power outlet is deactivated. Additionally, the poweroutlet is deactivated in the event of
low vehicle battery voltage.
Electrical accessories that are
connected must comply with the
electromagnetic compatibility
requirements laid down in
DIN VDE 40 839.
Do not connect any current-delivering
accessories, e.g. electrical charging
devices or batteries.
Do not damage the outlets by using
unsuitable plugs.
Stop-start system 3 125.
USB charging port
One or two USB ports are prepared
for charging devices.
When two USB ports are available,
the upper USB port can be used to
connect a phone for phone projection.
Notice
The sockets must always be kept
clean and dry.
USB port and phone projection see
Infotainment manual.
Page 118 of 247

116Climate controlDemisting and defrosting the
windows à
● Press à. The LED in the button
illuminates to indicate activation.
● Temperature and air distribution are set automatically and the fan
runs at high speed.
● Switch on cooling by pressing A/C , if required.
● Switch on heated rear window b.
● Switch on heated windscreen ,.
● To return to previous mode press
à again, to return to automatic
mode press AUTO.
Notice
If à is pressed while the engine is
running, an Autostop will be inhibited until à is pressed again.
If à is pressed while the engine is in
an Autostop, the engine will restart
automatically.
Stop-start system 3 125.
Deactivation of electronic climate control system
Cooling, fan and automatic mode can
be switched off by turning control dial
Z anticlockwise.
Activation by switching on the fan or
pressing AUTO.
Heated rear window b 3 37.
Heated exterior mirrors b 3 34.
Heated windscreen , 3 38.
Heated seats ß 3 44.Auxiliary heater
Air heater
Quickheat is an electric auxiliary air
heater which automatically warms up
the passenger compartment more
quickly.
Page 133 of 247

Driving and operating1311. Continuously drive the vehiclefor 10 min making sure that
vehicle speed is always higher
than 12 mph.
2. If AdBlue refill is detected successfully, AdBlue supply-
driven warnings or limitations will disappear.
If AdBlue refill is still not detected, seek the assistance of a workshop.
If AdBlue must be refilled at
temperatures below -11 °C, the
refilling of AdBlue may not be
detected by the system. In this
event, park the vehicle in a space
with a higher ambient temperature
until AdBlue is liquified.
Notice
When unscrewing the protective cap from the filler neck, ammonia fumes
may emerge. Do not inhale as the
fumes have a pungent smell. The
fumes are not harmful by inhalation.
It is recommended to fill the AdBlue
tank completely.
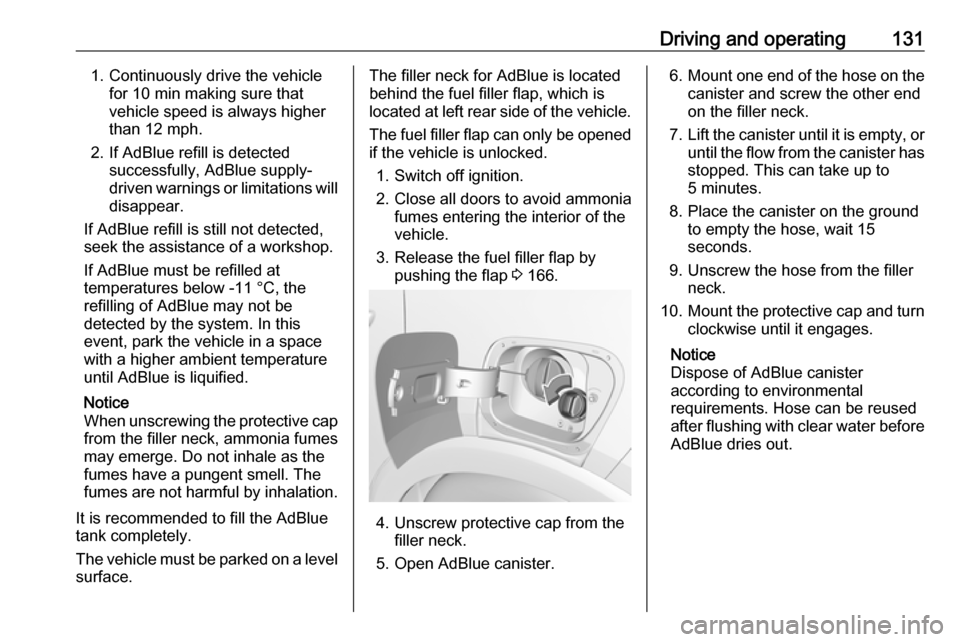
The vehicle must be parked on a level surface.The filler neck for AdBlue is locatedbehind the fuel filler flap, which is
located at left rear side of the vehicle.
The fuel filler flap can only be opened
if the vehicle is unlocked.
1. Switch off ignition.
2. Close all doors to avoid ammonia fumes entering the interior of the
vehicle.
3. Release the fuel filler flap by pushing the flap 3 166.
4. Unscrew protective cap from the
filler neck.
5. Open AdBlue canister.
6. Mount one end of the hose on the
canister and screw the other end
on the filler neck.
7. Lift the canister until it is empty, or
until the flow from the canister has stopped. This can take up to
5 minutes.
8. Place the canister on the ground to empty the hose, wait 15
seconds.
9. Unscrew the hose from the filler neck.
10. Mount the protective cap and turn
clockwise until it engages.
Notice
Dispose of AdBlue canister
according to environmental
requirements. Hose can be reused
after flushing with clear water before
AdBlue dries out.
Page 168 of 247

166Driving and operatingRefuelling9Danger
Before refuelling, switch off
ignition and any external heaters
with combustion chambers.
Follow the operating and safety
instructions of the filling station
when refuelling.
9 Danger
Fuel is flammable and explosive.
No smoking. No naked flames or
sparks.
If you can smell fuel in your
vehicle, have the cause of this
remedied immediately by a
workshop.
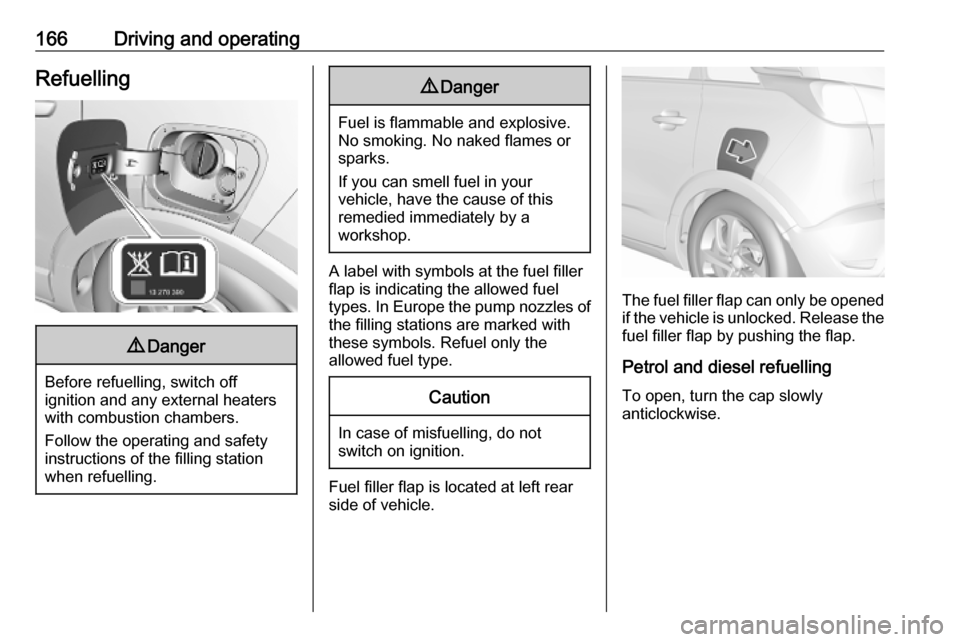
A label with symbols at the fuel filler
flap is indicating the allowed fuel
types. In Europe the pump nozzles of the filling stations are marked with
these symbols. Refuel only the
allowed fuel type.
Caution
In case of misfuelling, do not
switch on ignition.
Fuel filler flap is located at left rear
side of vehicle.
The fuel filler flap can only be opened
if the vehicle is unlocked. Release the
fuel filler flap by pushing the flap.
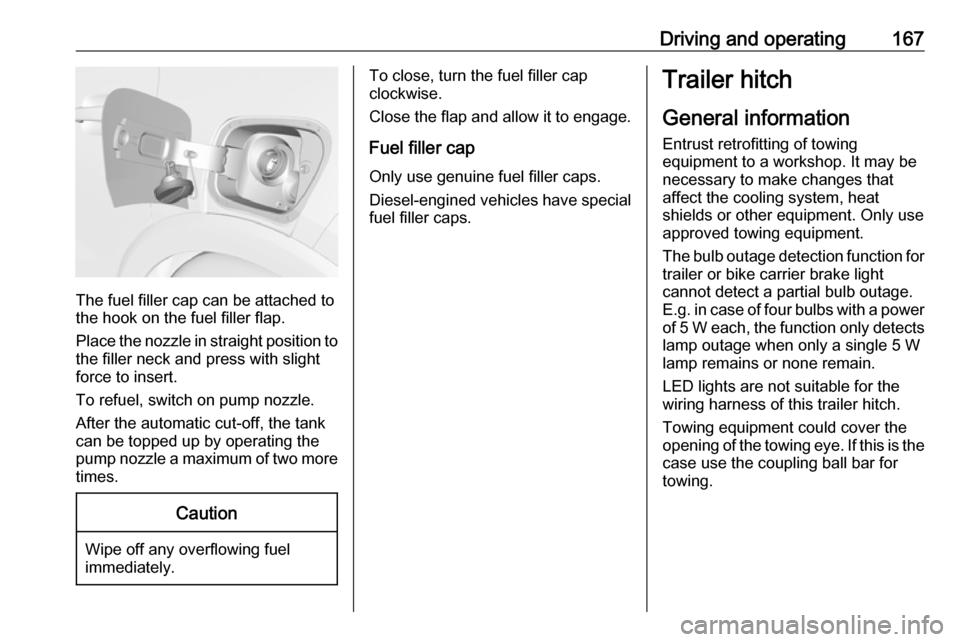
Petrol and diesel refuelling To open, turn the cap slowly
anticlockwise.
Page 169 of 247

Driving and operating167
The fuel filler cap can be attached to
the hook on the fuel filler flap.
Place the nozzle in straight position to the filler neck and press with slight
force to insert.
To refuel, switch on pump nozzle.
After the automatic cut-off, the tank can be topped up by operating the
pump nozzle a maximum of two more
times.
Caution
Wipe off any overflowing fuel
immediately.
To close, turn the fuel filler cap
clockwise.
Close the flap and allow it to engage.
Fuel filler cap
Only use genuine fuel filler caps.
Diesel-engined vehicles have special fuel filler caps.Trailer hitch
General information
Entrust retrofitting of towing
equipment to a workshop. It may be
necessary to make changes that
affect the cooling system, heat
shields or other equipment. Only use
approved towing equipment.
The bulb outage detection function for
trailer or bike carrier brake light
cannot detect a partial bulb outage.
E.g. in case of four bulbs with a power
of 5 W each, the function only detects lamp outage when only a single 5 W
lamp remains or none remain.
LED lights are not suitable for the
wiring harness of this trailer hitch.
Towing equipment could cover the
opening of the towing eye. If this is the case use the coupling ball bar for
towing.
Page 172 of 247

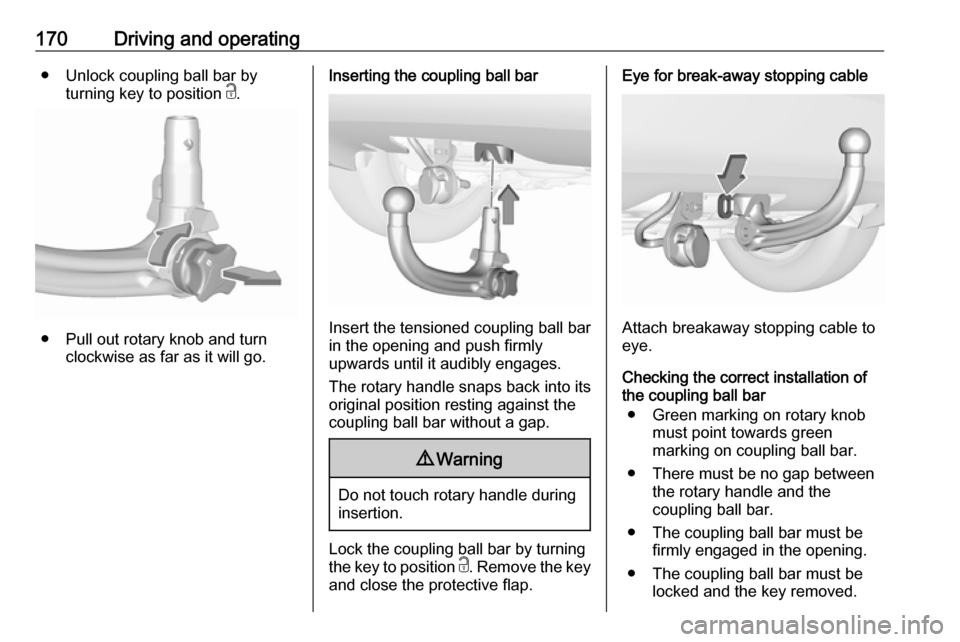
170Driving and operating● Unlock coupling ball bar byturning key to position c.
● Pull out rotary knob and turn
clockwise as far as it will go.
Inserting the coupling ball bar
Insert the tensioned coupling ball bar
in the opening and push firmly
upwards until it audibly engages.
The rotary handle snaps back into its
original position resting against the
coupling ball bar without a gap.
9 Warning
Do not touch rotary handle during
insertion.
Lock the coupling ball bar by turning
the key to position c. Remove the key
and close the protective flap.
Eye for break-away stopping cable
Attach breakaway stopping cable to
eye.
Checking the correct installation of
the coupling ball bar
● Green marking on rotary knob must point towards green
marking on coupling ball bar.
● There must be no gap between the rotary handle and the
coupling ball bar.
● The coupling ball bar must be firmly engaged in the opening.
● The coupling ball bar must be locked and the key removed.