2019.75 VAUXHALL CROSSLAND X Reverse
[x] Cancel search: ReversePage 158 of 247

156Driving and operatingThe system is switched off
automatically when attaching a trailer
or bike carrier to the trailer hitch.
Contact your dealer to switch off the
system for a prolonged period.
Fault
In the event of a fault, $ flashes for a
few seconds, accompanied by an acoustic signal. If the fault occurs
during the use of the system, $
extinguishes.
In the event of a fault in the power
steering, c flashes in the instrument
panel, accompanied by a message.
Notice
It is possible that the sensor detects a non-existing object caused by
echo disturbance from external
acoustic noise or mechanical
misalignments (sporadic false
warnings may occur).
Advanced parking assist system
may not respond to changes in the
available parking space after
initiating a parking manoeuvre. The
system may recognise an entry, a
gateway, a courtyard or even acrossing as a parking slot. After
selecting reverse gear the system
will start a parking manoeuvre. Take
care regarding the availability of the
suggested parking slot.
Low curbs and surface irregularities,
e.g. on construction zones, are not
detected by the system. The driver
accepts responsibility.
Side blind spot alert
The side blind spot alert system
detects and reports objects on either
side of the vehicle, within a specified
blind spot zone. The system displays
a visual alert in each exterior mirror,
when detecting objects that may not
be visible in the interior and exterior
mirrors.
Side blind spot alert uses some of the
parking assist sensors.9 Warning
Side blind spot alert does not
replace driver vision.
The system does not detect:
● vehicles outside the side blind zones which may be rapidly
approaching
● pedestrians, cyclists or animals
Before changing a lane, always
check all mirrors, look over the
shoulder and use the turn light.
Activation
7'' Colour Info Display: select Blind
spot monitoring on the Info Display
and activate the function.
8'' Colour Info Display: press Í.
Select Driving functions on the Info
Display and then Blind spot
monitoring . Activate the function.
B illuminates continously green in the
instrument cluster to confirm the
function.
Page 160 of 247

158Driving and operatingFault
In the event of a fault, B flashes for a
few moments in the instrument
cluster, accompanied by C and a
display message. Seek the
assistance of a workshop.
Panoramic view system This system allows views of the
vehicle's surroundings to be
displayed as a nearly 180° picture in
the Info Display, like a bird's eye view.
The system uses: ● rear camera, installed in the tailgate
● ultrasonic parking sensors in the rear bumper
The screen is divided into two parts:
on the right there is a view from above
the vehicle, and on the left there are
different views displayed.Activation
Panoramic view system is activated
by:
● engaging reverse gear
● driving up to 6 mph
Functionality
Different views can be selected in the left part of the display. Change the
type of view by pressing the touch
field in the left lower zone of the
display:
● rear view
● auto mode
● zoom view
● 180° view
Auto mode is activated by default. In
this mode, the system selects the
best view, standard or zoom, to
display according to the information
from the parking sensors.
The state of the system is not kept in
memory when the ignition is switched
off.
Rear view
The area behind the vehicle is
displayed in the screen. The vertical
lines represent the width of the
Page 162 of 247

160Driving and operatingDeactivation
Panoramic view system is
deactivated when:
● driving faster than 6 mph
● 7 seconds after disengaging reverse gear
● by pressing the icon q in the left
upper corner of the touch screen
● opening the tailgate
General information9 Warning
The panoramic view system does
not replace driver vision. It will not display children, pedestrians,
cyclists, crossing traffic, animals,
or any other objects outside of the camera view area, e. g. below the
bumper, or underneath the
vehicle.
Do not drive or park the vehicle
using only the panoramic view
system.
Always check the surrounding of
the vehicle before driving.
Displayed images may be further
or closer than they appear. The
area displayed is limited and
objects that are close to either
edge of the bumper or under the
bumper are not displayed on the
screen.
System limitations
Caution
For optimal operation of the
system, it is important to keep the
lense of the camera in the tailgate between the number plate lightsalways clean. Rinse the lense with water and wipe with a soft cloth.
Do not clean the lense with a
steam-jet or high-pressure jet
cleaner.
The panoramic view system may not
operate properly when:
● The surrounding is dark.
● The sun or the beam of headlights is shining directly into
the camera lenses.
● During nighttime driving.
● Weather limits visibility, such as fog, rain, or snow.
● The camera lenses are blocked by snow, ice, slush, mud, dirt.
● A trailer or bike carrier is attached
to the trailer hitch.
● The vehicle had an accident.
● There are extreme temperature changes.
Rear view camera The rear view camera assists the
driver when reversing by displaying a
view of the area behind the vehicle.
The view of the camera is displayed
in the Info Display.9 Warning
The rear view camera does not
replace driver vision. Note that
objects that are outside the
camera's field of view and the
Page 163 of 247

Driving and operating161parking assist sensors, e.g. below
the bumper or underneath the
vehicle, are not displayed.
Do not reverse or park the vehicle using only the rear view camera.
Always check the surrounding of
the vehicle before driving.
Switching on
Rear view camera is automatically
activated when reverse gear is
engaged.
Functionality
The area displayed by the camera is
limited. The distance of the image that
appears on the display differs from
the actual distance.
Guide lines
The vertical lines represent the width
of the vehicle without mirrors and the
general direction of the vehicle. The
horizontal lines represent a distance of about 30 cm, 1m and 2 m beyond
the rear bumper. The crossing curves
represent the maximum turning circle.
Deactivation of guide lines
Guide lines can be deactivated in the Info Display. Select Settings I Vehicle
I Collision detection I Rear view
camera guide lines I § .
Info Display 3 90.
Vehicle personalisation 3 94.
Switching off
The camera is switched off when a
certain forward speed is exceeded or
if reverse gear is disengaged for
approx. 10 seconds.
System limitations
The rear view camera may not
operate properly when:
● The surrounding is dark.
● The beam of headlights is shining
directly into the camera lenses.
● During nighttime driving.
● Weather limits visibility, such as fog, rain, or snow.
● The camera lenses are blocked by snow, ice, slush, mud, dirt.
Clean the lense, rinse with water,
and wipe with a soft cloth.
Page 175 of 247

Vehicle care173Caution
When transporting the vehicle on
a train or on a recovery vehicle, the
mud flaps might be damaged.
Vehicle storage
Storage for a long period of time
If the vehicle is to be stored for several months:
● Wash and wax the vehicle.
● Have the wax in the engine compartment and underbody
checked.
● Clean and preserve the rubber seals.
● Fill up fuel tank completely.
● Change the engine oil.
● Drain the washer fluid reservoir.
● Check the coolant antifreeze and
corrosion protection.
● Adjust tyre pressure to the value specified for full load.
● Park the vehicle in a dry, wellventilated place. Prevent the
vehicle from rolling.
● Engage first or reverse gear or set selector lever to P.
● Do not apply the parking brake.
● Open the bonnet, close all doors and lock the vehicle.
● Disconnect the clamp from the negative terminal of the vehicle
battery. Note that all systems are
not functional, e.g. central locking system.
Anti-theft alarm system 3 31.
Putting back into operation
When the vehicle is to be put back into
operation:
● Connect the clamp to the negative terminal of the vehicle
battery. Initialize the power
windows 3 36.
● Check tyre pressure.
● Fill up the washer fluid reservoir.
● Check the engine oil level.● Check the coolant level.
● Fit the number plate if necessary.
End-of-life vehicle recovery
Information on end-of-life vehicle
recovery centres and the recycling of
end-of-life vehicles is available on our website, where legally required. Only
entrust this work to an authorised
recycling centre.
Page 188 of 247

186Vehicle care
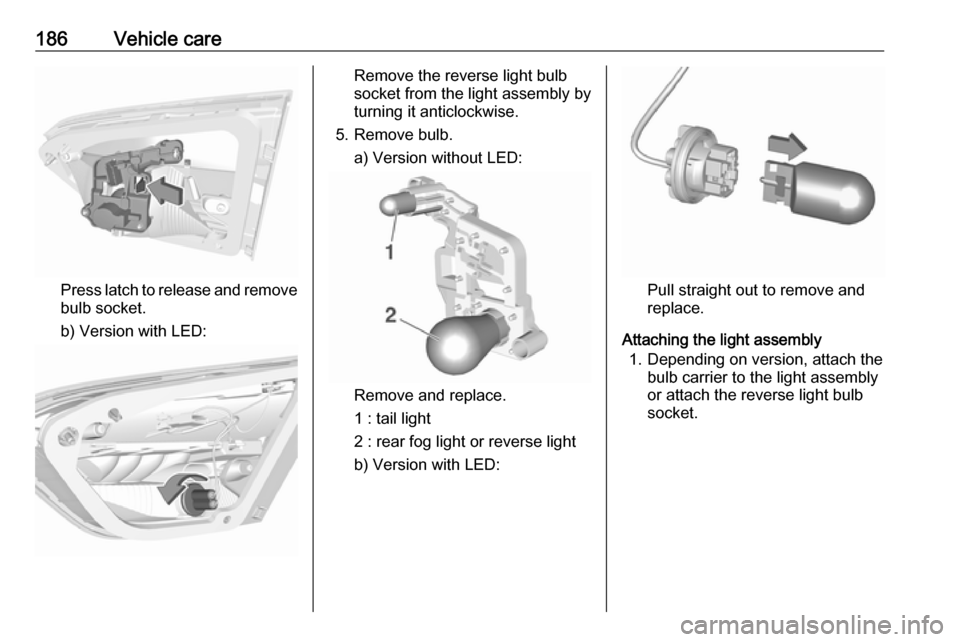
Press latch to release and remove
bulb socket.
b) Version with LED:
Remove the reverse light bulb
socket from the light assembly by
turning it anticlockwise.
5. Remove bulb. a) Version without LED:
Remove and replace.
1 : tail light
2 : rear fog light or reverse light
b) Version with LED:
Pull straight out to remove and
replace.
Attaching the light assembly 1. Depending on version, attach the bulb carrier to the light assembly
or attach the reverse light bulb
socket.
Page 199 of 247

Vehicle care197Wheel covers must not impair brake
cooling.9 Warning
Use of unsuitable tyres or wheel
covers could lead to sudden
pressure loss and thereby
accidents.
Vehicles with steel wheels: When
using locking wheel nuts, do not
attach wheel covers.
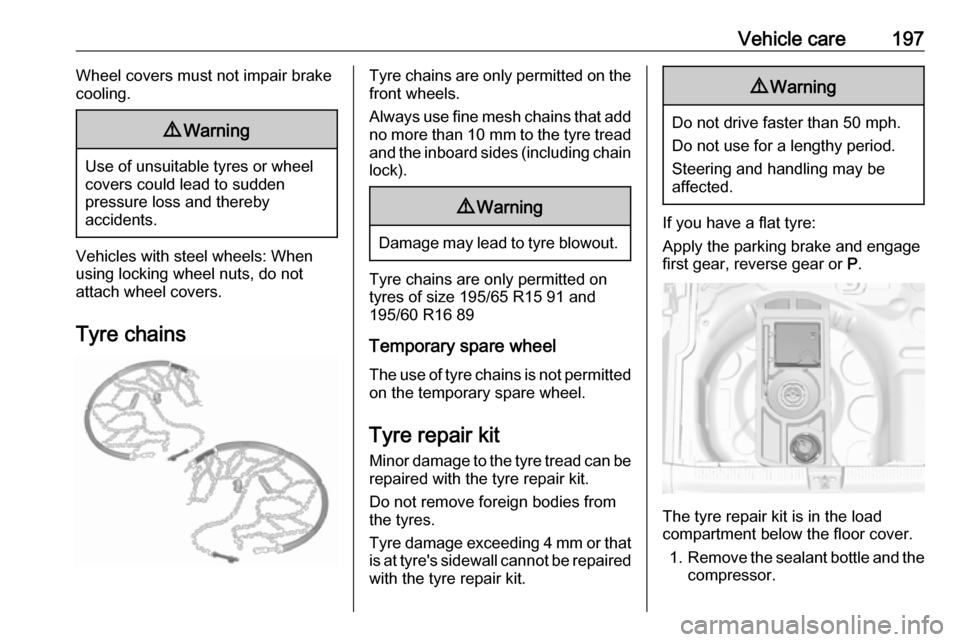
Tyre chains
Tyre chains are only permitted on the
front wheels.
Always use fine mesh chains that add no more than 10 mm to the tyre tread
and the inboard sides (including chain lock).9 Warning
Damage may lead to tyre blowout.
Tyre chains are only permitted on
tyres of size 195/65 R15 91 and
195/60 R16 89
Temporary spare wheel
The use of tyre chains is not permitted on the temporary spare wheel.
Tyre repair kit
Minor damage to the tyre tread can be
repaired with the tyre repair kit.
Do not remove foreign bodies from
the tyres.
Tyre damage exceeding 4 mm or that
is at tyre's sidewall cannot be repaired with the tyre repair kit.
9 Warning
Do not drive faster than 50 mph.
Do not use for a lengthy period.
Steering and handling may be
affected.
If you have a flat tyre:
Apply the parking brake and engage
first gear, reverse gear or P.
The tyre repair kit is in the load
compartment below the floor cover.
1. Remove the sealant bottle and the
compressor.
Page 202 of 247

200Vehicle carebefore. Drain excess tyrepressure with the button on the air
hose.
If tyre pressure hasn't decreased under 1.5 bar, set it to the correct
value. Otherwise the vehicle must
not be used. Seek assistance of a workshop.
Repeat the checking procedure
once more after driving further
6 miles (but no more than
10 minutes) to check that there is
no more loss of pressure.
If the tyre pressure has fallen
below 1.5 bar, the vehicle must
not be used. Seek the assistance
of a workshop.
17. Stow away tyre repair kit in load compartment.
Notice
The driving characteristics of the
repaired tyre are severely affected,
therefore have this tyre replaced.
If unusual noise is heard or the
compressor becomes hot, turn
compressor off for at least
30 minutes.The built-in safety valve opens at a
pressure of 7 bar (102 psi).
Note the expiry date of the kit. After
this date its sealing capability is no
longer guaranteed. Pay attention to
storage information on sealant
bottle.
Replace the used sealant bottle. Dispose of the bottle as prescribed
by applicable laws.
The compressor and sealant can be used from approx. -30 °C.
Wheel changing
Make the following preparations and
observe the following information:
● Park the vehicle on a level, firm and non-skid surface. The front
wheels must be in the straight-
ahead position.
● If necessary, place a chock under
the wheel diagonally opposite the wheel to be changed.
● Apply the parking brake and engage first gear, reverse gear or
P .● If the ground on which the vehicle
is standing is soft, a solid board
(max. 1 cm thick) should be
placed under the jack.
● Take heavy objects out of the vehicle before jacking up.
● No people or animals may be in the vehicle when it is jacked-up.
● Never crawl under a jacked-up vehicle.
● Do not start the vehicle when it is
raised on the jack.
● Before screwing in the wheel bolts, clean them.9Warning
Do not grease wheel bolts.
Tightening torques
Caution
If the vehicle is equipped with alloy
wheels, tighten the wheel bolts
manually at least for the first five
turns.