2019.75 VAUXHALL COMBO E tailgate
[x] Cancel search: tailgatePage 197 of 281

Driving and operating195distances of about 1 and 2 m beyond
the edge of your vehicle's rear
bumper.
This view is available in AUTO Mode
or in the view selection menu.
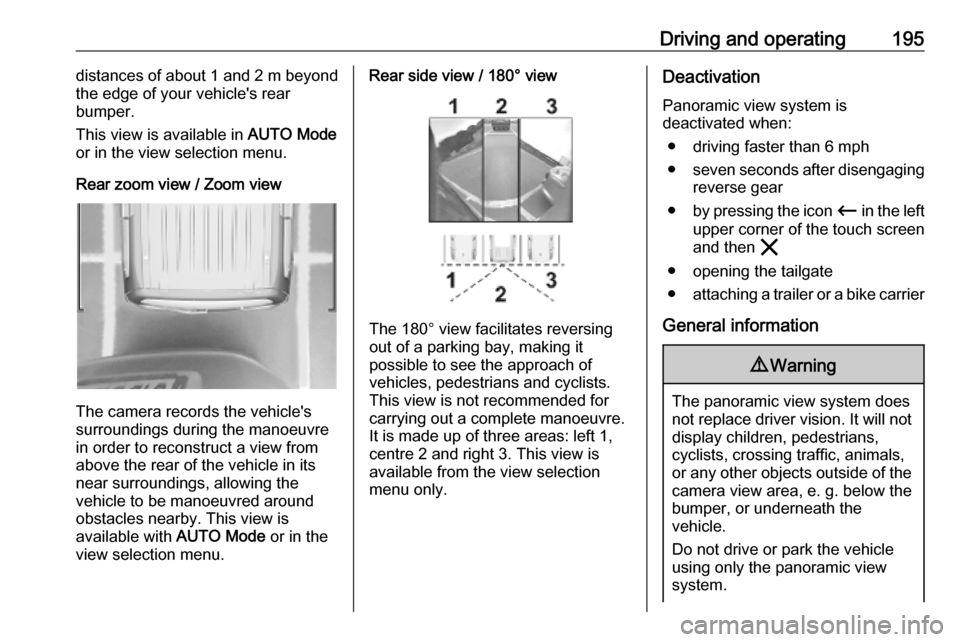
Rear zoom view / Zoom view
The camera records the vehicle's
surroundings during the manoeuvre in order to reconstruct a view fromabove the rear of the vehicle in its
near surroundings, allowing the
vehicle to be manoeuvred around
obstacles nearby. This view is
available with AUTO Mode or in the
view selection menu.
Rear side view / 180° view
The 180° view facilitates reversing
out of a parking bay, making it
possible to see the approach of
vehicles, pedestrians and cyclists.
This view is not recommended for
carrying out a complete manoeuvre.
It is made up of three areas: left 1,
centre 2 and right 3. This view is
available from the view selection menu only.
Deactivation
Panoramic view system is
deactivated when:
● driving faster than 6 mph
● seven seconds after disengaging
reverse gear
● by pressing the icon Ù in the left
upper corner of the touch screen
and then &
● opening the tailgate
● attaching a trailer or a bike carrier
General information9 Warning
The panoramic view system does
not replace driver vision. It will not display children, pedestrians,
cyclists, crossing traffic, animals,
or any other objects outside of the camera view area, e. g. below the
bumper, or underneath the
vehicle.
Do not drive or park the vehicle
using only the panoramic view
system.
Page 198 of 281

196Driving and operatingAlways check the surrounding of
the vehicle before driving.
Displayed images may be further or closer than they appear. The
area displayed is limited and
objects that are close to either
edge of the bumper or under the
bumper are not displayed on the
screen.
System limitations
Caution
For optimal operation of the
system, it is important to keep the
lense of the camera in the tailgate between the number plate lightsalways clean. Rinse the lense with water and wipe with a soft cloth.
Do not clean the lense with a
steam-jet or high-pressure jet
cleaner.
The panoramic view system may not
operate properly when:
● The surrounding is dark.
● The sun or the beam of headlights is shining directly into
the camera lenses.
● During nighttime driving.
● Weather limits visibility, such as fog, rain, or snow.
● The camera lenses are blocked by snow, ice, slush, mud, dirt.
● The vehicle is towing a trailer.
● The vehicle had an accident.
● There are extreme temperature changes.
Rear view camera Depending on version, camera is
mounted above the license plate in
the tailgate / left rear door or at the top
of the left rear door.9 Warning
The rear view camera does not
replace driver vision. Note that
objects that are outside the
camera's field of view and the
parking assist sensors, e.g. below
the bumper or underneath the
vehicle, are not displayed.
Do not reverse or park the vehicle
using only the rear view camera.
Always check the surrounding of
the vehicle before driving.
Camera above the license plate
on the tailgate / left rear door
Page 200 of 281

198Driving and operatingClose rear view
The lower horizontal line represents a
distance of about 30 cm beyond the edge of vehicle's rear bumper. The
upper horizontal lines represent a
distance of about 1 m and 2 m.
Trajectory lane of the vehicle is
shown in accordance with the
steering angle.
Additionally the opening radius of the
rear doors are shown in the rear view display.
Switching off
The rear view camera is switched off
when the rear view display is
switched off.
System limitationsThe rear view camera may not
operate properly when:
● the surrounding is dark
● the beam of headlights is shining
directly into the camera lenses
● weather limits visibility, such as fog, rain, or snow
● the camera lenses are blocked by snow, ice, slush, mud, dirt.
Clean the lense, rinse with water, and wipe with a soft cloth
● the tailgate will be opened
● the vehicle is towing an electrically connected trailer,
bicycle carrier, etc.
● the vehicle had a rear end accident
● there are extreme temperature changes
Lane keep assist
Lane keep assist helps to avoid
crashes due to unintentional lane
departures. A front camera located at the top of the windscreen observes
the lane markings between which the
vehicle is driving. If the vehicle
approaches a lane marking, the
steering wheel is gently turned to
position the vehicle back into the lane. The driver will then notice a turning
movement of the steering wheel. Turn
steering wheel in same direction, if
Page 225 of 281

Vehicle care2232. Slightly press down the bulb, turnit anticlockwise and remove it
from the socket.
3. Replace and insert the new bulb into socket by turning clockwise.
4. Insert the bulb socket into the reflector and turn clockwise.
Tail lights Light assembly in the body
Vehicle with tailgate
1. Unscrew and remove the two screws.
2. Carefully withdraw the tail lightassembly from recess and
remove. Take care that the cable
duct remains in position.
3. Detach the cable from the retainer.4. Press the retaining lug backwards, pull the bulb carrier
and disengage the remaining
retaining lugs.
Page 241 of 281

Vehicle care239The front arm position of the lifting
platform is centrically under the
relevant vehicle jacking point.
Spare wheel
The spare wheel can be classified as
a temporary spare wheel depending
on the size compared to the other
mounted wheels and country
regulations. In this case a permissible maximum speed applies, even
though no label at the spare wheel
indicates this.
Only mount one temporary spare
wheel. Do not drive faster than
50 mph. Take curves slowly. Do not
use for a long period of time.Caution
The use of a spare wheel that is smaller than the other wheels or in combination with winter tyres
could affect driveability. Have the defective tyre replaced as soon as
possible.
The spare wheel is located in a holder
beneath the vehicle floor.
1. Depending on the version, open the tailgate or the rear doors 3 30,
3 31.
2. Fit the wheel wrench on one
hexagon bolt. Turn it
anticlockwise until the spare wheel holder is low enough allow
the catch to be unhooked.
3. Lift the spare wheel holder and unhook the catch.
Lower the spare wheel holder.
4. Remove the spare wheel.
Page 242 of 281

240Vehicle care5. Change the wheel.
6. Position the damaged wheel with the outside down in the spare
wheel holder.
7. Lift the spare wheel holder and engage in the catch. The open
side of the catch must point in the
direction of travel.
8. Close the spare wheel holder by turning the hexagon bolt
clockwise using the wheel
wrench.
9. Stow wheel wrench in the storage.
10. Close the tailgate or the rear doors.
Only mount one temporary spare
wheel. The permissible maximum
speed on the label on the temporary
spare wheel is only valid for the
factory-fitted tyre size.
Fitting the spare wheel
Make the following preparations and
observe the following information:
● Park the vehicle on a level, firm and non-skid surface. The front
wheels must be in the straight-
ahead position.● If necessary, place a chock under
the wheel diagonally opposite the
wheel to be changed.
● Apply the parking brake and engage first gear, reverse gear orP .
● Remove the spare wheel 3 239.
● Never change more than one wheel at once.
● Use the jack only to change wheels in case of puncture, notfor seasonal winter or summer
tyre change.
● The jack is maintenance-free.
● If the ground on which the vehicle
is standing is soft, a solid board
(max. 1 cm thick) should be
placed under the jack.
● Take heavy objects out of the vehicle before jacking up.
● No people or animals may be in the vehicle when it is jacked-up.
● Never crawl under a jacked-up vehicle.
● Do not start the vehicle when it is
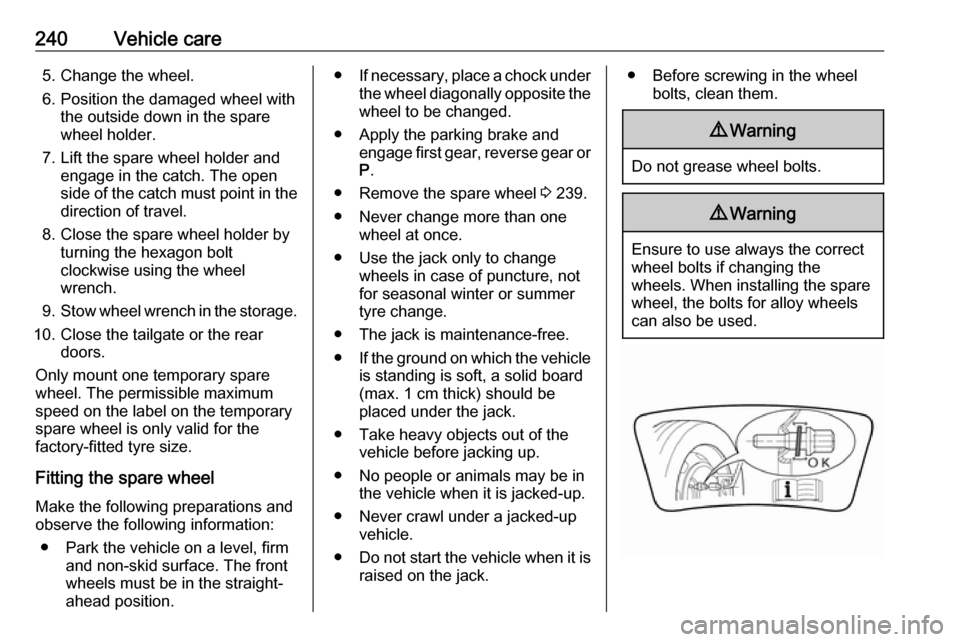
raised on the jack.● Before screwing in the wheel bolts, clean them.9Warning
Do not grease wheel bolts.
9Warning
Ensure to use always the correct
wheel bolts if changing the
wheels. When installing the spare
wheel, the bolts for alloy wheels can also be used.
Page 279 of 281

277PPanoramic view system ..............193
Parking ................................ 19, 150
Parking assist ............................ 183
Parking brake ..................... 103, 160
Parking heater ............................ 138
Parking lights ............................. 126
Particulate filter ........................... 151
Passenger side camera ..............193
Performing work ........................212
Peripheral lighting .......................129
Power button .............................. 144
Power outlets ............................... 93
Power windows ............................ 40
Preheating ................................. 104
Puncture ..................................... 239
R Radio Frequency Identification (RFID) ..................................... 273
Radio remote control ...................21
Rain sensor ................................ 106
REACH ....................................... 269
Reading lights ............................ 127
Rear doors ................................... 30
Rear fog light .............106, 126, 223
Rear view camera ...................... 196
Rear view display .................39, 113
Rear windows .............................. 42
Rear window wiper and washer ..92Recommended fluids and
lubricants ........................ 254, 258
Refuelling ................................... 204 Registered trademarks ...............269
Removing seats ............................ 51
Reversing lights .........................126
Ride control systems ..................163
Roadside assistance ..................119
Roller blinds ................................. 43
Roof .............................................. 43
Roof load ...................................... 85
Roof rack ..................................... 84
S Safety net .................................... 79
Seat adjustment ....................... 7, 46 Seat belt ........................................ 8
Seat belt reminder .....................100
Seat belts ..................................... 54
Seat folding .................................. 47
Seat heating ................................. 49
Seat position ................................ 45
Second row seats ........................50
Selective catalytic reduction .......152
Selective ride control ..................165
Selector lever.............................. 155
Service ............................... 141, 251
Service display ............................ 99
Service information ....................251
Service vehicle soon .................. 102Side airbag system ......................60
Side blind spot alert ............107, 191
Sidelights .................................... 121
Side turn lights ........................... 225
Sliding door .................................. 29
Sliding side door ........................... 29
SOS ............................................ 119
Spare wheel ............................... 239
Speed limiter....................... 107, 170
Speedometer ............................... 97
Starting and operating ................143
Starting off ................................... 17
Starting the engine ....................145
Steering ...................................... 143
Steering wheel adjustment ......9, 89
Steering wheel controls ...............89
Stop engine ................................ 102
Stop-start system........................ 147
Storage ......................................... 69
Storage compartments .................69
Sunvisor lights ........................... 128
Sun visors .................................... 43
Symbols ......................................... 4
System check ............................. 102
T
Tachometer ................................. 98
Tailgate ......................................... 31
Tail lights ................................... 223
Third row seats ............................ 51