Page 199 of 273
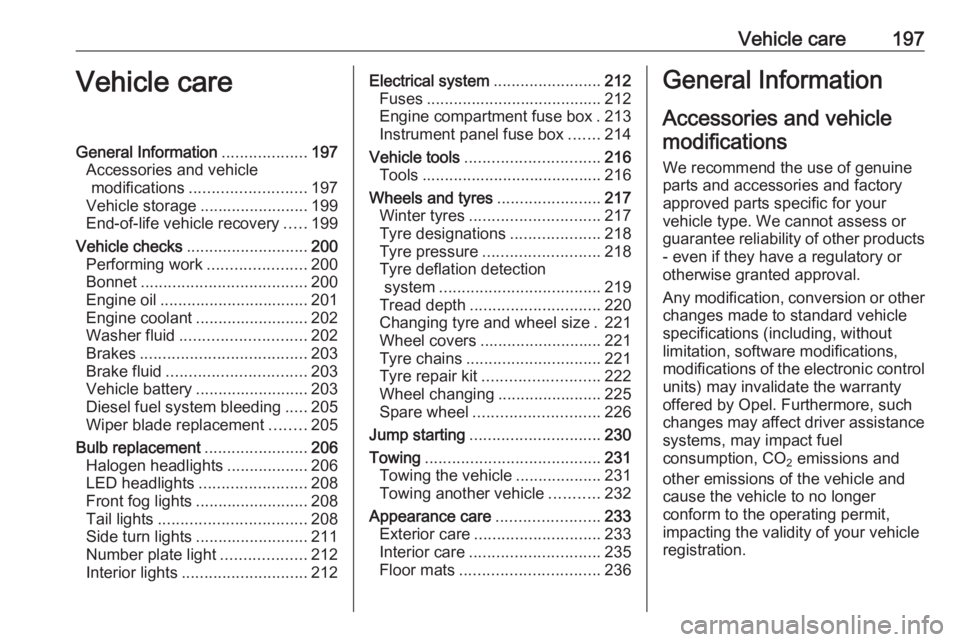
Vehicle care197Vehicle careGeneral Information...................197
Accessories and vehicle modifications .......................... 197
Vehicle storage ........................199
End-of-life vehicle recovery .....199
Vehicle checks ........................... 200
Performing work ......................200
Bonnet ..................................... 200
Engine oil ................................. 201
Engine coolant ......................... 202
Washer fluid ............................ 202
Brakes ..................................... 203
Brake fluid ............................... 203
Vehicle battery ......................... 203
Diesel fuel system bleeding .....205
Wiper blade replacement ........205
Bulb replacement .......................206
Halogen headlights ..................206
LED headlights ........................ 208
Front fog lights ......................... 208
Tail lights ................................. 208
Side turn lights ......................... 211
Number plate light ...................212
Interior lights ............................ 212Electrical system........................212
Fuses ....................................... 212
Engine compartment fuse box . 213
Instrument panel fuse box .......214
Vehicle tools .............................. 216
Tools ........................................ 216
Wheels and tyres .......................217
Winter tyres ............................. 217
Tyre designations ....................218
Tyre pressure .......................... 218
Tyre deflation detection system .................................... 219
Tread depth ............................. 220
Changing tyre and wheel size . 221
Wheel covers ........................... 221
Tyre chains .............................. 221
Tyre repair kit .......................... 222
Wheel changing .......................225
Spare wheel ............................ 226
Jump starting ............................. 230
Towing ....................................... 231
Towing the vehicle ...................231
Towing another vehicle ...........232
Appearance care .......................233
Exterior care ............................ 233
Interior care ............................. 235
Floor mats ............................... 236General Information
Accessories and vehicle modifications
We recommend the use of genuine parts and accessories and factory
approved parts specific for your
vehicle type. We cannot assess or
guarantee reliability of other products - even if they have a regulatory or
otherwise granted approval.
Any modification, conversion or other
changes made to standard vehicle
specifications (including, without
limitation, software modifications,
modifications of the electronic control units) may invalidate the warranty
offered by Opel. Furthermore, such
changes may affect driver assistance
systems, may impact fuel
consumption, CO 2 emissions and
other emissions of the vehicle and
cause the vehicle to no longer
conform to the operating permit,
impacting the validity of your vehicle
registration.
Page 200 of 273
198Vehicle careCaution
When transporting the vehicle on
a train or on a recovery vehicle, the
mud flaps might be damaged.
Cold protection covers
It is recommended to have the
protection covers installed by a
workshop.
Caution
The protection covers must be removed when one of the
following conditions occurs:
● The ambient temperature is above 10 °C.
● When the vehicle is towed.
● The vehicle is driven at speeds
above 120 km/h.
Installation
1. Install the protection cover as shown.
2. Press the lower part of theprotection cover against the slat ofthe grille. Ensure that the
protection cover is fixed securely.
3. Repeat the procedure for the other protection covers.
Deinstallation
1. With your hand behind the grille,push the brackets of the
protection cover upwards to
release the protection cover.
2. Pull the protection cover upwards and remove it.
3. Repeat the procedure for the other protection covers.
Page 209 of 273
Vehicle care207
High beam (1) inner bulb.
Low beam ( 2) outer bulb.
High beam (1)
1. Remove the protective cover by pulling the tab.
2. Press retaining clip downwardsand pull the bulb socket toward
the rear.
3. Detach the bulb from the bulb socket and replace the bulb.
4. Insert the bulb socket into the reflector housing.
5. Fit the cap on.
Low beam (2)
1. Remove the protective cover by pulling.
Page 210 of 273
208Vehicle care
2. Press retaining clip upwards andpull the bulb socket toward the
rear.
3. Detach the bulb from the bulb socket and replace the bulb.
4. Insert the bulb socket into the reflector housing.
5. Fit the cap on.
Front turn lights
In case of defective LEDs, have them replaced by a workshop.
Side light
In case of defective LEDs, have them
replaced by a workshop.
Daytime running light
In case of defective LEDs, have them replaced by a workshop.
LED headlights Headlights for low and high beam,
sidelights, daytime running lights and turn lights are designed as LEDs and
cannot be changed.
Have lights repaired by a workshop in
case of failure.
Front fog lights
Have bulbs replaced by a workshop.Tail lights
Tail lights, daytime running lights and
centre high-mounted brake light are
designed as LEDs. In case of failure,
have LEDs replaced by a workshop.
Light assembly in the body
1. Open the tailgate then unclip the access cover on the relevant side.
Page 218 of 273
216Vehicle careNo.Circuit11Doors lock / Tailgate lock12Stop-start system / Diagnostic
connector module / Brake
system13Infotainment / Climate control
system14Alarm siren15Climate control system16Stop-start system / Brake
system17Instrument cluster19Column electrical assembly /
Steering wheel controls21Anti-theft alarm system22Camera / Rain sensor / Auto‐
matic light control23Seat belt reminder24Automatic transmission /
Advanced parking assist /
Panoramic view systemNo.Circuit25Airbag26Electronic Stability Control27Alarm28OnStar29Infotainment32Cigarette lighter / Power outlet front34Heated rear window / Heated
windscreen / Inductive charging35Light switch / Diagnostic
connector module36LightingVehicle tools
Tools
Vehicles with spare wheel Open the floor cover of the load
compartment 3 73.
Remove the cover of the tool box.
The jack, the towing eye, chocks and
the tools are located in the tool box.
Page 219 of 273
Vehicle care217Vehicles without spare wheel
The towing eye and the chocks are
located in a box below the floor cover in the load compartment.
Tyre repair kit 3 222.
Vehicles with audio speaker system
The towing eye and the chocks are
located in a box below the floor cover in the load compartment.
Tyre repair kit 3 222.
Wheels and tyres
Tyre condition, wheel condition Drive over edges slowly and at right
angles if possible. Driving over sharp
edges can cause tyre and wheel
damage. Do not trap tyres on the kerb when parking.
Regularly check the wheels for
damage. Seek the assistance of a
workshop in the event of damage or
unusual wear.
Winter tyres
Winter tyres improve driving safety at temperatures below 7 °C and should
therefore be fitted on all wheels.
In accordance with country-specific
regulations, affix the speed sticker in
the driver's field of view.
All tyre sizes are permitted as winter
tyres 3 253.
Page 224 of 273
222Vehicle careTemporary spare wheel
The use of tyre chains is not permitted
on the temporary spare wheel.
Tyre repair kit
Minor damage to the tyre tread can be repaired with the tyre repair kit.
Do not remove foreign bodies from
the tyres.
Tyre damage exceeding 4 mm or that
is at tyre's sidewall cannot be repaired with the tyre repair kit.9 Warning
Do not drive faster than 80 km/h.
Do not use for a lengthy period.
Steering and handling may be
affected.
In the case of a flat tyre:
Apply the parking brake and engage
first gear, reverse gear or P.
The tyre repair kit is in the load
compartment below the floor cover.
1. Remove the sealant bottle and the
compressor.
2. Pull speed limit label from sealant
bottle and place it in driver's
visible area.3. Remove the electrical connection cable and air hose from the
stowage compartments on the
underside of the compressor.
Page 226 of 273

224Vehicle care
Drain excess tyre pressure with
the button on the air hose.
Do not run the compressor longer
than 10 minutes.
14. Detach the tyre repair kit. Remove
sealant bottle from bracket. Screw
the filler hose to the free connection of the sealant bottle.
This prevents sealant from
escaping. Stow tyre repair kit in
load compartment.
15. Remove any excess sealant using a cloth.16. Continue driving immediately sothat sealant is evenly distributed
in the tyre. After driving approx.
5 km but no more than
10 minutes, stop and check tyre
pressure. Screw compressor air
hose directly onto tyre valve when doing this. Fill tyre as described
before. Drain excess tyre pressure with the button on the air
hose.
If tyre pressure hasn't decreased under 150 kPa (1.5 bar), set it to
the correct value. Otherwise the
vehicle must not be used. Seek
assistance of a workshop 3 253.
Repeat the checking procedure
once more after driving further
10 km but no more than
10 minutes to check that there is
no more loss of pressure.
If the tyre pressure has fallen
below 150 kPa (1.5 bar), the
vehicle must not be used. Seek
the assistance of a workshop.
17. Stow away tyre repair kit in load compartment.
Note
The driving characteristics of the
repaired tyre are severely affected,
therefore have this tyre replaced.
If unusual noise is heard or the
compressor becomes hot, turn
compressor off for at least 30 min.
The built-in safety valve opens at a
pressure of 700 kPa (7 bar).
Note the expiry date of the kit. After
this date its sealing capability is no
longer guaranteed. Pay attention to
storage information on sealant
bottle.


