Page 27 of 90

Instrument and control functions
4-1
4
EAU40661
Han dle bar switch
EAU53962En gine stop switch “ENGINE STOP”
Hold this switch pushed until the en-
gine stops.
EAU64023
Clutch lever
The clutch lever is located on the left
side of the handlebar. To disengage
the clutch, pull the lever toward the
handlebar grip. To engage the clutch,
release the lever. The lever should be
pulled rapidly and released slowly for
smooth clutch operation.
The clutch lever is equipped with a
clutch lever position adjusting bolt. Ad-
just the distance between the clutch le-
ver and the handlebar grip as follows. 1. Loosen the locknut.
2. While holding the clutch lever pulled slightly towards the handle-
bar grip, turn the adjusting bolt in
direction (a) to increase the dis-
tance, and in direction (b) to de-
crease it.
3. Tighten the locknut.
1. Engine stop switch “ENGINE STOP”
1. Clutch lever
2. Locknut
3. Clutch lever position adjusting bolt
4. Distance between clutch lever and handle- bar grip
4 2
13
(b)
(a)
UBR880E0.book Page 1 Friday, February 16, 2018 8:32 AM
Page 28 of 90

Instrument and control functions
4-2
4
EAU12875
Shift pe dal
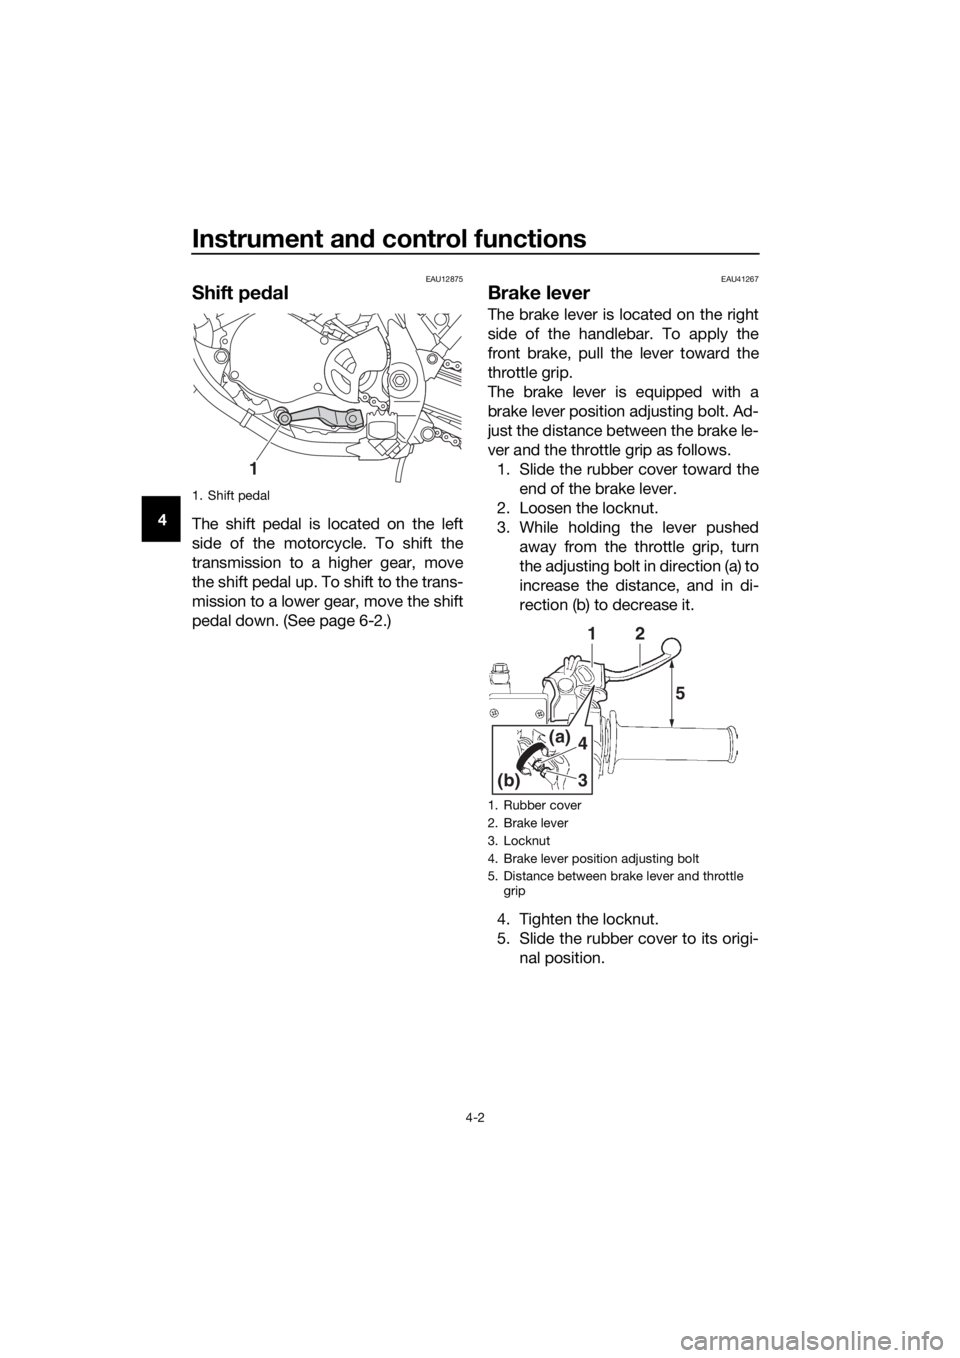
The shift pedal is located on the left
side of the motorcycle. To shift the
transmission to a higher gear, move
the shift pedal up. To shift to the trans-
mission to a lower gear, move the shift
pedal down. (See page 6-2.)
EAU41267
Brake lever
The brake lever is located on the right
side of the handlebar. To apply the
front brake, pull the lever toward the
throttle grip.
The brake lever is equipped with a
brake lever position adjusting bolt. Ad-
just the distance between the brake le-
ver and the throttle grip as follows.
1. Slide the rubber cover toward the end of the brake lever.
2. Loosen the locknut.
3. While holding the lever pushed away from the throttle grip, turn
the adjusting bolt in direction (a) to
increase the distance, and in di-
rection (b) to decrease it.
4. Tighten the locknut.
5. Slide the rubber cover to its origi- nal position.
1. Shift pedal
1
1. Rubber cover
2. Brake lever
3. Locknut
4. Brake lever position adjusting bolt
5. Distance between brake lever and throttle grip
1
4
3
(a)
(b)
2
5
UBR880E0.book Page 2 Friday, February 16, 2018 8:32 AM
Page 46 of 90

Operation and important rid ing points
6-2
6
EAU16661
Startin g a warm en gine
Follow the same procedure as for
starting a cold engine with the excep-
tion that the starter (choke) is not re-
quired when the engine is warm.
Instead, start the engine with the throt-
tle slightly open.
TIP
If the engine does not start after sever-
al kicks, try again with the throttle 1/4
to 1/2 open.
EAU16674
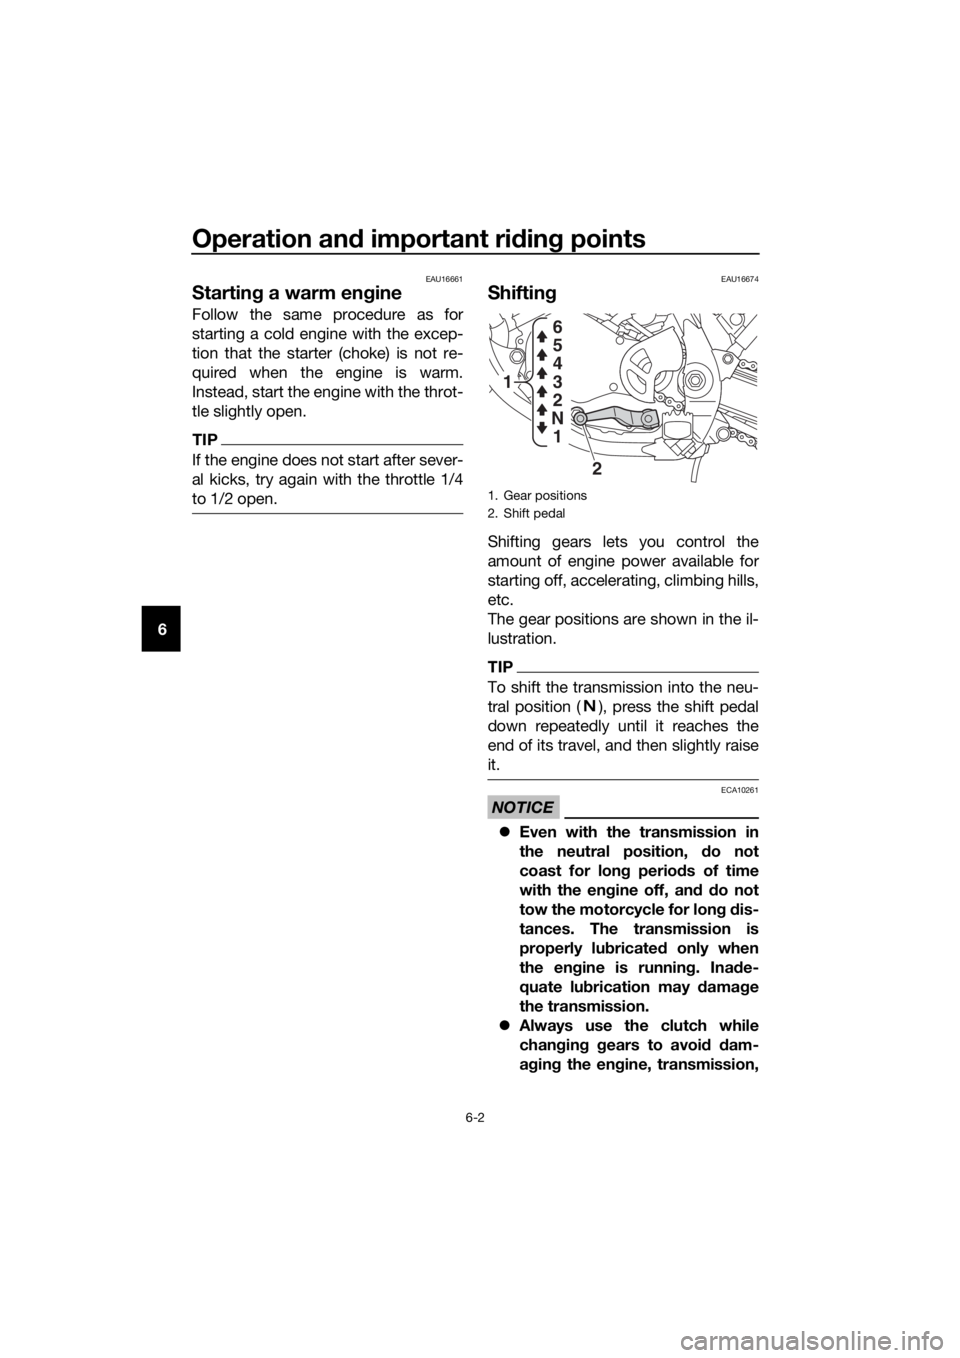
Shiftin g
Shifting gears lets you control the
amount of engine power available for
starting off, accelerating, climbing hills,
etc.
The gear positions are shown in the il-
lustration.
TIP
To shift the transmission into the neu-
tral position ( ), press the shift pedal
down repeatedly until it reaches the
end of its travel, and then slightly raise
it.
NOTICE
ECA10261
Even with the transmission in
the neutral position, d o not
coast for lon g period s of time
with the en gine off, an d d o not
tow the motorcycle for lon g d is-
tances. The transmission is
properly lu bricated only when
the en gine is runnin g. Ina de-
quate lu brication may damag e
the transmission.
Always use the clutch while
chan gin g g ears to avoi d d am-
a g in g the en gine, transmission,
1. Gear positions
2. Shift pedal
2
1
1
N 2 3
4
5
6
UBR880E0.book Page 2 Friday, February 16, 2018 8:32 AM
Page 81 of 90

Periodic maintenance an d a djustment
7-32
7
En
gine overheatin g
WARNING
EWAT1041
Do not remove the rad iator cap when the engine an d ra diator are hot.
Scal din g hot flui d an d steam may b e blown out un der pressure, which
coul d cause serious injury. Be sure to wait until the en gine has coole d.
Place a thick ra g, like a towel, over the rad iator cap, and then slowly ro-
tate the cap counterclockwise to the d etent to allow any residual pres-
sure to escape. When the hissin g soun d has stoppe d, press d own on the
cap while turnin g it counterclockwise, an d then remove the cap.
TIP
If coolant is not available, tap water can be temporarily used instead, provided
that it is changed to the recommended coolant as soon as possible.
W ait until the engine
has cooled.
Add coolant.
(See TIP.)
The coolant le vel is
OK.
Check the coolant
le vel in the radiator.There is no leakage.
There is leakage.
The coolant le vel is
lo w.
Check the cooling
system for leakage.
Ha ve a Yamaha
dealer check and
repair the cooling
system.
Start the engine. If the engine o verheats again,
ha ve a Yamaha dealer check and repair the cooling
system.
UBR880E0.book Page 32 Friday, February 16, 2018 8:32 AM