2018 YAMAHA AEROX50 tire pressure
[x] Cancel search: tire pressurePage 31 of 78

For your safety – pre-operation checks
4-2
4
Rear brake• Check operation.
• If soft or spongy, have Yamaha dealer bleed hydraulic system.
• Check brake pads for wear.
• Replace if necessary.
• Check fluid level in reservoir.
• If necessary, add specified brake fluid to specified level.
• Check hydraulic system for leakage.6-17, 6-17, 6-18
Throttle grip• Make sure that operation is smooth.
• Check throttle grip free play.
• If necessary, have Yamaha dealer adjust throttle grip free play and lubricate ca-
ble and grip housing.6-14, 6-20
Wheels and tires• Check for damage.
• Check tire condition and tread depth.
• Check air pressure.
• Correct if necessary.6-15, 6-16
Brake levers• Make sure that operation is smooth.
• Lubricate lever pivoting points if necessary.6-20
Centerstand• Make sure that operation is smooth.
• Lubricate pivot if necessary.6-21
Chassis fasteners• Make sure that all nuts, bolts and screws are properly tightened.
• Tighten if necessary.—
Instruments, lights, signals
and switches• Check operation.
• Correct if necessary.—
Battery• Check fluid level.
• Fill with distilled water if necessary.6-23 ITEM CHECKS PAGE
U1GBE1E0.book Page 2 Tuesday, October 17, 2017 11:45 AM
Page 38 of 78

Periodic maintenance and adjustment
6-3
6
EAU1771B
General maintenance and lubrication chartNO. ITEM CHECK OR MAINTENANCE JOBODOMETER READING
ANNUAL
CHECK 1000 km
(600 mi)6000 km
(3500 mi)12000 km
(7000 mi)18000 km
(10500 mi)24000 km
(14000 mi)
1*Air filter element• Replace.√√√√√
2 Air filter check hose• Clean.√√√√√
3*Battery• Check electrolyte level and spe-
cific gravity.
• Make sure that the breather hose
is properly routed.√√√√√
4*Front brake• Check operation, fluid level and
vehicle for fluid leakage.√√√√√√
• Replace brake pads. Whenever worn to the limit
5*Rear brake• Check operation, fluid level and
vehicle for fluid leakage.√√√√√√
• Replace brake pads. Whenever worn to the limit
6*Brake hoses• Check for cracks or damage.
• Check for correct routing and
clamping.√√√√√
• Replace. Every 4 years
7*Brake fluid• Change. Every 2 years
8*Wheels• Check runout and for damage.√√√√
9*Tires• Check tread depth and for dam-
age.
• Replace if necessary.
• Check air pressure.
• Correct if necessary.√√√√√
U1GBE1E0.book Page 3 Tuesday, October 17, 2017 11:45 AM
Page 50 of 78

Periodic maintenance and adjustment
6-15
6
EAU69760
TiresTires are the only contact between the
vehicle and the road. Safety in all con-
ditions of riding depends on a relatively
small area of road contact. Therefore, it
is essential to maintain the tires in good
condition at all times and replace them
at the appropriate time with the speci-
fied tires.
Tire air pressure
The tire air pressure should be
checked and, if necessary, adjusted
before each ride.
WARNING
EWA10504
Operation of this vehicle with im-
proper tire pressure may cause se-
vere injury or death from loss of
control.
The tire air pressure must be
checked and adjusted on cold
tires (i.e., when the temperature
of the tires equals the ambient
temperature).
The tire air pressure must be
adjusted in accordance with the
riding speed and with the totalweight of rider, passenger, car-
go, and accessories approved
for this model.
WARNING
EWA10512
Never overload your vehicle. Opera-
tion of an overloaded vehicle could
cause an accident.
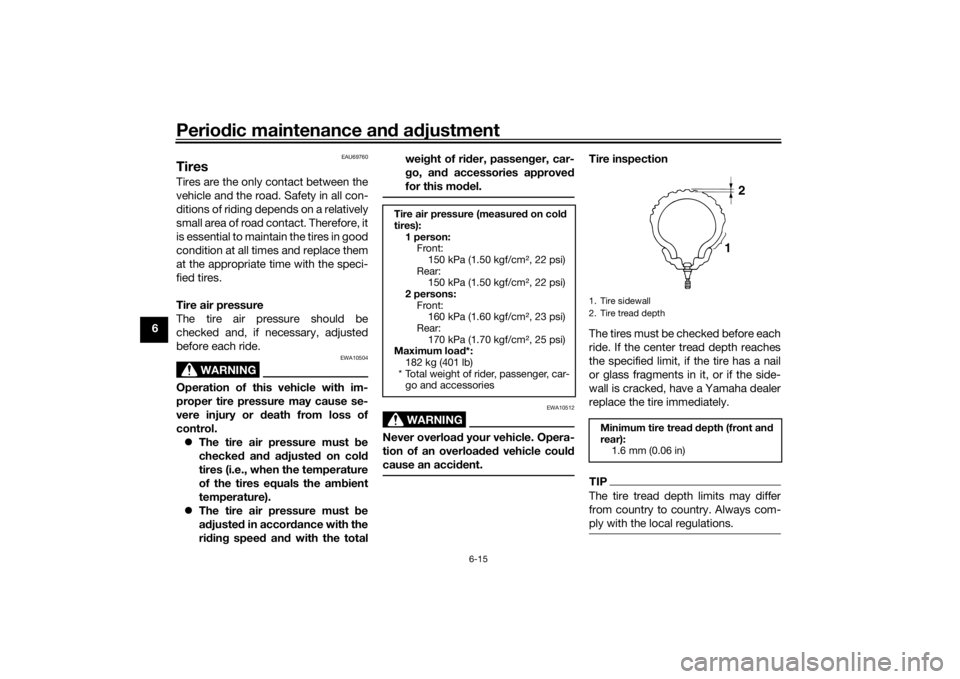
Tire inspection
The tires must be checked before each
ride. If the center tread depth reaches
the specified limit, if the tire has a nail
or glass fragments in it, or if the side-
wall is cracked, have a Yamaha dealer
replace the tire immediately.TIPThe tire tread depth limits may differ
from country to country. Always com-
ply with the local regulations.
Tire air pressure (measured on cold
tires):
1 person:
Front:
150 kPa (1.50 kgf/cm², 22 psi)
Rear:
150 kPa (1.50 kgf/cm², 22 psi)
2 persons:
Front:
160 kPa (1.60 kgf/cm², 23 psi)
Rear:
170 kPa (1.70 kgf/cm², 25 psi)
Maximum load*:
182 kg (401 lb)
* Total weight of rider, passenger, car-
go and accessories
1. Tire sidewall
2. Tire tread depthMinimum tire tread depth (front and
rear):
1.6 mm (0.06 in)
12
U1GBE1E0.book Page 15 Tuesday, October 17, 2017 11:45 AM
Page 69 of 78

Scooter care and storage
7-4
7
EAU36564
StorageShort-term
Always store your scooter in a cool, dry
place and, if necessary, protect it
against dust with a porous cover. Be
sure the engine and the exhaust sys-
tem are cool before covering the
scooter.NOTICE
ECA10821
Storing the scooter in a poorly
ventilated room or covering it
with a tarp, while it is still wet,
will allow water and humidity to
seep in and cause rust.
To prevent corrosion, avoid
damp cellars, stables (because
of the presence of ammonia)
and areas where strong chemi-
cals are stored.Long-term
Before storing your scooter for several
months:
1. Follow all the instructions in the
“Care” section of this chapter.2. Fill up the fuel tank and add fuel
stabilizer (if available) to prevent
the fuel tank from rusting and the
fuel from deteriorating.
3. Perform the following steps to
protect the cylinder, piston rings,
etc. from corrosion.
a. Remove the spark plug cap
and spark plug.
b. Pour a teaspoonful of engine
oil into the spark plug bore.
c. Install the spark plug cap onto
the spark plug, and then place
the spark plug on the cylinder
head so that the electrodes are
grounded. (This will limit spark-
ing during the next step.)
d. Turn the engine over several
times with the starter. (This will
coat the cylinder wall with oil.)
e. Remove the spark plug cap
from the spark plug, and then
install the spark plug and the
spark plug cap. WARNING! To
prevent damage or injury
from sparking, make sure to
ground the spark plug elec-
trodes while turning the en-
gine over.
[EWA10952]
4. Lubricate all control cables and
the pivoting points of all levers and
pedals as well as of the side-
stand/centerstand.
5. Check and, if necessary, correct
the tire air pressure, and then lift
the scooter so that both of its
wheels are off the ground. Alterna-
tively, turn the wheels a little every
month in order to prevent the tires
from becoming degraded in one
spot.
6. Cover the muffler outlet with a
plastic bag to prevent moisture
from entering it.
7. Remove the battery and fully
charge it. Store it in a cool, dry
place and charge it once a month.
Do not store the battery in an ex-
cessively cold or warm place [less
than 0 °C (30 °F) or more than 30
°C (90 °F)]. For more information
on storing the battery, see page
6-23.TIPMake any necessary repairs before
storing the scooter.
U1GBE1E0.book Page 4 Tuesday, October 17, 2017 11:45 AM
Page 71 of 78

Specifications
8-2
8
Front tire:Type:
Tubeless
Size:
120/70-13 53P
Manufacturer/model:
MICHELIN/POWER PURE SCRear tire:Type:
Tubeless
Size:
130/60-13 53P
Manufacturer/model:
MICHELIN/POWER PURE SCLoading:Maximum load:
182 kg (401 lb)
(Total weight of rider, passenger, cargo
and accessories)Tire air pressure (measured on cold
tires):1 person:
Front:
150 kPa (1.50 kgf/cm², 22 psi)
Rear:
150 kPa (1.50 kgf/cm², 22 psi)
2 persons:
Front:
160 kPa (1.60 kgf/cm², 23 psi)
Rear:
170 kPa (1.70 kgf/cm², 25 psi)Front wheel:Wheel type:
Cast wheelRim size:
13 x MT3.00
Rear wheel:Wheel type:
Cast wheel
Rim size:
13 x MT3.50Front brake:Type:
Hydraulic single disc brake
Specified brake fluid:
DOT 4Rear brake:Type:
Hydraulic single disc brake
Specified brake fluid:
DOT 4Front suspension:Type:
Telescopic fork
Spring:
Coil spring
Shock absorber:
Hydraulic damper
Wheel travel:
80 mm (3.1 in)Rear suspension:Type:
Unit swing
Spring:
Coil spring
Shock absorber:
Hydraulic damperWheel travel:
64 mm (2.5 in)
Electrical system:System voltage:
12 V
Ignition system:
TCI
Charging system:
AC magnetoBattery:Model:
GS CB5L-B
Voltage, capacity:
12 V, 5.0 Ah (10 HR)Headlight:Bulb type:
Halogen bulbBulb wattage:Headlight:
35.0 W/35.0 W x 1
Brake/tail light:
21.0 W/5.0 W × 1
Front turn signal light:
10.0 W × 2
Rear turn signal light:
10.0 W × 2
Auxiliary light:
5.0 W × 1
License plate light:
5.0 W × 1
Meter lighting:
LED
High beam indicator light:
LED
U1GBE1E0.book Page 2 Tuesday, October 17, 2017 11:45 AM