2018 VOLVO V90 CROSS COUNTRY ECO mode
[x] Cancel search: ECO modePage 159 of 662
LIGHTING
}}
* Option/accessory.157
With the steering wheel lever's lighting ring in the
position, the daytime running lights (DRL
1
)
will illuminate when the vehicle is driven in day- light conditions. The headlights will switch auto-matically from daytime running lights to lowbeams in weak daylight or dark conditions. Theheadlights will also switch to low beams if the front fog lights * and/or rear fog light are acti-
vated. US models : When
mode is selected, the
daytime running lights can be deactivated in the center display. The parking lights will also bedeactivated. In weak daylight or dark conditions,the parking lights and low beams will be illumi-nated. In the US: With the lighting ring in the
or
position, the daytime running lights will be
off .
In Canada : With the lighting ring in the
or
position, the daytime running lights will be
on.
NOTE
Volvo recommends use of Daytime Running Lights in the US. Its use is mandatory in Can-ada.
WARNING
The system is an energy saving aid – it cannot in all situations determine when the daylight istoo weak or not strong enough, e.g. whenthere is fog or rain. The driver is always responsible for driving the vehicle with lighting that is safe for the trafficconditions and as specified by applicable traf-fic regulations.
Related information
• Lighting panel and controls (p. 154)
• Ignition modes (p. 403)
• Low beams (p. 157)
• Replacing daytime running lights/front park- ing light bulbs (p. 591)
Low beams
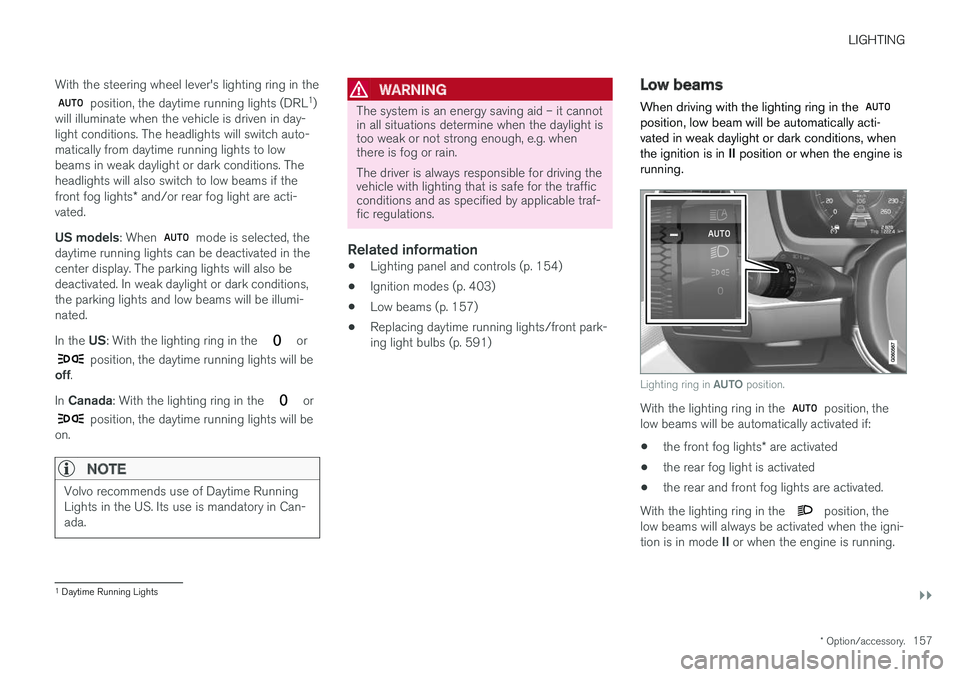
When driving with the lighting ring in the
position, low beam will be automatically acti- vated in weak daylight or dark conditions, whenthe ignition is in II position or when the engine is
running.
Lighting ring in AUTO position.
With the lighting ring in the position, the
low beams will be automatically activated if:
• the front fog lights
* are activated
• the rear fog light is activated
• the rear and front fog lights are activated.
With the lighting ring in the
position, the
low beams will always be activated when the igni- tion is in mode II or when the engine is running.
1
Daytime Running Lights
Page 169 of 662
LIGHTING
* Option/accessory.167
Adjusting interior lighting
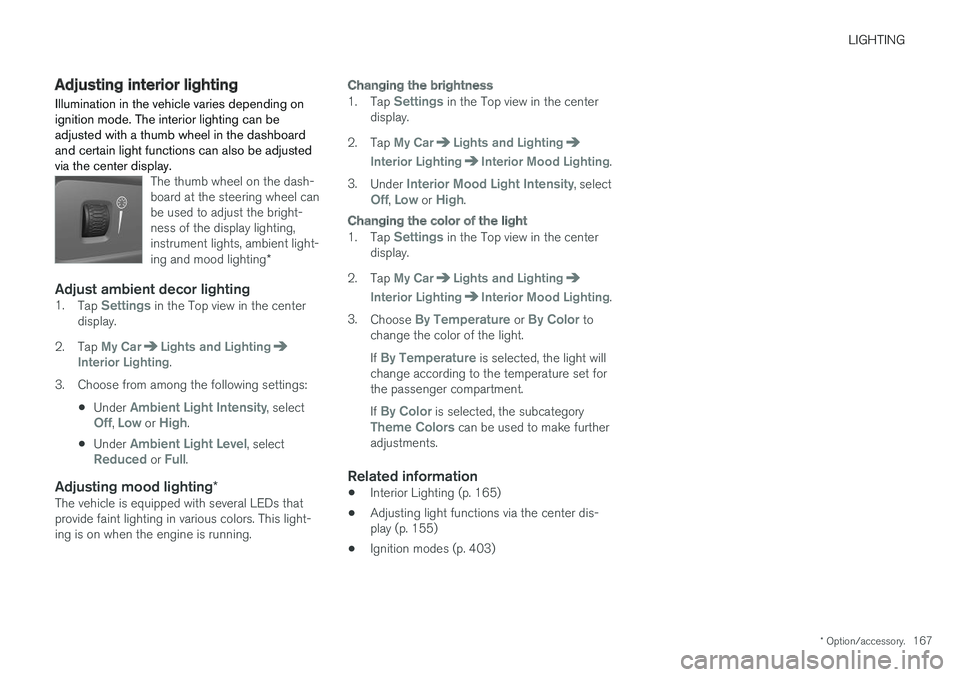
Illumination in the vehicle varies depending on ignition mode. The interior lighting can beadjusted with a thumb wheel in the dashboardand certain light functions can also be adjustedvia the center display.
The thumb wheel on the dash- board at the steering wheel canbe used to adjust the bright-ness of the display lighting,instrument lights, ambient light- ing and mood lighting *
Adjust ambient decor lighting1.
Tap Settings in the Top view in the center
display.
2. Tap
My CarLights and LightingInterior Lighting.
3. Choose from among the following settings:
•Under
Ambient Light Intensity, selectOff, Low or High.
• Under
Ambient Light Level, selectReduced or Full.
Adjusting mood lighting
*The vehicle is equipped with several LEDs that provide faint lighting in various colors. This light-ing is on when the engine is running.
Changing the brightness
1.
Tap Settings in the Top view in the center
display.
2. Tap
My CarLights and Lighting
Interior LightingInterior Mood Lighting.
3. Under
Interior Mood Light Intensity, selectOff, Low or High.
Changing the color of the light
1.Tap Settings in the Top view in the center
display.
2. Tap
My CarLights and Lighting
Interior LightingInterior Mood Lighting.
3. Choose
By Temperature or By Color to
change the color of the light. If
By Temperature is selected, the light will
change according to the temperature set for the passenger compartment. If
By Color is selected, the subcategoryTheme Colors can be used to make further
adjustments.
Related information
• Interior Lighting (p. 165)
• Adjusting light functions via the center dis- play (p. 155)
• Ignition modes (p. 403)
Page 173 of 662
WINDOWS, GLASS AND MIRRORS
}}
* Option/accessory.171
Related information
•Reset procedure for pinch protection (p. 171)
• Operating the power windows (p. 172)
• Using sun curtains
* (p. 173)
• Panoramic roof
* (p. 176)
Reset procedure for pinchprotection
If the power windows are not operating properly, you can try a reset procedure.
WARNING
If the starter battery is disconnected, the func- tion for automatic opening and closing mustbe reset to function correctly. A reset isrequired in order for the pinch protection towork.
If the problem persists or if it affects the panor- amic roof or sunroof, contact a workshop. 2
Resetting a power window
1. Start with the window in the closed position.
2. Then operate the window in manual mode
three times upward toward the closed posi- tion.
> The system will be automatically initiated.
Related information
• Pinch protection for windows and sun cur- tains (p. 170)
• Operating the power windows (p. 172)
• Using sun curtains
* (p. 173)
Power windows
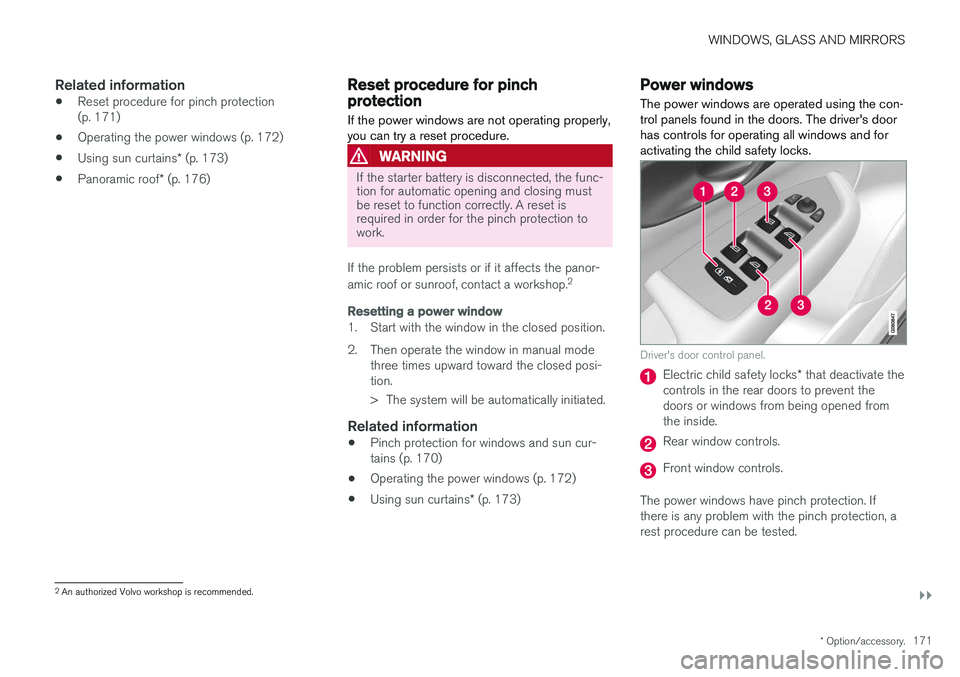
The power windows are operated using the con- trol panels found in the doors. The driver's doorhas controls for operating all windows and foractivating the child safety locks.
Driver's door control panel.
Electric child safety locks * that deactivate the
controls in the rear doors to prevent the doors or windows from being opened fromthe inside.
Rear window controls.
Front window controls.
The power windows have pinch protection. If there is any problem with the pinch protection, arest procedure can be tested.
2 An authorized Volvo workshop is recommended.
Page 177 of 662
WINDOWS, GLASS AND MIRRORS
}}
* Option/accessory.175
Adjusting the door mirrors
To improve visibility to the rear, the door mirrors need to be adjusted to the driver's height andseating position. There are several automaticsettings that can also be connected to the mem- ory function buttons for the power seat *.
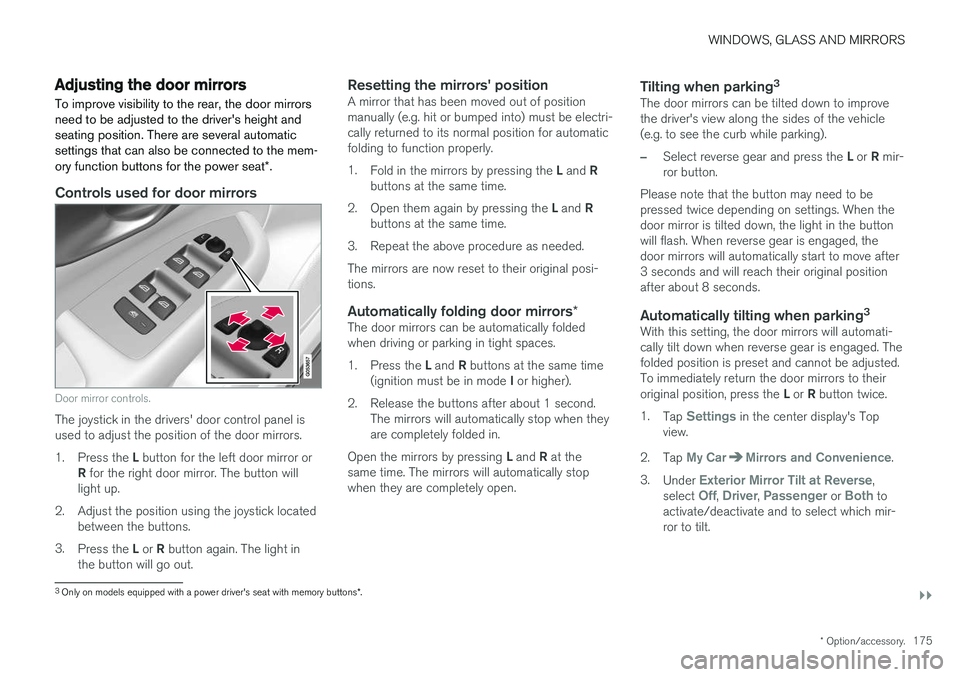
Controls used for door mirrors
Door mirror controls.
The joystick in the drivers' door control panel is used to adjust the position of the door mirrors. 1.
Press the L button for the left door mirror or
R for the right door mirror. The button will
light up.
2. Adjust the position using the joystick located between the buttons.
3. Press the L or R button again. The light in
the button will go out.
Resetting the mirrors' positionA mirror that has been moved out of position manually (e.g. hit or bumped into) must be electri-cally returned to its normal position for automaticfolding to function properly. 1. Fold in the mirrors by pressing the L and R
buttons at the same time.
2. Open them again by pressing the L and R
buttons at the same time.
3. Repeat the above procedure as needed.The mirrors are now reset to their original posi- tions.
Automatically folding door mirrors *The door mirrors can be automatically foldedwhen driving or parking in tight spaces. 1.
Press the L and R buttons at the same time
(ignition must be in mode I or higher).
2. Release the buttons after about 1 second. The mirrors will automatically stop when they are completely folded in.
Open the mirrors by pressing L and R at the
same time. The mirrors will automatically stopwhen they are completely open.
Tilting when parking 3The door mirrors can be tilted down to improvethe driver's view along the sides of the vehicle(e.g. to see the curb while parking).
–Select reverse gear and press the
L or R mir-
ror button.
Please note that the button may need to be pressed twice depending on settings. When thedoor mirror is tilted down, the light in the buttonwill flash. When reverse gear is engaged, thedoor mirrors will automatically start to move after3 seconds and will reach their original positionafter about 8 seconds.
Automatically tilting when parking 3With this setting, the door mirrors will automati-cally tilt down when reverse gear is engaged. Thefolded position is preset and cannot be adjusted.To immediately return the door mirrors to their original position, press the
L or R button twice.
1. Tap
Settings in the center display's Top
view.
2. Tap
My CarMirrors and Convenience.
3. Under
Exterior Mirror Tilt at Reverse,
select Off, Driver, Passenger or Both to
activate/deactivate and to select which mir- ror to tilt.
3 Only on models equipped with a power driver's seat with memory buttons *.
Page 180 of 662
||
WINDOWS, GLASS AND MIRRORS
178direction opposite that of the current direction of movement. The panoramic roof and sun curtain are also equipped with pinch protection.
NOTE
For manual opening, the sun curtain must be completely open before the panoramic roofcan be opened. For the reverse procedure,the panoramic roof must be completelyclosed before the sun curtain can be com-pletely closed.
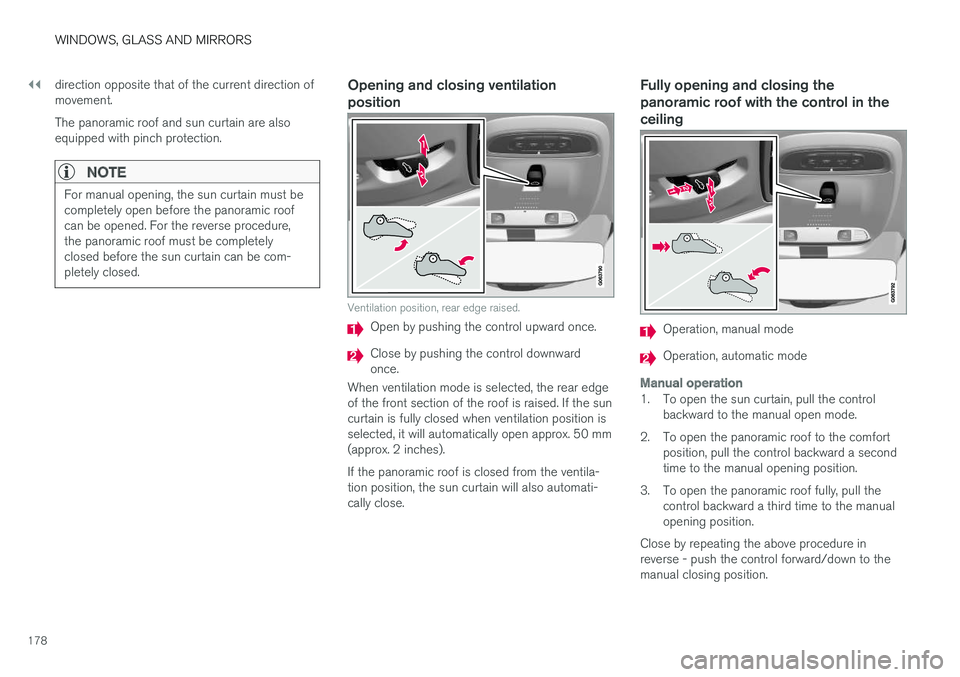
Opening and closing ventilation position
Ventilation position, rear edge raised.
Open by pushing the control upward once.
Close by pushing the control downward once.
When ventilation mode is selected, the rear edgeof the front section of the roof is raised. If the suncurtain is fully closed when ventilation position isselected, it will automatically open approx. 50 mm(approx. 2 inches). If the panoramic roof is closed from the ventila- tion position, the sun curtain will also automati-cally close.
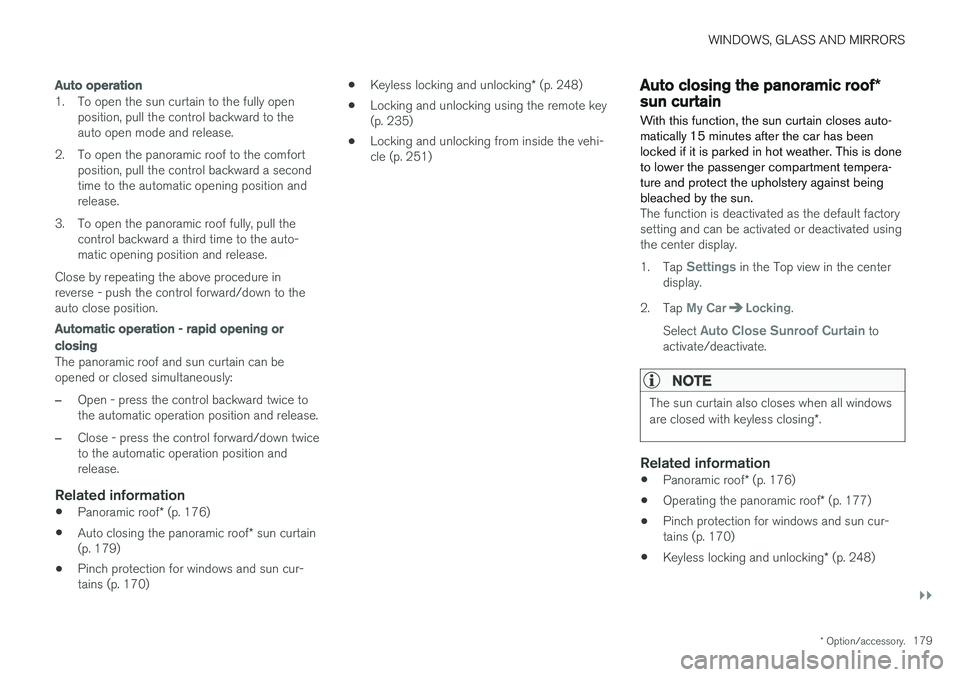
Fully opening and closing the panoramic roof with the control in theceiling
Operation, manual mode
Operation, automatic mode
Manual operation
1. To open the sun curtain, pull the control backward to the manual open mode.
2. To open the panoramic roof to the comfort position, pull the control backward a second time to the manual opening position.
3. To open the panoramic roof fully, pull the control backward a third time to the manualopening position.
Close by repeating the above procedure inreverse - push the control forward/down to themanual closing position.
Page 181 of 662
WINDOWS, GLASS AND MIRRORS
}}
* Option/accessory.179
Auto operation
1. To open the sun curtain to the fully open
position, pull the control backward to the auto open mode and release.
2. To open the panoramic roof to the comfort position, pull the control backward a secondtime to the automatic opening position andrelease.
3. To open the panoramic roof fully, pull the control backward a third time to the auto-matic opening position and release.
Close by repeating the above procedure inreverse - push the control forward/down to theauto close position.
Automatic operation - rapid opening or
closing
The panoramic roof and sun curtain can be opened or closed simultaneously:
–Open - press the control backward twice to the automatic operation position and release.
–Close - press the control forward/down twice to the automatic operation position andrelease.
Related information
• Panoramic roof
* (p. 176)
• Auto closing the panoramic roof
* sun curtain
(p. 179)
• Pinch protection for windows and sun cur-tains (p. 170) •
Keyless locking and unlocking
* (p. 248)
• Locking and unlocking using the remote key(p. 235)
• Locking and unlocking from inside the vehi-cle (p. 251)
Auto closing the panoramic roof
*sun curtain
With this function, the sun curtain closes auto- matically 15 minutes after the car has beenlocked if it is parked in hot weather. This is doneto lower the passenger compartment tempera-ture and protect the upholstery against beingbleached by the sun.
The function is deactivated as the default factory setting and can be activated or deactivated usingthe center display. 1. Tap
Settings in the Top view in the center
display.
2. Tap
My CarLocking.
Select
Auto Close Sunroof Curtain to
activate/deactivate.
NOTE
The sun curtain also closes when all windows are closed with keyless closing *.
Related information
• Panoramic roof
* (p. 176)
• Operating the panoramic roof
* (p. 177)
• Pinch protection for windows and sun cur- tains (p. 170)
• Keyless locking and unlocking
* (p. 248)
Page 239 of 662
KEY, LOCKS AND ALARM
}}
* Option/accessory.237
Unlocking the tailgate using theremote key
The remote key can be used to unlock the tail- gate while keeping the rest of the vehicle locked.
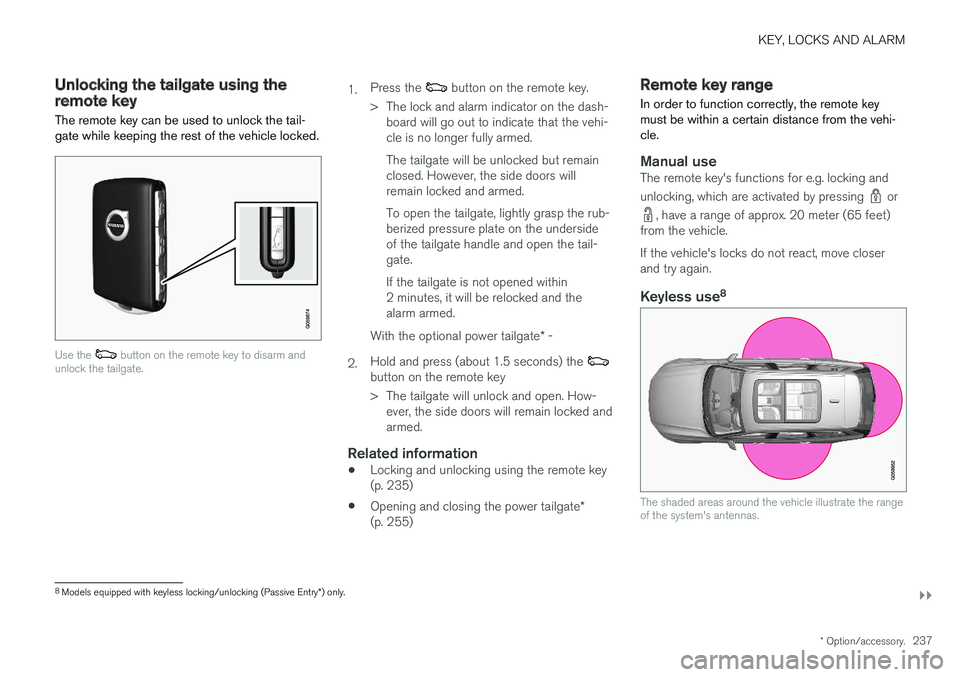
Use the button on the remote key to disarm and
unlock the tailgate.
1. Press the button on the remote key.
> The lock and alarm indicator on the dash- board will go out to indicate that the vehi- cle is no longer fully armed. The tailgate will be unlocked but remain closed. However, the side doors willremain locked and armed. To open the tailgate, lightly grasp the rub- berized pressure plate on the undersideof the tailgate handle and open the tail-gate. If the tailgate is not opened within 2 minutes, it will be relocked and thealarm armed.
2. With the optional power tailgate
* -
Hold and press (about 1.5 seconds) the
button on the remote key
> The tailgate will unlock and open. How- ever, the side doors will remain locked and armed.
Related information
• Locking and unlocking using the remote key(p. 235)
• Opening and closing the power tailgate
*
(p. 255)
Remote key range
In order to function correctly, the remote key must be within a certain distance from the vehi-cle.
Manual useThe remote key's functions for e.g. locking and unlocking, which are activated by pressing
or
, have a range of approx. 20 meter (65 feet)
from the vehicle. If the vehicle's locks do not react, move closer and try again.
Keyless use 8
The shaded areas around the vehicle illustrate the range of the system's antennas.
8
Models equipped with keyless locking/unlocking (Passive Entry *) only.
Page 264 of 662
||
KEY, LOCKS AND ALARM
262
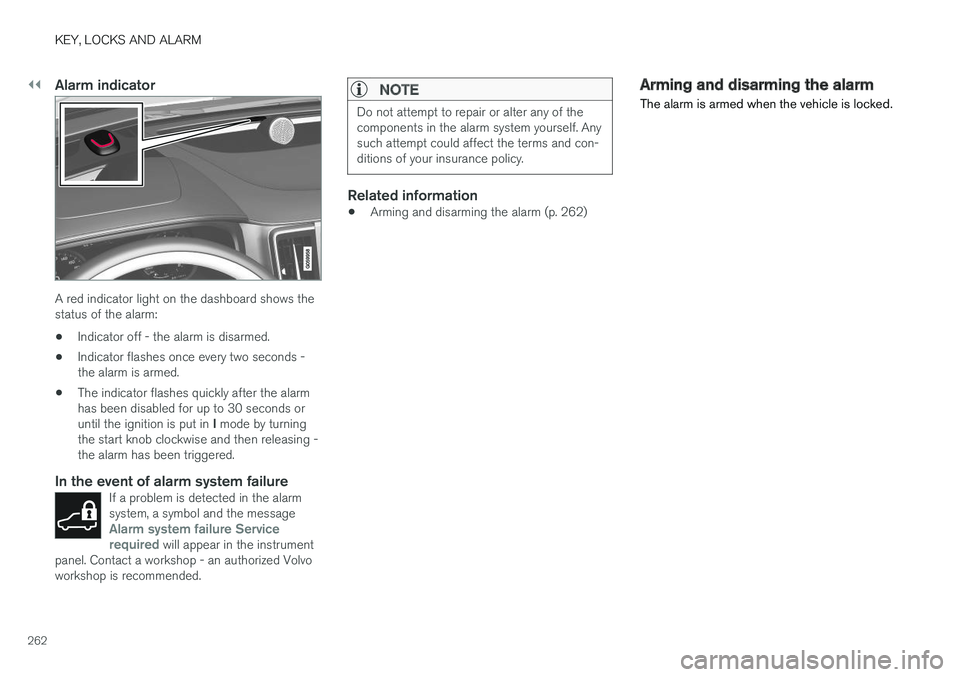
Alarm indicator
A red indicator light on the dashboard shows the status of the alarm:• Indicator off - the alarm is disarmed.
• Indicator flashes once every two seconds -the alarm is armed.
• The indicator flashes quickly after the alarmhas been disabled for up to 30 seconds or until the ignition is put in
I mode by turning
the start knob clockwise and then releasing - the alarm has been triggered.
In the event of alarm system failureIf a problem is detected in the alarmsystem, a symbol and the message
Alarm system failure Service
required will appear in the instrument
panel. Contact a workshop - an authorized Volvo workshop is recommended.
NOTE
Do not attempt to repair or alter any of the components in the alarm system yourself. Anysuch attempt could affect the terms and con-ditions of your insurance policy.
Related information
• Arming and disarming the alarm (p. 262)
Arming and disarming the alarm
The alarm is armed when the vehicle is locked.