2018 VOLVO V60 CROSS COUNTRY wheel
[x] Cancel search: wheelPage 251 of 404
DRIVER SUPPORT
}}
249
DeactivationMove the gear selector from R to another gear.
The camera remains active for approx. 5 seconds after the gear selector has been moved from R or
until the vehicle's forward speed exceeds 6 mph/10 km/h (21 mph/35 km/h in reverse).The screen will then revert to the view that was displayed before R was selected.
NOTE
If any button on the center console control panel is pressed, the camera image will disap- pear from the display. Pressing CAM will
return the camera image to the display.
SettingsBy default, PAC is set to activate when the gear selector is moved to R
To change PAC settings when a camera view is displayed: 1. Press OK/MENU when a camera view is on
the screen. A menu will be displayed.
2. Turn TUNE to scroll to the desired setting.
3. Press OK/MENU to make the setting and
exit the menu by pressing EXIT.
Summary
•Pressing
CAM will activate the camera even
if the gear selector is not in Reverse.
• Toggle between normal view and zoom by pressing
CAM or by turning TUNE.
Related information
•Park assist – introduction (p. 238)
• Park assist – function (p. 238)
• Park assist – troubleshooting (p. 246)
• Park assist – limitations (p. 241)
• Rear Park Assist Camera (PAC) – introduc- tion (p. 247)
Rear Park Assist Camera (PAC) – guiding and marker lines
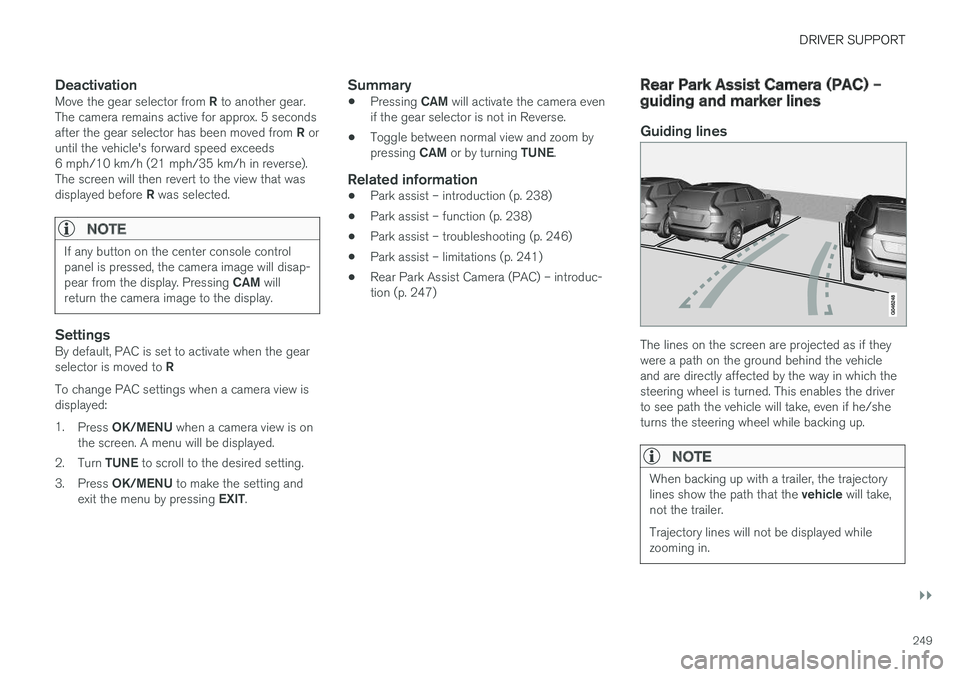
Guiding lines
The lines on the screen are projected as if they were a path on the ground behind the vehicleand are directly affected by the way in which thesteering wheel is turned. This enables the driverto see path the vehicle will take, even if he/sheturns the steering wheel while backing up.
NOTE
When backing up with a trailer, the trajectory lines show the path that the
vehicle will take,
not the trailer. Trajectory lines will not be displayed while zooming in.
Page 252 of 404
||
DRIVER SUPPORT
250
WARNING
Keep in mind that the image on the screen only shows the area behind the vehicle. Thedriver must always watch for people, animals,other vehicles, etc., near the sides of the vehi-cle when turning while backing up.
Marker lines
The PAC system's lines
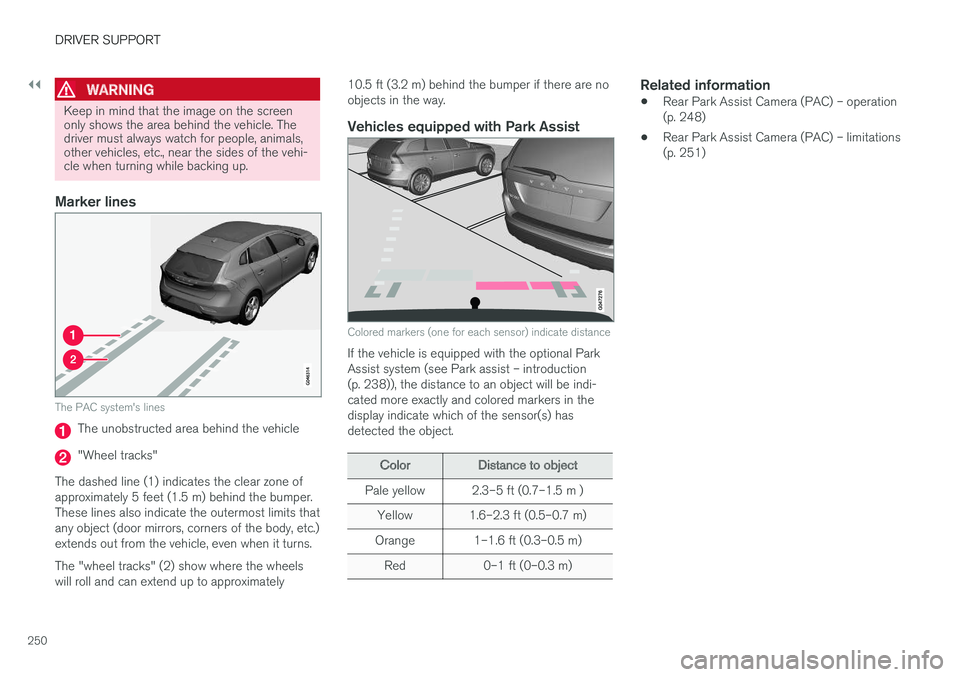
The unobstructed area behind the vehicle
"Wheel tracks"
The dashed line (1) indicates the clear zone of approximately 5 feet (1.5 m) behind the bumper.These lines also indicate the outermost limits thatany object (door mirrors, corners of the body, etc.)extends out from the vehicle, even when it turns. The "wheel tracks" (2) show where the wheels will roll and can extend up to approximately 10.5 ft (3.2 m) behind the bumper if there are noobjects in the way.
Vehicles equipped with Park Assist
Colored markers (one for each sensor) indicate distance
If the vehicle is equipped with the optional Park Assist system (see Park assist – introduction(p. 238)), the distance to an object will be indi-cated more exactly and colored markers in thedisplay indicate which of the sensor(s) hasdetected the object.
Color
Distance to object
Pale yellow 2.3–5 ft (0.7–1.5 m ) Yellow 1.6–2.3 ft (0.5–0.7 m)
Orange 1–1.6 ft (0.3–0.5 m) Red 0–1 ft (0–0.3 m)
Related information
• Rear Park Assist Camera (PAC) – operation (p. 248)
• Rear Park Assist Camera (PAC) – limitations(p. 251)
Page 255 of 404
DRIVER SUPPORT
* Option/accessory.253
WARNING
•BLIS does not function in sharp curves.
• BLIS does not function when your vehicle is backing up.
Related information
•
BLIS
* – introduction (p. 251)
• BLIS
* – operation (p. 253)
• BLIS
* – Cross Traffic Alert (CTA) (p. 254)
• BLIS
* – limitations (p. 255)
• BLIS
* – messages (p. 256)
BLIS * – operation
Activating/deactivating BLIS
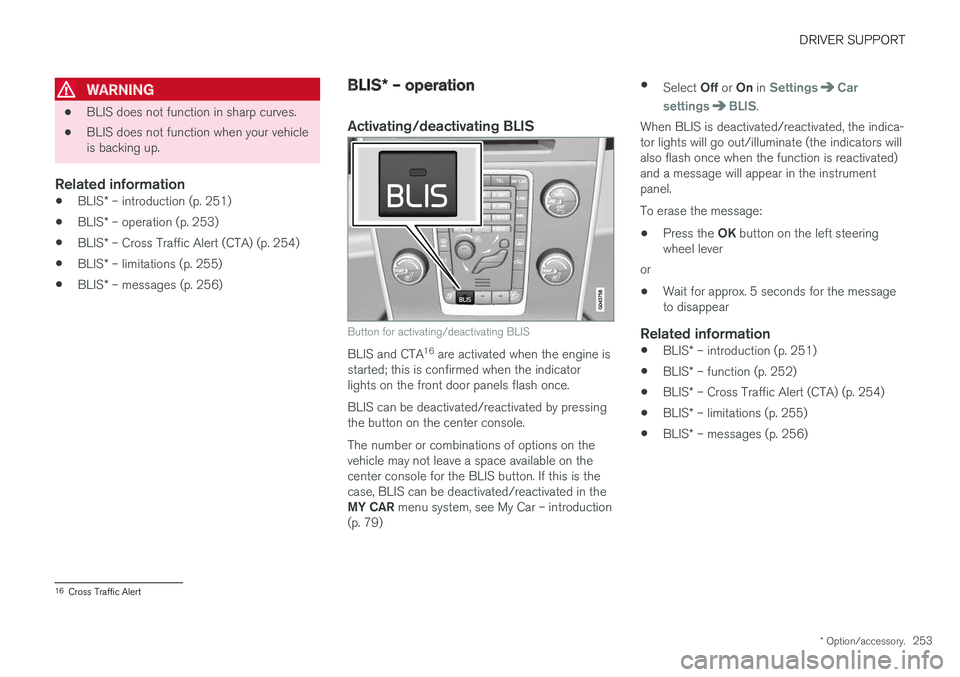
Button for activating/deactivating BLIS
BLIS and CTA 16
are activated when the engine is
started; this is confirmed when the indicator lights on the front door panels flash once. BLIS can be deactivated/reactivated by pressing the button on the center console. The number or combinations of options on the vehicle may not leave a space available on thecenter console for the BLIS button. If this is thecase, BLIS can be deactivated/reactivated in the MY CAR menu system, see My Car – introduction
(p. 79) •
Select Off or On in
SettingsCar
settings
BLIS.
When BLIS is deactivated/reactivated, the indica- tor lights will go out/illuminate (the indicators willalso flash once when the function is reactivated)and a message will appear in the instrumentpanel. To erase the message:
• Press the
OK button on the left steering
wheel lever
or
• Wait for approx. 5 seconds for the message to disappear
Related information
•
BLIS
* – introduction (p. 251)
• BLIS
* – function (p. 252)
• BLIS
* – Cross Traffic Alert (CTA) (p. 254)
• BLIS
* – limitations (p. 255)
• BLIS
* – messages (p. 256)
16
Cross Traffic Alert
Page 258 of 404
||
DRIVER SUPPORT
* Option/accessory.
256 The BLIS/CTA
18
sensors are located on the
inside of the rear fenders/bumper. The surfaces in front of the sensors must be kept clean for the system to function optimally.
CAUTION
Repairs to the BLIS/CTA systems and/or repainting the rear bumper should only bedone by a trained and qualified Volvo servicetechnician.
Related information
• BLIS
* – introduction (p. 251)
• BLIS
* – function (p. 252)
• BLIS
* – operation (p. 253)
• BLIS
* – Cross Traffic Alert (CTA) (p. 254)
• BLIS
* – messages (p. 256)
BLIS * – messages
If BLIS/CTA 19
are not functioning normally, a
symbol will illuminate in the instrument panel and a text message will be displayed. Follow anyinstructions that may be provided. These messages include:
Message System status
CTA OFFCTA has been switched off manually. BLIS remains active.
BLIS and CTA OFFTrailerattachedBLIS and CTA are temporarily deactivated because a trailer'swiring has been connected tothe vehicle's electrical system.
BLIS and CTA ServicerequiredBLIS and CTA are not func- tioning normally.
• If this message recurs,the systems should beinspected by a trainedand qualified Volvo serv-ice technician.
Messages can be erased by pressing the
OK
button on the left steering wheel lever.
Related information
• BLIS
* – introduction (p. 251)
• BLIS
* – function (p. 252)
• BLIS
* – operation (p. 253)
• BLIS
* – Cross Traffic Alert (CTA) (p. 254)
• BLIS
* – limitations (p. 255)
18
Cross Traffic Alert
19 Cross Traffic Alert
Page 260 of 404

STARTING AND DRIVING
* Option/accessory.
258
Starting the engine
The engine can be started/switched off using the remote key and the START/STOP ENGINE
button.
Ignition slot with remote key inserted (see Ignition modes (p. 82) for more information on ignition modes)
WARNING
Before starting the engine:
• Fasten the seat belt.
• Check that the seat, steering wheel and mirrors are adjusted properly.
• Make sure the brake pedal can bedepressed completely. Adjust the seat ifnecessary.
WARNING
•Never use more than one floor mat at a time on the driver's floor. Before driving,remove the original mat from the driver'sseat floor before using any other type offloor mat. Any mat used in this positionshould be securely and properly anchoredin the attaching pins. An extra mat on thedriver's floor can cause the acceleratorand/or brake pedal to catch. Check thatthe movement of these pedals is notimpeded.
• Volvo's floor mats are specially manufac-tured for your car. They must be firmlysecured in the clips on the floor so thatthey cannot slide and become trappedunder the pedals on the driver's side.
1. Press the remote key into the ignition slot as far as possible, with the metallic key blade pointing outward (not inserted into the slot) 1
.
2. Depress the brake pedal 2
. 3.
Press and release the START/STOP
ENGINE button. The autostart function will
operate the starter motor until the engine starts or until its overheating function stopsit. The starter motor operates for a maximum of 10 seconds. If the engine has not started,repeat the procedure.
CAUTION
If the engine does not start after the third try, wait for approximately 3 minutes before tryingto start it again to give the battery time torecover its starting capacity.
NOTE
Keyless drive *
To start a vehicle equipped with the keyless drive feature, one of the remote keys must bein the passenger compartment. Follow theinstructions in steps 2 and 3 to start the vehi-cle.
1 On vehicles with the optional keyless drive, it is only necessary to have a remote key in the passenger
Page 268 of 404
||
STARTING AND DRIVING
* Option/accessory.
266
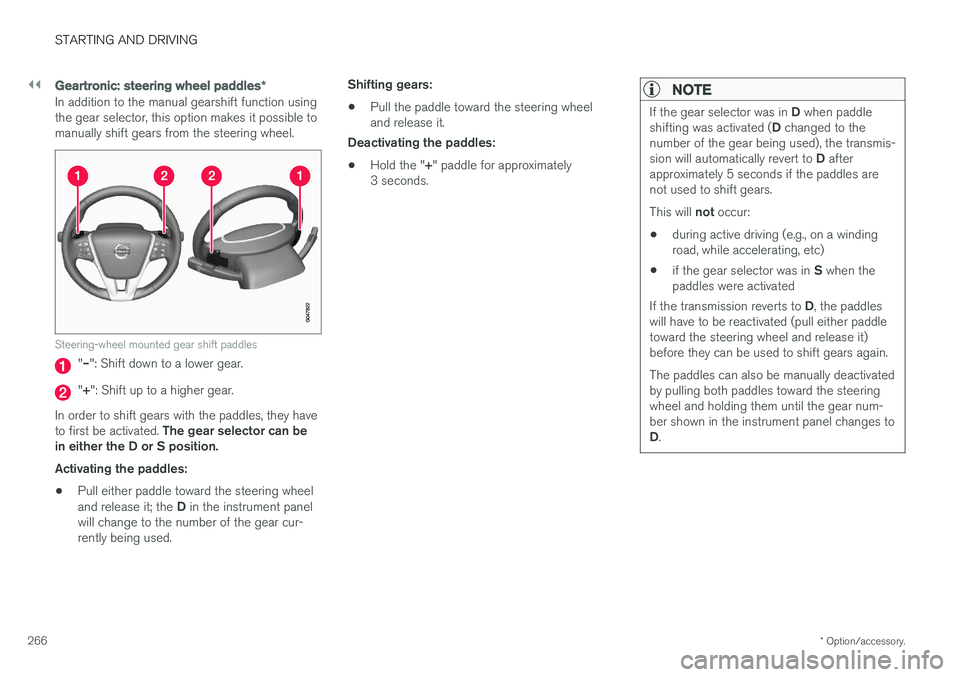
Geartronic : steering wheel paddles *
In addition to the manual gearshift function using the gear selector, this option makes it possible tomanually shift gears from the steering wheel.
Steering-wheel mounted gear shift paddles
"– ": Shift down to a lower gear.
"+ ": Shift up to a higher gear.
In order to shift gears with the paddles, they have to first be activated. The gear selector can be
in either the D or S position. Activating the paddles:
• Pull either paddle toward the steering wheel and release it; the
D in the instrument panel
will change to the number of the gear cur- rently being used. Shifting gears:
• Pull the paddle toward the steering wheeland release it.
Deactivating the paddles:
• Hold the "
+" paddle for approximately
3 seconds.
NOTE
If the gear selector was in D when paddle
shifting was activated ( D changed to the
number of the gear being used), the transmis- sion will automatically revert to D after
approximately 5 seconds if the paddles are not used to shift gears. This will not occur:
• during active driving (e.g., on a winding road, while accelerating, etc)
• if the gear selector was in
S when the
paddles were activated
If the transmission reverts to D, the paddles
will have to be reactivated (pull either paddletoward the steering wheel and release it)before they can be used to shift gears again. The paddles can also be manually deactivated by pulling both paddles toward the steeringwheel and holding them until the gear num-ber shown in the instrument panel changes to D .
Page 272 of 404
STARTING AND DRIVING
* Option/accessory.
270
Start/Stop – Auto-stop exceptions
In certain situations or conditions, the engine may not auto-stop when the vehicle comes to a
standstill, such as if:
Condition/situation The vehicle's speed has not reached a speed of approx. 6 mph (10 km/h) after the mostrecent auto-start or after the driver has startedthe engine. The driver unbuckles his/her seat belt.The main battery's charge is below the mini- mum level. The engine has not reached its normal operat- ing temperature. The ambient temperature is below approx. 25°F (-4°C) or above approx. 85°F (30°C). The windshield's heating function * is activated.
The climate system cannot keep the desired settings in the passenger compartment; theblower will operate at high speed. The vehicle is backing up.The main battery's temperature is below freez- ing or too high. The driver is turning the steering wheel hard.
Condition/situation The road's incline is very steep. A trailer's electrical system is connected to the vehicle. The hood has been opened A
.
The transmission has not reached its normal operating temperature. Atmospheric pressure is below a level equiva- lent to an altitude of approx. 4,900–8,200 ft
(1500–2500 m) above sea level. The actualpressure is also affected by current weatherconditions. The Adaptive Cruise Control's * Queue Assist
feature is activated. The gear selector is in the SB
or " +/–" posi-
tion.
A Certain engines only
B Sport mode (where applicable)
Related information
• Start/Stop – introduction (p. 268)
• Start/Stop – function (p. 269)
• Start/Stop – settings (p. 271)
• Start/Stop – Auto-start exceptions (p. 270)
• Start/Stop – Hill Start Assist (HSA) (p. 268)
• Start/Stop – symbols and messages (p. 272)
Start/Stop – Auto-start exceptions
In certain situations or conditions, the engine may auto-start
even though the driver is still
pressing the brake pedal, such as if:
Condition/situation Condensation forms on the windows. The climate system cannot keep the desired settings in the passenger compartment. Electrical current consumption is temporarily high or the main battery's charge is below theminimum level. The brake pedal is pumped repeatedly. The hood has been opened A
.
The vehicle begins to move or increases speed
slightly (if the engine auto-stopped before the vehicle was at a standstill (see ECO *
(p. 273))). The driver unbuckles his/her seat belt while the gear selector is in the D or N positions.
The steering wheel is turned A
.
Page 276 of 404
||
STARTING AND DRIVING
* Option/accessory.
274 This feature is primarily intended to be used in driving situations where a decrease in speed isexpected, such as when entering a zone with alower speed limit. Eco Coast enables proactive driving with as little braking as possible.
Combinations of On and Off
Depending on the driving situation, Eco can be used in different ways to help reduce fuel con-sumption:
• With Eco activated
: this enables Eco Coast,
which allows the vehicle to roll freely for as
far as possible when the driver releases the
accelerator pedal (e.g., when approaching atraffic light or intersection).
or
• With Eco deactivated
: engine braking can
be used when the vehicle will only roll for
a short distance (in heavy traffic, etc.) or
when driving down hills .
To help keep fuel consumption as low as possi-ble, Eco Coast should not be used in traffic situa-tions where the brakes have to be used fre-quently.
Activating Eco Coast
Eco Coast is activated when the accelerator pedal is released completely if:
• Eco is activated
• The gear selector is in
D •
The vehicle's speed is between approxi-mately 40–85 mph (65–140 km/h). Alwaysobserve posted speed limits
• The gradient of a down-slope is less thanapproximately 6%
Deactivating
Eco Coast
In certain situations, it may be advisable to switch off the Eco Coast function, such as:
• When driving down steep hills, in order to uti-lize engine braking
• Prior to passing another vehicle, in order todo so as safely as possible
Deactivating Eco Coast (and reactivating enginebraking) can be done in the following ways: • Press the
ECO button on the center console
• Move the gear selector to the manual "
S+/–"
position
• Change gears using the steering wheel pad- dles
*
• Press the brake or accelerator pedal
Eco Coast limitationsThis function will not be available if:
• Cruise control is activated
• The gradient of a down-slope is more than approximately 6%
• The steering wheel paddles
* are used to
manually change gears •
The engine and/or transmission have notreached their normal operating temperature
• The gear selector is moved from
D to the
manual " S+/–" position
• The vehicle's speed is not within the40–85 mph (65–140 km/h). interval
Additional information and settings
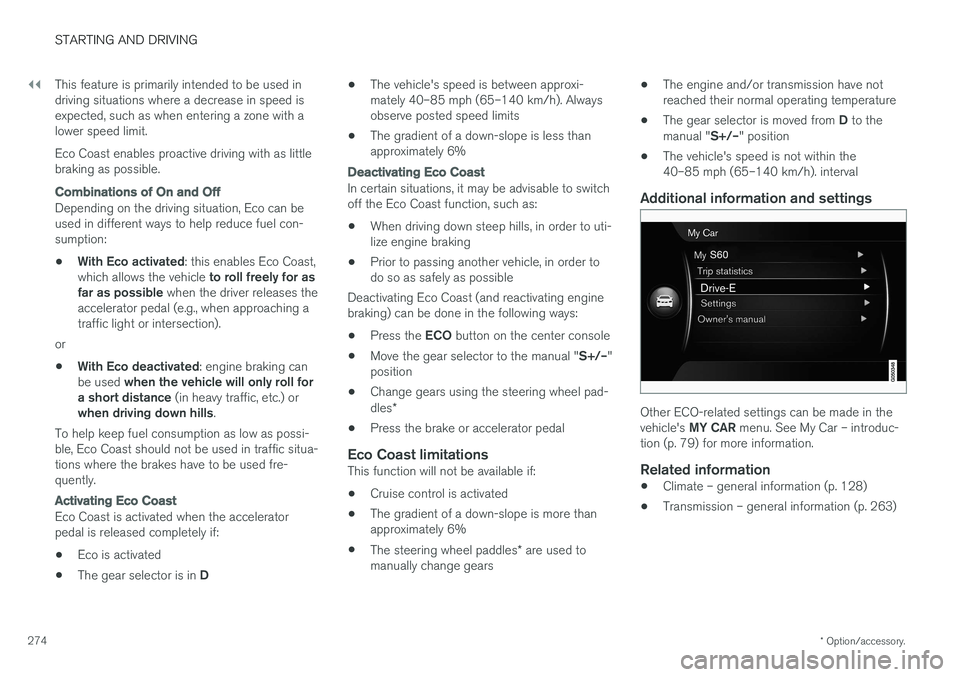
Other ECO-related settings can be made in the vehicle's
MY CAR menu. See My Car – introduc-
tion (p. 79) for more information.
Related information
• Climate – general information (p. 128)
• Transmission – general information (p. 263)