2018 VOLVO V60 CROSS COUNTRY fold seats
[x] Cancel search: fold seatsPage 89 of 404

INSTRUMENTS AND CONTROLS
}}
87
Returning the seat/mirrors to the stored positions
To move the seat and door mirrors to the position stored in the remote key: 1.Unlock the driver's door with the same
remote key (the one used to lock the doors). For models equipped with the optional key-less drive, you must have the same remotekey in your possession.
2. Open the driver's door within 2 minutes. The driver's seat and door mirrors will automati- cally move to the position in which you left them(if the vehicle has been unlocked with one of theother keys and new seat/mirror adjustments havebeen made).
NOTE
• The seat will move to this position even if someone else has moved it to a different position and locked the vehicle with a
dif-
ferent remote key.
• This feature will work in the same way with all of the remote keys that you usewith your vehicle.
Emergency stop
WARNING
•
Because the driver's seat can be adjusted with the ignition off, children should neverbe left unattended in the vehicle.
• Movement of the seat can be STOPPEDat any time by pressing any button on thepower seat control panel.
• Do not adjust the seat while driving. Theseat should be adjusted so that the brakepedal can be depressed fully. In addition,position the seat as far rearward as com-fort and control allow.
• The seat rails on the floor must not beobstructed in any way when the seat is inmotion.
Related information
• Remote key – functions (p. 155)
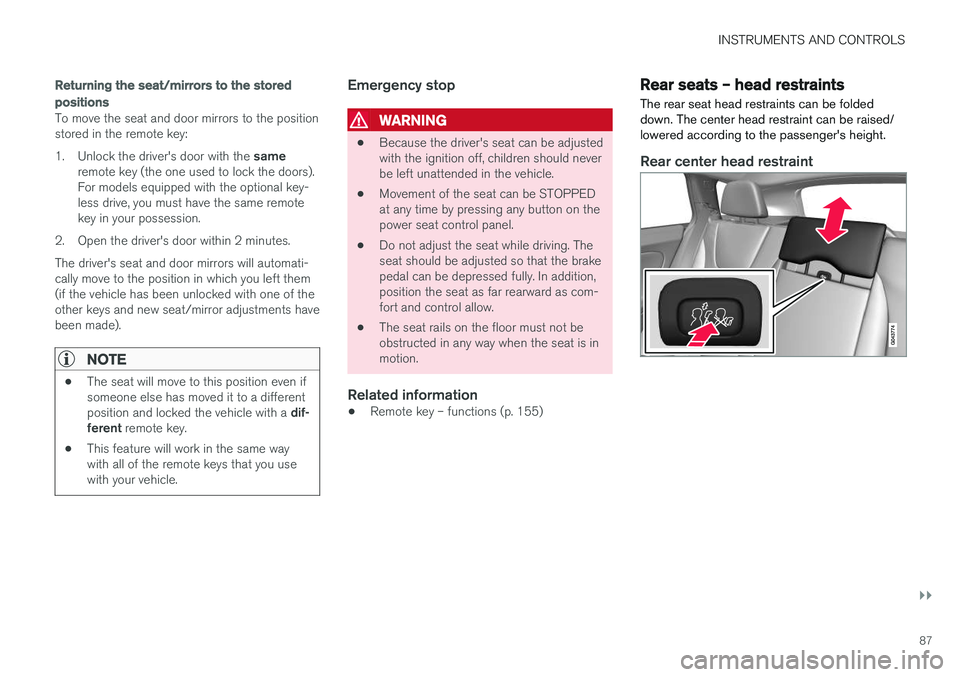
Rear seats – head restraints The rear seat head restraints can be folded down. The center head restraint can be raised/lowered according to the passenger's height.
Rear center head restraint
Page 92 of 404

||
INSTRUMENTS AND CONTROLS
90
Release and lower the center head restraint (see Rear seats – head restraints (p. 87)) ifthe center and/or right section of the back-rest is to be lowered. The outboard headrestraints fold down automatically.
Pull up the backrest release control on the respective section(s) (
) and fold the sec-
tion(s) down. A red indicator (
) shows that
the backrest is not locked in the upright position.
NOTE
It may be necessary to move the front seats forward or put their backrests in a moreupright position before folding down the rearseat backrests.
WARNING
• When one or more sections of the back- rest is returned to the upright position,check that it is properly locked in place bypushing and pulling it. The red indicatorsshould also not be visible.
• Return the outboard head restraints tothe upright position.
• Long loads should always be securelyanchored to help avoid injury in the eventof a sudden stop.
• Always turn the engine off and apply theparking brake when loading/unloadingthe vehicle.
• Place the transmission in the Park (
P)
position to help prevent inadvertentmovement of the gear selector.
• On hot days, the temperature in the vehi-cle interior can rise very quickly. Exposureof people to these high temperatures foreven a short period of time can causeheat-related injury or death. Small chil-dren are particularly at risk.
Related information
• Front seats (p. 83)
• Front seats – power seat (p. 84)
• Rear seats – head restraints (p. 87)
Page 148 of 404

LOADING AND STORAGE
146
Loading – general
The load carrying capacity of your vehicle is determined by factors such as the number ofpassengers, the amount of cargo, the weight ofany accessories that may be installed, etc.
To increase loading space, the rear seat back- rests can be folded down, see Rear seats – fold-
ing backrest (p. 89).
When loading the cargo area, keep the following
in mind:
• Load objects in the cargo area against thebackrest whenever possible.
• Unstable loads can be secured to the loadanchoring eyelets with straps or web lash-ings to help keep them from shifting.
• Stop the engine and apply the parking brakewhen loading or unloading long objects. Thegear selector can be knocked out of positionby long loads, which could set the vehicle inmotion.
WARNING
• Stop the engine, put the gear selector in P
, and apply the parking brake when
loading or unloading long objects.
• The vehicle's driving characteristics may change depending on the weight and dis-tribution of the load.
• A 44-pound (20 kg) object produces aforce of 2,200 pounds (1,000 kg) in ahead-on collision at 30 mph (50 km/h).
• The cargo compartment and rear seatshould not be loaded to a level higherthan 2 in. (5 cm) below the upper edge ofthe rear side windows. Objects placedhigher than this level could impede thefunction of the Inflatable Curtain.
Related information
• Load anchoring eyelets (p. 147)
• Steel cargo grid (p. 150)
• Loading – roof load carriers (p. 146)
Loading – roof load carriers
Using load carriersLoad carriers are available as Volvo accessories. Observe the following points when in use:
• To avoid damaging your vehicle and toachieve maximum safety when driving, werecommend using the load carriers that Volvohas developed especially for your vehicle.
• Volvo-approved removable roof racks aredesigned to carry the maximum allowableroof load for this vehicle: 220 lbs (100 kg).For non-Volvo roof racks, check the manu-facturer's weight limits for the rack.
• Never exceed the rack manufacturer's weighlimits and never exceed the maximum ratedroof load of 220 lbs (100 kg).
• Avoid single-point loads. Distribute loadsevenly.
• Place heavier cargo at the bottom of theload.
• Secure the cargo correctly with appropriatetie-down equipment.
• Check periodically that the load carriers andload are properly secured.
• Remember that the vehicle's center of gravityand handling change when you carry a loadon the roof.
Page 150 of 404

LOADING AND STORAGE
148
Grocery bag holder
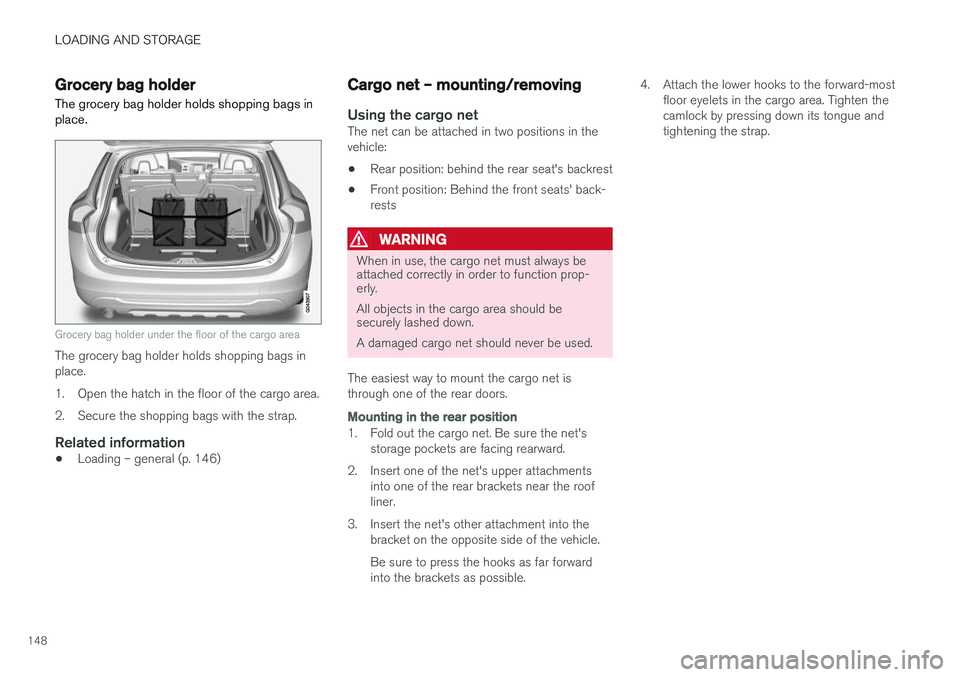
The grocery bag holder holds shopping bags in place.
Grocery bag holder under the floor of the cargo area
The grocery bag holder holds shopping bags in place.
1. Open the hatch in the floor of the cargo area.
2. Secure the shopping bags with the strap.
Related information
• Loading – general (p. 146)
Cargo net – mounting/removing
Using the cargo netThe net can be attached in two positions in the vehicle:
• Rear position: behind the rear seat's backrest
• Front position: Behind the front seats' back-rests
WARNING
When in use, the cargo net must always be attached correctly in order to function prop-erly. All objects in the cargo area should be securely lashed down. A damaged cargo net should never be used.
The easiest way to mount the cargo net is through one of the rear doors.
Mounting in the rear position
1. Fold out the cargo net. Be sure the net's storage pockets are facing rearward.
2. Insert one of the net's upper attachments into one of the rear brackets near the roof liner.
3. Insert the net's other attachment into the bracket on the opposite side of the vehicle. Be sure to press the hooks as far forward into the brackets as possible. 4. Attach the lower hooks to the forward-most
floor eyelets in the cargo area. Tighten thecamlock by pressing down its tongue andtightening the strap.
Page 151 of 404

LOADING AND STORAGE
}}
149
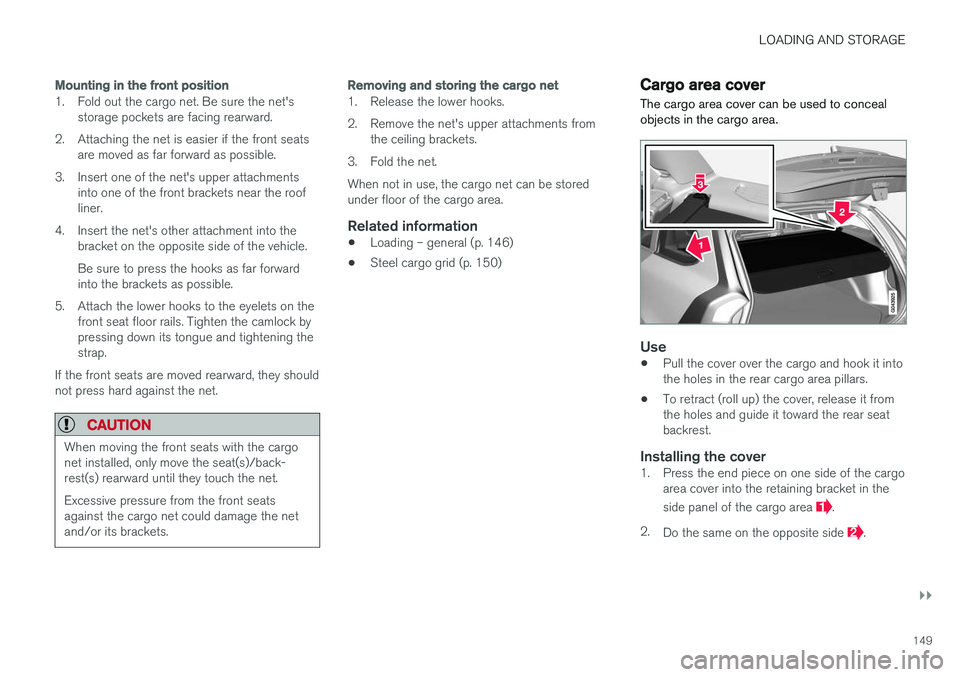
Mounting in the front position
1. Fold out the cargo net. Be sure the net'sstorage pockets are facing rearward.
2. Attaching the net is easier if the front seats are moved as far forward as possible.
3. Insert one of the net's upper attachments into one of the front brackets near the roof liner.
4. Insert the net's other attachment into the bracket on the opposite side of the vehicle. Be sure to press the hooks as far forward into the brackets as possible.
5. Attach the lower hooks to the eyelets on the front seat floor rails. Tighten the camlock bypressing down its tongue and tightening thestrap.
If the front seats are moved rearward, they shouldnot press hard against the net.
CAUTION
When moving the front seats with the cargo net installed, only move the seat(s)/back-rest(s) rearward until they touch the net. Excessive pressure from the front seats against the cargo net could damage the netand/or its brackets.
Removing and storing the cargo net
1. Release the lower hooks.
2. Remove the net's upper attachments from the ceiling brackets.
3. Fold the net.When not in use, the cargo net can be stored under floor of the cargo area.
Related information
• Loading – general (p. 146)
• Steel cargo grid (p. 150)
Cargo area cover
The cargo area cover can be used to conceal objects in the cargo area.
Use
• Pull the cover over the cargo and hook it into the holes in the rear cargo area pillars.
• To retract (roll up) the cover, release it fromthe holes and guide it toward the rear seatbackrest.
Installing the cover1. Press the end piece on one side of the cargo
area cover into the retaining bracket in the side panel of the cargo area
.
2. Do the same on the opposite side
.
Page 355 of 404

MAINTENANCE AND SERVICING
353
With the wipers in the service position, fold out the wiper arm from the windshield. Pressthe button on the wiper blade attachmentand pull the wiper blade straight out, parallelwith the wiper arm.
Slide in the new wiper blade until it clicks into place.
Check that the blade is securely in place.
4. Press the wipers back against the wind- shield.
To return the wipers from the service position to the normal position, fold the wipers back against the windshield and press the START/STOP
ENGINE button briefly to put the ignition in mode
I (or start the engine).
CleaningKeeping the windshield and wiper blades clean helps improve visibility and prolongs the servicelife of the wiper blades. Clean the wiper bladeswith a stiff-bristle brush and lukewarm soap solu-tion or car washing detergent.
Related information
• Engine compartment – washer fluid (p. 354)
• Wiper blades – service position (p. 351)
Wiper blades – tailgate
The wiper blades should be replaced regularly for best effect.
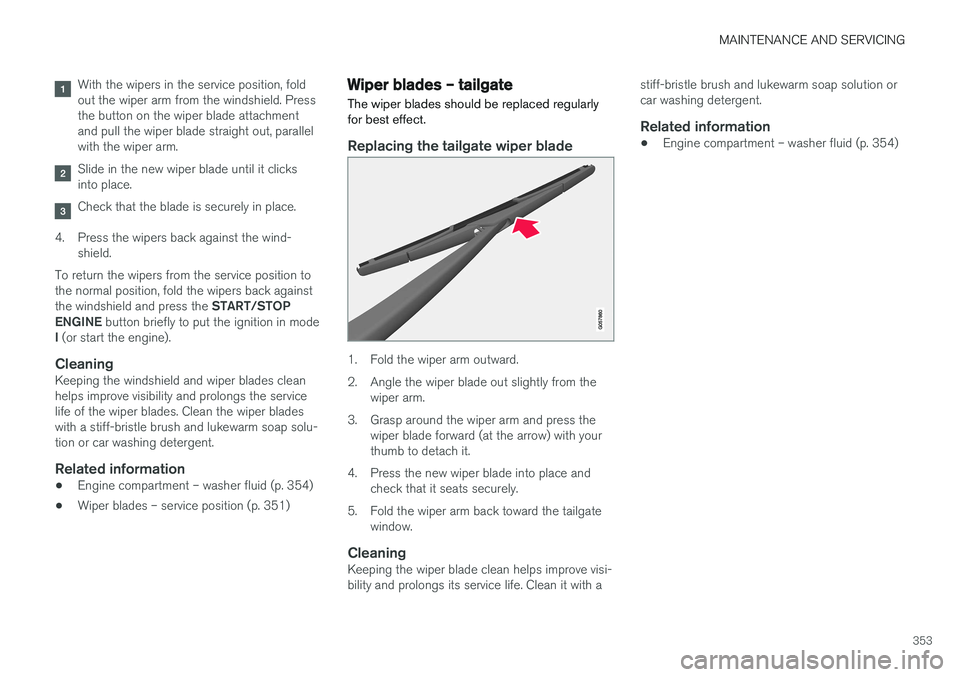
Replacing the tailgate wiper blade
1. Fold the wiper arm outward.
2. Angle the wiper blade out slightly from the wiper arm.
3. Grasp around the wiper arm and press the wiper blade forward (at the arrow) with your thumb to detach it.
4. Press the new wiper blade into place and check that it seats securely.
5. Fold the wiper arm back toward the tailgate window.
CleaningKeeping the wiper blade clean helps improve visi-bility and prolongs its service life. Clean it with a stiff-bristle brush and lukewarm soap solution orcar washing detergent.
Related information
•
Engine compartment – washer fluid (p. 354)
Page 399 of 404

INDEX
397
M
Main instrument panel 116, 117
Maintenance 332hoisting the vehicle 334
performed by the owner 333
Malfunction indicator light 76
Messages in the instrument panel 116, 117Mirrors defroster 108
power door 106, 107
rearview, auto-dim function 108
retractable 106, 107
vanity 145
Moonroof 110, 111 Motor oil checking 339
volumes 384
O
Occupant safety 28
Occupant weight sensor 38
Octane recommendations 287
Odometer, trip 81
Oil checking 339
volumes 384
Oil level sensor 340
Oil quality 383
OK button 116, 117
Option/accessory 15
Outside temperature sensor 80
Overhead courtesy lighting 100
Overheating, engine 78
Ownership, changing 19
Oxygen sensors, heated 290
P
Paint, touching up 373
Park assist 238, 246
Park Assist Camera 247
Park Assist Pilot 242Parking brake electric, applying/releasing 280, 281, 282 , 283
warning light 77
Parking lights 97
Pedestrian detection 214, 217
Polishing 371 Power front seat memory function 84
Power meter 74
Power mirrors 106, 107 defroster 108
Power moonroof 110, 111Power steering adjustable 178
fluid 343
Power steering fluid 386
Power windows 105
Pregnancy, using seat belts during 33
Private locking 158
PROPOSITION 65 WARNING 262, 358, 388
R
Rain sensor 103
Rear fog lights 98
Rear park assist 238, 246
Rear seat head restraints 88Rear seats center head restraint 87
folding 87, 89
heated 133