2018 VOLVO S60 INSCRIPTION steering wheel
[x] Cancel search: steering wheelPage 175 of 396

DRIVER SUPPORT
}}
173
Related information
•Cruise control (CC) – engaging and setting speed (p. 173)
• Cruise control (CC) – deactivating (p. 175)
Cruise control (CC) – engaging and setting speed
Cruise control is designed to assist the driver by maintaining a set speed. It is primarily intendedfor use on long straight roads in steady traffic,such as on highways and other main roads.
Engaging the cruise control function
Steering wheel-mounted controls and display
Standby mode
Resume set speed
Deactivating
Activate/set speed
Selected speed ( gray symbol indicates
standby mode)
Cruise control active: white symbol ( gray
symbol indicates standby mode) Before a speed can be set, the cruise control system must be engaged (put in standby mode).
–Press the
CRUISE button (1).
> The symbol
illuminates and the text(---) mph (5) indicates that cruise control
is in standby mode.
NOTE
Putting cruise control in standby mode does not set a cruising speed.
Setting a speed
Use the or buttons set the vehicle's cur-
rent speed. The set speed is shown in the display.
NOTE
Cruise control cannot be engaged at speeds below 20 mph (30 km/h).
Adjusting the set speedAfter a speed has been set, it can be increased or decreased by using the
or buttons.
1. Press
or briefly and release the but-
ton to increase or decrease vehicle speed by approximately 1 mph or 1 km/h.
> This will become the set speed when the button is released.
Page 179 of 396

DRIVER SUPPORT
}}
177
•
Adaptive Cruise Control – setting speed (p. 179)
• Radar sensor (p. 185)
• Adaptive Cruise Control (ACC) – QueueAssist (p. 183)
• Adaptive Cruise Control – passing anothervehicle (p. 182)
• Adaptive Cruise Control – limitations(p. 185)
• Adaptive Cruise Control – function (p. 177)
• Adaptive Cruise Control – engaging (p. 179)
• Adaptive Cruise Control – deactivating(p. 181)
Adaptive Cruise Control – function
Function
Function overview 3
Warning light, braking by driver required
Controls in steering wheel
Radar sensor in front grille
Adaptive Cruise Control consists of:
• A cruise control system to maintain a set speed
• A system to maintain a set distance to thevehicle ahead, which is expressed as a timeinterval. For example, you can choose toremain approximately 2 seconds behind thevehicle ahead. The actual distance required to maintain a 2-second interval will varyaccording the speed of the vehicles.
WARNING
•
Adaptive Cruise Control is not a collision avoidance system. The driver is alwaysresponsible for applying the brakes if thesystem does not detect another vehicle.
• Adaptive Cruise Control does not react topeople or animals, or small vehicles suchas bicycles and motorcycles. It also doesnot react to slow moving, parked orapproaching vehicles, or stationaryobjects.
• Do not use Adaptive Cruise Control indemanding driving conditions such as citydriving or other heavy traffic situations, inslippery conditions, when there is a greatdeal of water or slush on the road, duringheavy rain or snow, in poor visibility, onwinding roads or on highway on- or off-ramps.
The distance to the vehicle ahead (in the samelane) is monitored by a radar sensor. Your vehi-cle's speed is regulated by accelerating andbraking. The brakes may emit a sound when theyare being modulated by the adaptive cruise con-trol system. This is normal.
3 The illustration is generic; details will vary, depending on the model
Page 184 of 396

||
DRIVER SUPPORT
182In the event of automatic deactivation, an audible signal will sound and the message
Cruise
control Cancelled is shown in the instrument
panel. The driver must then intervene and adapt the vehicle's speed to the surrounding traffic andregulate the distance to the vehicle ahead. An automatic switch to standby mode may be caused if:
• engine speed (rpm) is too high/low
• The driver's door is opened
• The driver unbuckles his/her seat belt
• the vehicle's speed goes below 18 mph(30 km/h)
• the wheels lose traction
• brake temperature is high
• the radar sensor is obstructed by, for exam-ple, wet snow or rain.
Resuming the set speedIf ACC is in standby mode, it can be reactivated by pressing the
button on the steering wheel
keypad. The vehicle will return to the most recently set speed.
WARNING
The vehicle may accelerate quickly after has been pressed if its current speed is con- siderably lower than the set speed.
Turning ACC off completely
Controls and display
Resume previous settings.
Off/On/Standby mode
• From standby mode, press (2)
once.
• From active mode, press (2)
twice.
The set speed and time interval are then cleared from the system's memory and cannot be resumed by pressing (1)
.
Related information
• Adaptive Cruise Control – introduction (p. 175)
Adaptive Cruise Control – passing another vehicle
Passing another vehicleIf your vehicle
Page 210 of 396

||
DRIVER SUPPORT
* Option/accessory.
208
WARNING
• In certain situations, the system cannot provide warnings or warnings may bedelayed if traffic conditions or other exter-nal factors make it impossible for theradar sensor or camera to detect apedestrian, a cyclist or a vehicle ahead.
• Warnings may not be provided if the dis-tance to the vehicle ahead is short, or ifmovements of the steering wheel/brakepedal are great, such as during activedriving.
• The sensor system has a limited range forpedestrians/cyclists and provides warn-ings and braking effect most effectively atspeeds up to 30 mph (50 km/h). For sta-tionary or slow-moving vehicles, the sys-tem functions best if your vehicle
Page 228 of 396

DRIVER SUPPORT
226
Lane Keeping Aid (LKA) – operation
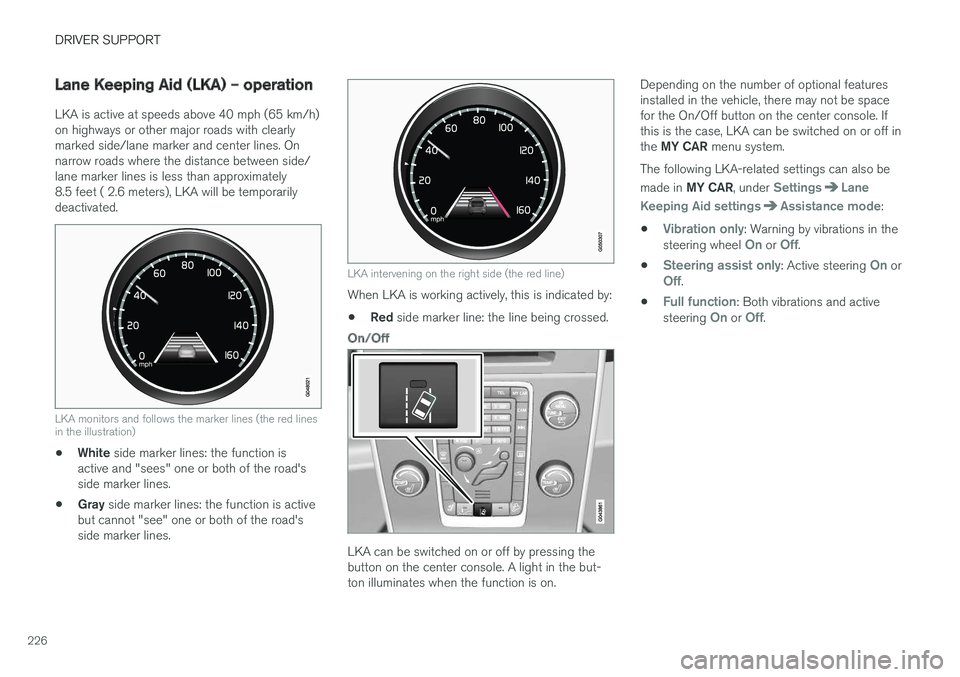
LKA is active at speeds above 40 mph (65 km/h) on highways or other major roads with clearlymarked side/lane marker and center lines. Onnarrow roads where the distance between side/lane marker lines is less than approximately8.5 feet ( 2.6 meters), LKA will be temporarilydeactivated.
LKA monitors and follows the marker lines (the red lines in the illustration)
•White
side marker lines: the function is
active and "sees" one or both of the road's side marker lines.
• Gray
side marker lines: the function is active
but cannot "see" one or both of the road'sside marker lines.
LKA intervening on the right side (the red line)
When LKA is working actively, this is indicated by:
• Red
side marker line: the line being crossed.
On/Off
LKA can be switched on or off by pressing the button on the center console. A light in the but-ton illuminates when the function is on. Depending on the number of optional featuresinstalled in the vehicle, there may not be spacefor the On/Off button on the center console. Ifthis is the case, LKA can be switched on or off in the
MY CAR menu system.
The following LKA-related settings can also be made in MY CAR , under
SettingsLane
Keeping Aid settings
Assistance mode:
•
Vibration only: Warning by vibrations in the
steering wheel On or Off.
•
Steering assist only: Active steering On orOff.
•
Full function: Both vibrations and active
steering On or Off.
Page 229 of 396

DRIVER SUPPORT
227
Steering assist
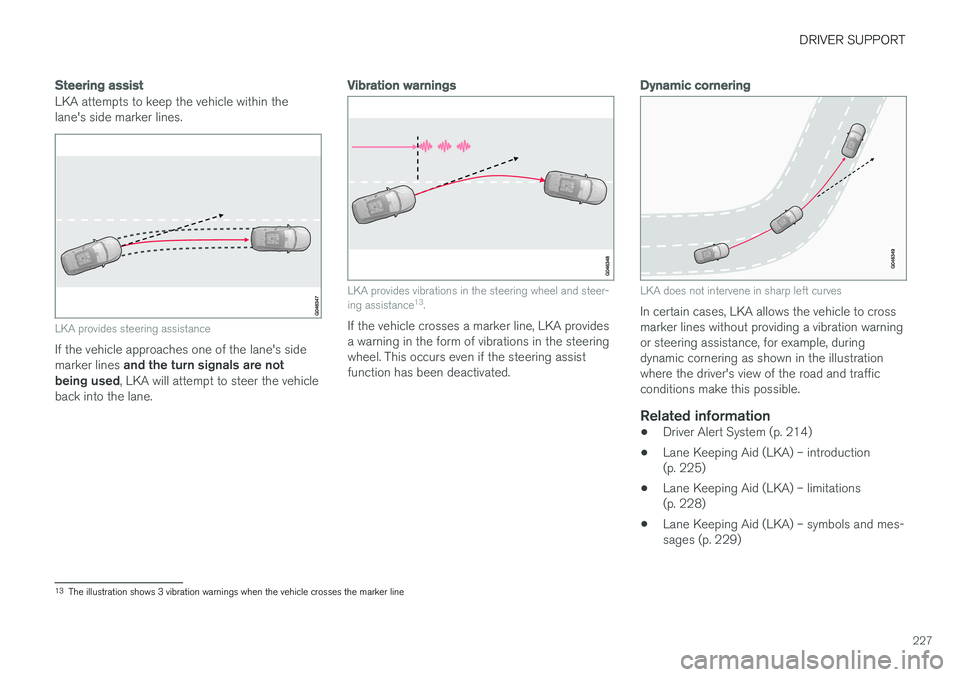
LKA attempts to keep the vehicle within the lane's side marker lines.
LKA provides steering assistance
If the vehicle approaches one of the lane's side marker lines and the turn signals are not
being used , LKA will attempt to steer the vehicle
back into the lane.
Vibration warnings
LKA provides vibrations in the steering wheel and steer- ing assistance 13
.
If the vehicle crosses a marker line, LKA provides a warning in the form of vibrations in the steeringwheel. This occurs even if the steering assistfunction has been deactivated.
Dynamic cornering
LKA does not intervene in sharp left curves
In certain cases, LKA allows the vehicle to cross marker lines without providing a vibration warningor steering assistance, for example, duringdynamic cornering as shown in the illustrationwhere the driver's view of the road and trafficconditions make this possible.
Related information
• Driver Alert System (p. 214)
• Lane Keeping Aid (LKA) – introduction(p. 225)
• Lane Keeping Aid (LKA) – limitations(p. 228)
• Lane Keeping Aid (LKA) – symbols and mes-sages (p. 229)
13
The illustration shows 3 vibration warnings when the vehicle crosses the marker line
Page 236 of 396

DRIVER SUPPORT
* Option/accessory.
234
Park Assist Pilot (PAP) * –
introduction
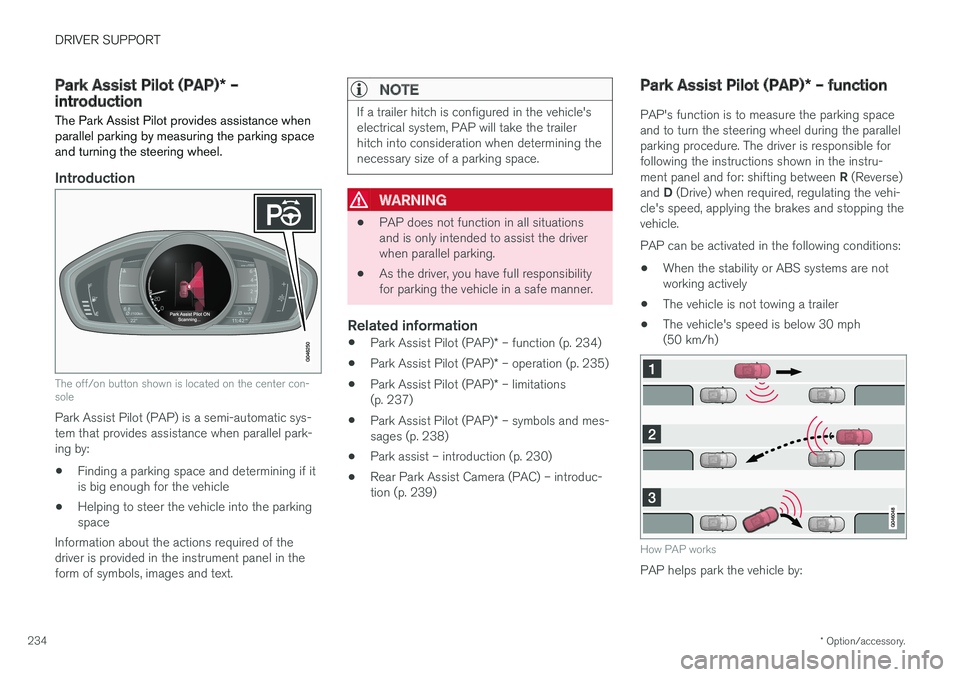
The Park Assist Pilot provides assistance when parallel parking by measuring the parking spaceand turning the steering wheel.
Introduction
The off/on button shown is located on the center con- sole
Park Assist Pilot (PAP) is a semi-automatic sys- tem that provides assistance when parallel park-ing by:
• Finding a parking space and determining if itis big enough for the vehicle
• Helping to steer the vehicle into the parkingspace
Information about the actions required of thedriver is provided in the instrument panel in theform of symbols, images and text.
NOTE
If a trailer hitch is configured in the vehicle's electrical system, PAP will take the trailerhitch into consideration when determining thenecessary size of a parking space.
WARNING
• PAP does not function in all situations and is only intended to assist the driverwhen parallel parking.
• As the driver, you have full responsibilityfor parking the vehicle in a safe manner.
Related information
•
Park Assist Pilot (PAP)
* – function (p. 234)
• Park Assist Pilot (PAP)
* – operation (p. 235)
• Park Assist Pilot (PAP)
* – limitations
(p. 237)
• Park Assist Pilot (PAP)
* – symbols and mes-
sages (p. 238)
• Park assist – introduction (p. 230)
• Rear Park Assist Camera (PAC) – introduc-tion (p. 239)
Park Assist Pilot (PAP)
* – function
PAP's function is to measure the parking space and to turn the steering wheel during the parallelparking procedure. The driver is responsible forfollowing the instructions shown in the instru- ment panel and for: shifting between R (Reverse)
and D (Drive) when required, regulating the vehi-
cle's speed, applying the brakes and stopping the vehicle. PAP can be activated in the following conditions:
• When the stability or ABS systems are not working actively
• The vehicle is not towing a trailer
• The vehicle's speed is below 30 mph(50 km/h)
How PAP works
PAP helps park the vehicle by:
Page 238 of 396

||
DRIVER SUPPORT
* Option/accessory.
236
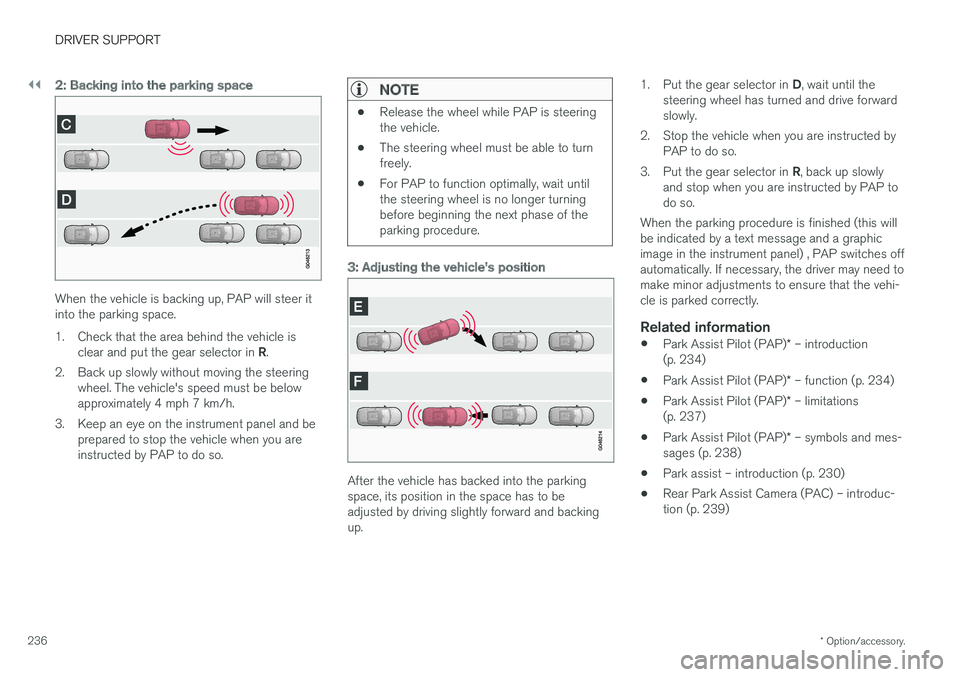
2: Backing into the parking space
When the vehicle is backing up, PAP will steer it into the parking space.
1. Check that the area behind the vehicle is
clear and put the gear selector in R.
2. Back up slowly without moving the steering wheel. The vehicle's speed must be below approximately 4 mph 7 km/h.
3. Keep an eye on the instrument panel and be prepared to stop the vehicle when you areinstructed by PAP to do so.
NOTE
•Release the wheel while PAP is steering the vehicle.
• The steering wheel must be able to turnfreely.
• For PAP to function optimally, wait untilthe steering wheel is no longer turningbefore beginning the next phase of theparking procedure.
3: Adjusting the vehicle's position
After the vehicle has backed into the parking space, its position in the space has to beadjusted by driving slightly forward and backingup. 1.
Put the gear selector in D, wait until the
steering wheel has turned and drive forwardslowly.
2. Stop the vehicle when you are instructed by PAP to do so.
3. Put the gear selector in R, back up slowly
and stop when you are instructed by PAP todo so.
When the parking procedure is finished (this willbe indicated by a text message and a graphicimage in the instrument panel) , PAP switches offautomatically. If necessary, the driver may need tomake minor adjustments to ensure that the vehi-cle is parked correctly.
Related information
• Park Assist Pilot (PAP)
* – introduction
(p. 234)
• Park Assist Pilot (PAP)
* – function (p. 234)
• Park Assist Pilot (PAP)
* – limitations
(p. 237)
• Park Assist Pilot (PAP)
* – symbols and mes-
sages (p. 238)
• Park assist – introduction (p. 230)
• Rear Park Assist Camera (PAC) – introduc-tion (p. 239)