2018 VAUXHALL MOVANO_B interior lights
[x] Cancel search: interior lightsPage 28 of 261

26Keys, doors and windowsWarning lights in the appropriate
doors extinguish.
To unlock, press 0 side of switch.
Warning lights in the appropriate
doors illuminate continuously.
Fault
In the event of a fault in the system,
the warning light alongside the switch illuminates continuously and an
audible warning will sound.
Check the doors are manually
unlocked (interior door lock switches).
If necessary, have the cause of the
fault remedied by a workshop.
Automatic lockingAutomatic locking after driving off
Depending on version, this security
feature can be configured to
automatically lock all doors and the
load compartment as soon as the
vehicle is driven.
Activation
With the ignition switched on, press and hold the central locking switch e
for approx. five seconds. An audible
signal confirms activation.
LED in switch illuminates when the
vehicle is locked.
Deactivation
With the ignition switched on, press
and hold e for approx. five seconds.
An audible signal confirms
deactivation.
Child locks9 Warning
Use the child locks whenever
children are occupying the rear
seats.
Press down the child lock, door
cannot be opened from the inside.
Raise to deactivate.
Page 34 of 261

32Keys, doors and windowsThe rear doors can be locked from
inside the vehicle with the interior lock switch on the inside of the right-hand
door.
Always close the left-hand door
before the right-hand door.
Combi, Bus
In left-hand drive vehicles, the rear
doors are opened from inside the
vehicle by pulling the interior handle.
In right-hand drive vehicles, from
inside the vehicle pull the interior
handle on the right-hand door and
open, then release the left-hand door by lowering the lever and open.
Always close the left-hand door
before the right-hand door.9 Danger
Do not drive with the rear doors
open or ajar, e.g. when
transporting bulky objects, since
toxic exhaust gases, which cannot
be seen or smelled, could enter
the vehicle. This can cause
unconsciousness and even death.
Vehicle security
Anti-theft locking system9 Warning
Do not use the system if there are
people in the vehicle! The doorscannot be unlocked from the
inside.
The system deadlocks the doors. All
doors must be closed or the system
cannot be activated.
Notice
The anti-theft locking system cannot be activated when the hazard
warning lights or sidelights are
switched on.
Activation and deactivation are not
possible with the central locking
switch.
Activation
Press e twice within three seconds.
Hazard warning lights flash
five times as confirmation.
Deactivation Unlock the doors by pressing c on the
remote control.
Anti-theft alarm system The anti-theft alarm system is
operated in conjunction with the
central locking system.
Page 35 of 261

Keys, doors and windows33It monitors:● doors, tailgate, bonnet
● passenger compartment
● load compartment
● ignition
● interruption of alarm siren power supply
Activation All doors and the bonnet must be
closed.
Press e to activate anti-theft alarm
system. Hazard warning lights flash
twice to confirm activation.
If the hazard warning lights do not
flash upon activation, a door or the
bonnet is not fully closed.
Notice
Changes to the vehicle interior, e.g.
the use of seat covers, and open
windows, could impair the function
of passenger compartment
monitoring.
Deactivation
Unlocking the vehicle or switching on the ignition deactivates the anti-theft
alarm system. Hazard warning lights
flash once to confirm deactivation.
Notice
If the alarm has been triggered,
unlocking the vehicle with the key
will not stop the alarm siren. To stop the siren, switch on the ignition. The
hazard warning lights will not flash
upon deactivation if the alarm has
been triggered.
Activation without monitoring of
passenger compartment
Switch off monitoring of the
passenger compartment when
people or animals are being left in thevehicle, or if the auxiliary heater
3 122 is set for a timed or remote
controlled start.
Depending on vehicle configuration:
● press and hold e, or
● switch ignition on and off twice quickly, then close doors and
activate the anti-theft alarm
system
An audible signal will sound as
confirmation.
The status will remain until the doors
are unlocked.
Page 109 of 261

Lighting107LightingExterior lighting.......................... 107
Light switch .............................. 107
Automatic light control .............107
High beam ............................... 108
High beam assist .....................108
Headlight flash ......................... 109
Headlight range adjustment ....109
Headlights when driving abroad .................................... 109
Daytime running lights .............109
Adaptive forward lighting .........110
Hazard warning flashers ..........110
Turn and lane-change signals . 110
Front fog lights ......................... 111
Rear fog lights ......................... 111
Reversing lights .......................111
Misted light covers ...................111
Interior lighting ........................... 112
Interior lights ............................ 112
Load compartment lighting ......112
Reading lights .......................... 113
Lighting features ........................114
Exit lighting .............................. 114
Battery discharge protection ....114Exterior lighting
Light switch
Turn outer light switch:
7:off0:sidelights9 P:headlightsAUTO:automatic light control:
headlights are switched on
and off automatically.
Turn inner light switch:
>:front fog lightsø:rear fog lights
High beam control indicator P
3 100.
Low beam control indicator 9 3 100.
Notice
If the headlights have been switched
on manually, a warning chime will
sound when the engine is switched
off and when the driver's door is
opened as a reminder that the lights are still on.
Tail lights
Tail lights are illuminated together with low beam and sidelights.
Automatic light control
Page 114 of 261

112LightingInterior lightingInterior lights Courtesy lights illuminate when thevehicle is unlocked with the remote
control or the front doors are opened.
When the doors are closed, the
courtesy light extinguishes after a
delay or immediately after the ignition
is switched on.
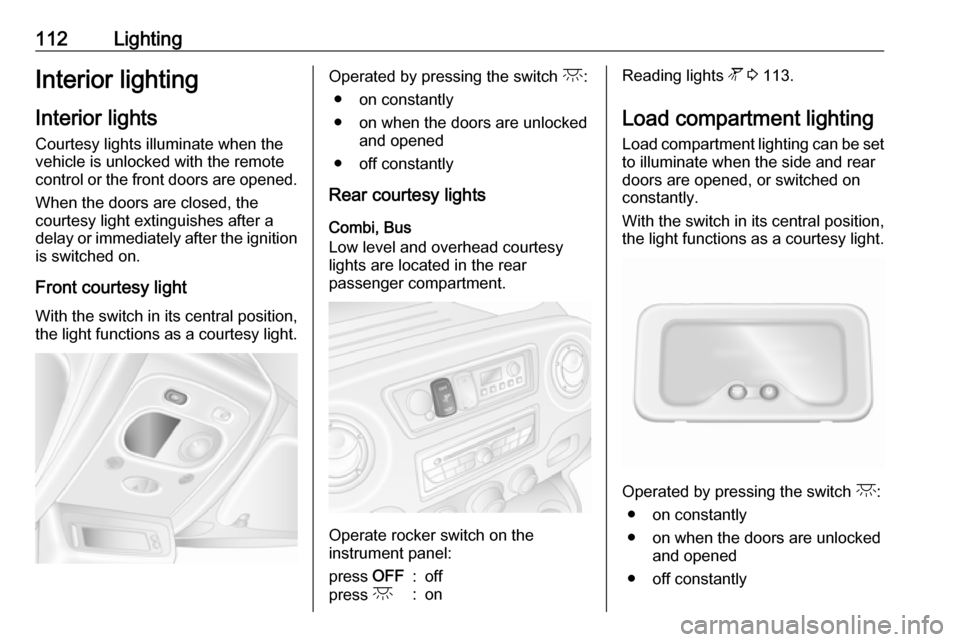
Front courtesy light
With the switch in its central position,
the light functions as a courtesy light.Operated by pressing the switch c:
● on constantly
● on when the doors are unlocked and opened
● off constantly
Rear courtesy lights
Combi, Bus
Low level and overhead courtesy
lights are located in the rear
passenger compartment.
Operate rocker switch on the
instrument panel:
press OFF:offpress c:onReading lights l 3 113.
Load compartment lighting Load compartment lighting can be setto illuminate when the side and rear
doors are opened, or switched on
constantly.
With the switch in its central position,
the light functions as a courtesy light.
Operated by pressing the switch c:
● on constantly
● on when the doors are unlocked and opened
● off constantly
Page 116 of 261

114LightingLighting featuresExit lighting
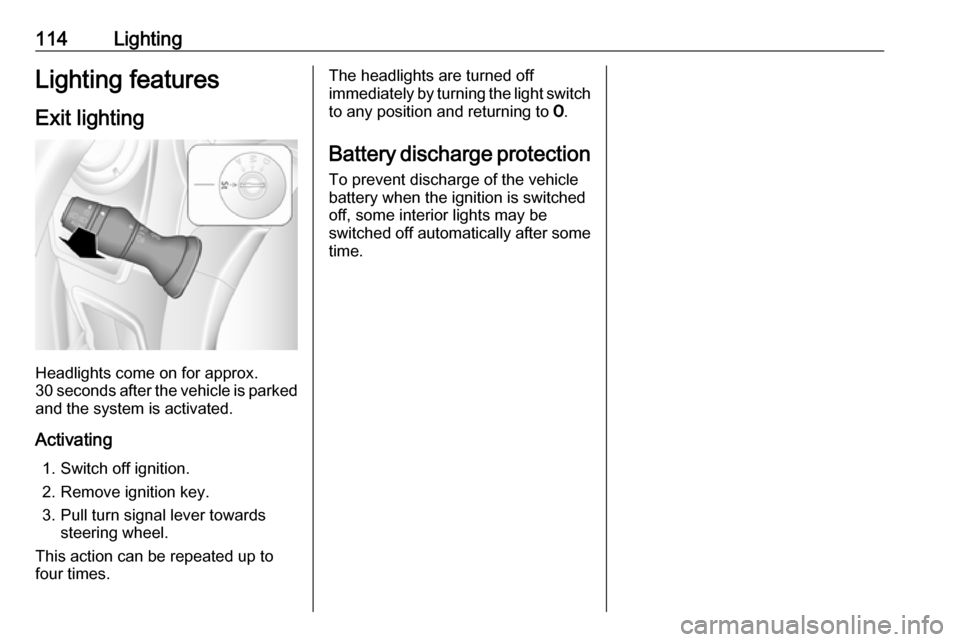
Headlights come on for approx.
30 seconds after the vehicle is parked
and the system is activated.
Activating 1. Switch off ignition.
2. Remove ignition key.
3. Pull turn signal lever towards steering wheel.
This action can be repeated up to
four times.
The headlights are turned off immediately by turning the light switch
to any position and returning to 7.
Battery discharge protection To prevent discharge of the vehicle
battery when the ignition is switched
off, some interior lights may be
switched off automatically after some
time.
Page 175 of 261

Vehicle care173Vehicle careGeneral Information...................174
Accessories and vehicle modifications .......................... 174
Vehicle storage ........................174
End-of-life vehicle recovery .....175
Vehicle checks ........................... 175
Performing work ......................175
Bonnet ..................................... 175
Engine oil ................................. 176
Engine coolant ......................... 178
Power steering fluid .................178
Washer fluid ............................ 179
Brakes ..................................... 180
Brake fluid ............................... 180
Vehicle battery ......................... 180
Diesel fuel filter ........................182
Diesel fuel system bleeding .....183
Wiper blade replacement ........183
Bulb replacement .......................184
Headlights ............................... 184
Adaptive forward lighting .........187
Fog lights ................................. 187
Front turn signal lights .............187
Tail lights ................................. 188
Side turn signal lights ..............190Centre high-mounted brake
light ......................................... 190
Number plate light ...................191
Interior lights ............................ 192
Instrument panel illumination ...193
Electrical system ........................193
Fuses ....................................... 193
Engine compartment fuse box . 194
Instrument panel fuse box .......195
Load compartment fuse box ....196
Vehicle tools .............................. 198
Tools ........................................ 198
Wheels and tyres .......................199
Tyres ....................................... 199
Winter tyres ............................. 199
Tyre designations ....................199
Tyre pressure .......................... 199
Tyre pressure monitoring system .................................... 200
Tread depth ............................. 202
Changing tyre and wheel size . 203 Wheel covers ........................... 203
Tyre chains .............................. 203
Tyre repair kit .......................... 204
Wheel changing .......................207
Spare wheel ............................ 209
Jump starting ............................. 212Towing....................................... 214
Towing the vehicle ...................214
Towing another vehicle ...........215
Appearance care .......................216
Exterior care ............................ 216
Interior care ............................. 218
Page 194 of 261

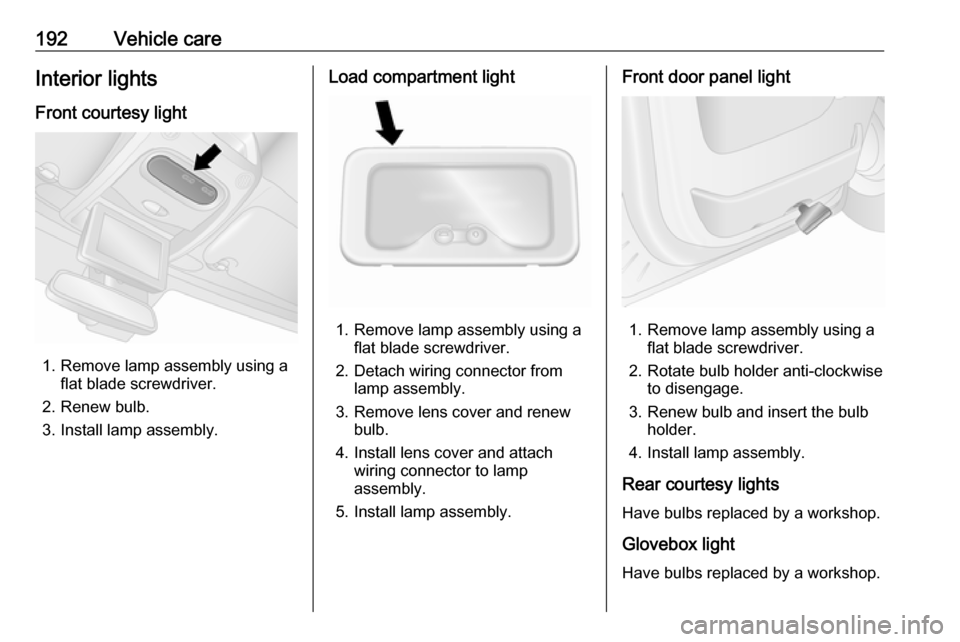
192Vehicle careInterior lightsFront courtesy light
1. Remove lamp assembly using a flat blade screwdriver.
2. Renew bulb.
3. Install lamp assembly.
Load compartment light
1. Remove lamp assembly using a flat blade screwdriver.
2. Detach wiring connector from lamp assembly.
3. Remove lens cover and renew bulb.
4. Install lens cover and attach wiring connector to lamp
assembly.
5. Install lamp assembly.
Front door panel light
1. Remove lamp assembly using a flat blade screwdriver.
2. Rotate bulb holder anti-clockwise to disengage.
3. Renew bulb and insert the bulb holder.
4. Install lamp assembly.
Rear courtesy lights
Have bulbs replaced by a workshop.
Glovebox light
Have bulbs replaced by a workshop.