2018 VAUXHALL MOVANO_B key
[x] Cancel search: keyPage 141 of 261

Driving and operating139● Close the windows.
● Turn the ignition key to position
0 and remove it. Turn the
steering wheel until the
steering wheel lock is felt to
engage.
Lock the vehicle 3 22 and activate the
anti-theft locking system 3 32 and
anti-theft alarm system 3 32.
Air suspension
Operates automatically when the
vehicle is driven. The air suspension
system constantly adjusts the ride
height according to the vehicle load.
Caution
To ensure safe operation of the air
suspension system, do not exceed the maximum permissible gross
vehicle weight rating. Refer to
identification plate 3 223 or the
vehicle documents.
For further information on the air
suspension system, refer to the
operating instructions supplied.
Master switchCaution
The air suspension system must
be switched off when the vehicle is being towed, jump‐started, raised
off the ground or transported.
Do not switch off the air
suspension system when driving.
Jump starting 3 212, Towing the
vehicle 3 214.
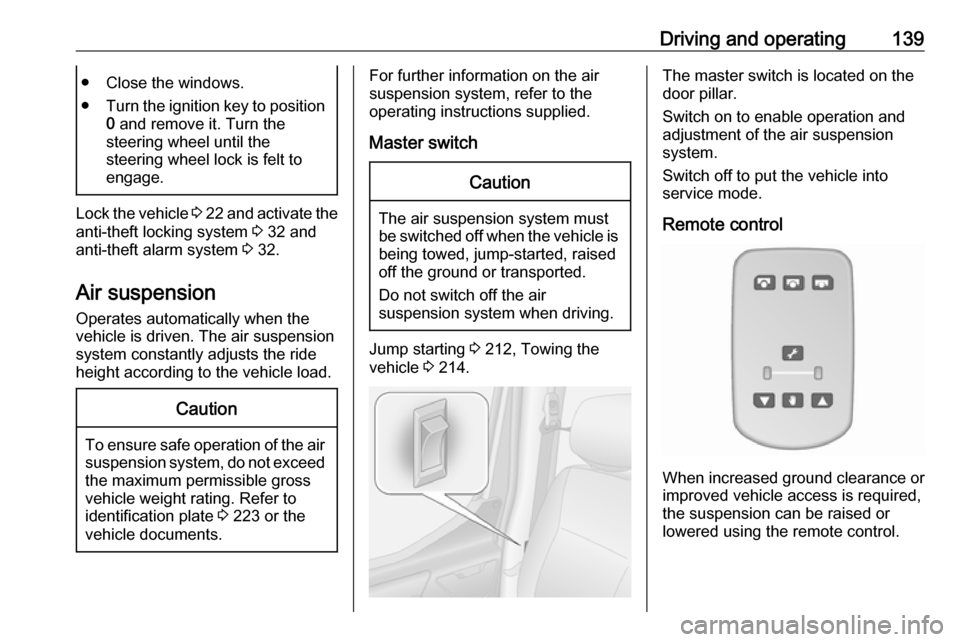
The master switch is located on the
door pillar.
Switch on to enable operation and
adjustment of the air suspension
system.
Switch off to put the vehicle into
service mode.
Remote control
When increased ground clearance or improved vehicle access is required,the suspension can be raised or
lowered using the remote control.
Page 149 of 261

Driving and operating147Notice
If AdBlue must be refilled at very low
temperatures, the refilling of AdBlue may not be detected by the system.
In this case, park the vehicle in a
space with a higher ambient
temperature until AdBlue is
liquefied.
Notice
If engine starting is prohibited due to low AdBlue level, we recommend
refilling the tank completely or with a
volume of at least ten litres of AdBlue (depending on AdBlue
consumption).
Avoid minor top-ups (e.g. less than ten litres), otherwise the system may not detect a refill.
Notice
When unscrewing the protective cap from the filler neck, ammonia fumes
may emerge. Do not inhale as the fumes have a pungent smell. The
fumes are not harmful by inhalation.
The vehicle must be parked on a level surface.The filler neck for AdBlue is located
behind the filler flap located on the
right-hand side of the vehicle.
The filler flap can only be opened if the vehicle is unlocked and the right-hand door is opened.9 Danger
Vehicles with stop-start system:
The engine must be switched off
and the ignition key removed, to
avoid risk of engine being
restarted automatically by the
system.
Capacities 3 243.
Filling station
9 Danger
Follow the operating and safety
instructions of the filling station
when refilling AdBlue.
1. Switch off engine and remove key
from ignition switch.
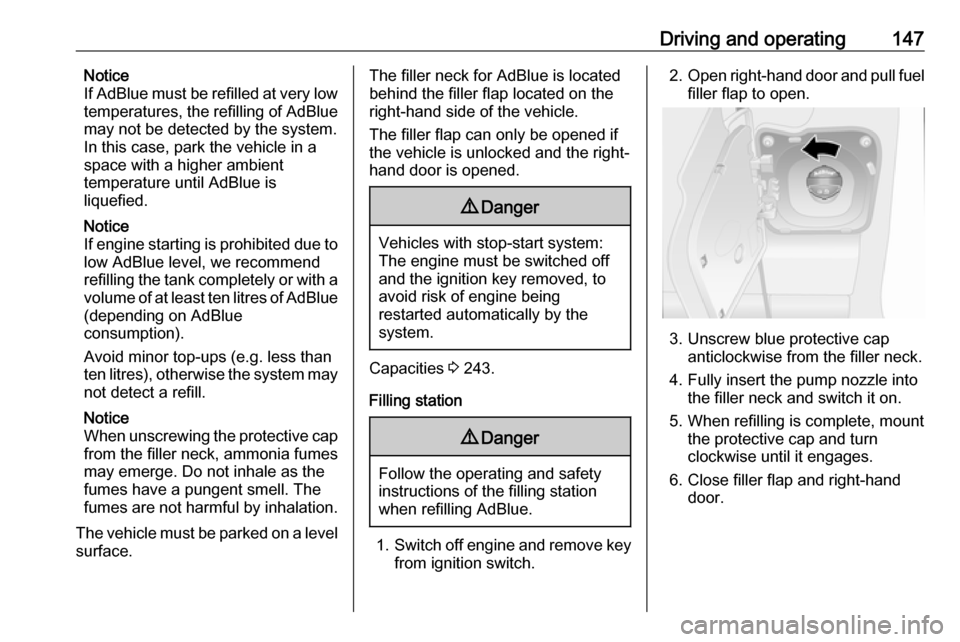
2. Open right-hand door and pull fuel
filler flap to open.
3. Unscrew blue protective cap anticlockwise from the filler neck.
4. Fully insert the pump nozzle into the filler neck and switch it on.
5. When refilling is complete, mount the protective cap and turn
clockwise until it engages.
6. Close filler flap and right-hand door.
Page 150 of 261

148Driving and operatingAdBlue canisterNotice
Only use the designated AdBlue
canisters for refilling, to prevent a
topping-up of too much AdBlue.
Additionally, the fumes in the tank
are captured in the canister and do
not emerge.
Notice
Since AdBlue has a limited
durability, check the date of expiry
before refilling.
1. Switch off engine and remove key
from ignition switch.
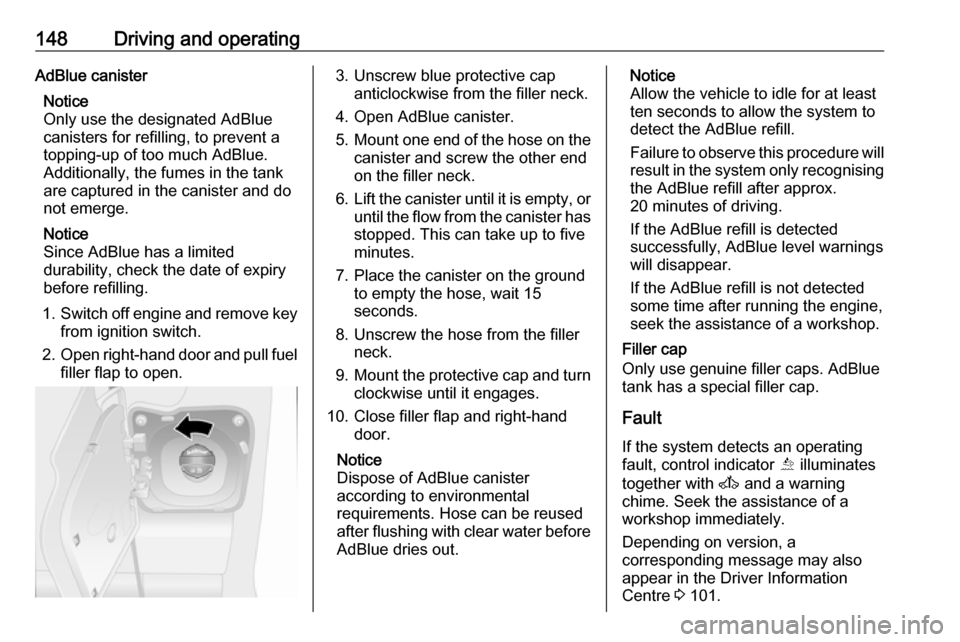
2. Open right-hand door and pull fuel
filler flap to open.3. Unscrew blue protective cap anticlockwise from the filler neck.
4. Open AdBlue canister.
5. Mount one end of the hose on the
canister and screw the other end
on the filler neck.
6. Lift the canister until it is empty, or
until the flow from the canister has stopped. This can take up to five
minutes.
7. Place the canister on the ground to empty the hose, wait 15
seconds.
8. Unscrew the hose from the filler neck.
9. Mount the protective cap and turn
clockwise until it engages.
10. Close filler flap and right-hand door.
Notice
Dispose of AdBlue canister
according to environmental
requirements. Hose can be reused
after flushing with clear water before
AdBlue dries out.Notice
Allow the vehicle to idle for at least
ten seconds to allow the system to
detect the AdBlue refill.
Failure to observe this procedure will
result in the system only recognising the AdBlue refill after approx.
20 minutes of driving.
If the AdBlue refill is detected
successfully, AdBlue level warnings
will disappear.
If the AdBlue refill is not detected
some time after running the engine,
seek the assistance of a workshop.
Filler cap
Only use genuine filler caps. AdBlue tank has a special filler cap.
Fault
If the system detects an operating
fault, control indicator Õ illuminates
together with A and a warning
chime. Seek the assistance of a
workshop immediately.
Depending on version, a
corresponding message may also
appear in the Driver Information
Centre 3 101.
Page 170 of 261

168Driving and operatingdiesel, Aquazole and similar diesel-
water emulsions. Diesel fuels must not be diluted with fuels for petrol
engines.
The flow and filterability of diesel fuels are temperature-dependent. When
temperatures are low, refuel with
diesel fuel with guaranteed winter
properties.
Diesel fuel filter 3 182, diesel fuel
system bleeding 3 183.
Low temperature operation
At temperatures below 0° C, some
diesel products with biodiesel blends
may clog, freeze or gel, which may
affect the fuel supply system. Starting
and engine operation may not work
properly. Make sure to fill winter
grade diesel fuel at ambient
temperatures below 0°C.
Arctic grade diesel fuel can be used
in extreme cold temperatures below
-20° C. Using this fuel grade in warm
or hot climates is not recommended
and may cause engine stalling, poor
starting or damage on the fuel
injection system.Refuelling9 Danger
Before refuelling, switch off engine
and any external heaters with
combustion chambers. Switch off
any mobile phones.
Follow the operating and safety
instructions of the filling station
when refuelling.
9 Danger
Fuel is flammable and explosive.
No smoking. No naked flames or
sparks.
If you can smell fuel in your
vehicle, have the cause of this
remedied immediately by a
workshop.
Caution
In case of misfuelling, do not
switch on ignition.
The fuel tank filler neck with bayonet
cap is located on the left front side of
the vehicle.
The fuel filler flap can only be opened
if the vehicle is unlocked and the door is opened. Open the fuel filler flap by
hand.9 Danger
Vehicles with stop-start system:
The engine must be switched off
and the ignition key removed, to
avoid risk of engine being
restarted automatically by the
system.
Capacities 3 243.
Page 185 of 261

Vehicle care183The filter is drained as soon as diesel
fuel emerges from the knurled screw
at the bottom. Retighten the two
screws.
Check diesel fuel filter at shorter
intervals if the vehicle is subjected to
extreme operating conditions.
Diesel fuel system bleeding
If the fuel tank has been run dry, it willbe necessary to air vent or bleed the
diesel fuel system.
Fill the tank with fuel and proceed as
follows:
1. Place a suitable container underneath the fuel filter vent
screw to collect fuel.
2. Loosen the vent screw (arrowed) by one turn.
3. Manually operate the in-line supply pump slowly and steadily
until fuel discharging from the
loosened vent screw is free of air
bubbles.
4. Retighten the vent screw.
In vehicles without an in-line supply
pump, fill the tank with fuel and
proceed as follows:Caution
Do not turn ignition key to position 3 before beginning the bleeding
procedure.
Ignition switch positions 3 133.
1. Turn ignition key to position 2 and
hold for five seconds.
2. Turn key back to position 1 and
wait for three seconds.
3. Repeat Step 1 and 2 multiple times.
4. Turn key to position 3, then return
to 0.
If the engine cannot be started after
several attempts to bleed the diesel
fuel system, seek the assistance of a
workshop.
Wiper blade replacement
Wiper blades on the windscreen If required, use the step located below
the headlights to reach the
windscreen wiper.
Page 248 of 261

246Customer informationCustomer
informationCustomer information ................246
Declaration of conformity .........246
REACH .................................... 250
Collision damage repair ...........250
Registered trademarks ............250
Vehicle data recording and pri‐
vacy ........................................... 250
Event data recorders ...............250
Radio Frequency Identification (RFID) ..................................... 251Customer information
Declaration of conformity
Radio transmission systems
This vehicle has systems that
transmit and / or receive radio waves
subject to Directive 1999/5/EC or 2014/53/EU. The manufacturers ofthe systems listed below declare
conformity with Directive 1999/5/EC
or 2014/53/EU . The full text of the EU
declaration of conformity for each
system is available at the following
internet address: www.opel.com/
conformity
Importer is
Opel / Vauxhall, Bahnhofsplatz,
65423 Ruesselsheim am Main,
Germany.
Radio remote control receiver
Visteon Electronics
04 Rue Nelson Mandela, Zone
Industrielle Borj Cedria, 2055 Bir El
Bey, Tunisia
Operation frequency: 433 MHz
Maximum output: 10 mW ERPRadio remote control transmitter
Visteon Electronics
04 Rue Nelson Mandela, Zone
Industrielle Borj Cedria, 2055 Bir El
Bey, Tunisia
Operation frequency: 433 MHz
Maximum output: 10 mW ERP
Electronic key transmitter
ALPS ELECTRIC EUROPE GmbH
Ohmstrasse 4, 85716
Unterschleissheim, Germany
Operation frequency: 433 MHz
Maximum output: 10 mW ERP
Immobiliser
Visteon Electronics
04 Rue Nelson Mandela, Zone
Industrielle Borj Cedria, 2055 Bir El
Bey, Tunisia
Operation frequency: 125 kHz
Maximum output:
42 dBμA/m @ 10 m
Immobiliser
ALPS ELECTRIC EUROPE GmbH
Page 256 of 261

254First aid kit ................................... 79
Fixed air vents ........................... 129
Fog light ..................................... 100
Fog lights ............................ 111, 187
Folding mirrors ............................. 35
Folding seat .................................. 72
Front airbag system .....................58
Front courtesy light .....................112
Front fog lights ....................107, 111
Front reading light....................... 113
Front seats.................................... 42
Front storage ................................ 72
Front turn signal lights ...............187
Fuel consumption - CO 2-
Emissions ............................... 169
Fuel economy rating (ecoScoring) ............................ 103
Fuel for diesel engines ..............167
Fuel gauge ................................... 90
Fuel tank ..................................... 243
Fuse box ..................... 194, 195, 196
Fuses ......................................... 193
G
Gauges ......................................... 88
General information ...................170
Glass panel .................................. 40
Glovebox ..................................... 72
Glovebox cooler ......................... 129Grab handles ................................ 74
Ground clearance .......................139
H Hand brake - see Parking brake. 154
Hazard warning flashers ............110
Headlight flash ........................... 109
Headlight range adjustment ......109
Headlights .................. 107, 108, 184
Headlights when driving abroad 109
Head restraint adjustment .............8
Head restraints ............................ 41
Heated exterior mirrors .................15
Heated mirrors ............................. 35
Heated rear window ...............15, 39
Heating ........................................ 48
Heating and ventilation system . 115
High beam ......................... 100, 108
High beam assist ................100, 108
Hill start assist ........................... 155
Horn ....................................... 14, 83
Hub cap hook ............................. 198
I
Identification plate .....................223
Idle speed control .......................135
Ignition switch positions .............133
Immobiliser .................................. 34
Indicators ...................................... 88
Info display ................................. 101
Information displays.................... 101Infotainment system ...................101
Initial drive information.................... 6
Instrument cluster ........................88
Instrument panel fuse box .........195
Instrument panel illumination .....193
Instrument panel overview ........... 10
Instrument panel storage .............71
Interior care ............................... 218
Interior lighting ............................ 112
Interior lights ...................... 112, 192
Interior mirrors .............................. 36
Interruption of power supply ......153
Introduction .................................... 3
ISOFIX .......................................... 61
J Jack ............................................ 198
Journey record............................ 103
Jump starting ............................. 212
K Keys ............................................. 19
Keys, locks ................................... 19
L
Lane departure warning .......97, 166
Lashing eyes ............................... 74
Lashing straps .............................. 74
Laying up the vehicle ..................180
Light covers, misted.................... 111
Lighting ....................................... 107