2018 VAUXHALL MOVANO_B park assist
[x] Cancel search: park assistPage 156 of 261

154Driving and operating9Warning
If there is a fault in the ABS, the
wheels may be liable to lock due
to braking that is heavier than
normal. The advantages of ABS are no longer available. During
hard braking, the vehicle can no longer be steered and may
swerve.
If control indicators u, A , R and
C illuminate, the ABS and ESP are
deactivated and the message
BRAKING FAULT is shown in the
Driver Information Centre. Seek the
assistance of a workshop.
Have the cause of the fault remedied
by a workshop.
Parking brake9 Warning
Always apply parking brake firmly
without operating the release
button, and apply as firmly as
possible on a downhill or uphill
slope.
To release the parking brake, pull
the lever up slightly, press the
release button and fully lower the
lever.
To reduce the operating forces of
the parking brake, depress the
brake pedal at the same time.
Control indicator R 3 97.
Parking 3 138.
Retractable parking brake
Depending on vehicle, the parking
brake lever retracts to the horizontal
position even with the parking brake
applied.
To release the parking brake, press the release button and pull the lever
up slightly, then return the lever to the
horizontal position.
To apply the parking brake, pull the
lever up then release it. The lever
returns to the horizontal position.
Page 164 of 261

162Driving and operatingSpeed limiter
Maximum speed limiter In accordance with local or national
regulations, the vehicle may be
equipped with a fixed maximum
speed limiter that cannot be disabled.
If equipped, a warning label indicating the fixed maximum speed limit (55 to
80 mph) is located on the instrument
panel.
Deviations from the maximum speed
limit may occur briefly when driving
downhill, for physical reasons.
A warning buzzer may sound for
ten seconds if the vehicle briefly
exceeds the set limit.
Vehicles also equipped with cruise
control speed limiter: the maximum
speed cannot be exceeded by
depressing the accelerator pedal
firmly beyond the point of resistance.
Cruise control speed limiter 3 158.Parking assist9 Warning
It is the driver who bears full
responsibility for the parking
manoeuvre.
Always check the surrounding
area while reversing and using the rear parking assist system.
The parking assist makes reverse
parking easier by measuring the
distance between the rear of the
vehicle and obstacles.
The system consists of four ultrasonic parking sensors in the rear bumper.
Notice
Attached parts in the detection area
cause system malfunction.
Activation
When reverse gear is engaged, the
system switches itself on
automatically. Readiness for
operation is indicated by a brief
acoustic signal.
An obstacle is indicated by buzzers.
The interval between the buzzers
becomes shorter as the vehicle gets
closer to the obstacle. When the
distance is less than 30 cm, the buzzer is continuous.
Page 165 of 261

Driving and operating163Deactivation
It is possible to permanently or
temporarily deactivate the system.
Temporary deactivation
Temporarily deactivate the system by
pressing r on the instrument panel
with the ignition on. LED illuminates in
the button when deactivated.
When reverse gear is selected, no
acoustic signal will sound, indicating
deactivation.
The function is reactivated by
pressing r again or the next time
the ignition is switched on.
Permanent deactivation
Permanently deactivate the system
by pressing and holding r on the
instrument panel for approx. three seconds with the ignition on.
LED illuminates continuously in the
button when permanently
deactivated.
The system is deactivated and will not
operate. When reverse gear is
selected, no acoustic signal will
sound, indicating deactivation.
The function is reactivated by
pressing and holding r for approx.
three seconds.
Fault
If the system detects an operating fault, when selecting reverse gear a
continuous acoustic alarm will sound for approx. three seconds. Consult a
workshop to have the cause of the
fault remedied.Caution
When reversing, the area should
be free from obstacles which could impact on the underside of the
vehicle.
Impact to the rear axle, which may
not be visible, could lead to
uncharacteristic changes in the
vehicle handling. In the event of
such an impact, consult a
workshop.
Basic notes on parking assist
system
9 Warning
Under certain circumstances,
various reflective surfaces on
objects or clothing as well as
external noise sources may cause the system to fail to detect
obstacles.
Special attention must be paid to
low obstacles which can damage
the lower part of the bumper.
Page 166 of 261

164Driving and operatingCaution
Performance of the sensors can
be reduced when sensors are
covered, e.g. by ice or snow.
Performance of the parking assist
system can be reduced due to
heavy loading.
Special conditions apply if there
are taller vehicles involved (e.g.
off-road vehicles, mini vans,
vans). Object identification in the
upper part of these vehicles
cannot be guaranteed.
Objects with a very small reflection
cross-section, e.g. objects of
narrow size or soft materials, may
not be detected by the system.
The parking assist system will not
detect objects which are out of the detection range of the sensors.
Rear view camera
The rear view camera assists the
driver when reversing by displaying a view of the area behind the vehicle in
either the interior mirror or the
Infotainment system display screen.
9 Warning
The rear view camera does not
replace driver vision. Note that
objects that are outside the
camera's field of view, e.g. below
the bumper or underneath the
vehicle, are not displayed.
Do not reverse the vehicle by only looking at the display and checkthe surrounding area behind and
around the vehicle before
reversing.
The camera is typically installed on
the rear doors/tailgate, beneath the
number plate moulding.
The area displayed by the camera is
limited. The distance of the image that
appears on the display differs from
the actual distance.
Notice
To achieve the optimum visibility, the rear view camera must not be
obscured by dirt, snow or ice.
Activation
Interior mirror display screen
Rear view camera display is
automatically activated when reverse
gear is engaged. An audible signal
confirms activation.
Page 201 of 261

Vehicle care199Wheels and tyres
Tyre condition, wheel condition
Drive over edges slowly and at right
angles if possible. Driving over sharp
edges can cause tyre and wheel
damage. Do not trap tyres on the kerb when parking.
Regularly check the wheels for
damage. Seek the assistance of a
workshop in the event of damage or
unusual wear.
We recommend not swapping the
front wheels with the rear wheels and vice versa, as this can affect vehicle
stability. Always use less worn tyres
on the rear axle.
Tyres Factory-fitted tyres are matched to
the chassis and offer optimum driving comfort and safety.Winter tyres
Winter tyres improve driving safety at temperatures below 7 °C and should
therefore be fitted on all wheels.
In accordance with country-specific
regulations, affix the maximum speed
sticker in the driver's field of view.
Tyre designations
E.g. 215/65 R 16 C 109 R215:tyre width, mm65:cross-section ratio (tyre height
to tyre width), %R:belt type: RadialRF:type: RunFlat16:wheel diameter, inchesC:cargo or commercial use88:load index e.g. 109 is
equivalent to approx. 1030 kgR:speed code letter
Speed code letter:
Q:up to 100 mphS:up to 112 mphT:up to 118 mphH:up to 130 mphV:up to 150 mphW:up to 168 mphChoose a tyre appropriate for the
maximum speed of your vehicle.
The maximum speed is achievable at kerb weight with driver (75 kg) plus
125 kg payload. Optional equipment
could reduce the maximum speed of
the vehicle.
Directional tyres
Fit directional tyres such that they roll in the direction of travel. The rolling
direction is indicated by a symbol
(e.g. an arrow) on the sidewall.
Tyre pressure
Check the pressure of cold tyres at
least every 14 days and before any
long journey. Do not forget the spare
wheel. This also applies to vehicles
with tyre pressure monitoring system.
The tyre pressure information label
on the driver's door frame indicates the original equipment tyres and the
correspondent tyre pressures.
Always inflate tyres to the pressures
shown on the label.
Tyre pressures 3 244.
Page 209 of 261
Vehicle care207not be driven. Seek the
assistance of a workshop.
21. Stow tyre repair kit under the front
seat.
Notice
The driving characteristics of the repaired tyre are severely affected,therefore have this tyre replaced.
If unusual noise is heard or the
compressor becomes hot, turn
compressor off for at least
30 minutes.
The built-in safety valve opens at a
pressure of seven bar (102 psi).
Note the expiry date of the kit. After
this date its sealing capability is no
longer guaranteed. Pay attention to
storage information on sealant
bottle.
Replace the used sealant bottle. Dispose of the bottle as prescribed
by applicable laws.
The compressor and sealant can be used from approx. -30 °C.Wheel changing
Some vehicles are equipped with a
tyre repair kit instead of a spare wheel
3 204.
Make the following preparations and
observe the following information:
● Park the vehicle on a level, firm and non-slippery surface. The
front wheels must be in the
straight-ahead position.
● Apply the parking brake and engage first gear or reverse gear
(manual transmission) or N
(manual transmission
automated).
● Switch off the air suspension system 3 139.
● Remove the spare wheel 3 209.
● Never change more than one wheel at a time.
● Use the jack only to change wheels in case of puncture, not
for seasonal winter or summer
tyre change.
● The jack is maintenance-free.● If the ground on which the vehicle
is standing is soft, a solid board
(max. 1 cm thick) should be
placed under the jack.
● No people or animals may be in the vehicle when it is jacked-up.
● Never crawl under a jacked-up vehicle.
● Do not start the engine when the vehicle is raised on the jack.
● Clean wheel bolts/nuts and their threads before mounting the
wheel.9 Warning
Do not grease wheel bolt, wheel
nut and wheel nut cone.
1. Remove the wheel cover using the hook supplied. Vehicle tools
3 198.
Depending on vehicle, first
remove the bolt/nut covers by
hand then remove the wheel
cover, or press wheel cover at the points indicated by the arrows and
turn to release.
Page 217 of 261
Vehicle care215Caution
Do not tow the vehicle from the
rear. The front towing eye must
only be used for towing and not
recovering a vehicle.
Switch on ignition to permit operation
of brake lights, horn and windscreen
wipers, and move the steering wheel
slightly to release the steering wheel
lock.
Switch off the air suspension system 3 139.
Move the selector lever to neutral.
Release the parking brake.
Caution
Vehicles with manual
transmission automated: If neutral cannot be selected, the vehiclemust only be towed with the drive
wheels raised off the ground.
The vehicle should always be
towed with the ignition switched
off.
Manual transmission automated
3 149.Caution
Drive slowly. Do not drive jerkily.
Excessive tractive force can
damage the vehicle.
When the engine is not running,
considerably more force is needed to
brake and steer.
To prevent the entry of exhaust fumes
from the towing vehicle, switch on the air recirculation system 3 116 and
close the windows.
Seek the assistance of a workshop.
After towing, unscrew the towing eye
and refit the cover.
Towing another vehicle
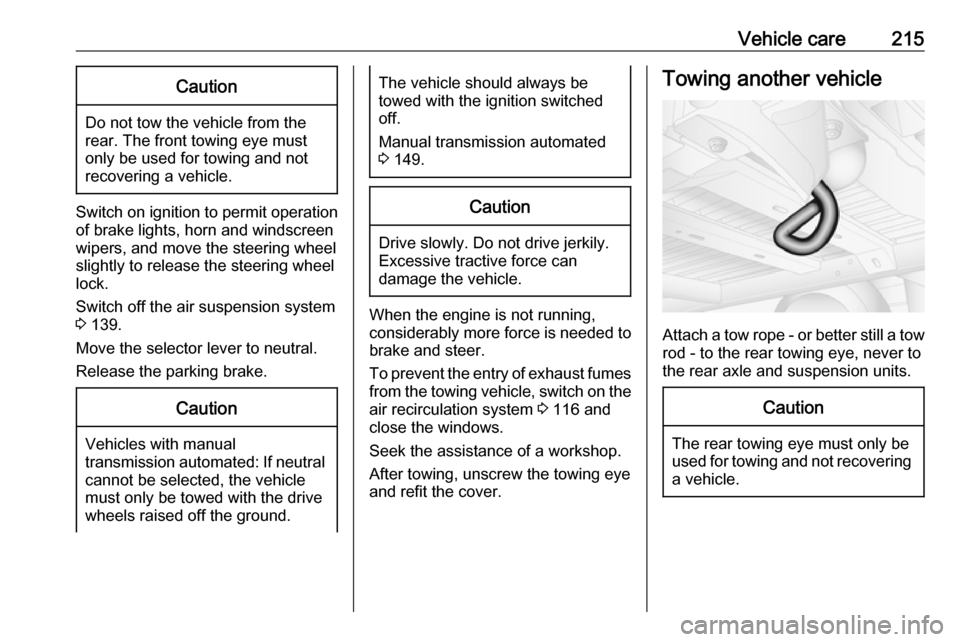
Attach a tow rope - or better still a tow
rod - to the rear towing eye, never to
the rear axle and suspension units.
Caution
The rear towing eye must only be
used for towing and not recovering a vehicle.
Page 256 of 261

254First aid kit ................................... 79
Fixed air vents ........................... 129
Fog light ..................................... 100
Fog lights ............................ 111, 187
Folding mirrors ............................. 35
Folding seat .................................. 72
Front airbag system .....................58
Front courtesy light .....................112
Front fog lights ....................107, 111
Front reading light....................... 113
Front seats.................................... 42
Front storage ................................ 72
Front turn signal lights ...............187
Fuel consumption - CO 2-
Emissions ............................... 169
Fuel economy rating (ecoScoring) ............................ 103
Fuel for diesel engines ..............167
Fuel gauge ................................... 90
Fuel tank ..................................... 243
Fuse box ..................... 194, 195, 196
Fuses ......................................... 193
G
Gauges ......................................... 88
General information ...................170
Glass panel .................................. 40
Glovebox ..................................... 72
Glovebox cooler ......................... 129Grab handles ................................ 74
Ground clearance .......................139
H Hand brake - see Parking brake. 154
Hazard warning flashers ............110
Headlight flash ........................... 109
Headlight range adjustment ......109
Headlights .................. 107, 108, 184
Headlights when driving abroad 109
Head restraint adjustment .............8
Head restraints ............................ 41
Heated exterior mirrors .................15
Heated mirrors ............................. 35
Heated rear window ...............15, 39
Heating ........................................ 48
Heating and ventilation system . 115
High beam ......................... 100, 108
High beam assist ................100, 108
Hill start assist ........................... 155
Horn ....................................... 14, 83
Hub cap hook ............................. 198
I
Identification plate .....................223
Idle speed control .......................135
Ignition switch positions .............133
Immobiliser .................................. 34
Indicators ...................................... 88
Info display ................................. 101
Information displays.................... 101Infotainment system ...................101
Initial drive information.................... 6
Instrument cluster ........................88
Instrument panel fuse box .........195
Instrument panel illumination .....193
Instrument panel overview ........... 10
Instrument panel storage .............71
Interior care ............................... 218
Interior lighting ............................ 112
Interior lights ...................... 112, 192
Interior mirrors .............................. 36
Interruption of power supply ......153
Introduction .................................... 3
ISOFIX .......................................... 61
J Jack ............................................ 198
Journey record............................ 103
Jump starting ............................. 212
K Keys ............................................. 19
Keys, locks ................................... 19
L
Lane departure warning .......97, 166
Lashing eyes ............................... 74
Lashing straps .............................. 74
Laying up the vehicle ..................180
Light covers, misted.................... 111
Lighting ....................................... 107