2018 TESLA MODEL 3 ESP
[x] Cancel search: ESPPage 15 of 165

1.Firmly push the illuminated button in the
direction of the arrow to release the latch.
2. Push the rear trunk open.
Note: The button glows for several hours after
a brief exposure to ambient light.
Warning: Do not allow children to play
inside the trunk or become locked inside.
An unrestrained child could
suffer serious
injury or death in a crash. A child could
suffer heat exhaustion if trapped in the
vehicle, especially without climate control
on.
Rear Trunk
Opening and Closing13
Page 21 of 165

Folding Rear Seats
Model 3 has a split rear seat that can fold
forward.
Before folding, remove items from the seats
and the rear footwell. To allow the rear seat
backs to fold completely
flat, you may need to
move the front seats forward.
To fold a rear seat, pull the corresponding
lever and fold the seat forward.
Raising Rear Seats
Before raising a rear seat, make sure that the
seat belts are not trapped behind the backrest.
Pull the seat back upward until it locks into
place.
To
confirm that the seat back is locked in the
upright position, try pulling it forward.
Warning: Always ensure the seat backs
are locked in their upright position.
Failure to do so increases the risk of injury.
Head Supports
The front seats and outer rear seats include
integrated head supports that are not adjustable.
The rear center seat includes an adjustable head support that can be raised, lowered, or
removed. The head support should always be
raised and locked into position (so that the
center is aligned with the center of the ears) when occupied by a passenger that is not in a
child safety seat.
The head support in the rear center seat
should always be lowered when a seat belt
retained child safety seat is installed. See
Raising/Lowering the Rear Center Head Support on page 19.
Warning:
Ensure that all head supports
are positioned correctly before sitting in, or operating, Model 3 to minimize the risk
of severe injury or death in the event of a
collision.
Raising/Lowering the Rear Center Head
Support
To raise the head support, lift it until you hear
it click into place. Push down on the head support to ensure that it is secure.
To lower the head support, press and hold the button on the outer base of the right post and
press the head support down.
Front and Rear Seats
Seating and Safety Restraints19
Page 22 of 165

Removing/Installing the Rear Center Head
Support
To remove the head support:
1. Raise the head support (see Raising/
Lowering the Rear Center Head Support on page 19).
2. Press and hold the button on the outer
base of the right post.
3. Insert a short,
flat object (such as a smallflat head screwdriver) into the opening on
the inside base of the left post and pull
the head support upwards.
To install the head support:
1. With the front of the head support facing
forward, insert both posts into the corresponding holes on the backrest.
2. Press down on the head support until you
hear it click into place.
3. Pull up on the head support to ensure that
it is secure.
Warning: Ensure that the head
support is installed properly before
anyone occupies the rear center seat.
Failure to do so increases the risk of injury or death if a collision occurs.Seat Heaters
The front and rear seats are equipped with
heating pads that operate at three levels from
3 (highest) to 1 (lowest). To operate the seat
heaters, see Operating Seat Heaters on page
89.Warning: To avoid burns resulting from
prolonged use, individuals who have
peripheral neuropathy, or whose capacity
to feel pain is limited because of diabetes,
age, neurological injury, or some other
condition, should exercise caution when
using the climate control system and seat heaters.
Seat Covers
Warning: Do not use seat covers in Model
3. Doing so could restrict deployment of
the seat-mounted side air bags if a collision occurs. It can also reduce theaccuracy of the occupant detection
system.
Front and Rear Seats
20Model 3 Owner
Page 48 of 165

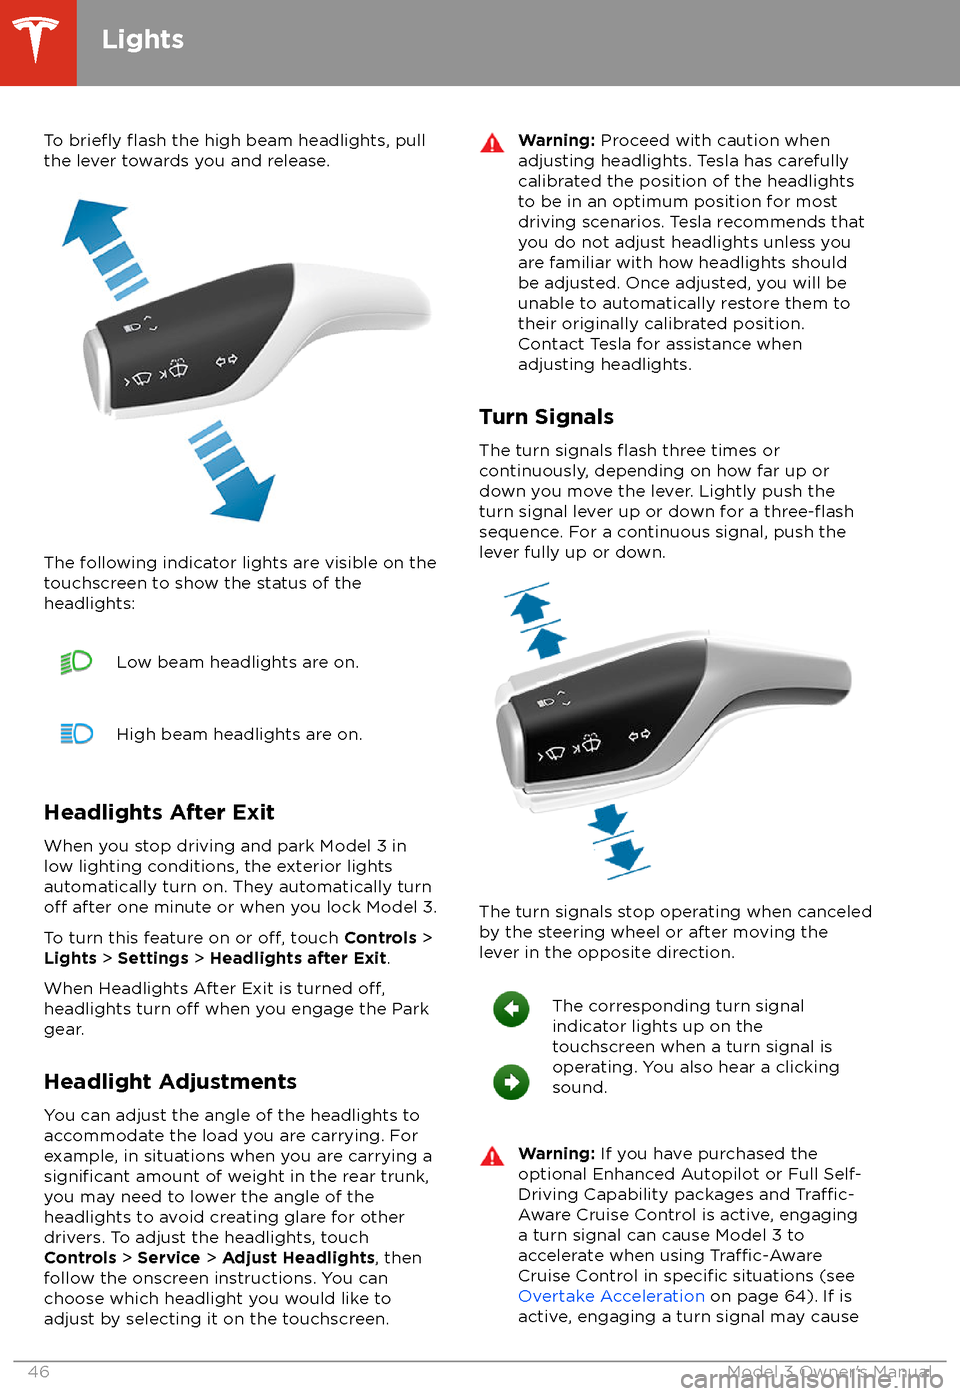
To briefly flash the high beam headlights, pull
the lever towards you and release.
The following indicator lights are visible on the
touchscreen to show the status of the
headlights:
Low beam headlights are on.High beam headlights are on.
Headlights After Exit
When you stop driving and park Model 3 in
low lighting conditions, the exterior lights
automatically turn on. They automatically turn
off after one minute or when you lock Model 3.
To turn this feature on or
off, touch Controls >
Lights > Settings > Headlights after Exit .
When Headlights After Exit is turned
off,headlights turn off when you engage the Park
gear.
Headlight Adjustments You can adjust the angle of the headlights toaccommodate the load you are carrying. For
example, in situations when you are carrying a
significant amount of weight in the rear trunk,
you may need to lower the angle of the
headlights to avoid creating glare for other
drivers. To adjust the headlights, touch
Controls > Service > Adjust Headlights , then
follow the onscreen instructions. You can
choose which headlight you would like to adjust by selecting it on the touchscreen.
Warning: Proceed with caution when
adjusting headlights. Tesla has carefully
calibrated the position of the headlights
to be in an optimum position for most
driving scenarios. Tesla recommends that
you do not adjust headlights unless you
are familiar with how headlights should
be adjusted. Once adjusted, you will be
unable to automatically restore them to their originally calibrated position.
Contact Tesla for assistance when
adjusting headlights.
Turn Signals
The turn signals
flash three times or
continuously, depending on how far up or
down you move the lever. Lightly push the
turn signal lever up or down for a
three-flashsequence. For a continuous signal, push the lever fully up or down.
The turn signals stop operating when canceled
by the steering wheel or after moving the
lever in the opposite direction.
The corresponding turn signal
indicator lights up on the
touchscreen when a turn signal is
operating. You also hear a clicking
sound.Warning: If you have purchased the
optional Enhanced Autopilot or Full Self-
Driving Capability packages and
Traffic-
Aware Cruise Control is active, engaging
a turn signal can cause Model 3 to accelerate when using
Traffic-AwareCruise Control in specific situations (see
Overtake Acceleration on page 64). If is
active, engaging a turn signal may cause
Lights
46Model 3 Owner
Page 63 of 165

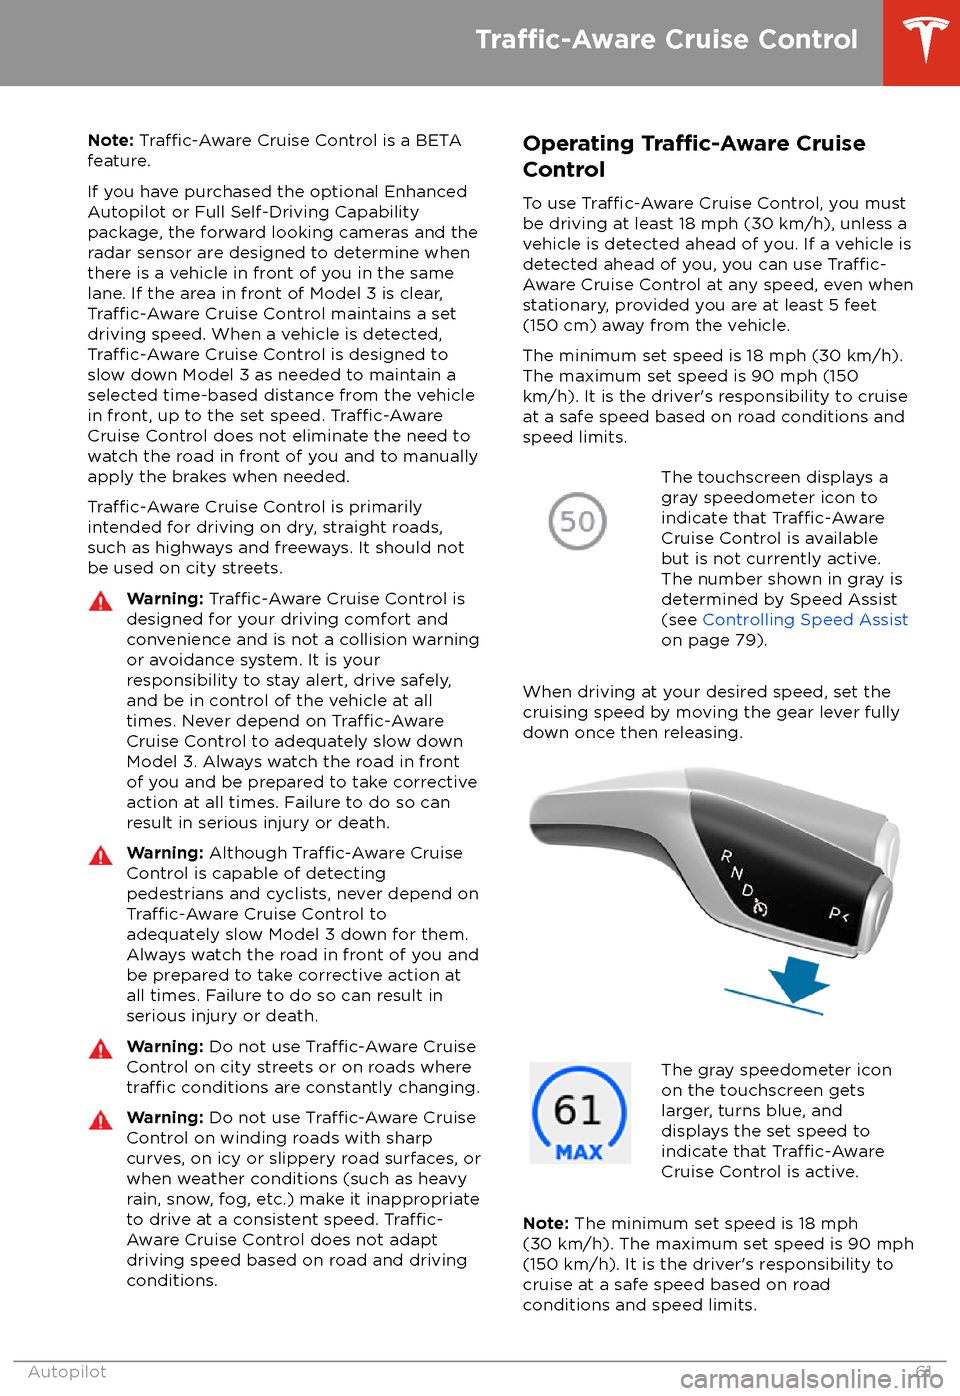
Note: Traffic-Aware Cruise Control is a BETA
feature.
If you have purchased the optional Enhanced Autopilot or Full Self-Driving Capabilitypackage, the forward looking cameras and theradar sensor are designed to determine when
there is a vehicle in front of you in the same
lane. If the area in front of Model 3 is clear,
Traffic-Aware Cruise Control maintains a set
driving speed. When a vehicle is detected,
Traffic-Aware Cruise Control is designed to
slow down Model 3 as needed to maintain a selected time-based distance from the vehiclein front, up to the set speed.
Traffic-AwareCruise Control does not eliminate the need to
watch the road in front of you and to manually
apply the brakes when needed.
Traffic-Aware Cruise Control is primarily
intended for driving on dry, straight roads,
such as highways and freeways. It should not be used on city streets.
Warning: Traffic-Aware Cruise Control is
designed for your driving comfort and
convenience and is not a collision warning or avoidance system. It is your
responsibility to stay alert, drive safely,
and be in control of the vehicle at all
times. Never depend on
Traffic-AwareCruise Control to adequately slow down
Model 3. Always watch the road in front
of you and be prepared to take corrective
action at all times. Failure to do so can
result in serious injury or death.
Warning: Although Traffic-Aware Cruise
Control is capable of detecting
pedestrians and cyclists, never depend on
Traffic-Aware Cruise Control to
adequately slow Model 3 down for them.
Always watch the road in front of you and
be prepared to take corrective action at
all times. Failure to do so can result in
serious injury or death.
Warning: Do not use Traffic-Aware Cruise
Control on city streets or on roads where
traffic conditions are constantly changing.
Warning: Do not use Traffic-Aware Cruise
Control on winding roads with sharp
curves, on icy or slippery road surfaces, or
when weather conditions (such as heavy
rain, snow, fog, etc.) make it inappropriate
to drive at a consistent speed.
Traffic-
Aware Cruise Control does not adapt
driving speed based on road and driving
conditions.
Operating Tra
Page 76 of 165

The cameras monitor the markers on the lane
you are driving in and the ultrasonic sensors
monitor the surrounding areas and the blind
spot for the presence of a vehicle or other
objects.
When an object is detected in your blind spot
or close to the side of Model 3 (such as a
vehicle, guard rail, etc.), colored lines radiate
from the image of Model 3 on the
touchscreen. The location of the lines
correspond to the location of the detected object. The color of the lines (white, yellow,
orange, or red) represents the object
Page 85 of 165

DrivingAcceleration: Adjust the amount of acceleration. Chill limits acceleration for
a slightly smoother and gentler ride, whereas Standard provides the normal
level of acceleration.
Note: When Chill is selected, Chill displays on the touchscreen above the
driving speed.
Steering Mode : Adjust the amount of
effort required to turn the steering
wheel. Sport feels more responsive whereas Comfort feels easier to drive
and park (see Adjusting Steering
Effort on page 36).
Regenerative Braking : When you release the accelerator when driving,
regenerative braking slows Model 3 and feeds any surplus energy back to
the Battery. If set to LOW, Model 3 does not slow down as quickly, but also
feeds less energy back to the Battery (see Regenerative Braking on page
49).
Note: Regardless of the setting selected, the energy gained by regenerative
braking is reduced if the Battery is full, or is extremely cold or hot (in which
case, surplus energy is used to heat or cool it).
Traction Control : Turn slip start on to allow wheels to spin (see Traction
Control on page 51).
Creep : When on, Model 3 applies forward torque in Drive and backwards
torque in Reverse when you release the brake pedal (similar to a conventional vehicle with an automatic transmission). The torque moves the
vehicle slowly on
flat roads, but may require you to press the accelerator
pedal in some situations (for example, when on a steep hill or driveway).
When
off, Model 3 is free rolling when you let your foot off the brake pedal
and the motor does not apply torque until the accelerator pedal is pressed.
You can adjust this setting only when Model 3 is in Park.
Warning: Never rely on Creep to apply enough torque to prevent your
vehicle from rolling down a hill. Always apply brakes to remain stopped
or the accelerator to proceed up the hill. Failure can result in property
damage and/or a collision.
Controls and Settings
Using the Touchscreen83
Page 90 of 165

Operating the Face-Level Vent
Model 3 has a unique horizontal face-level
vent that spans the width of the dashboard.
Using the touchscreen, you can pinpoint
exactly where you want to direct the air
flowing from this vent when heating or cooling
the cabin area.
When the face-level vent is turned on (see
Customizing Climate Control on page 87), you
can control the driver and passenger side
separately using the corresponding grids that
appear on each side of the climate control
settings window.
1. Driver vent and control grid
2. Passenger vent and control grid
Simply drag the oblong or circle(s) on the control grid to direct air
flow from the
corresponding vent to wherever you want it. You can also touch a location on the grid tomove the oblong or circle(s) to that location.
Note: The line across the center of the grid
represents the center of the headrest on the
corresponding front seat.
This example illustrates how moving the single
oblong in the driver