2018 SUBARU CROSSTREK radio controls
[x] Cancel search: radio controlsPage 185 of 474

(190,1)
北米Model "A1320BE-C" EDITED: 2017/ 10/ 10
!Information screen
Press the INFO button on the steering wheel to switch the item displayed on the information screen.
Content Description Page
Electric components operating status screen
Displays the operating status of the electric components and equipment. 3-53
Prevention safety screen Displays the status of your vehicle. 3-53
EyeSight screen*1
Displays the operating status of EyeSight. 3-54
Favorite screen Displays up to 3 optional items. 3-54
Weather information screen*
2
Displays weather information. 3-55
Traffic information*
2/Navigation*
3screen Displays information linked with the navigation system. 3-55
Audio screen Displays audio system information. 3-56
Fuel consumption screen Displays fuel consumption information. 3-56
Clock screen Displays the clock. 3-56
Guidance screen Moves to the setting screen.3-57
*1: Models with EyeSight system
*2: Models with SiriusXM Satellite Radio
*3: Models with navigation system
Instruments and controls/Multi-function display (color LCD)
3-52
Page 188 of 474

(193,1)
北米Model "A1320BE-C" EDITED: 2017/ 10/ 10
Item Details
The posted speed limit of the road
you are currently driving on is
displayed.*
1
The calender is displayed.Nothing is displayed.
*1: If equipped
*2: Models with SiriusXM Satellite Radio
NOTESome displayed items may be not
displayed depending on the model
and specifications.
The items shown in the favorite screen can
be changed. For details, refer to“Favorite
setting”F3-60.!Weather information screen (if
equipped)
1) Weather information for the destination.*
2) Weather information for the current loca-
tion.
*: Only when a destination is set in the
navigation systemThe weather information is displayed on
the screen.NOTE.When all of the following conditions
are satisfied, weather information is
displayed.
–The vehicle is equipped with an
audio and navigation system for
SiriusXM satellite radio.
–You have a current SiriusXMsatellite radio subscription.
.The weather forecast for the set
destination remains displayed until a
new destination is set or until you reach
the destination.
.Depending on the reception timing
of XM, the display of weather informa-
tion may be delayed.
!Navigation screen (models with
navigation system)
The navigation system information to the
destination is displayed on the screen.NOTEWhen a destination is not set in the
navigation system, the compass orien-
tation, name, route sign and speed limit
of the road the vehicle is traveling on
–CONTINUED–
Instruments and controls/Multi-function display (color LCD)
3-55
3
Page 193 of 474

(198,1)
北米Model "A1320BE-C" EDITED: 2017/ 10/ 10
the ignition switch is turned to the“ON”or
“ACC”position, the screen will be restored.
The screen will be restored with the basic
screen that was displayed when the
screen was turned off.NOTEWhile the screen is off, the screen
switches to the climate control screen
only when the climate control system is
operated.
!Favorite setting
1. Select the“Favorite”from the 2nd
menu in setting screen. Refer to“Setting
screen”F3-57.2. Set the desired items by using the
control switches. For details about items,
refer to“Favorite screen”F3-54.3. Select“Set”to exit settings. Select“Go
Back”to return to the previous screen
without applying the setting changes.
NOTE.You can display a maximum of the 3
items.
.The same item cannot be selected
for the left, center or right location.
.Weather information for 3 hours
later or 6 hours later can be displayed.
!Bypass screen setting
1. Select“Bypass Screen”from the 2nd
menu in the setting screen. Refer to
“Setting screen”F3-57.2. Select“On”or“Off”to turn the display
of items on or off by using the controlswitches.
3. Select“Set”to exit settings. Select“Go
Back”to return to the previous screen
without applying the setting changes.
NOTETraffic information setting is only dis-
played for the audio unit with SiriusXM
satellite radio.
!Beep setting
1. Select“Beep”from the 2nd menu in the
setting screen. Refer to“Setting screen”
F3-57.2. Set the beep volume by using the
control switches.
3. Select“Set”to exit settings. Select“Go
Back”to return to the previous screen
Instruments and controls/Multi-function display (color LCD)
3-60
Page 215 of 474

(220,1)
北米Model "A1320BE-C" EDITED: 2017/ 10/ 10
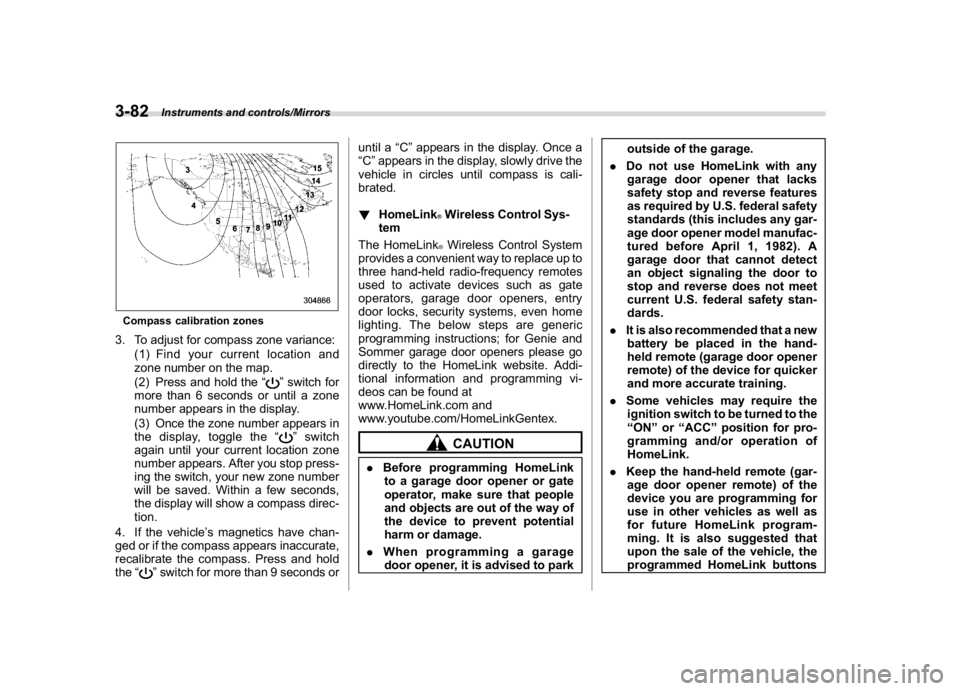
Compass calibration zones3. To adjust for compass zone variance:
(1) Find your current location and
zone number on the map.
(2) Press and hold the“
”switch for
more than 6 seconds or until a zone
number appears in the display.
(3) Once the zone number appears in
the display, toggle the“”switch
again until your current location zone
number appears. After you stop press-
ing the switch, your new zone number
will be saved. Within a few seconds,
the display will show a compass direc-
tion.
4. If the vehicle’s magnetics have chan-
ged or if the compass appears inaccurate,
recalibrate the compass. Press and hold
the“
”switch for more than 9 seconds oruntil a“C”appears in the display. Once a
“C”appears in the display, slowly drive the
vehicle in circles until compass is cali-
brated.
!HomeLink
®Wireless Control Sys-
tem
The HomeLink®Wireless Control System
provides a convenient way to replace up to
three hand-held radio-frequency remotes
used to activate devices such as gate
operators, garage door openers, entry
door locks, security systems, even home
lighting. The below steps are generic
programming instructions; for Genie and
Sommer garage door openers please go
directly to the HomeLink website. Addi-
tional information and programming vi-
deos can be found at
www.HomeLink.com and
www.youtube.com/HomeLinkGentex.CAUTION
.Before programming HomeLink
to a garage door opener or gate
operator, make sure that people
and objects are out of the way of
the device to prevent potential
harm or damage.
.When programming a garage
door opener, it is advised to parkoutside of the garage.
.Do not use HomeLink with any
garage door opener that lacks
safety stop and reverse features
as required by U.S. federal safety
standards (this includes any gar-
age door opener model manufac-
tured before April 1, 1982). A
garage door that cannot detect
an object signaling the door to
stop and reverse does not meet
current U.S. federal safety stan-
dards.
.It is also recommended that a new
battery be placed in the hand-
held remote (garage door opener
remote) of the device for quicker
and more accurate training.
.Some vehicles may require the
ignition switch to be turned to the
“ON”or“ACC”position for pro-
gramming and/or operation of
HomeLink.
.Keep the hand-held remote (gar-
age door opener remote) of the
device you are programming for
use in other vehicles as well as
for future HomeLink program-
ming. It is also suggested that
upon the sale of the vehicle, the
programmed HomeLink buttons
Instruments and controls/Mirrors
3-82
Page 218 of 474

(223,1)
北米Model "A1320BE-C" EDITED: 2017/ 10/ 10
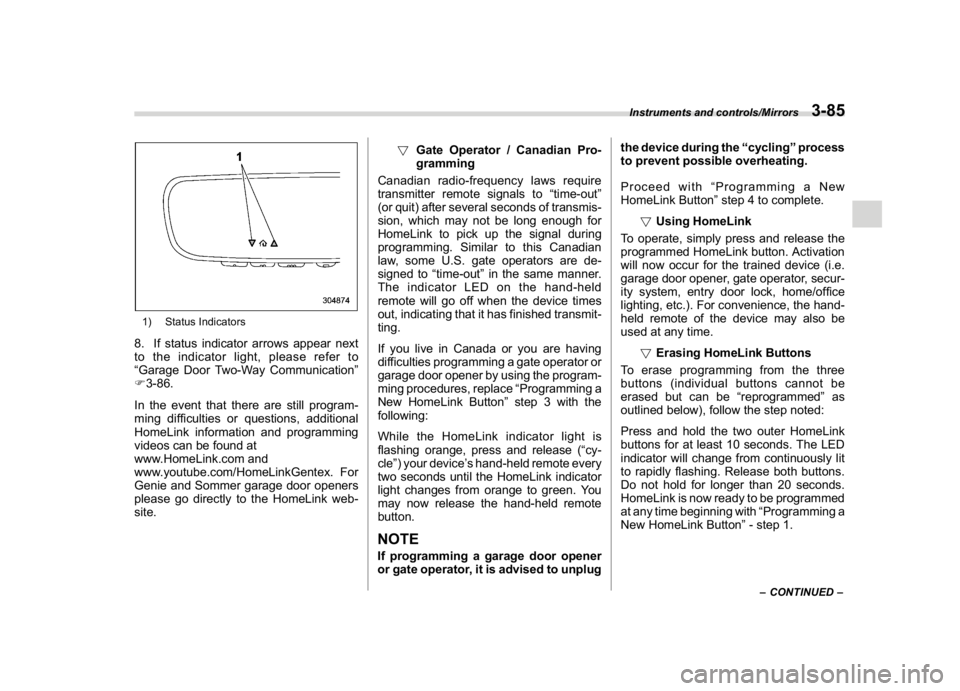
1) Status Indicators8. If status indicator arrows appear next
to the indicator light, please refer to
“Garage Door Two-Way Communication”
F3-86.
In the event that there are still program-
ming difficulties or questions, additional
HomeLink information and programming
videos can be found at
www.HomeLink.com and
www.youtube.com/HomeLinkGentex. For
Genie and Sommer garage door openers
please go directly to the HomeLink web-
site.!Gate Operator / Canadian Pro-
gramming
Canadian radio-frequency laws require
transmitter remote signals to“time-out”
(or quit) after several seconds of transmis-
sion, which may not be long enough for
HomeLink to pick up the signal during
programming. Similar to this Canadian
law, some U.S. gate operators are de-
signed to“time-out”in the same manner.
The indicator LED on the hand-held
remote will go off when the device times
out, indicating that it has finished transmit-
ting.
If you live in Canada or you are having
difficulties programming a gate operator or
garage door opener by using the program-
ming procedures, replace“Programming a
New HomeLink Button”step 3 with the
following:
While the HomeLink indicator light is
flashing orange, press and release (“cy-
cle”) your device’s hand-held remote every
two seconds until the HomeLink indicator
light changes from orange to green. You
may now release the hand-held remote
button.
NOTEIf programming a garage door opener
or gate operator, it is advised to unplugthe device during the“cycling”process
to prevent possible overheating.
Proceed with“Programming a New
HomeLink Button”step 4 to complete.
!Using HomeLink
To operate, simply press and release the
programmed HomeLink button. Activation
will now occur for the trained device (i.e.
garage door opener, gate operator, secur-
ity system, entry door lock, home/office
lighting, etc.). For convenience, the hand-
held remote of the device may also be
used at any time.
!Erasing HomeLink Buttons
To erase programming from the three
buttons (individual buttons cannot be
erased but can be“reprogrammed”as
outlined below), follow the step noted:
Press and hold the two outer HomeLink
buttons for at least 10 seconds. The LED
indicator will change from continuously lit
to rapidly flashing. Release both buttons.
Do not hold for longer than 20 seconds.
HomeLink is now ready to be programmed
at any time beginning with“Programming a
New HomeLink Button”- step 1.
–CONTINUED–
Instruments and controls/Mirrors
3-85
3