2018 RENAULT ZOE heating
[x] Cancel search: heatingPage 104 of 226

2.10
VEHICLE RANGE: recommendations (1/2)
A “sporty” driving style reduces your
vehicle range: opt for a “lighter” driving
style.
Advice:
– drive at a constant speed.
– keep an eye on the tools available to you to view the road conditions
(charge meter, current consump-
tion, journey log, etc). Please refer
to the information on “Eco-driving” in
Section 2;– adapt your driving style to avoid ex- cessive energy consumption
– favour power recovery: anticipate traffic changes by lifting your foot off
the accelerator pedal or by braking
gradually.
Road type
Do not try to maintain the same speed
up a hill, accelerate no more than you
would on the level. Keep your foot in
the same position on the accelerator
pedal.
The vehicle range is approved for a
mixed NEDC cycle (New European
Driving Cycle).
In real usage, the range of an electric
vehicle may vary depending on several
factors over which you have partial con-
trol, which may make a considerable
difference to the vehicle range. These
factors are:
– speed and driving style;
– type of road;
– heating level;
– tyres;
– use of electrical accessories;
– vehicle loading.
Furthermore, activating ECO mode en-
ables the vehicle to automatically take
charge of all energy consuming ele-
ments (engine power, heating, etc.) to
reduce their consumption to the fullest
possible extent. Please refer to the in-
formation on “Eco-driving” in Section 2.
Speed and driving style
High speeds will reduce your vehicle’s
range.
Page 105 of 226

2.11
VEHICLE RANGE: recommendations (2/2)
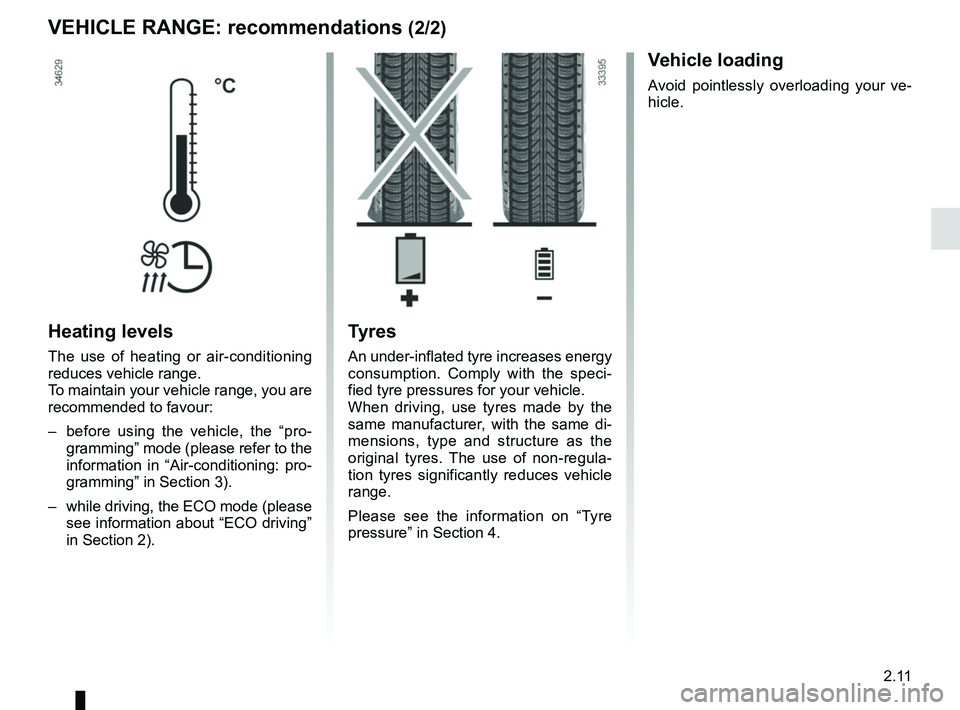
Heating levels
The use of heating or air-conditioning
reduces vehicle range.
To maintain your vehicle range, you are
recommended to favour:
– before using the vehicle, the “pro-gramming” mode (please refer to the
information in “Air-conditioning: pro-
gramming” in Section 3).
– while driving, the ECO mode (please see information about “ECO driving”
in Section 2).
Tyres
An under-inflated tyre increases energy
consumption. Comply with the speci-
fied tyre pressures for your vehicle.
When driving, use tyres made by the
same manufacturer, with the same di-
mensions, type and structure as the
original tyres. The use of non-regula-
tion tyres significantly reduces vehicle
range.
Please see the information on “Tyre
pressure” in Section 4.
Vehicle loading
Avoid pointlessly overloading your ve-
hicle.
Page 130 of 226

3.4
MANUAL AIR CONDITIONING (1/3)
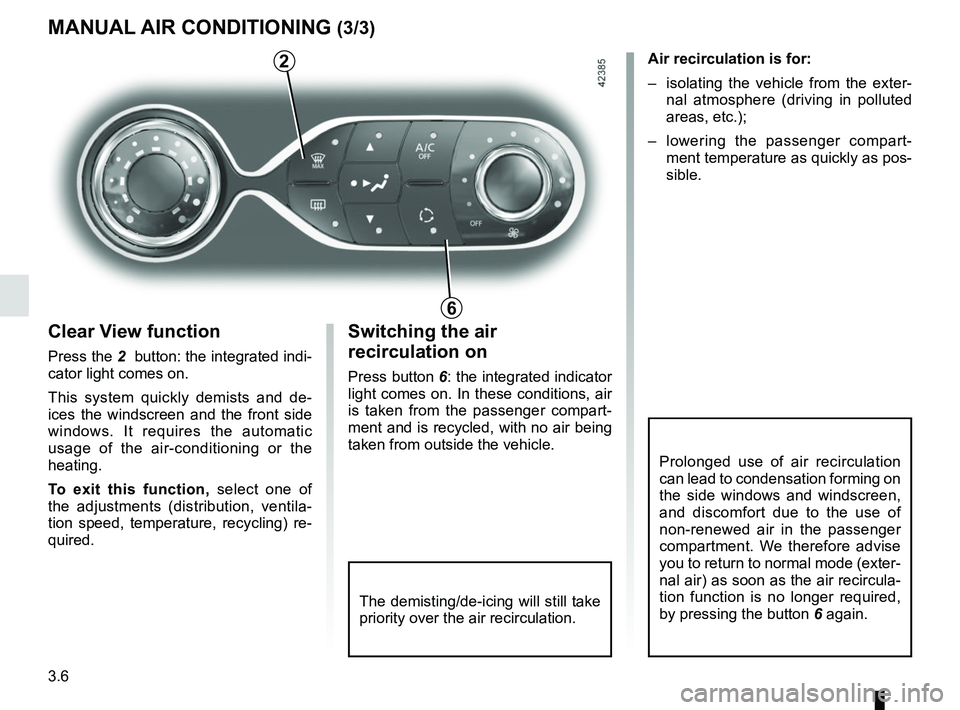
The controls
1 Adjusting the air temperature.
2 “Clear View” function.
3 Passenger compartment air distribu- tion adjustment.
4 Air-conditioning deactivation control.
5 Adjusting the fan speed until the
system switches off.
6 Air recirculation.
7 De-icing/demisting of the rear screen
and, depending on the vehicle, the
door mirrors.
Heating or air-conditioning can only be
used while the engine is running.
2345
67
1
Some buttons have an operating
tell-tale which indicates the operat-
ing status.
Switching air conditioning on
or off
(depending on vehicle)
The air conditioning is switched on (in-
dicator light on) or off (indicator light off)
using button 4.
Activation is not possible if control 5 is
set to OFF. The air conditioning system is used
for:
–
lowering the temperature inside the
passenger compartment;
– eliminating condensation more quickly.
Advice: to optimize vehicle range, de-
activate the air conditioning when the
outside temperature is comfortable.
Adjusting the ventilation
speed
Turn the control 5 to one of the eight
positions to start the ventilation system
and adjust the power.
Position OFF
In this position:
– the air conditioning switches off au- tomatically;
– the ventilation speed of air in the passenger compartment is zero;
– there is, however, a slight flow of air when the vehicle is moving.
This position should not normally be
used.
Page 132 of 226

3.6
MANUAL AIR CONDITIONING (3/3)
The demisting/de-icing will still take
priority over the air recirculation.
Switching the air
recirculation on
Press button 6: the integrated indicator
light comes on. In these conditions, air
is taken from the passenger compart-
ment and is recycled, with no air being
taken from outside the vehicle.Air recirculation is for:
– isolating the vehicle from the exter-
nal atmosphere (driving in polluted
areas, etc.);
– lowering the passenger compart- ment temperature as quickly as pos-
sible.
Prolonged use of air recirculation
can lead to condensation forming on
the side windows and windscreen,
and discomfort due to the use of
non-renewed air in the passenger
compartment. We therefore advise
you to return to normal mode (exter-
nal air) as soon as the air recircula-
tion function is no longer required,
by pressing the button 6 again.
6
Clear View function
Press the 2 button: the integrated indi-
cator light comes on.
This system quickly demists and de-
ices the windscreen and the front side
windows. It requires the automatic
usage of the air-conditioning or the
heating.
To exit this function, select one of
the adjustments (distribution, ventila-
tion speed, temperature, recycling) re-
quired.
2
Page 133 of 226

3.7
AUTOMATIC AIR-CONDITIONING (1/4)
The system controls the fan speed, air
distribution, air recirculation,starting
and stopping the air conditioning, the
heating and air temperature.
AUTO: allows the selected comfort
level to be best attained, depending on
the exterior conditions. Press button 1.
Adjusting the air temperatureTurn control 2 to obtain the desired
temperature. The further the pointer is
away from the heating stop position,
the higher the temperature will be.
If the outdoor temperature is too high,
the heating decreases automatically.
This limits energy consumption and
maintains the range of the vehicle.
Special note: the highest and lowest
settings allow the system to produce
maximum hot or cold temperature
levels (“ LOW” and “HIGH" indicated on
the multimedia display).
8 Air recirculation.
9
De-icing/demisting of the rear screen
and, depending on the vehicle, the
door mirrors.
Heating or air-conditioning can only be
used while the engine is running.
Automatic mode
The automatic climate control system
guarantees comfort in the passen-
ger compartment and good visibility
(except in the event of extreme condi-
tions), while optimising consumption.
The controls
1 Automatic mode.
2 Air temperature adjuster.
3 “Clear View” function.
4 Passenger compartment air distribu- tion adjustment.
5 Air-conditioning deactivation control.
6 Adjusting the fan speed until the
system switches off.
7 Depending on the vehicle, quick access control to the “Air condition-
ing programming” menu or activa-
tion control for air conditioning pro-
gramming.
3456
897
12
Some buttons have an operating
tell-tale which indicates the operat-
ing status.
Page 134 of 226

3.8
3
Deactivating the air-
conditioning
The button 5 stops (warning light on)
the operation of the air-conditioning.
To activate the air-conditioning, press
the button 1 . The integrated warning
light in the button 5 will go out.
The air conditioning system is used
for:
– lowering the temperature inside the passenger compartment;
– eliminating condensation more quickly.
The air conditioning does not operate
when the exterior temperature is low.
5
AUTOMATIC AIR-CONDITIONING (2/4)
The displayed temperature values
show a comfort level.
When starting the engine, increas-
ing or decreasing the value dis-
played will not allow the com-
fort level to be reached any more
quickly. The system will always op-
timise the temperature increase or
decrease (the ventilation system
does not start instantly at maximum
speed: it gradually increases). This
may take several minutes.
Generally speaking, unless there is
a particular reason not to, the dash-
board air vents should remain open.
Preferably, use automatic mode.
In automatic mode (the button’s
warning light 1 is lit), all heating and
air-conditioning functions are con-
trolled by the system.
You can always modify the choice
of system; in this case, the warning
light in the button 1 goes out.
Advice: to optimize vehicle range, de-
activate the air conditioning when the
outside temperature is comfortable.
Clear View function
Press button 3 – the integrated indica-
tor light comes on.
This system quickly demists and de-
ices the windscreen and the front side
windows. It requires the automatic
usage of the air-conditioning or the
heating.
To exit this function, press the button
marked 3.
61
Page 192 of 226

5.18
WINDSCREEN WIPER BLADES
Replacing wiper blades 1
With the ignition on and the engine
switched off, lower the windscreen
wiper stalk completely: they stop
slightly away from the bonnet.
Lift wiper arm 3 , pull tab 2 (move-
ment A) and push the blade upwards.
To refit
Slide the blade along the arm until it
clips on. Make sure that the blade is
correctly locked in position. Return the
windscreen wiper stalk to the park po-
sition.
1
2
3
Keep monitoring the condition of the
wiper blades. How long they last de-
pends on you:
– clean the blades and the wind- screen regularly with soapy
water;
– do not use them when the wind- screen is dry;
– free them from the windscreen when they have not been used
for a long time.
A
– In frosty weather, make
sure that the wiper blades
are not stuck by ice (to
avoid the risk of the motor
overheating).
– Check the condition of the wiper
blades.
They should be replaced as soon
as they become less efficient: ap-
proximately once a year.
When changing the blade, when it
has been removed, do not let the
wiper arm fall against the window:
risk of breaking the window.Rear screen wiper blade 4
– Lift wiper arm 6;
– pivot blade 4 until some resistance is
met (movement C);
– depending on the vehicle, press tab 5, then remove the blade by pull-
ing it (movement B).
To refit
To refit the wiper blade, proceed in re-
verse order to removal. Make sure that
the blade is correctly locked in position.
4
5
B
C
6
Page 220 of 226

7.2
ALPHABETICAL INDEX (2/5)
E
»ECO» mode function ......................................................... 2.9
ECO driving ...............................................................2.7 → 2.9
ECO mode ........................................................................\
... 2.9
electric beam height adjustment ........................................ 1.84
»400 volt» electrical circuit ........................................1.2 → 1.6
electric vehicle vehicle range .................................................... 2.10 – 2.11
noise ..................................................................\
............ 1.6
charge ................................................................1.8 → 1.15
driving ........................................................ 1.6, 2.10 – 2.11
presentation .........................................................1.2 → 1.6
important recommendations .......................................... 1.7
electric windows ..................................................... 3.20 – 3.21
Electronic Stability Program: ESP .........................2.16 → 2.20
emergency brake assist.........................................2.16 → 2.20
emergency braking ................................................2.16 → 2.20
emergency key ....................................................... 1.18 – 1.19
energy »ECO» mode ................................................................. 2.9
saving .................................................................\
......... 2.10
charge meter (function) .................................................. 2.7
range ..................................................................\
..2.7 → 2.9
energy saving .......................................................... 2.7 → 2.11
energy consumption ........................... 1.65 – 1.66, 2.10 – 2.11
energy recovery ................................................................. 2.10
engine specifications ........................................................... 6.3
environment ............................................................\
........... 2.12
ESP: Electronic Stability Program .........................2.16 → 2.20
external temperature .............................................. 1.75 – 1.76
F
faults operating faults ................................................5.22 → 5.25
fitting a radio ...................................................................... 5.16
fittings ...............................................................\
.....3.23 → 3.25fragrance diffuser ............................................................... 3.16
fragrance ..............................................................\
............. 3.16
front passenger air bag deactivation ................................. 1.55
front seat adjustment ......................................................... 1.32
front seats adjustment .......................................................1.32 → 1.36
with manual controls .................................................... 1.32
fuses ....................................................................... 5.13 – 5.14
G
gear lever.................................................................... 2.5 – 2.6
glove box ........................................................................\
... 3.25
H
handbrake........................................................................\
.... 2.6
hands-free telephone integrated control ............................ 3.33
hazard warning lights signal ..................................... 1.79, 1.81
headlight beam adjustment ............................................... 1.84
headlight flashers .............................................................. 1.79
headlight washer ............................................................... 1.86
headrest........................................................................\
..... 3.27
heating and air conditioning system .................................. 3.18
heating, air conditioning: programming ........ 2.11, 3.12 → 3.15
heating system .................................. 3.4 → 3.10, 3.12 → 3.15
heating/air conditioning programming ...................3.12 → 3.15
horn ...................................................................\
................ 1.79
horn: flash ..................................................................\
........... 1.79
sounding the horn ........................................................ 1.79
hubcap tool ........................................................................\
.. 5.2
I
indicators .............................................................\
....... 1.79, 5.9
indicators: direction indicators ................................................ 1.79, 5.9
exterior temperature indicator ...................................... 1.75