2018 RENAULT SCENIC headlights
[x] Cancel search: headlightsPage 105 of 364
1.99
EXTERIOR LIGHTING AND SIGNALS (5/6)
“See-me-home lighting”
function
This function allows you to briefly switch
on the dipped beam headlights (to pro-
vide light when opening a gate, etc.).
With the engine and lights switched
off and the ring 3 in position 0 or
AUTO, pull the stalk 1 towards you: the
dipped beam headlights come on for
approximately 30 seconds. To increase
this duration, you may pull the stalk up
to four times (total time restricted to ap-
proximately two minutes). The mes-
sage “Follow-me home for _ _ _” along
with the time the lights will be on for is
displayed on the instrument panel to
confirm this action. You can then lock
your vehicle.
To switch off the lights before they go
out automatically, turn ring 3 to any po-
sition, then return it to the AUTO posi-
tion .
Welcome and goodbye
function
(depending on the vehicle)
Once the function is activated, the day-
time running lights and the rear side
light light up automatically upon detect-
ing the RENAULT card or when the ve-
hicle is unlocked.
They switch off automatically:
– approximately one minute after li- ghting up;
– when starting the engine based on the position of the lighting stalk;
or
– upon locking the vehicle. Welcome lighting under the door
mirrors
With the function activated, the lights
located under the door mirrors come
on automatically upon detection of the
RENAULT card, upon unlocking the
vehicle or when opening a door.
They switch off automatically:
– approximately one minute after li-
ghting up;
– upon starting the engine;
or
– upon locking the vehicle.
Activating/deactivating the function
From the multifunction screen, select
menu “vehicle”, “User settings” then
“External welcome”. Choose “ ON”
or “OFF” to activate or deactivate the
function.
Page 106 of 364
1.100
EXTERIOR LIGHTING AND SIGNALS (6/6)
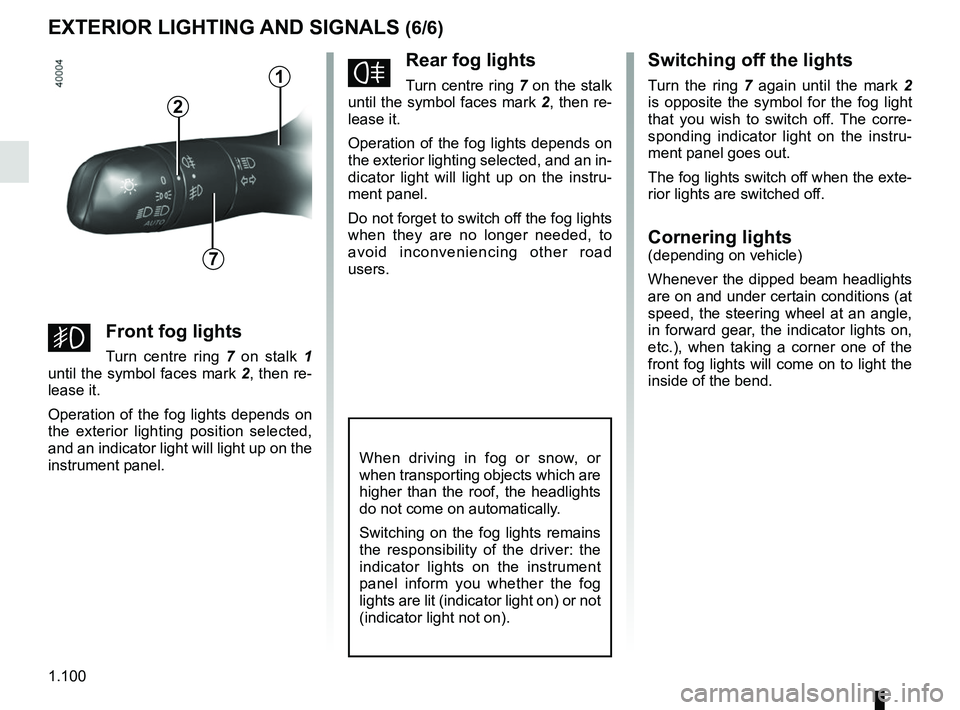
fRear fog lights
Turn centre ring 7 on the stalk
until the symbol faces mark 2, then re-
lease it.
Operation of the fog lights depends on
the exterior lighting selected, and an in-
dicator light will light up on the instru-
ment panel.
Do not forget to switch off the fog lights
when they are no longer needed, to
avoid inconveniencing other road
users.
Switching off the lights
Turn the ring 7 again until the mark 2
is opposite the symbol for the fog light
that you wish to switch off. The corre-
sponding indicator light on the instru-
ment panel goes out.
The fog lights switch off when the exte-
rior lights are switched off.
Cornering lights(depending on vehicle)
Whenever the dipped beam headlights
are on and under certain conditions (at
speed, the steering wheel at an angle,
in forward gear, the indicator lights on,
etc.), when taking a corner one of the
front fog lights will come on to light the
inside of the bend.
When driving in fog or snow, or
when transporting objects which are
higher than the roof, the headlights
do not come on automatically.
Switching on the fog lights remains
the responsibility of the driver: the
indicator lights on the instrument
panel inform you whether the fog
lights are lit (indicator light on) or not
(indicator light not on).
7
2
gFront fog lights
Turn centre ring 7 on stalk 1
until the symbol faces mark 2, then re-
lease it.
Operation of the fog lights depends on
the exterior lighting position selected,
and an indicator light will light up on the
instrument panel.
1
Page 107 of 364
1.101
HEADLIGHT BEAM ADJUSTMENT (1/2)
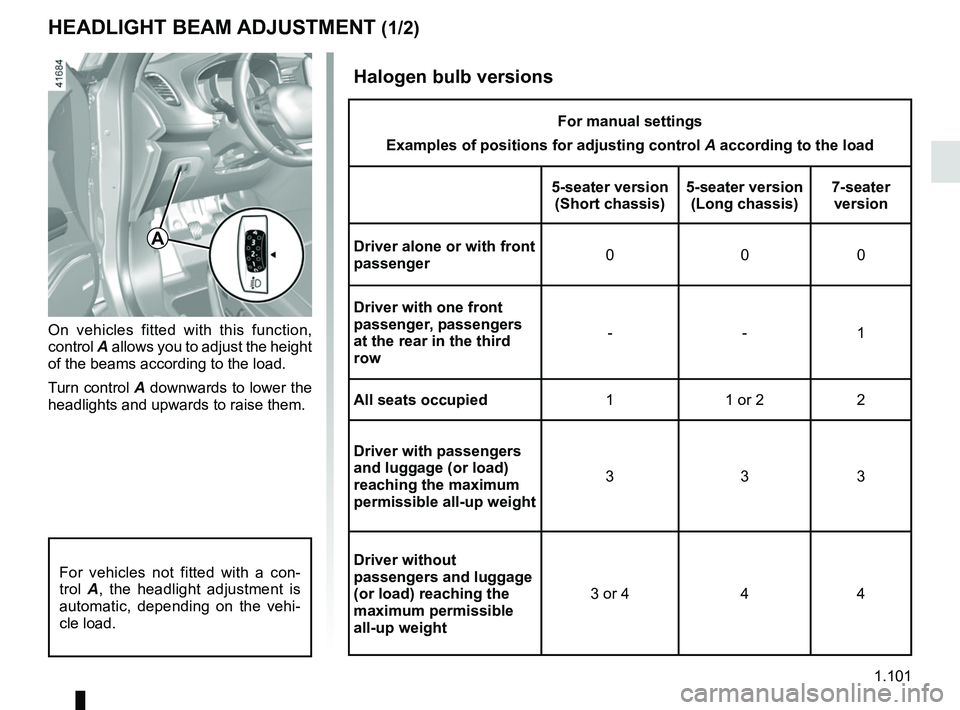
On vehicles fitted with this function,
control A allows you to adjust the height
of the beams according to the load.
Turn control A downwards to lower the
headlights and upwards to raise them.
A
For vehicles not fitted with a con-
trol A, the headlight adjustment is
automatic, depending on the vehi-
cle load.
Halogen bulb versions
For manual settings
Examples of positions for adjusting control A according to the load
5-seater version (Short chassis) 5-seater version
(Long chassis) 7-seater
version
Driver alone or with front
passenger 000
Driver with one front
passenger, passengers
at the rear in the third
row --1
All seats occupied 1 1 or 2 2
Driver with passengers
and luggage (or load)
reaching the maximum
permissible all-up weight 333
Driver without
passengers and luggage
(or load) reaching the
maximum permissible
all-up weight 3 or 4 4 4
Page 114 of 364
1.108
WINDSCREEN WASH, WIPE (6/6)
Note:
To ensure the headlight washers op-
erate correctly in winter, remove snow
from the jet trims and de-ice the jet
trims using an aerosol de-icer.
You are recommended to regularly
remove dirt encrusted on the headlight
glass.
When the windscreen washer fluid level
reaches minimum:
– the message “Windscreen wash fluid shortage” is displayed on the instru-
ment panel;
– the headlight washer system may be deprimed.
Fill the windscreen washer fluid and
then activate the windscreen washer,
with the engine running , to reprime
the system.
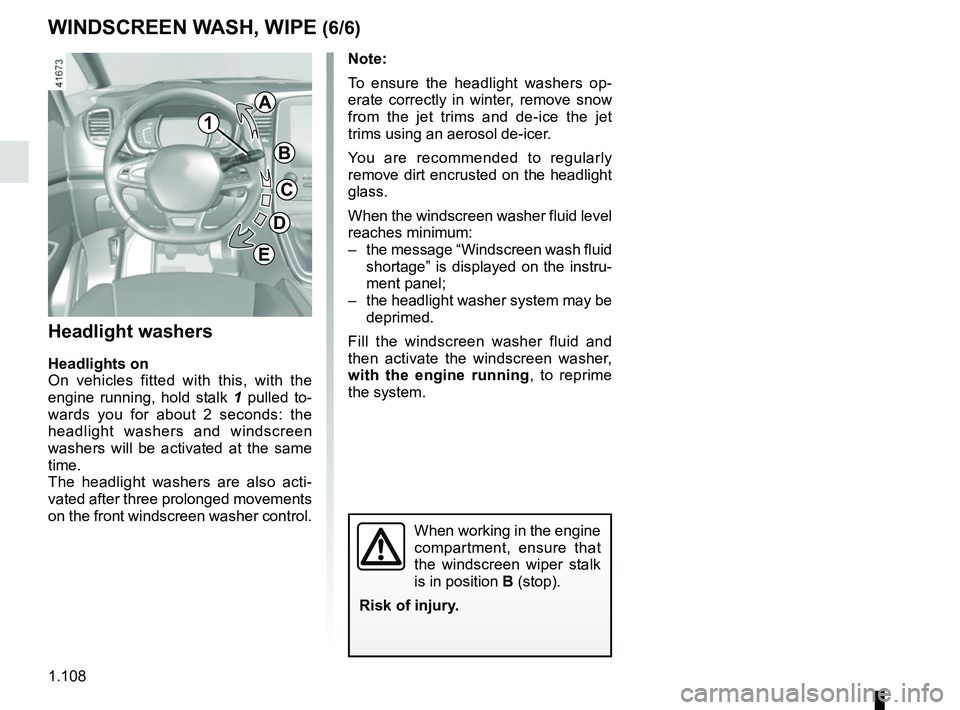
Headlight washers
Headlights on
On vehicles fitted with this, with the
engine running, hold stalk 1 pulled to-
wards you for about 2 seconds: the
headlight washers and windscreen
washers will be activated at the same
time.
The headlight washers are also acti-
vated after three prolonged movements
on the front windscreen washer control.
When working in the engine
compartment, ensure that
the windscreen wiper stalk
is in position B (stop).
Risk of injury.
1
A
B
C
D
E
Page 140 of 364
2.20
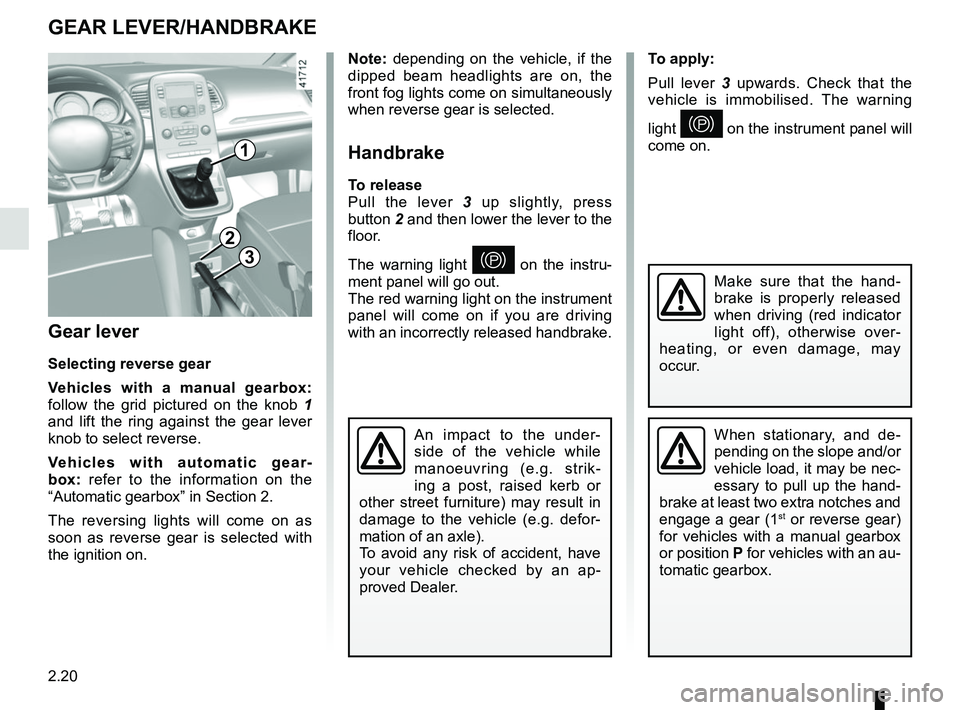
To apply:
Pull lever 3 upwards. Check that the
vehicle is immobilised. The warning
light
} on the instrument panel will
come on.
Gear lever
Selecting reverse gear
Vehicles with a manual gearbox:
follow the grid pictured on the knob 1
and lift the ring against the gear lever
knob to select reverse.
Vehicles with automatic gear-
box: refer to the information on the
“Automatic gearbox” in Section 2.
The reversing lights will come on as
soon as reverse gear is selected with
the ignition on.
1
GEAR LEVER/HANDBRAKE
Note: depending on the vehicle, if the
dipped beam headlights are on, the
front fog lights come on simultaneously
when reverse gear is selected.
Handbrake
To release
Pull the lever 3 up slightly, press
button 2 and then lower the lever to the
floor.
The warning light
} on the instru-
ment panel will go out.
The red warning light on the instrument
panel will come on if you are driving
with an incorrectly released handbrake.3
2
When stationary, and de-
pending on the slope and/or
vehicle load, it may be nec-
essary to pull up the hand-
brake at least two extra notches and
engage a gear (1
st or reverse gear)
for vehicles with a manual gearbox
or position P for vehicles with an au-
tomatic gearbox.
An impact to the under-
side of the vehicle while
manoeuvring (e.g. strik-
ing a post, raised kerb or
other street furniture) may result in
damage to the vehicle (e.g. defor-
mation of an axle).
To avoid any risk of accident, have
your vehicle checked by an ap-
proved Dealer.
Make sure that the hand-
brake is properly released
when driving (red indicator
light off), otherwise over-
heating, or even damage, may
occur.
Page 164 of 364

2.44
ACTIVE EMERGENCY BRAKING (5/7)
Conditions for non-activation
of the system
The system cannot be activated:
– when the gear lever is in neutral;
– when the parking brake is activated;
– while cornering.
As a general rule, if the driver shows
signs of attention (action on the steering
wheel, pedals etc.), the system delays
its operation or does not activate.
Operating faults
When the system detects an operating
fault, the
\b warning light lights up
on the instrument panel, with the mes-
sage “Active braking disconnected”.
Consult an approved dealer
Temporarily not available
When the system detects a tempo-
rary unavailability, the
\b warning
light lights up on the instrument panel
accompanied by the message “Active
braking: sensor blind” or, depending on
the vehicle, “Radar-camera: no visibil-
ity”.
The possible causes are:
– the system is temporarily blinded (glare from the sun, dipped beam
headlights, bad weather conditions
etc.). The system will be operational
again when visibility conditions are
better;
– the system is temporarily disrupted (for example: windscreen obscured
by dirt, ice, snow etc.). In this case,
park the vehicle and switch off the
engine. Clean the windscreen. When
you next start the engine, the warn-
ing light and the message go out;
– if this is not the case, this may arise from another cause; contact an
Approved Dealer.
Page 289 of 364
4.17
Using a roller type car wash
Return the windscreen wiper stalk to
the Park position (refer to the informa-
tion on the “Windscreen washer, wiper”
in Section 1). Check the mounting of
external accessories, additional lights
and mirrors, and ensure that the wiper
blades are secured with adhesive tape.
Remove the radio aerial mast if your
vehicle is fitted with this equipment.
Remember to remove the tape and refit
the antenna after washing.
Vehicles with a matte paint
finish
This type of paint requires certain pre-
cautions.
You should do the following
Wash the vehicle by hand using plenty
of water, using a soft cloth or a gentle
sponge.
Do not do the following
Use wax-based products (polishing).
Rub too hard.
Wash the vehicle in a roller-type car
wash.
Attach stickers to the paintwork (risk of
leaving marks).
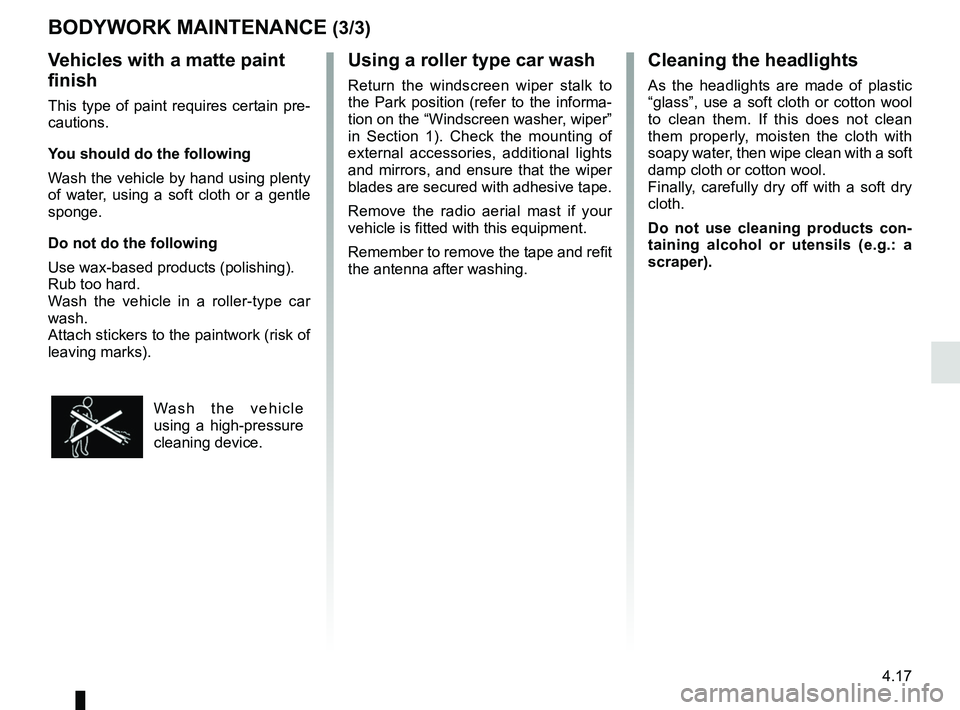
Wash the vehicle
using a high-pressure
cleaning device.
BODYWORK MAINTENANCE (3/3)Cleaning the headlights
As the headlights are made of plastic
“glass”, use a soft cloth or cotton wool
to clean them. If this does not clean
them properly, moisten the cloth with
soapy water, then wipe clean with a soft
damp cloth or cotton wool.
Finally, carefully dry off with a soft dry
cloth.
Do not use cleaning products con-
taining alcohol or utensils (e.g.: a
scraper).
Page 293 of 364
5.1
Section 5: Practical advice
Puncture/emergency spare wheel . . . . . . . . . . . . . . . . . . . . . . . . . . . . . . . . . . . . \
. . . . . . . . . . . . . . . 5.2
Tyre inflation kit . . . . . . . . . . . . . . . . . . . . . . . . . . . . . . . . . . . .\
. . . . . . . . . . . . . . . . . . . . . . . . . . . . . 5.5
Tools . . . . . . . . . . . . . . . . . . . . . . . . . . . . . . . . . . . .\
. . . . . . . . . . . . . . . . . . . . . . . . . . . . . . . . . . . . . 5.9
Wheel trim . . . . . . . . . . . . . . . . . . . . . . . . . . . . . . . . . . . . \
. . . . . . . . . . . . . . . . . . . . . . . . . . . . . . . . . 5.11
Changing a wheel . . . . . . . . . . . . . . . . . . . . . . . . . . . . . . . . . . . .\
. . . . . . . . . . . . . . . . . . . . . . . . . . . 5.12
Tyres (tyre and wheel safety, use in winter) . . . . . . . . . . . . . . . . . . . . . . . . . . . . . . . . . . . .\
. . . . . . . 5.14
Headlights (changing bulbs) . . . . . . . . . . . . . . . . . . . . . . . . . . . . . . . . . . . .\
. . . . . . . . . . . . . . . . . . . 5.17
Rear lights (changing bulbs) . . . . . . . . . . . . . . . . . . . . . . . . . . . . . . . . . . . .\
. . . . . . . . . . . . . . . . . . . 5.19
Indicator lights (changing bulbs) . . . . . . . . . . . . . . . . . . . . . . . . . . . . . . . . . . . .\
. . . . . . . . . . . . . . . . 5.23
Interior lighting: changing bulbs . . . . . . . . . . . . . . . . . . . . . . . . . . . . . . . . . . . . \
. . . . . . . . . . . . . . . . . 5.24
Fuses . . . . . . . . . . . . . . . . . . . . . . . . . . . . . . . . . . . . \
. . . . . . . . . . . . . . . . . . . . . . . . . . . . . . . . . . . . . 5.27
Battery: troubleshooting. . . . . . . . . . . . . . . . . . . . . . . . . . . . . . . . . . . . \
. . . . . . . . . . . . . . . . . . . . . . . 5.29
RENAULT card: battery . . . . . . . . . . . . . . . . . . . . . . . . . . . . . . . . . . . . \
. . . . . . . . . . . . . . . . . . . . . . . 5.31
Radio frequency remote control: batteries. . . . . . . . . . . . . . . . . . . . . . . . . . . . . . . . . . . . \
. . . . . . . . . 5.32
Accessories . . . . . . . . . . . . . . . . . . . . . . . . . . . . . . . . . . . . \
. . . . . . . . . . . . . . . . . . . . . . . . . . . . . . . . 5.33
Wipers (replacing blades) . . . . . . . . . . . . . . . . . . . . . . . . . . . . . . . . . . . .\
. . . . . . . . . . . . . . . . . . . . . 5.34
Towing: breakdown . . . . . . . . . . . . . . . . . . . . . . . . . . . . . . . . . . . .\
. . . . . . . . . . . . . . . . . . . . . . . . . . 5.36
Tow eye . . . . . . . . . . . . . . . . . . . . . . . . . . . . . . . . . . . . \
. . . . . . . . . . . . . . . . . . . . . . . . . . . . . . . . . . . 5.37
Operating faults . . . . . . . . . . . . . . . . . . . . . . . . . . . . . . . . . . . . \
. . . . . . . . . . . . . . . . . . . . . . . . . . . . . 5.38