Page 89 of 700

Manual Climate Control Descriptions
IconDescription
MAX A/C Setting
Rotate the Temperature Control Knob counterclockwise until it is set to MAX A/C. This is the
coldest setting and will put the A/C to its maximum power.
A/C Button
Push the A/C button to engage the Air Conditioning (A/C). A LED will illuminate when the
A/C system is engaged.
Recirculation Button
Push and release this button to change the system between recirculation mode and outside air
mode. Recirculation can be used when outside conditions such as smoke, odors, dust, or high
humidity are present.
NOTE:
•Continuous use of the Recirculation mode may make the inside air stuffy and window fog-
ging may occur. Extended use of this mode is not recommended.
•The use of the Recirculation mode in cold or damp weather could cause windows to fog on
the inside, because of moisture buildup inside the vehicle. Select the outside air position for
maximum defogging.
•Recirculation can be used in all modes except for Defrost.
•The A/C can be deselected manually without disturbing the mode control selection.
3
GETTING TO KNOW YOUR VEHICLE 87
Page 90 of 700

IconDescription
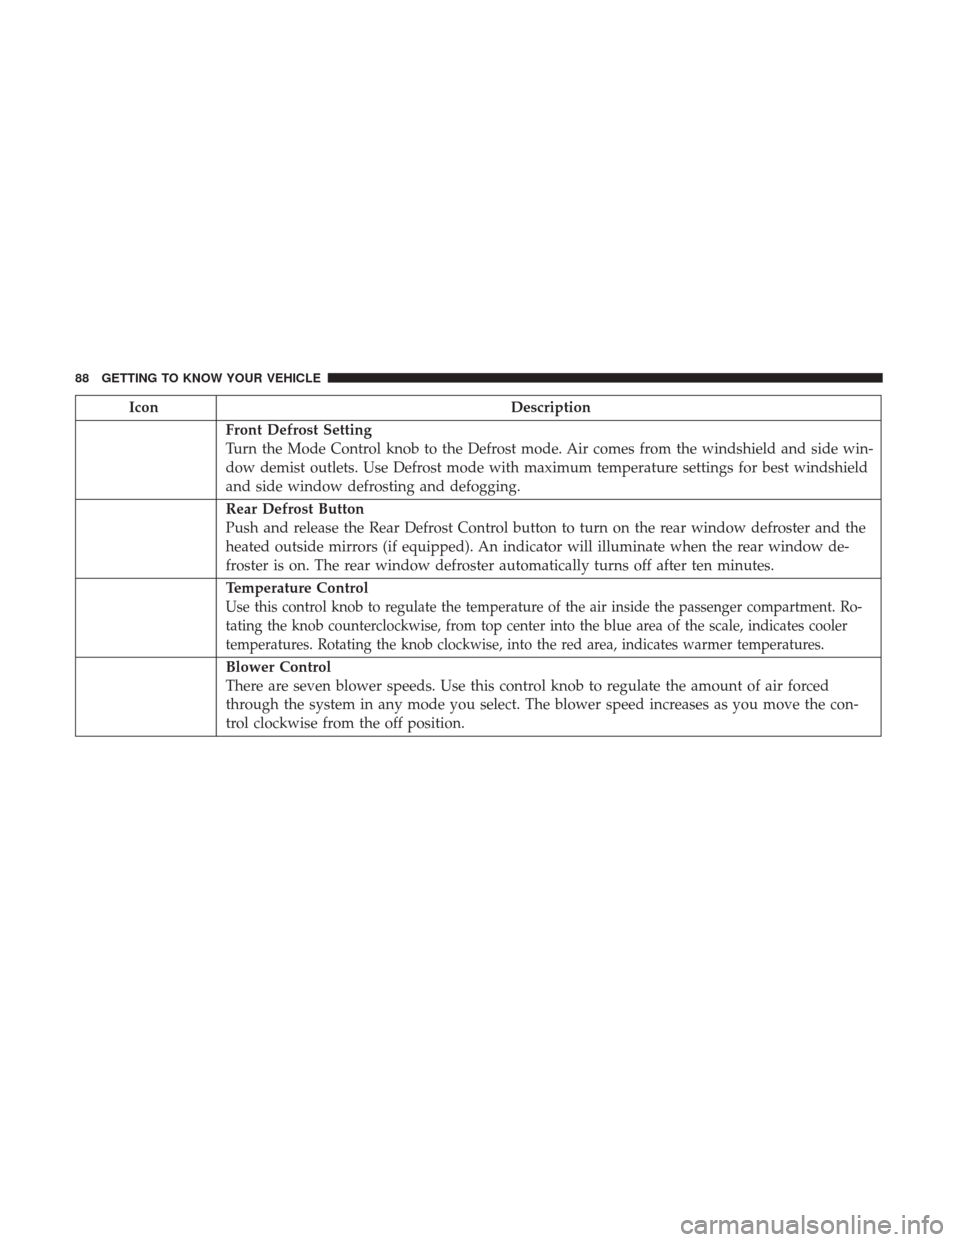
Front Defrost Setting
Turn the Mode Control knob to the Defrost mode. Air comes from the windshield and side win-
dow demist outlets. Use Defrost mode with maximum temperature settings for best windshield
and side window defrosting and defogging.
Rear Defrost Button
Push and release the Rear Defrost Control button to turn on the rear window defroster and the
heated outside mirrors (if equipped). An indicator will illuminate when the rear window de-
froster is on. The rear window defroster automatically turns off after ten minutes.
Temperature Control
Use this control knob to regulate the temperature of the air inside the passenger compartment. Ro-
tating the knob counterclockwise, from top center into the blue area of the scale, indicates cooler
temperatures. Rotating the knob clockwise, into the red area, indicates warmer temperatures.
Blower Control
There are seven blower speeds. Use this control knob to regulate the amount of air forced
through the system in any mode you select. The blower speed increases as you move the con-
trol clockwise from the off position.
88 GETTING TO KNOW YOUR VEHICLE
Page 95 of 700

IconDescription
Front Defrost Setting
Push the button to activate Defrost mode. Air comes from the windshield and side window de-
mist outlets. Use Defrost mode with maximum temperature settings for best windshield and
side window defrosting and defogging.
Rear Defrost Button
Push and release the Rear Defrost Control button to turn on the rear window defroster and the
heated outside mirrors (if equipped). An indicator will illuminate when the rear window de-
froster is on. The rear window defroster automatically turns off after ten minutes.
Temperature Control
Press the arrows on the touchscreen or faceplate to regulate the temperature of the air inside the
passenger compartment. Pressing the down arrow indicates cooler temperatures, and pressing
the up arrow indicates warmer temperatures.
Blower Control
There are seven blower speeds. Press the buttons to regulate the amount of air forced through
the system in any mode you select. The blower speed increases as you move the control clock-
wise from the off position.
3
GETTING TO KNOW YOUR VEHICLE 93
Page 103 of 700

IconDescription
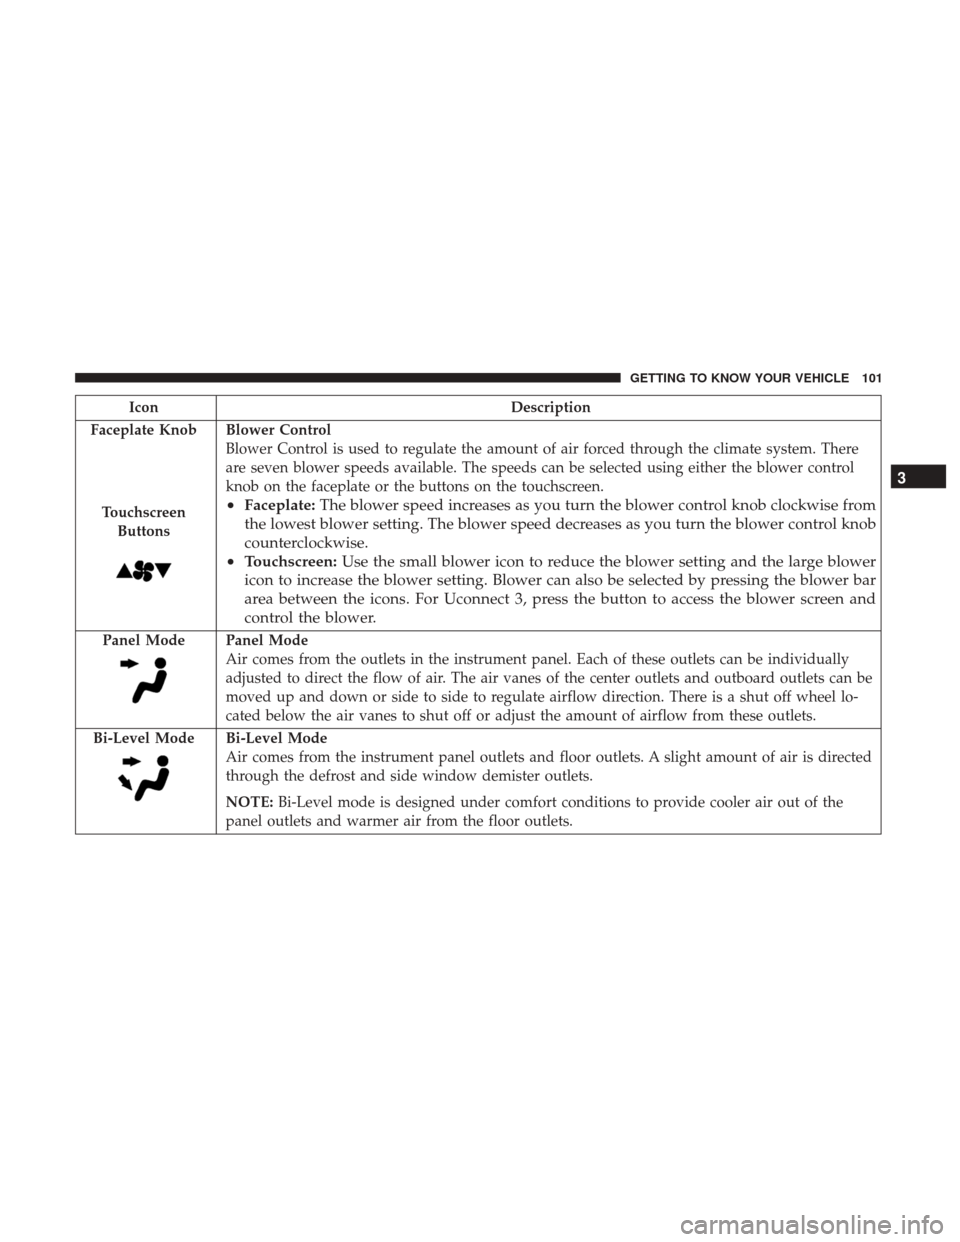
Faceplate Knob
Touchscreen Buttons
Blower Control
Blower Control is used to regulate the amount of air forced through the climate system. There
are seven blower speeds available. The speeds can be selected using either the blower control
knob on the faceplate or the buttons on the touchscreen.
• Faceplate: The blower speed increases as you turn the blower control knob clockwise from
the lowest blower setting. The blower speed decreases as you turn the blower control knob
counterclockwise.
• Touchscreen: Use the small blower icon to reduce the blower setting and the large blower
icon to increase the blower setting. Blower can also be selected by pressing the blower bar
area between the icons. For Uconnect 3, press the button to access the blower screen and
control the blower.
Panel ModePanel Mode
Air comes from the outlets in the instrument panel. Each of these outlets can be individually
adjusted to direct the flow of air. The air vanes of the center outlets and outboard outlets can be
moved up and down or side to side to regulate airflow direction. There is a shut off wheel lo-
cated below the air vanes to shut off or adjust the amount of airflow from these outlets.
Bi-Level Mode
Bi-Level Mode
Air comes from the instrument panel outlets and floor outlets. A slight amount of air is directed
through the defrost and side window demister outlets.
NOTE: Bi-Level mode is designed under comfort conditions to provide cooler air out of the
panel outlets and warmer air from the floor outlets.
3
GETTING TO KNOW YOUR VEHICLE 101
Page 111 of 700

3. Push the window switch down firmly to the seconddetent to open the window completely and continue to
hold the switch down for an additional two seconds
after the window is fully open.
Window Lockout Switch (4–Door Models Only)
The window lockout switch on the driver’s door allows
you to disable the window control on the rear passenger
doors. To disable the window controls on the rear passen-
ger doors, push the window lock switch into the latched or
down position. To enable the window controls, push the
window lock switch again and return the switch to the
released or up position.
Wind Buffeting
Wind buffeting can be described as the perception of
pressure on the ears or a helicopter-type sound in the ears.
Your vehicle may exhibit wind buffeting with the windows
down, or the sunroof (if equipped) in certain open or
partially open positions. This is a normal occurrence and
can be minimized. If the buffeting occurs with the rear
windows open, open the front and rear windows together
to minimize the buffeting. If the buffeting occurs with the
sunroof open, adjust the sunroof opening to minimize the
buffeting or open any window.
Window Lockout Switch
3
GETTING TO KNOW YOUR VEHICLE 109
Page 112 of 700

POWER SUNROOF — IF EQUIPPED
The power sunroof switch is located on the overhead
console between the courtesy/reading lights.
WARNING!
•Never leave children unattended in a vehicle, or with
access to an unlocked vehicle. Never leave the key
fob in or near the vehicle, or in a location accessible
to children. Do not leave the ignition of a vehicle
(Continued)
WARNING! (Continued)
equipped with Keyless Enter-N-Go in the ACC or
ON/RUN mode. Occupants, particularly unattended
children, can become entrapped by the power sun-
roof while operating the power sunroof switch. Such
entrapment may result in serious injury or death.
• In a collision, there is a greater risk of being thrown
from a vehicle with an open sunroof. You could also
be seriously injured or killed. Always fasten your
seat belt properly and make sure all passengers are
also properly secured.
• Do not allow small children to operate the sunroof.
Never allow your fingers, other body parts, or any
object, to project through the sunroof opening. In-
jury may result.
Opening Sunroof
Express
Push the switch rearward and release it within one-half
second and the sunroof will open automatically from any
position. The sunroof will open fully and stop automati-
cally. This is called “Express Open”. During Express Open
operation, any other actuation of the sunroof switch will
stop the sunroof.
Power Sunroof Switch
110 GETTING TO KNOW YOUR VEHICLE
Page 114 of 700
Venting Sunroof — Express
Push and release the Vent button within one half second
and the sunroof will open to the vent position. This is
called “Express Vent” and it will occur regardless of
sunroof position. During Express Vent operation, any
movement of the switch will stop the sunroof.
Sunroof Maintenance
Use only a non-abrasive cleaner and a soft cloth to clean the
glass panel.
Ignition Off Operation
The power sunroof switch will remain active for up to
approximately 10 minutes after the ignition switch is
turned to the OFF/LOCK position. Opening either front
door will cancel this feature.
NOTE:Ignition Off time is programmable through the
Uconnect System. Refer to “Uconnect Settings” in “Multi-
media” for further information.
HOOD
To Open The Hood
To open the hood, two latches must be released.
1. Pull the hood release lever located below the steering wheel at the base of the instrument panel.
Hood Release
112 GETTING TO KNOW YOUR VEHICLE
Page 115 of 700

2. Reach into the opening beneath the center of the hoodand push the safety latch lever to the left to release it,
before raising the hood.
To Close The Hood
Lower the hood to approximately 12 inches (30 cm) from
the engine compartment and drop it. Make sure that the
hood is completely closed.
WARNING!
Be sure the hood is fully latched before driving your
vehicle. If the hood is not fully latched, it could open
when the vehicle is in motion and block your vision.
Failure to follow this warning could result in serious
injury or death.
CAUTION!
To prevent possible damage, do not slam the hood to
close it. Use a firm downward push at the front center
of the hood to ensure that both latches engage.
TAILGATE
Opening
To open the tailgate, lift up on the handle and pull the
tailgate down.
Closing
To close the tailgate, push it upward until both sides are
latched.
NOTE: Pull back on the tailgate firmly after closing to
ensure it is securely latched.
Safety Latch Location (1500 Series Shown)
3
GETTING TO KNOW YOUR VEHICLE 113