Page 85 of 700
you hear a click. This feature is termed the “Parade” mode
and is useful when headlights are required during the day.
NOTE:If your vehicle is equipped with a touchscreen, the
dimming of the touchscreen is programmable through the
Uconnect system. Refer to “Uconnect Settings” in “Multi-
media” for further details.
Illuminated Approach
The courtesy lights will turn on when you use the key fob
to unlock the doors or open any door.
This feature also turns on the approach lighting in the
outside mirrors (if equipped). Refer to “Mirrors” in “Get-
ting To Know Your Vehicle” for further information.
The lights will fade to off after approximately 30 seconds,
or they will immediately fade to off once the ignition
switch is turned to ON/RUN from the OFF position.
The front courtesy overhead console and door courtesy
lights will not turn off if the dimmer control is in the
“Dome ON” position (rotate vertical thumb wheel all the
way to the top detent).
The illuminated entry system will not operate if the
dimmer control is in the “Dome OFF” position (rotate
vertical thumb wheel all the way to the bottom detent). NOTE:
If your vehicle is equipped with illuminated ap-
proach lights under the outside mirrors, they can be turned
off by moving the instrument panel dimmer into the
“Dome Defeat” detent position.
WINDSHIELD WIPERS AND WASHERS
Windshield Wipers
The wipers and washers are operated by a switch in the
multifunction lever. Turn the end of the lever to select the
desired wiper speed.
Windshield Wiper/Washer Switch
3
GETTING TO KNOW YOUR VEHICLE 83
Page 87 of 700
Mist Feature
When a single wipe to clear off road mist or spray from a
passing vehicle is needed, push the washer knob, located
on the end of the multifunction lever, inward to the first
detent and release. The wipers will cycle one time and
automatically shut off.
NOTE:The mist feature does not activate the washer
pump; therefore, no washer fluid will be sprayed on the
windshield. The wash function must be used in order to
spray the windshield with washer fluid.
Rain Sensing Wipers — If Equipped
This feature senses moisture on the windshield and auto-
matically activates the wipers for the driver. The feature is
especially useful for road splash or overspray from the
windshield washers of the vehicle ahead. Rotate the end of
the multifunction lever to one of five settings to activate
this feature.
NOTE: This feature can be programmed through the
Uconnect system. Refer to “Uconnect Settings” in “Multi-
media” for further information.
The sensitivity of the system can be adjusted with the
multifunction lever. Wiper delay position 1 is the least
sensitive, and wiper delay position 5 is the most sensitive. Position 3 should be used for normal rain conditions.
Positions 1 and 2 can be used if the driver desires less
wiper sensitivity. Positions 4 and 5 can be used if the driver
desires more sensitivity. Place the wiper switch in the
O (off) position when not using the system.
NOTE:
•
The Rain Sensing feature will not operate when the
wiper switch is in the low or high-speed position.
• The Rain Sensing feature may not function properly
when ice, or dried salt water is present on the wind-
shield.
• Use of Rain-X or products containing wax or silicone
may reduce Rain Sensing performance.
The Rain Sensing system has protection features for the
wiper blades and arms, and will not operate under the
following conditions:
• Low Ambient Temperature — When the ignition is first
turned ON, the Rain Sensing system will not operate
until the wiper switch is moved, vehicle speed is greater
than 0 mph (0 km/h), or the outside temperature is
greater than 32°F (0°C).
3
GETTING TO KNOW YOUR VEHICLE 85
Page 102 of 700
IconDescription
Uconnect 3
Uconnect 4C/4C NAV
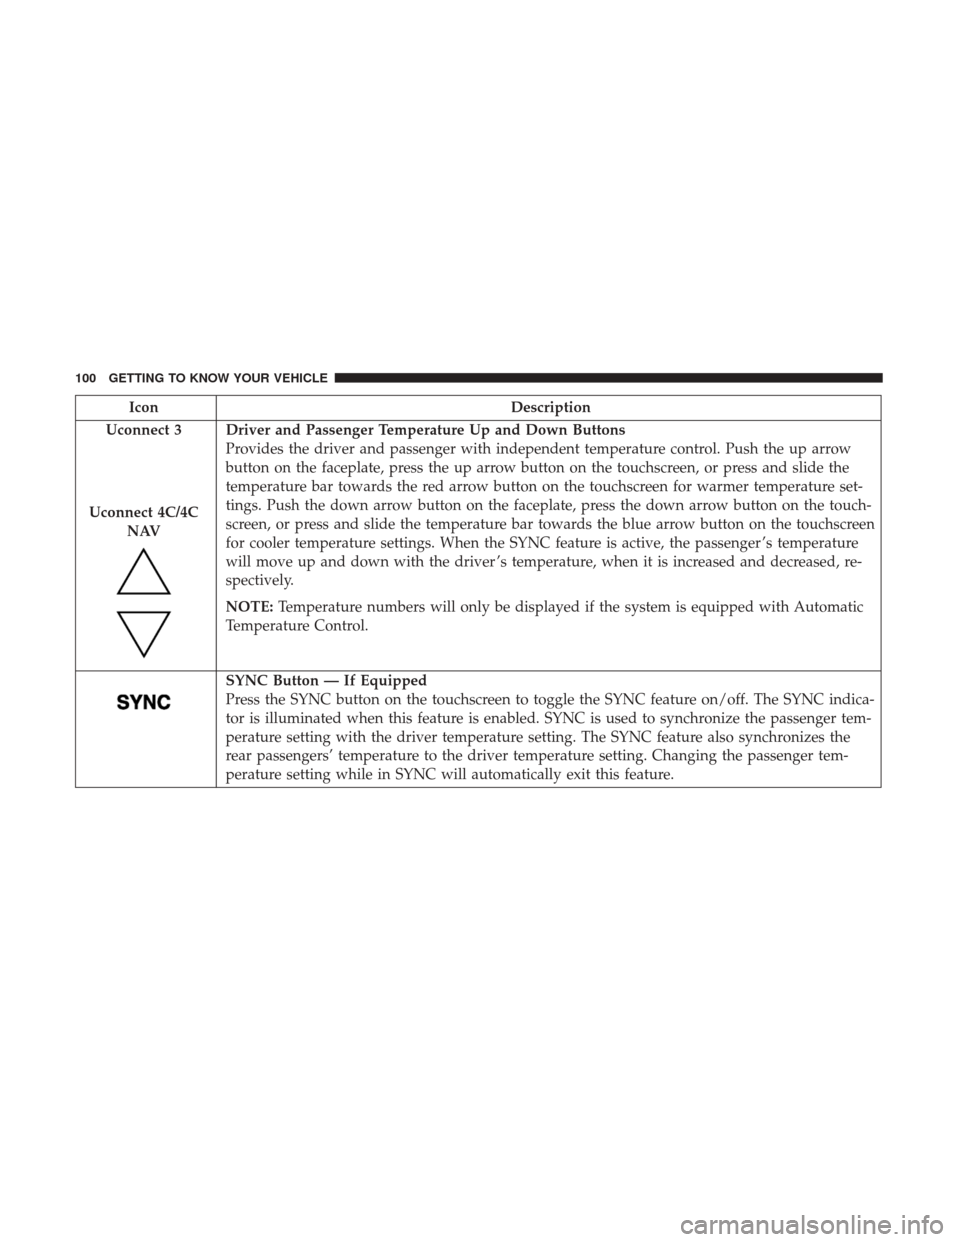
Driver and Passenger Temperature Up and Down Buttons
Provides the driver and passenger with independent temperature control. Push the up arrow
button on the faceplate, press the up arrow button on the touchscreen, or press and slide the
temperature bar towards the red arrow button on the touchscreen for warmer temperature set-
tings. Push the down arrow button on the faceplate, press the down arrow button on the touch-
screen, or press and slide the temperature bar towards the blue arrow button on the touchscreen
for cooler temperature settings. When the SYNC feature is active, the passenger ’s temperature
will move up and down with the driver ’s temperature, when it is increased and decreased, re-
spectively.
NOTE: Temperature numbers will only be displayed if the system is equipped with Automatic
Temperature Control.
SYNC Button — If Equipped
Press the SYNC button on the touchscreen to toggle the SYNC feature on/off. The SYNC indica-
tor is illuminated when this feature is enabled. SYNC is used to synchronize the passenger tem-
perature setting with the driver temperature setting. The SYNC feature also synchronizes the
rear passengers’ temperature to the driver temperature setting. Changing the passenger tem-
perature setting while in SYNC will automatically exit this feature.
100 GETTING TO KNOW YOUR VEHICLE
Page 103 of 700
IconDescription
Faceplate Knob
Touchscreen Buttons
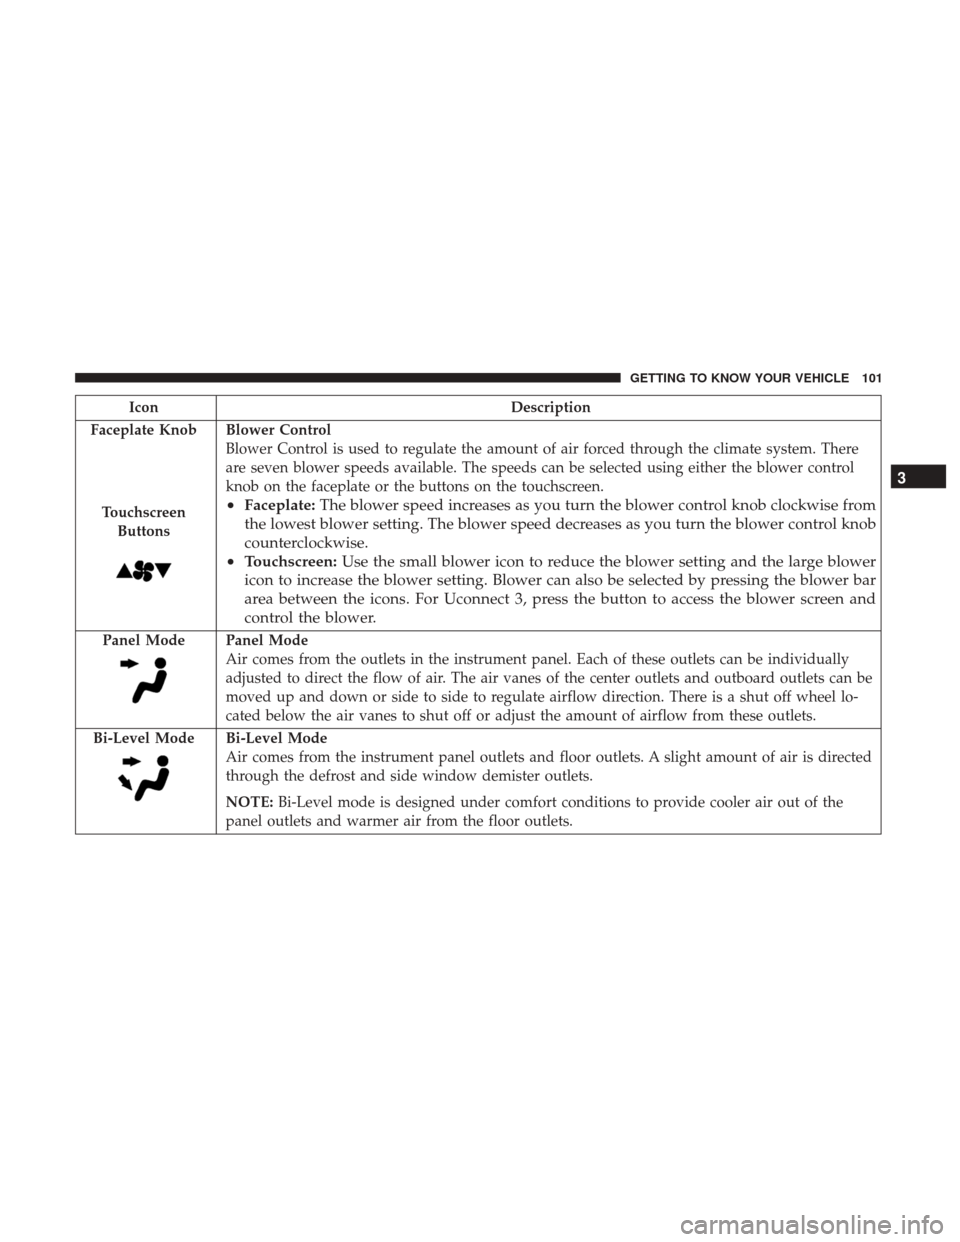
Blower Control
Blower Control is used to regulate the amount of air forced through the climate system. There
are seven blower speeds available. The speeds can be selected using either the blower control
knob on the faceplate or the buttons on the touchscreen.
• Faceplate: The blower speed increases as you turn the blower control knob clockwise from
the lowest blower setting. The blower speed decreases as you turn the blower control knob
counterclockwise.
• Touchscreen: Use the small blower icon to reduce the blower setting and the large blower
icon to increase the blower setting. Blower can also be selected by pressing the blower bar
area between the icons. For Uconnect 3, press the button to access the blower screen and
control the blower.
Panel ModePanel Mode
Air comes from the outlets in the instrument panel. Each of these outlets can be individually
adjusted to direct the flow of air. The air vanes of the center outlets and outboard outlets can be
moved up and down or side to side to regulate airflow direction. There is a shut off wheel lo-
cated below the air vanes to shut off or adjust the amount of airflow from these outlets.
Bi-Level Mode
Bi-Level Mode
Air comes from the instrument panel outlets and floor outlets. A slight amount of air is directed
through the defrost and side window demister outlets.
NOTE: Bi-Level mode is designed under comfort conditions to provide cooler air out of the
panel outlets and warmer air from the floor outlets.
3
GETTING TO KNOW YOUR VEHICLE 101
Page 106 of 700
Automatic Temperature Control (ATC) — If
Equipped
Automatic Operation
1. Push the AUTO button on the faceplate, or the AUTObutton on the touchscreen on the Automatic Tempera-
ture Control (ATC) Panel.
2. Next, adjust the temperature you would like the system to maintain by adjusting the driver and passenger
temperature control buttons. Once the desired tempera-
ture is displayed, the system will achieve and automati-
cally maintain that comfort level.
3. When the system is set up for your comfort level, it is not necessary to change the settings. You will experience
the greatest efficiency by simply allowing the system to
function automatically. NOTE:
•
It is not necessary to move the temperature settings for
cold or hot vehicles. The system automatically adjusts
the temperature, mode, and blower speed to provide
comfort as quickly as possible.
• The temperature can be displayed in U.S. or Metric units
by selecting the US/Metric customer-programmable fea-
ture. Refer to the “Uconnect Settings” in “Multimedia”
for further information.
To provide you with maximum comfort in the Automatic
mode during cold start-ups, the blower fan will remain on
low until the engine warms up. The blower will increase in
speed and transition into Auto mode.
Manual Operation Override
This system offers a full complement of manual override
features. The AUTO symbol in the front ATC display will
be turned off when the system is being used in the manual
mode.
Operating Tips
NOTE: Refer to the chart at the end of this section for
suggested control settings for various weather conditions.
104 GETTING TO KNOW YOUR VEHICLE
Page 114 of 700
Venting Sunroof — Express
Push and release the Vent button within one half second
and the sunroof will open to the vent position. This is
called “Express Vent” and it will occur regardless of
sunroof position. During Express Vent operation, any
movement of the switch will stop the sunroof.
Sunroof Maintenance
Use only a non-abrasive cleaner and a soft cloth to clean the
glass panel.
Ignition Off Operation
The power sunroof switch will remain active for up to
approximately 10 minutes after the ignition switch is
turned to the OFF/LOCK position. Opening either front
door will cancel this feature.
NOTE:Ignition Off time is programmable through the
Uconnect System. Refer to “Uconnect Settings” in “Multi-
media” for further information.
HOOD
To Open The Hood
To open the hood, two latches must be released.
1. Pull the hood release lever located below the steering wheel at the base of the instrument panel.
Hood Release
112 GETTING TO KNOW YOUR VEHICLE
Page 176 of 700
•Stored Messages
• Screen Setup
• Vehicle Settings (Not Equipped with a Uconnect touch-
screen radio)
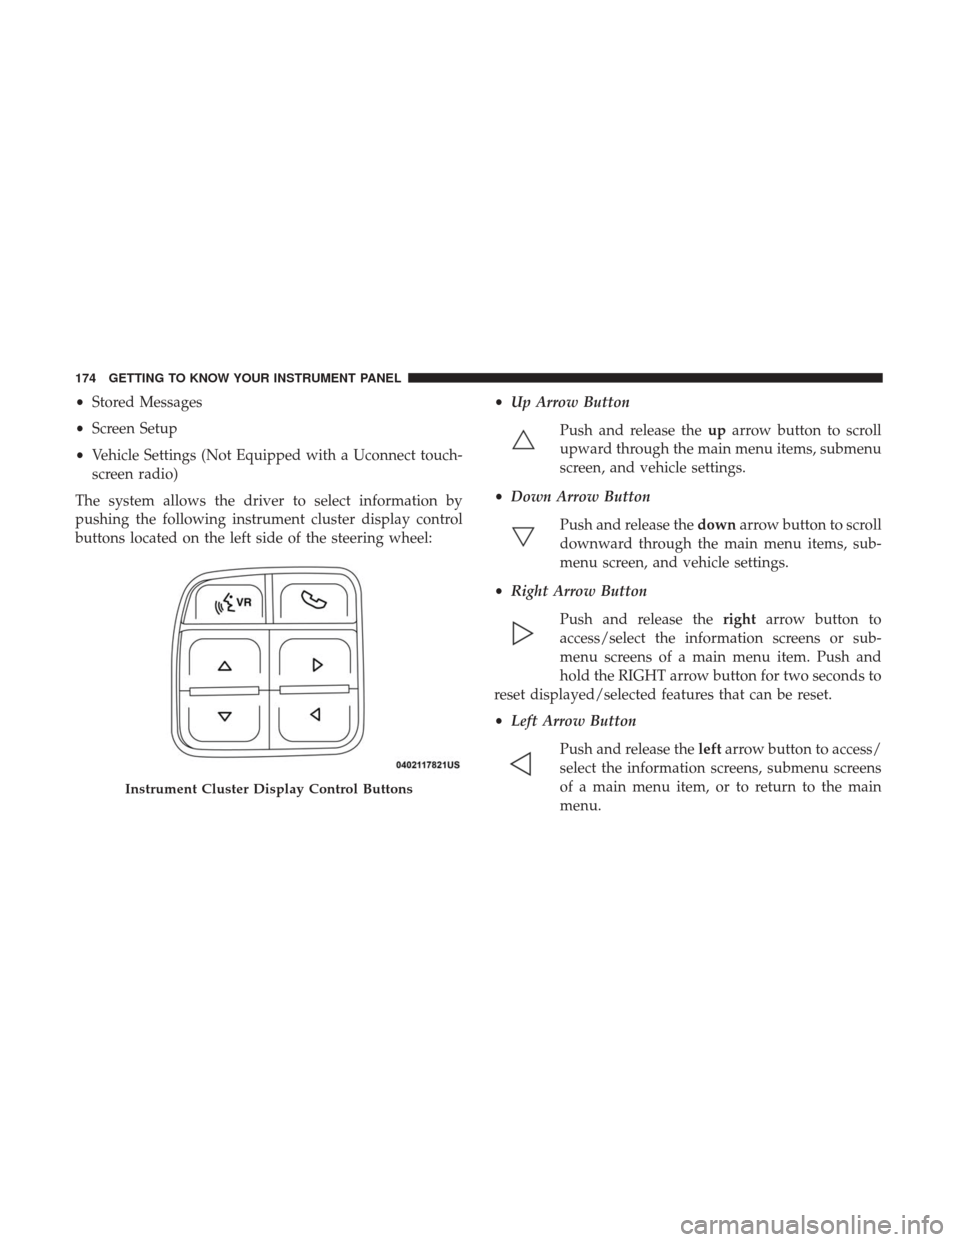
The system allows the driver to select information by
pushing the following instrument cluster display control
buttons located on the left side of the steering wheel: •
Up Arrow Button
Push and release the uparrow button to scroll
upward through the main menu items, submenu
screen, and vehicle settings.
• Down Arrow Button
Push and release the downarrow button to scroll
downward through the main menu items, sub-
menu screen, and vehicle settings.
• Right Arrow Button
Push and release the rightarrow button to
access/select the information screens or sub-
menu screens of a main menu item. Push and
hold the RIGHT arrow button for two seconds to
reset displayed/selected features that can be reset.
• Left Arrow Button
Push and release the leftarrow button to access/
select the information screens, submenu screens
of a main menu item, or to return to the main
menu.
Instrument Cluster Display Control Buttons
174 GETTING TO KNOW YOUR INSTRUMENT PANEL
Page 177 of 700
Display Menu Screens
The instrument cluster display screens are located in the
center portion of the cluster and consists of seven sections:
1. Compass Display
Displays the current direction. Refer to “Uconnect Set-
tings” in “Multimedia” for further information.
2. Temperature Display
Displays the outside temperature in Celsius or Fahrenheit.3. Main Screen
Displays main menu, submenus, settings.
4. White Telltales
5. Amber Telltales
6. Red Telltales
7. Audio/Phone Information And Submenu Information
Base Instrument Cluster Display
Premium Instrument Cluster Display
4
GETTING TO KNOW YOUR INSTRUMENT PANEL 175