2018 PEUGEOT EXPERT air conditioning
[x] Cancel search: air conditioningPage 201 of 416
199
In this case, this warning lamp
flashes for a few seconds then goes
of f.
Going into engine
START mode
With a manual gearbox, the Stop & Start
warning lamp goes off on the instrument panel
and the engine restarts automatically when you
press the clutch pedal fully down to the floor.
With an automatic gearbox , the Stop & Start
warning lamp on the instrument panel goes off
and the engine restarts automatically when:
-
y
ou release the brake pedal with the gear
selector in position D or M ,
-
y
ou are in position N with the brake pedal
released and you move the gear selector to
position D or M,
-
y
ou engage reverse.
This operation is perfectly normal.
With an electronic gearbox
, the Stop & Start
warning lamp on the instrument panel goes off
and the engine restarts automatically when:
-
y
ou release the brake pedal with the gear
selector in position A or M ,
-
y
ou are in position N with the brake pedal
released and you move the gear selector to
position A or M,
-
y
ou engage reverse.
Special cases: START mode
activated automatically
START mode is invoked automatically in
certain temporary conditions (examples:
battery charge, engine temperature, braking
assistance, air conditioning setting) to assure
correct operation of the system and mainly
when:
-
y
ou open the driver's door,
-
y
ou open a sliding side door,
-
y
ou unfasten the driver's seat belt,
-
t
he speed of the vehicle exceeds 16 mph
(25
km/h) or 2 mph (3 km/h) (depending on
the engine) with a manual gearbox,
-
t
he speed of the vehicle exceeds 2 mph
(3
km/h) with an automatic gearbox.In this case, this warning lamp
flashes for a few seconds then goes
of f.
Deactivation/Activation
With/Without audio system
This operation is perfectly normal.
With touch screen
In the " Driving/Vehicle " menu,
activate/deactivate " Stop & Star t
system".
If the system has been deactivated
in STOP mode, the engine restarts
immediately.
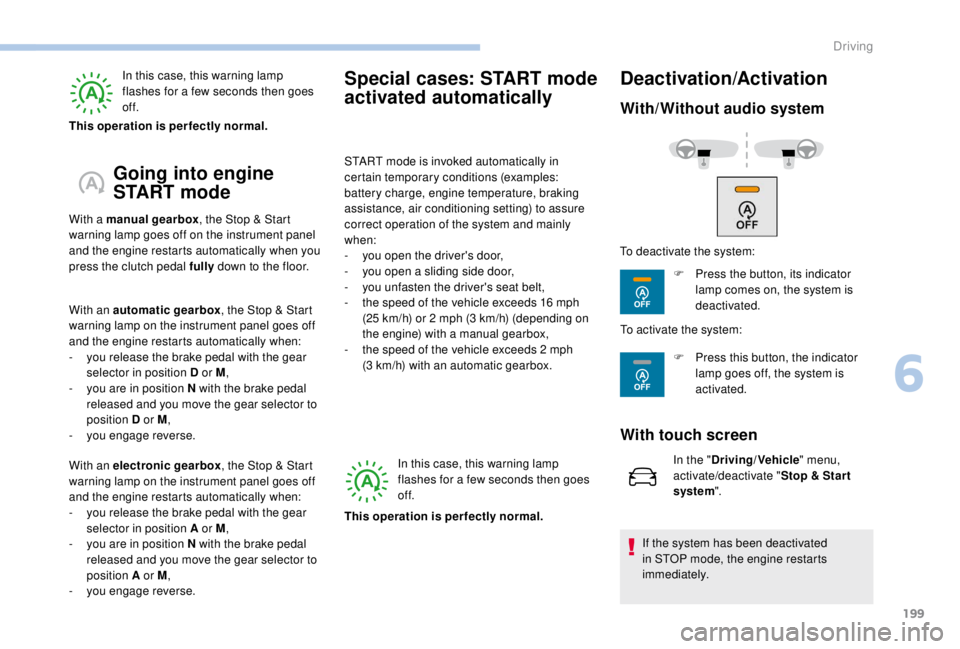
To deactivate the system:
F
P
ress the button, its indicator
lamp comes on, the system is
deactivated.
To activate the system:
F
P
ress this button, the indicator
lamp goes off, the system is
activated.
6
Driving
Page 245 of 416
243
Exiting the mode
These functions will be automatically restored
the next time the vehicle is used.
In order to restore the use of these functions
immediately, start the engine and let it run:
-
f
or less than ten minutes, to use the
equipment for approximately five minutes,
-
f
or more than ten minutes, to use the
equipment for up to approximately thirty
minutes.
Let the engine run for the duration specified to
ensure that the battery charge is sufficient.
Do not repeatedly and continuously restart the
engine in order to charge the battery.
A flat battery prevents the engine from
starting.
For more information on the 12
V batter y,
refer to the corresponding section.
Load reduction mode
System which manages the use of certain
functions according to the level of charge
remaining in the battery.
When the vehicle is being driven, the load
reduction function temporarily deactivates
certain functions, such as the air conditioning,
the heated rear screen, etc.
The deactivated functions are reactivated
automatically as soon as conditions permit.
Roof bars/Roof rack
Recommendations
F D istribute the load uniformly, taking
care to avoid overloading one of the
sides.
F
A
rrange the heaviest part of the load
as close as possible to the roof.
F
L
ash the load down securely and fit a
warning flag if it overhangs the vehicle.
F
D
rive gently: the vehicle will be more
susceptible to the effects of side winds
(stability may be affected).
F
W
hen not in use, the roof bars should
be removed.
If the height exceeds 40
cm, adapt the
speed of the vehicle to the profile of the
road to avoid damaging the roof bars and
the mountings on the vehicle.
Be sure to refer to national legislation in
order to comply with the regulations for
transporting objects which are longer than
the vehicle.
7
Practical information
Page 252 of 416
250
Diesel fuel additive level
(Diesel with particle filter)
A low additive level is indicated by
illumination of this warning lamp,
accompanied by an audible warning
and a message in the instrument
panel screen.
To p p i n g u p
The reser voir must be topped up without delay
by a PEUGEOT dealer or a qualified workshop.
Checks
Unless otherwise indicated, check these
components in accordance with the
manufacturer's service schedule and according
to your engine.
Other wise, have them checked by a PEUGEOT
dealer or a qualified workshop.
12 V battery
The battery does not require any
maintenance.
However, check regularly that the
terminals are correctly tightened
(versions without quick release terminals)
and that the connections are clean.
For more information on the precautions
to take before starting work on the 12 V
battery , refer to the corresponding
section.
Air filter
Refer to the manufacturer's
ser vice schedule for details of
the replacement inter val for this
component. Depending on the environment (e.g. dusty
atmosphere) and the use of the vehicle (e.g.
city driving), replace it twice as often if
necessary
.
Passenger compartment
filter
Refer to the manufacturer's
ser vice schedule for details of
the replacement inter val for this
component.
Depending on the environment (e.g. dusty
atmosphere) and the use of the vehicle (e.g.
city driving), replace it twice as often if
necessary .
Oil filter
Change the oil filter each time the
engine oil is changed.
Refer to the manufacturer’s
ser vice schedule for details of
the replacement inter val for this
component.
A clogged passenger compartment
filter may have an adverse effect on
the per formance of the air conditioning
system and generate undesirable odours.
Practical information
Page 287 of 416
285
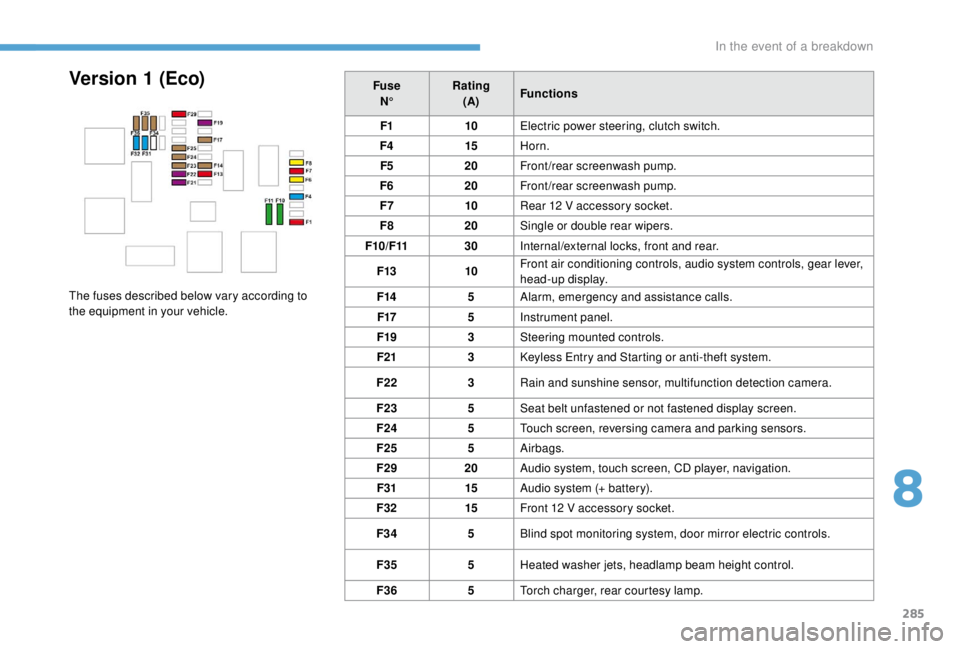
FuseN° Rating
(A) Functions
F1 10Electric power steering, clutch switch.
F4 15Horn.
F5 20Front/rear screenwash pump.
F6 20Front/rear screenwash pump.
F7 10Rear 12
V accessory socket.
F8 20Single or double rear wipers.
F10/F11 30Internal/external locks, front and rear.
F13 10Front air conditioning controls, audio system controls, gear lever,
head-up display.
F14 5Alarm, emergency and assistance calls.
F17 5Instrument panel.
F19 3Steering mounted controls.
F21 3
K
eyless Entry and Starting or anti-theft system.
F22 3Rain and sunshine sensor, multifunction detection camera.
F23 5Seat belt unfastened or not fastened display screen.
F24 5Touch screen, reversing camera and parking sensors.
F25 5Airbags.
F29 20Audio system, touch screen, CD player, navigation.
F31 15Audio system (+ battery).
F32 15Front 12
V accessory socket.
F34 5Blind spot monitoring system, door mirror electric controls.
F35 5Heated washer jets, headlamp beam height control.
F36 5Torch charger, rear courtesy lamp.Version 1 (Eco)
The fuses described below vary according to
the equipment in your vehicle.
8
In the event of a breakdown
Page 288 of 416
286
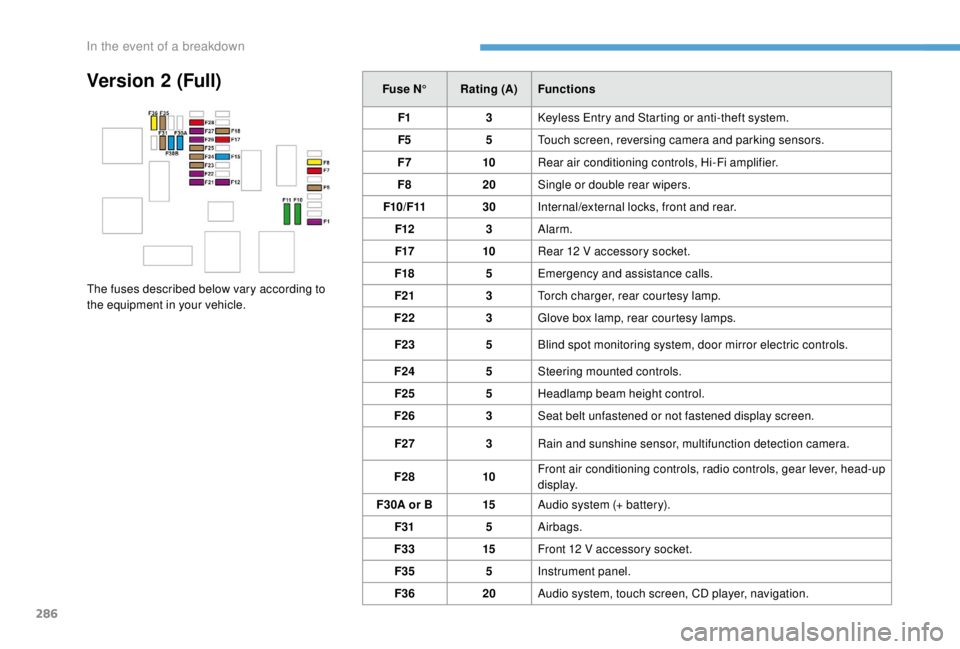
Version 2 (Full)Fuse N°Rating (A) Functions
F1 3
K
eyless Entry and Starting or anti-theft system.
F5 5Touch screen, reversing camera and parking sensors.
F7 10Rear air conditioning controls, Hi-Fi amplifier.
F8 20Single or double rear wipers.
F10/F11 30Internal/external locks, front and rear.
F12 3Alarm.
F17 10Rear 12
V accessory socket.
F18 5Emergency and assistance calls.
F21 3Torch charger, rear courtesy lamp.
F22 3Glove box lamp, rear courtesy lamps.
F23 5Blind spot monitoring system, door mirror electric controls.
F24 5Steering mounted controls.
F25 5Headlamp beam height control.
F26 3Seat belt unfastened or not fastened display screen.
F27 3Rain and sunshine sensor, multifunction detection camera.
F28 10Front air conditioning controls, radio controls, gear lever, head-up
display.
F30A or B 15Audio system (+ battery).
F31 5Airbags.
F33 15Front 12
V accessory socket.
F35 5Instrument panel.
F36 20Audio system, touch screen, CD player, navigation.
The fuses described below vary according to
the equipment in your vehicle.
In the event of a breakdown
Page 310 of 416
2
12:13
18,5 21,5
23 °CFirst steps
With the engine running, a press
mutes the sound.
With the ignition off, a press turns
the system on.
Adjustment of the volume.
Use the buttons either side of or below the
touch screen for access to the menus, then
press the virtual buttons in the touch screen.
Depending on the model, use the "Source" or
"Menu" buttons either side of the touch screen
for access to the menus, then press the virtual
buttons in the touch screen.
You can display the menu at any time by
pressing the screen briefly with three fingers.
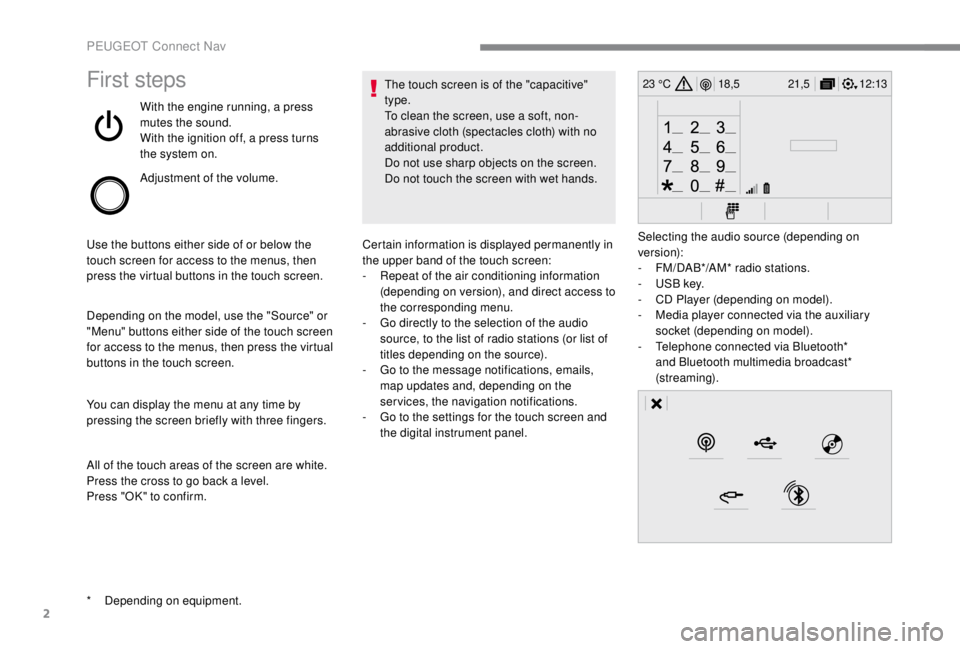
All of the touch areas of the screen are white.
Press the cross to go back a level.
Press "OK" to confirm. The touch screen is of the "capacitive"
type.
To clean the screen, use a soft, non-
abrasive cloth (spectacles cloth) with no
additional product.
Do not use sharp objects on the screen.
Do not touch the screen with wet hands.
*
D
epending on equipment. Certain information is displayed permanently in
the upper band of the touch screen:
-
R
epeat of the air conditioning information
(depending on version), and direct access to
the corresponding menu.
-
G
o directly to the selection of the audio
source, to the list of radio stations (or list of
titles depending on the source).
-
G
o to the message notifications, emails,
map updates and, depending on the
services, the navigation notifications.
-
G
o to the settings for the touch screen and
the digital instrument panel. Selecting the audio source (depending on
version):
-
F
M/DAB*/AM* radio stations.
-
U
SB key.
-
C
D Player (depending on model).
-
M
edia player connected via the auxiliary
socket (depending on model).
-
T
elephone connected via Bluetooth*
and Bluetooth multimedia broadcast*
(streaming).
PEUGEOT Connect Nav
Page 312 of 416
4
FM/87.5 MHz
87.5MHz
12:13
18,5 21,5
23 °C
12:13
18,5 21,5
23 °C
12:13
18,5 21,5
23 °C
21,518,5
12:1323 °C
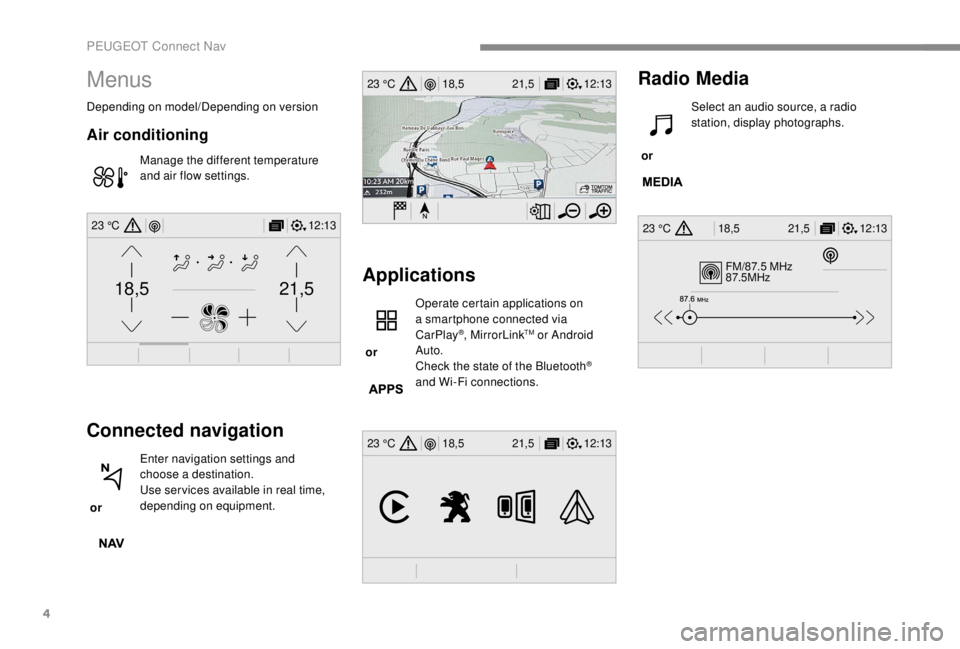
Menus
Depending on model/Depending on version
Air conditioning
Manage the different temperature
and air flow settings.
Connected navigation
or Enter navigation settings and
choose a destination.
Use ser vices available in real time,
depending on equipment.
Applications
or Operate certain applications on
a smartphone connected via
CarPlay
®, MirrorLinkTM or Android
Auto.
Check the state of the Bluetooth
®
and Wi-Fi connections.
Radio Media
or Select an audio source, a radio
station, display photographs.
PEUGEOT Connect Nav
Page 356 of 416
2
First steps
With the engine running, a press
mutes the sound.
With the ignition off, a press turns
the system on.
Adjustment of the volume.
Use the buttons either side of or below the
touch screen for access to the menus, then
press the virtual buttons in the touch screen.
Depending on the model, use the "Source" or
"Menu" buttons either side of the touch screen
for access to the menus, then press the virtual
buttons in the touch screen.
You can display the menu at any time by
pressing the screen briefly with three fingers.
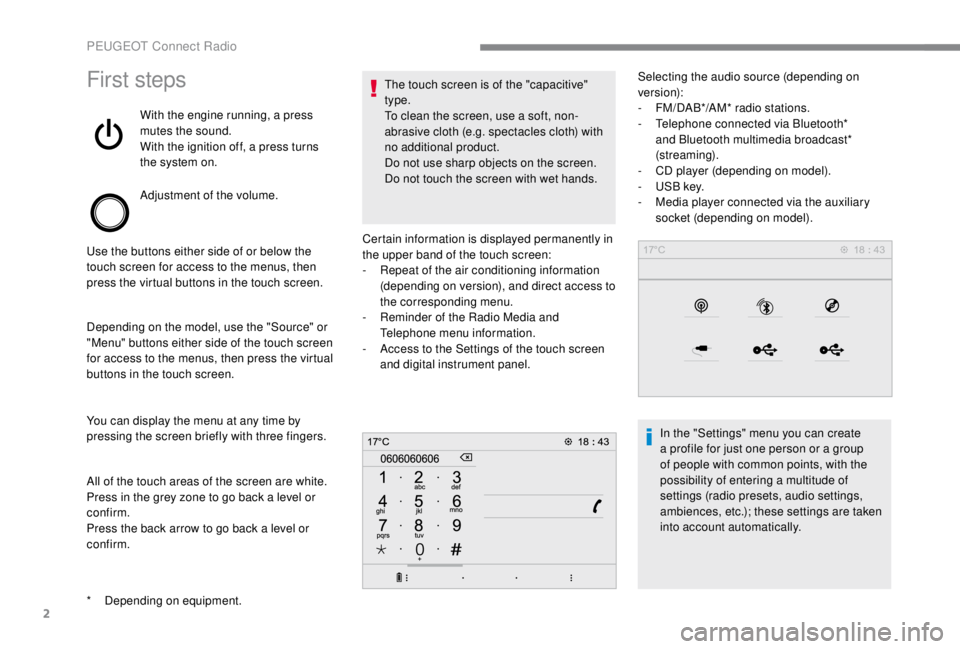
All of the touch areas of the screen are white.
Press in the grey zone to go back a level or
confirm.
Press the back arrow to go back a level or
confirm. The touch screen is of the "capacitive"
type.
To clean the screen, use a soft, non-
abrasive cloth (e.g. spectacles cloth) with
no additional product.
Do not use sharp objects on the screen.
Do not touch the screen with wet hands.
*
D
epending on equipment. Certain information is displayed permanently in
the upper band of the touch screen:
-
R
epeat of the air conditioning information
(depending on version), and direct access to
the corresponding menu.
-
R
eminder of the Radio Media and
Telephone menu information.
-
A
ccess to the Settings of the touch screen
and digital instrument panel. Selecting the audio source (depending on
version):
-
F M/DAB*/AM* radio stations.
- T elephone connected via Bluetooth*
and Bluetooth multimedia broadcast*
(streaming).
-
C
D player (depending on model).
-
U
SB key.
-
M
edia player connected via the auxiliary
socket (depending on model).
In the "Settings" menu you can create
a profile for just one person or a group
of people with common points, with the
possibility of entering a multitude of
settings (radio presets, audio settings,
ambiences, etc.); these settings are taken
into account automatically.
PEUGEOT Connect Radio