2018 PEUGEOT 3008 open bonnet
[x] Cancel search: open bonnetPage 34 of 360
32
If the low oil level is confirmed by a check using
the dipstick, the level must be topped up to
avoid damage to the engine.
For more information on Checking levels,
refer to the corresponding section.
Oil level indicator fault
This is signalled by the display of the message
"Oil level measurement invalid" in the
instrument panel.
Contact a PEUGEOT dealer or a qualified
workshop.
In the event of a fault with the electric
indicator, the oil level is no longer
monitored.
If the system is faulty, you must check
the engine oil level using the manual
dipstick located under the bonnet.
For more information on Checking
levels , refer to the corresponding
section.
Engine coolant
temperature gauge
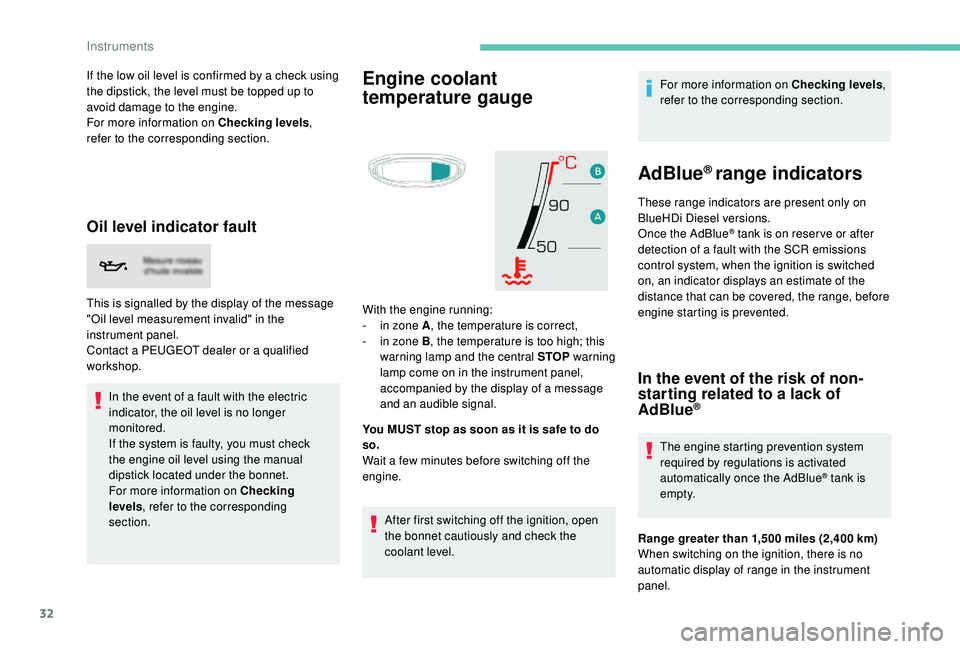
With the engine running:
- i n zone A , the temperature is correct,
-
i
n zone B , the temperature is too high; this
warning lamp and the central STOP warning
lamp come on in the instrument panel,
accompanied by the display of a message
and an audible signal.
You MUST stop as soon as it is safe to do
so.
Wait a few minutes before switching off the
engine.
After first switching off the ignition, open
the bonnet cautiously and check the
coolant level. For more information on Checking levels
,
refer to the corresponding section.
AdBlue® range indicators
These range indicators are present only on
BlueHDi Diesel versions.
Once the AdBlue
® tank is on reser ve or after
detection of a fault with the SCR emissions
control system, when the ignition is switched
on, an indicator displays an estimate of the
distance that can be covered, the range, before
engine starting is prevented.
In the event of the risk of non-
starting related to a lack of
AdBlue
®
The engine starting prevention system
required by regulations is activated
automatically once the AdBlue
® tank is
e m pt y.
Range greater than 1,500
miles (2,400 km)
When switching on the ignition, there is no
automatic display of range in the instrument
panel.
Instruments
Page 60 of 360
58
Anti-intrusion security
This system allows automatic simultaneous
locking of the doors and boot as soon as the
speed of the vehicle exceeds 6 mph (10 km/h).
Operation
If one of the doors or the boot is open, the
automatic central locking does not take place.
Carrying long or voluminous objects
If you want to drive with the boot open, you
should press the central locking button
to lock the doors. Other wise, every time
the speed of the vehicle exceeds 6
mph
(10
km/h), the locks will rebound and the
alerts mentioned above will appear.
Pressing the central locking button
unlocks the vehicle.
Above 6
mph (10 km/h), this unlocking is
te m p o r a r y.
Activation / Deactivation
Driving with the doors locked may render
access for the emergency services
difficult in an emergency.
Alarm
(Depending on version)
System which protects and provides a deterrent
against theft and break-ins. It provides the
following types of monitoring:
- perimeter monitoring
The system checks for opening of the vehicle.
The alarm is triggered if anyone tries to open a
door, the boot, the bonnet, etc.
- volumetric monitoring
The system checks for any variation in the
volume in the passenger compartment.
The alarm is triggered if anyone breaks a
window, enters the passenger compartment or
moves inside the vehicle.
- anti-tilt monitoring
The system checks for any change in the
attitude of the vehicle.
The alarm is triggered if the vehicle is lifted,
moved or knocked.
Self-protection function
The system checks for the putting out of
ser vice of its components.
The alarm is triggered if the battery, the central
control or the siren wiring are put out of ser vice
or damaged.
For all work on the alarm system, contact
a PEUGEOT dealer or a qualified
workshop.
This is signalled by the sound of
the locks rebounding, accompanied
by illumination of this symbol in the
instrument panel, an audible signal and
the display of an alert message.
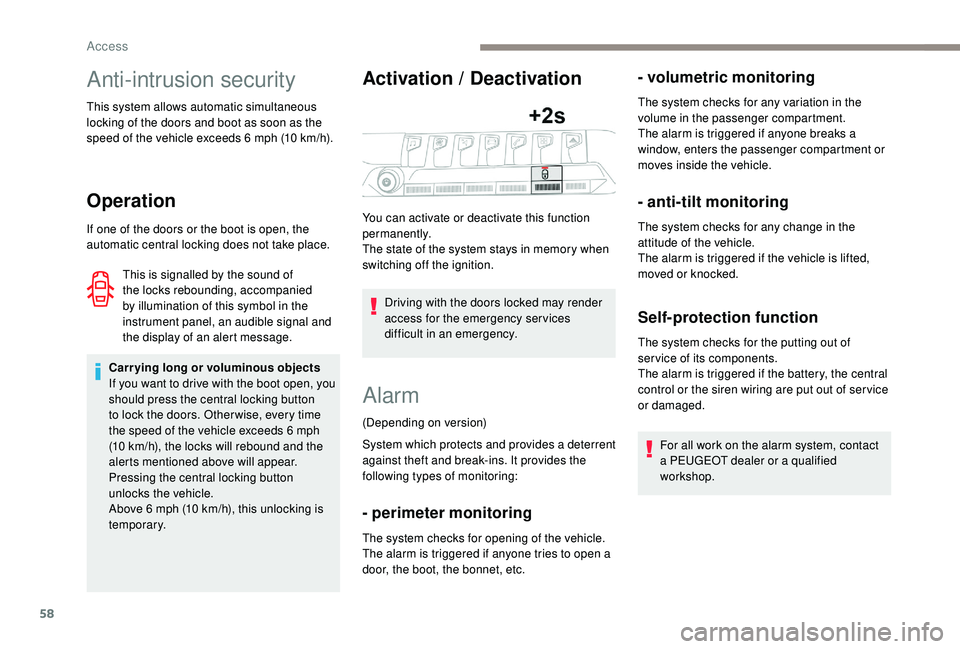
You can activate or deactivate this function
permanently.
The state of the system stays in memory when
switching off the ignition.
Access
Page 61 of 360

59
Locking the vehicle with full
alarm system
Activation
Following a vehicle locking request, the
perimeter monitoring is activated after
5 seconds and the interior volumetric and
anti-tilt monitoring after 45
seconds.
F
T
urn the ignition off and exit the vehicle.
F
L
ock the vehicle using the remote control or
the "
K
eyless Entry and Starting" system.
The monitoring system is active: the red
indicator lamp in the button flashes once per
second and the direction indicators come on for
about 2
seconds. If an opening (door, boot or bonnet) is not
fully closed, the vehicle is not locked but
the exterior perimeter monitoring will be
activated after a delay of 45 seconds at
the same time as the interior volumetric
and anti-tilt monitoring.
Deactivation
F Press the unlocking button on the remote control.
or
F
U
nlock the vehicle with the "
K
eyless Entry
and Starting" system.
The monitoring system is deactivated: the
indicator lamp in the button goes off and the
direction indicators flash for about 2
seconds.
When the vehicle automatically locks itself
again (as happens if a door or boot is not
opened within 30
seconds of unlocking),
the monitoring system is also reactivated
automatically.
Locking the vehicle
with exterior perimeter
monitoring only
Deactivate the interior volumetric and anti-tilt
monitoring to avoid unwanted triggering of the
alarm in certain cases such as:
Deactivating the interior
volumetric and anti-tilt
monitoring
F Switch off the ignition and within 10 seconds, press the button until the red
indicator lamp is on continuously.
F
G
et out of the vehicle.
F
I
mmediately lock the vehicle using the
remote control or the "
K
eyless Entry and
Starting" system.
The exterior perimeter monitoring alone is
activated: the indicator lamp in the button
flashes once per second. -
l
eaving a pet in the vehicle,
-
l
eaving a window or sunroof partially open,
-
w
ashing your vehicle,
-
c
hanging a wheel,
-
h
aving your vehicle towed,
-
t
ransport by ship.
2
Access
Page 171 of 360
169
Deactivation / Reactivation
In certain circumstances, such as the need
to maintain the temperature in the passenger
compartment, it may be useful to deactivate
the Stop & Start system.
The system can be deactivated at any time,
once the ignition is switched on.
If the engine is in STOP mode, it restarts
immediately.
The Stop & Start system is reactivated
automatically every time the ignition is
switched on.
With the button on the dashboard
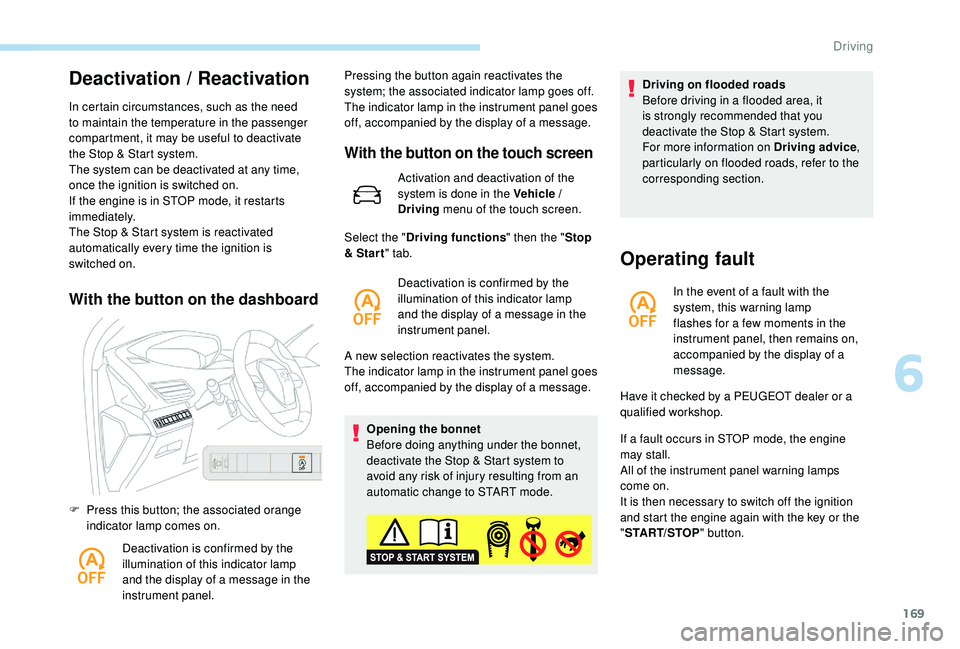
F Press this button; the associated orange indicator lamp comes on.
Deactivation is confirmed by the
illumination of this indicator lamp
and the display of a message in the
instrument panel. Pressing the button again reactivates the
system; the associated indicator lamp goes off.
The indicator lamp in the instrument panel goes
off, accompanied by the display of a message.
With the button on the touch screen
Activation and deactivation of the
system is done in the Vehicle /
Driving
menu of the touch screen.
A new selection reactivates the system.
The indicator lamp in the instrument panel goes
off, accompanied by the display of a message. Opening the bonnet
Before doing anything under the bonnet,
deactivate the Stop & Start system to
avoid any risk of injury resulting from an
automatic change to START mode.
Select the "
Driving functions " then the "Stop
& Star t " tab.
Deactivation is confirmed by the
illumination of this indicator lamp
and the display of a message in the
instrument panel. Driving on flooded roads
Before driving in a flooded area, it
is strongly recommended that you
deactivate the Stop & Start system.
For more information on Driving advice
,
particularly on flooded roads, refer to the
corresponding section.
Operating fault
In the event of a fault with the
system, this warning lamp
flashes for a few moments in the
instrument panel, then remains on,
accompanied by the display of a
message.
If a fault occurs in STOP mode, the engine
may stall.
All of the instrument panel warning lamps
come on.
It is then necessary to switch off the ignition
and start the engine again with the key or the
" START/STOP " button.
Have it checked by a PEUGEOT dealer or a
qualified workshop.
6
Driving
Page 228 of 360
226
Fitting directly to the roof
Recommendations
Distribute the load uniformly, taking care
to avoid overloading one of the sides.
Arrange the heaviest part of the load as
close as possible to the roof.
Lash the load securely.
Drive gently: the vehicle will be more
susceptible to the effects of side winds
and the stability of the vehicle may be
affected.
On a long journey, check the security of
the load at every stop.
Remove the roof bars once they are no
longer needed.Sunroof
Check that the load does not pass below
the roof bars so that it does not impede
the movements of the sunroof.
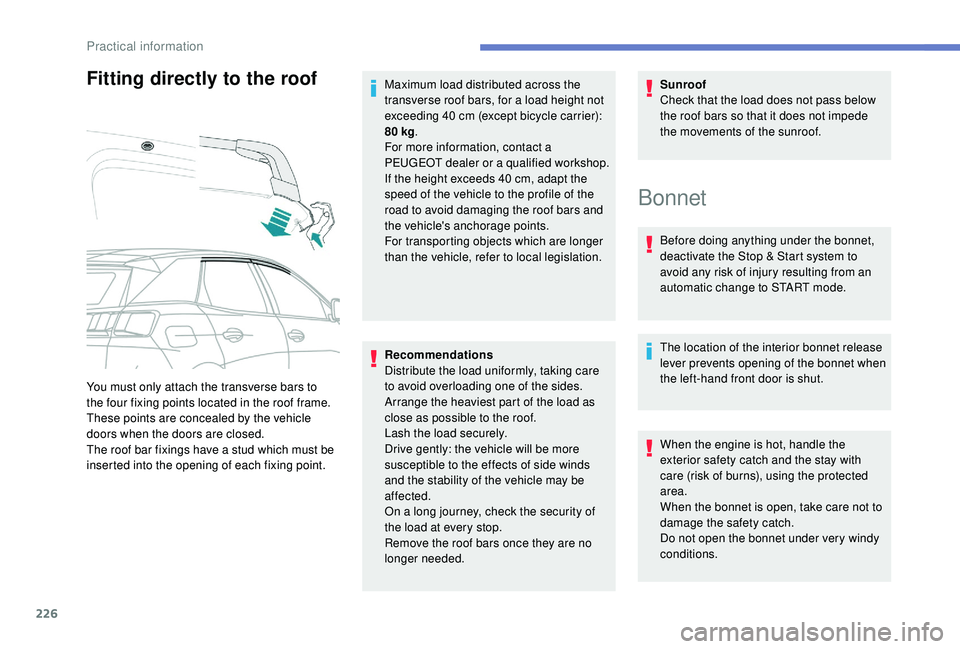
You must only attach the transverse bars to
the four fixing points located in the roof frame.
These points are concealed by the vehicle
doors when the doors are closed.
The roof bar fixings have a stud which must be
inserted into the opening of each fixing point. Maximum load distributed across the
transverse roof bars, for a load height not
exceeding 40
cm (except bicycle carrier):
80 kg
.
For more information, contact a
PEUGEOT dealer or a qualified workshop.
If the height exceeds 40 cm, adapt the
speed of the vehicle to the profile of the
road to avoid damaging the roof bars and
the vehicle's anchorage points.
For transporting objects which are longer
than the vehicle, refer to local legislation.
Bonnet
Before doing anything under the bonnet,
deactivate the Stop & Start system to
avoid any risk of injury resulting from an
automatic change to START mode.
The location of the interior bonnet release
lever prevents opening of the bonnet when
the left-hand front door is shut.
When the engine is hot, handle the
exterior safety catch and the stay with
care (risk of burns), using the protected
area.
When the bonnet is open, take care not to
damage the safety catch.
Do not open the bonnet under very windy
conditions.
Practical information
Page 229 of 360
227
The cooling fan may star t after
switching off the engine: take care
with articles and clothing that might
be caught by the fan blades.
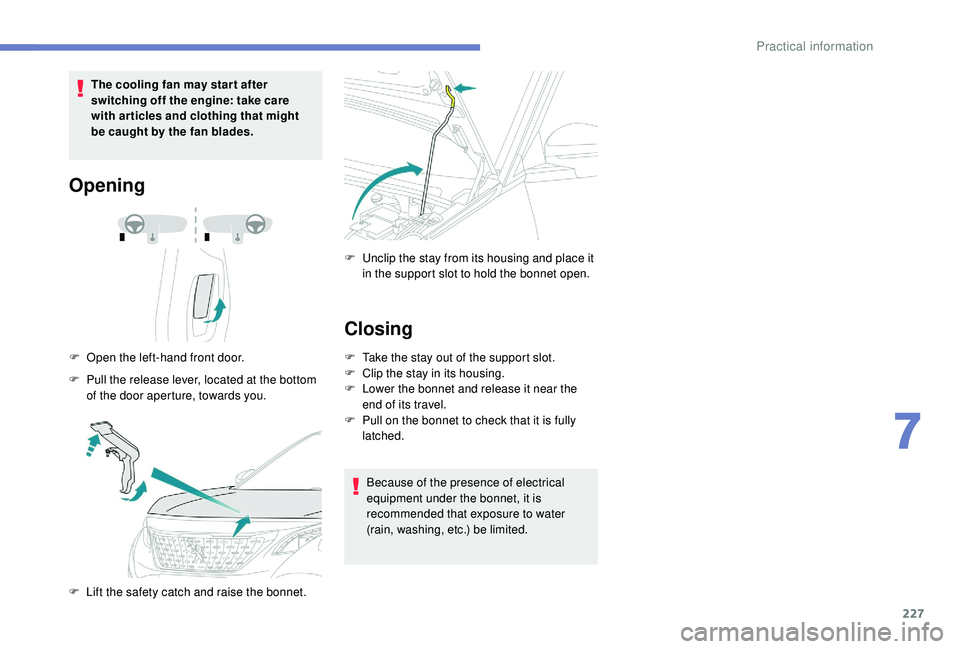
Opening
F Open the left-hand front door.
F
P
ull the release lever, located at the bottom
of the door aperture, towards you.
F
L
ift the safety catch and raise the bonnet. F
U
nclip the stay from its housing and place it
in the support slot to hold the bonnet open.
Closing
F Take the stay out of the support slot.
F C lip the stay in its housing.
F
L
ower the bonnet and release it near the
end of its travel.
F
P
ull on the bonnet to check that it is fully
latched.
Because of the presence of electrical
equipment under the bonnet, it is
recommended that exposure to water
(rain, washing, etc.) be limited.
7
Practical information
Page 232 of 360
230
Topping up the engine oil level
The location of the oil filler cap is shown in the
corresponding underbonnet layout view.
F
U
nscrew the oil filler cap to access the filler
opening.
F
A
dd oil in small quantities, avoiding any
spills on engine components (risk of fire).
F
W
ait a few minutes before checking the
level again using the dipstick.
F
A
dd more oil if necessary.
F
A
fter checking the level, carefully refit the oil
filler cap and the dipstick in its tube.
After topping up the oil, the check when
switching on the ignition with the oil
level indicator in the instrument panel
is not valid during the 30
minutes after
topping up.
Engine oil change
In order to maintain the reliability of the engine
and emissions control system, never use
additives in the engine oil.
Brake fluid level
The brake fluid level should be close
to the "MA X" mark. If it is not, check
the brake pad wear.
Changing the fluid
Refer to the manufacturer's service schedule
for details of the inter val for this operation.
Fluid specification
This fluid must conform to the manufacturer's
recommendations.
Coolant level
Check the coolant level regularly.
It is normal to top up the fluid
between two services. A low coolant level presents a risk of serious
damage to your engine.
The coolant level should be close to the "MA X"
mark but should never exceed it.
If the level is close to or below the "MIN" mark,
it is essential to top up.
When the engine is hot, the temperature of the
coolant is regulated by the fan.
In addition, as the cooling system is
pressurised, wait at least one hour after
switching off the engine before carrying out any
work.
To avoid the risk of scalding when you need to
top up in an emergency, place a cloth around
the cap and unscrew the cap by two turns to
allow the pressure to drop.
Once the pressure has dropped, remove the
cap and top up to the required level.
The cooling fan may star t after
switching off the engine: take care
with articles and clothing that might
be caught by the fan blades.Fluid specification
This fluid must conform to the manufacturer's
recommendations.
Oil grade
Before topping up the oil or changing the oil,
check that the oil is the correct grade for your
engine and conforms to the manufacturer's
recommendations.
The check and top up must only be done with
the engine cold.
Practical information
Page 240 of 360

238
With 1.5 BlueHDi and 2.0
BlueHDi 180 S&S engines
F Fill the fuel tank with at least 5 litres of
Diesel.
F
S
witch on the ignition (without starting the
engine).
F
W
ait around 1 minute and switch off the
ignition.
F
O
perate the starter to run the engine.
If the engine does not start, repeat the
procedure.
With 2.0 HDi engines
F Put it back in place, clip in the cover and ensure it is clipped in.
F
C
lose the bonnet.
Tool kit
This is a set of tools provided with the vehicle.
Its content depends on your vehicle's
equipment:
-
t
emporary puncture repair kit,
-
spar
e wheel.
Access to the tools
F raise the floor past the two retractable stops,
F
l
ay the floor on these two stops to hold it up.
For versions with a temporary
puncture repair kit:
F unclip the two fixings to open its cover.
For versions with a spare wheel:
F Fill the fuel tank with at least five litres of Diesel.
F
O
pen the bonnet.
F
I
f necessary, unclip the cover to access the
priming pump.
F
L
oosen the degassing screw.
F
U
se the priming pump until fuel appears in
the transparent tube.
F
R
etighten the degassing screw.
F
O
perate the starter until the engine starts (if
the engine does not start at the first attempt,
wait around 15
seconds before trying
again).
F
I
f the engine does not start after a few
attempts, operate the priming pump again
then start the engine. The main tools are stowed in the boot under
t h e f l o o r.
For access to them:
F
o
pen the boot,
F
p
lace the adjustable boot floor in the high
position,
In the event of a breakdown