2018 PEUGEOT 3008 start stop button
[x] Cancel search: start stop buttonPage 69 of 360
67
Panoramic opening
sunroof
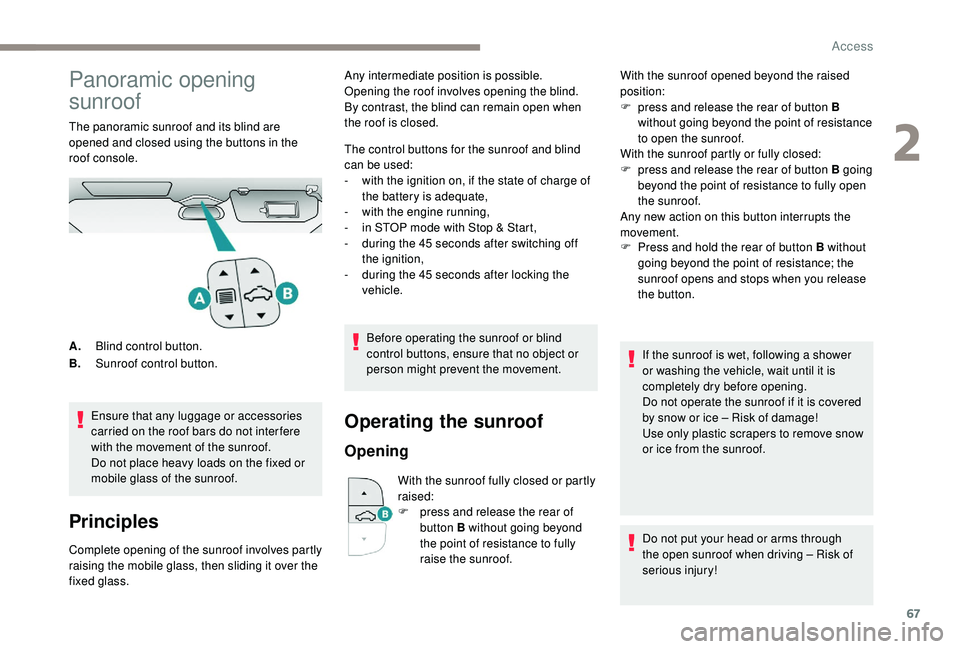
The panoramic sunroof and its blind are
opened and closed using the buttons in the
roof console.Ensure that any luggage or accessories
carried on the roof bars do not inter fere
with the movement of the sunroof.
Do not place heavy loads on the fixed or
mobile glass of the sunroof.
Principles
Complete opening of the sunroof involves partly
raising the mobile glass, then sliding it over the
fixed glass. The control buttons for the sunroof and blind
can be used:
-
w
ith the ignition on, if the state of charge of
the battery is adequate,
-
w
ith the engine running,
-
i
n STOP mode with Stop & Start,
-
d
uring the 45 seconds after switching off
the ignition,
-
d
uring the 45 seconds after locking the
vehicle.
Before operating the sunroof or blind
control buttons, ensure that no object or
person might prevent the movement.
Operating the sunroof
Opening
With the sunroof fully closed or partly
raised:
F
p
ress and release the rear of
button B without going beyond
the point of resistance to fully
raise the sunroof. F
P
ress and hold the rear of button B without
going beyond the point of resistance; the
sunroof opens and stops when you release
the button.
A. Blind control button.
B. Sunroof control button. Any intermediate position is possible.
Opening the roof involves opening the blind.
By contrast, the blind can remain open when
the roof is closed.
With the sunroof opened beyond the raised
position:
F
p
ress and release the rear of button B
without going beyond the point of resistance
to open the sunroof.
With the sunroof partly or fully closed:
F
p
ress and release the rear of button B going
beyond the point of resistance to fully open
the sunroof.
Any new action on this button interrupts the
movement.
If the sunroof is wet, following a shower
or washing the vehicle, wait until it is
completely dry before opening.
Do not operate the sunroof if it is covered
by snow or ice – Risk of damage!
Use only plastic scrapers to remove snow
or ice from the sunroof.
Do not put your head or arms through
the open sunroof when driving – Risk of
serious injury!
2
Access
Page 78 of 360
76
Multipoint massage
System with a choice of type of massage and
adjustment of its intensity.
This system operates with the engine running,
as well as in STOP mode of Stop & Start.
Activation / Settings
The massage settings are adjusted in the touch
screen.
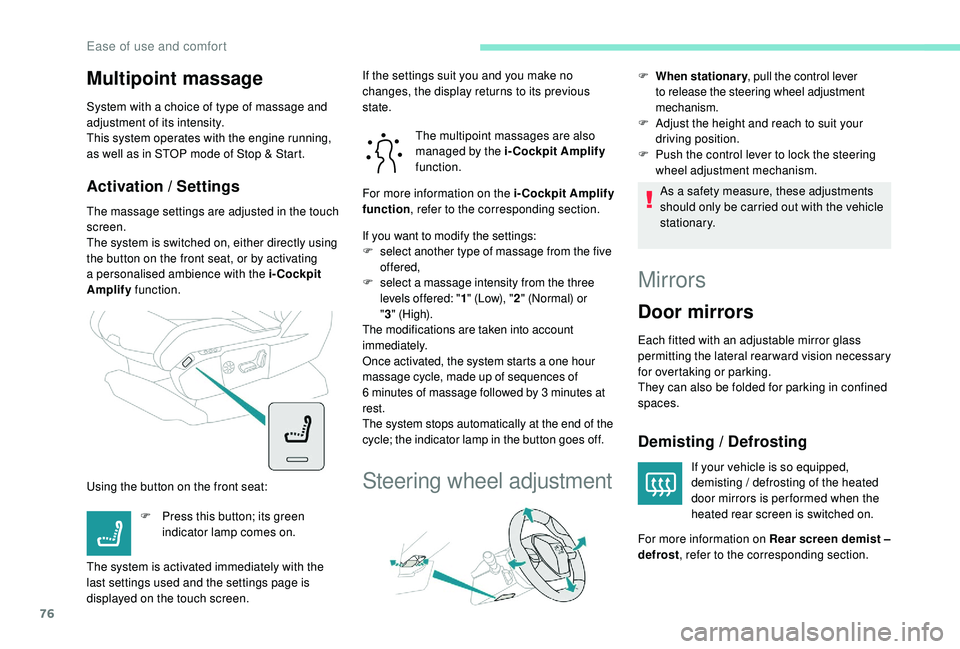
The system is switched on, either directly using
the button on the front seat, or by activating
a personalised ambience with the i-Cockpit
Amplify function.
Using the button on the front seat: The multipoint massages are also
managed by the i-Cockpit Amplify
function.
If you want to modify the settings:
F s elect another type of massage from the five
offered,
F
s
elect a massage intensity from the three
levels offered: " 1" (Low), " 2" (Normal) or
" 3 "
(High).
The modifications are taken into account
immediately.
Once activated, the system starts a one hour
massage cycle, made up of sequences of
6
minutes of massage followed by 3 minutes at
rest.
The system stops automatically at the end of the
cycle; the indicator lamp in the button goes off.
Steering wheel adjustment
F When stationary , pull the control lever
to release the steering wheel adjustment
mechanism.
F Adjust the height and reach to suit your driving position.
F
P
ush the control lever to lock the steering
wheel adjustment mechanism.
As a safety measure, these adjustments
should only be carried out with the vehicle
stationary.
Mirrors
Door mirrors
Each fitted with an adjustable mirror glass
permitting the lateral rearward vision necessary
for overtaking or parking.
They can also be folded for parking in confined
spaces.
Demisting / Defrosting
If your vehicle is so equipped,
demisting / defrosting of the heated
door mirrors is per formed when the
heated rear screen is switched on.
F
P
ress this button; its green
indicator lamp comes on.
The system is activated immediately with the
last settings used and the settings page is
displayed on the touch screen. If the settings suit you and you make no
changes, the display returns to its previous
state.
For more information on the i-Cockpit Amplify
function
, refer to the corresponding section.
For more information on Rear screen demist –
defrost , refer to the corresponding section.
Ease of use and comfort
Page 92 of 360
90
Recirculation of the
interior air
The intake of exterior air prevents the formation
of mist on the windscreen and the side windows.
The recirculation of the interior air isolates the
passenger compartment from exterior odours
and fumes.
This function also allows the desired
temperature in the passenger compartment to
be reached in the shortest time.F
P
ress this button to activate the
function; its orange indicator
lamp comes on.
F
P
ress this button again to deactivate the
function; its indicator lamp goes off.
Avoid prolonged use of the recirculation of
interior air – Risk of formation of mist and
deterioration of the air quality!
The system activates automatically when
reverse gear is engaged.
Front demist – defrost
With manual air
conditioning
F Adjust the temperature to maximum (red).
F A djust the air flow to maximum; all of the
orange indicator lamps come on.
F
A
djust the air distribution to the
" Windscreen" position; its associated
orange indicator lamp comes on.
F
C
heck that the recirculation of interior air is
deactivated; its indicator lamp must be off.
F
S
witch on the air conditioning by pressing
the " A/C" button; its orange indicator lamp
comes on.
With Stop & Start, when the demisting,
air conditioning and air flow functions are
activated, STOP mode is not available.
With semi-automatic and
automatic air conditioning
Automatic visibility programme
F Press this button to demist or defrost the windscreen and side
windows more quickly; its orange
indicator lamp comes on.
The system automatically manages the air
conditioning (depending on version), air
flow and air intake, and provides optimum
distribution towards the windscreen and side
windows.
F
T
o switch it off, press this button; its
indicator lamp goes off.
The system allows the manual modification of
air flow without causing automatic deactivation
of the automatic visibility programme.
With Stop & Start, when demisting –
defrosting has been activated, STOP
mode is not available.
In wintry conditions, remove all snow or
ice on the camera on the windscreen
before moving off.
Other wise, this can affect the function
of the equipment associated with the
camera.
Ease of use and comfort
Page 97 of 360
95
Programming the departure
time
F Press buttons 1 to display the programmed time.
F
A
fter having displayed the programmed
time, press buttons 4 and 5 simultaneously
within 10
seconds.
F
S
et the time by pressing buttons 1 .
F
S
imultaneously press buttons 4 and 5 to
save it.
Activation/Deactivation
F After having displayed the programmed time using buttons 1 , press button 5 until the
message " OK" is displayed. HTM: Heat Thermo Management
F
T
o deactivate the programming, press
button 4 until the message " OK" is
displayed.
During these operations, if the message
" FA I L " is displayed, it means that the
signal has not been received. Restart the
procedure after having changed position.
Stopping the heating
F Press button 5 .
Changing the heating level
The system has 5 heating levels: C1 (lowest
level) to C5 (highest level).
F
A
fter having displayed the heating level
using buttons 1 , press simultaneously on
buttons 4 and 5 .
The letter " C" will flash.
F
A
djust the heating level by pressing
button
1.
F
S
imultaneously press buttons 4 and 5 to
save the selected level.
The letter " C" will be displayed.
This symbol will be displayed.
This symbol will flash.
This symbol will be displayed.
When the signal has been received,
the message "
OK" is displayed
along with this symbol. This red indicator lamps comes on
until heating begins.
This symbol is displayed when the
heater starts.
This symbol will disappear.
This symbol remains on.
This indicator lamp goes off.
The presets are replaced by the new
entries. The programmed times are
memorised until the next change.
When the start time is activated, it is not
possible to change the heating level. You
must first deactivate the start time.
Operating fault
In the event of a fault with the programmable
heating, contact a PEUGEOT dealer or a
qualified workshop.
3
Ease of use and comfort
Page 157 of 360
155
The presence of the Keyless Entry and
Starting electronic key in the recognition
zone is essential.
If the electronic key is not detected in this
zone, a message is displayed.
Move the electronic key into this zone so
that the engine can be started.
If there is still a problem, refer to the "Key
not detected
– Back-up starting" section.
F
P
ress the "START/STOP "
button while maintaining
pressure on the pedal until the
engine starts.
For Diesel engines , when the temperature is
negative and/or the engine is cold, the start
will only take place once the preheater warning
lamp is off. "
START/STOP " button again until the
engine is running.
F
W
ith an automatic gearbox, you should
keep the brake pedal fully depressed until
the warning lamp goes off and not press
the " START/STOP " button again until the
engine is running.
If one of the starting conditions is not met,
a reminder message is displayed in the
instrument panel.
In some circumstances, it is necessary to turn
the steering wheel slightly while pressing the
" START/STOP " button to assist unlocking of
the steering column; a message warns you
when this is needed.
The steering column unlocks and the engine
starts.
On certain versions with the EAT8 automatic
gearbox, the steering column does not lock.
If this warning lamp comes on after
pressing the " START/STOP " button:
F
W
ith a manual gearbox , you should keep
the clutch pedal fully depressed until the
warning lamp goes off and not press the With petrol engines
, after a cold start,
preheating the catalytic converter can
cause clearly-felt engine vibrations for
anything up to 2
minutes while stationary
with the engine running (accelerated idle
speed).
As a safety measure, never leave the
vehicle while the engine is running.Switching off the engine
F Immobilise the vehicle, engine at idle.
F W ith a manual gearbox , put the gear lever
into neutral.
or
F
W
ith an automatic gearbox , place the gear
selector in mode P or N .
F
W
ith the electronic key inside the vehicle,
press the " START/STOP " button.
If the vehicle is not immobilised, the
engine will not stop.
Never leave your vehicle with the
electronic key still inside.
Switching off the engine leads to a loss of
braking assistance.
The engine stops and the steering column
locks.
In some circumstances, it is necessary to turn
the steering wheel to lock the steering column.
On certain versions with the EAT8 automatic
gearbox, the steering column does not lock.
6
Driving
Page 158 of 360
156
Switching the ignition on
(without starting)
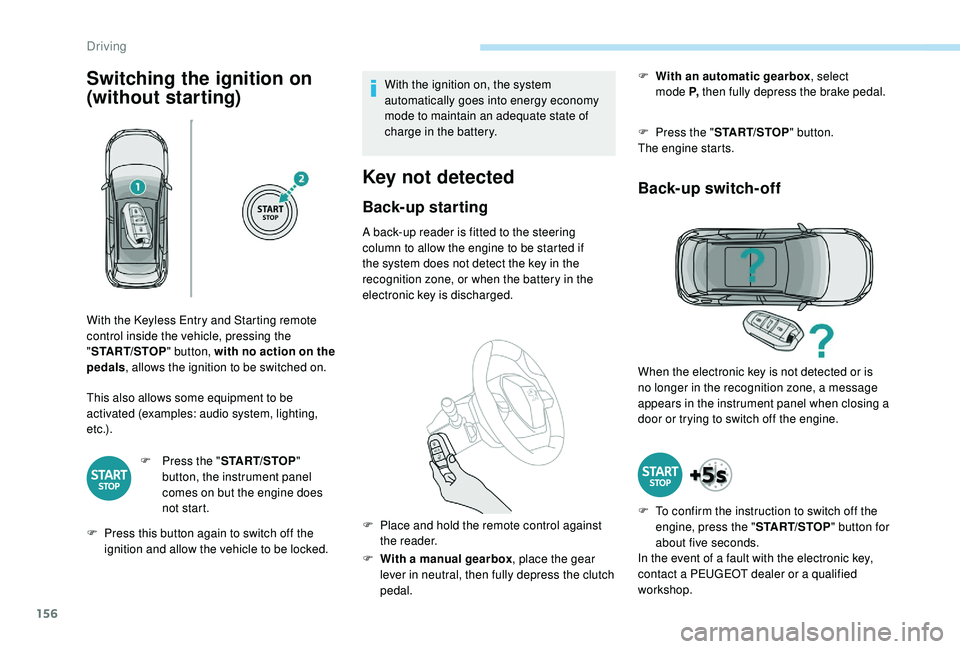
This also allows some equipment to be
activated (examples: audio system, lighting,
e t c .) .F
P
ress the "START/STOP "
button, the instrument panel
comes on but the engine does
not start.
F
P
ress this button again to switch off the
ignition and allow the vehicle to be locked. With the ignition on, the system
automatically goes into energy economy
mode to maintain an adequate state of
charge in the battery.
Key not detected
Back-up starting
A back-up reader is fitted to the steering
column to allow the engine to be started if
the system does not detect the key in the
recognition zone, or when the battery in the
electronic key is discharged.
F
W
ith a manual gearbox , place the gear
lever in neutral, then fully depress the clutch
pedal. F
W
ith an automatic gearbox
, select
mode P,
then fully depress the brake pedal.
F
P
ress the "
START/STOP " button.
The engine starts.
Back-up switch-off
With the Keyless Entry and Starting remote
control inside the vehicle, pressing the
" START/STOP " button, with no action on the
pedals , allows the ignition to be switched on.
F
P
lace and hold the remote control against
the reader. When the electronic key is not detected or is
no longer in the recognition zone, a message
appears in the instrument panel when closing a
door or trying to switch off the engine.
F
T
o confirm the instruction to switch off the
engine, press the " START/STOP" button for
about five seconds.
In the event of a fault with the electronic key,
contact a PEUGEOT dealer or a qualified
workshop.
Driving
Page 159 of 360

157
Emergency switch-off
Electric parking brake
The system allows, in automatic operation, the
application of the parking brake on switching
off the engine and release as the vehicle
moves off.F
b
y briefly pulling
the control lever to apply
the brake,
F
b
y briefly pushing
the control lever, while
pressing the brake pedal, to release it.
Automatic mode is activated by default.
Indicator lamp
This indicator lamp comes on in the
instrument panel and in the control
lever to confirm the application of
the parking brake.
It goes off to confirm the release of the parking
brake.
This indicator lamp flashes on the control lever
when manual parking brake application or
release is performed.
In the event of a battery failure, the
electric parking brake no longer works.
As a safety measure with a manual
gearbox, if the parking brake is not
applied, immobilise the vehicle by
engaging a gear.
As a safety measure with an automatic
gearbox, if the parking brake is not
applied, immobilise the vehicle by
placing one of the chocks supplied
against one of the wheels.
Call on a PEUGEOT dealer or a qualified
workshop.
Label on door panel
Before leaving the vehicle, check that the
parking brake is applied: the indicator
lamps in the instrument panel and
the control lever must be on fixed, not
flashing.
If the parking brake is not applied, there
is an audible signal and a message is
displayed on opening the driver's door.
Never leave a child alone inside the
vehicle with the ignition on, as they could
release the parking brake.
In the event of an emergency only, the engine
can be switched off without conditions (even
when driving).
Press the "
START/STOP " button for about five
seconds.
In this case, the steering column locks as soon
as the vehicle stops.
The driver can take over at any time to apply
or release the parking brake, by operating the
control lever:
6
Driving
Page 166 of 360
164
To switch off the ignition, the vehicle must be
stationary.
To put the vehicle in free-wheeling mode,
engine off:
F
w
ith the vehicle stationary, engine running,
select N ,
F
s
witch off the engine,
F
w
ithin five seconds, switch the ignition on
again,
F
w
ith your foot on the brake pedal, push the
selector for wards or backwards once to
confirm N and manually release the electric
parking brake,
F
s
witch off the ignition.
If you exceed the time limit of five seconds,
the gearbox engages mode P ; you must then
restart the procedure.
If you open the driver's door when mode
N is engaged, an audible signal will
sound. It will stop when you close the
driver's door again.
Special aspects of automatic
mode
The gearbox selects the gear that offers
optimum per formance, taking account of the
exterior temperature, the profile of the road, the
load on the vehicle and the style of driving.
For maximum acceleration without touching
the selector, press the accelerator fully down
(kick-down). The gearbox changes down
automatically or holds the gear selected until
the maximum engine speed is reached.
When braking, the gearbox changes down
automatically to provide effective engine
braking.
The steering mounted controls allow the driver
to temporarily select a gear, if the road and
engine speed permit.
Special aspects of manual mode
The change from one gear to another takes
place only if the road speed and engine speed
permit.
If the engine speed is too high or too low, the
gear selected flashes for a few seconds, then
the gear actually engaged is displayed.
Moving off
From mode P :
F P ress the brake pedal firmly.
F
S
tart the engine.
F
M
aintaining pressure on the brake pedal,
press the Unlock button.
F
P
ush once or twice rear ward to select the
automatic mode D , or for ward to engage
reverse R .
From neutral N :
F
P
ress the brake pedal firmly.
F
S
tart the engine.
F
M
aintaining pressure on the brake pedal,
push rear ward to select the automatic
mode
D, or for ward, while pressing the
Unlock
button to engage reverse R .
Then, from P or N :
F
R
elease the brake pedal.
F
A
ccelerate progressively to automatically
release the electric parking brake.
F
W
ith the parking brake released, the vehicle
then moves off.
To quit manual mode:
F
p
ush for wards once to go back to D
.
or
F
p
ress button M ; the indicator lamp in the
button goes off.
Driving