2018 PEUGEOT 108 buttons
[x] Cancel search: buttonsPage 20 of 180

18
Indicators
Total/trip distance recorder
When the ignition is switched on, the distance
recorder that was selected when the engine
was last switched off is displayed.-
t
rip recorder with TRIP displayed.
To reset the trip recorder to zero, while it is
displayed, press one of the two buttons 1 .
Fuel level indicator
Low fuel level
When the fuel in the tank reaches
a
low level, this warning lamp
comes on in the instrument panel,
accompanied by an audible warning.
You must add at least 5
litres of fuel after
running out of fuel.
Trip computer
System that gives you information on the
current journey (range, fuel consumption…).
Data displays
* depending on version. F
P
ress the steering mounted control to
display the various trip computer tabs in
succession.
-
T
otal distance travelled.
- Trip
A.
- Trip
B.
-
T
he partial Stop & Start time counter*.
-
T
he total Stop & Start* time counter.
-
T
he outside temperature*.
-
C
urrent fuel consumption.
-
A
verage fuel consumption.
-
Range.
-
A
verage speed.
-
L
ighting dimmer.
Pressing button 1
allows you to alternate the
distance display:
-
t
otal with ODO (odometer) displayed, Shows the quantity of fuel available:
-
1/
1
and six bars, the tank is full.
-
R
and one bar, the fuel in the tank is at the
reser ve level.
You have about 5
litres of fuel left.
Instruments
Page 21 of 180
19
Outside temperature
In some situations, it may happen that the
outside temperature is displayed after a delay
or not at all, including:
-
w
hen stationary or moving at a slow speed
(less than about 16
mph (25 km/h),
-
i
n the case of a change that is too high
(entering or leaving a
garage, tunnel, etc.),
-
d
uring very short journeys (less than about
2
minutes).
Lighting dimmer control
When driving at night, this function allows
certain instrument panel displays to be
switched off so as to reduce visual fatigue for
the driver.
It operates only while the sidelamps are on.
F
A
s soon as the "Lighting dimmer" menu is
displayed, keep one of the DISP buttons
pressed to access the settings.
F
T
hen press one of the two DISP buttons
successively to increase or decrease the
brightness. The display flashes to show you
the brightness chosen.
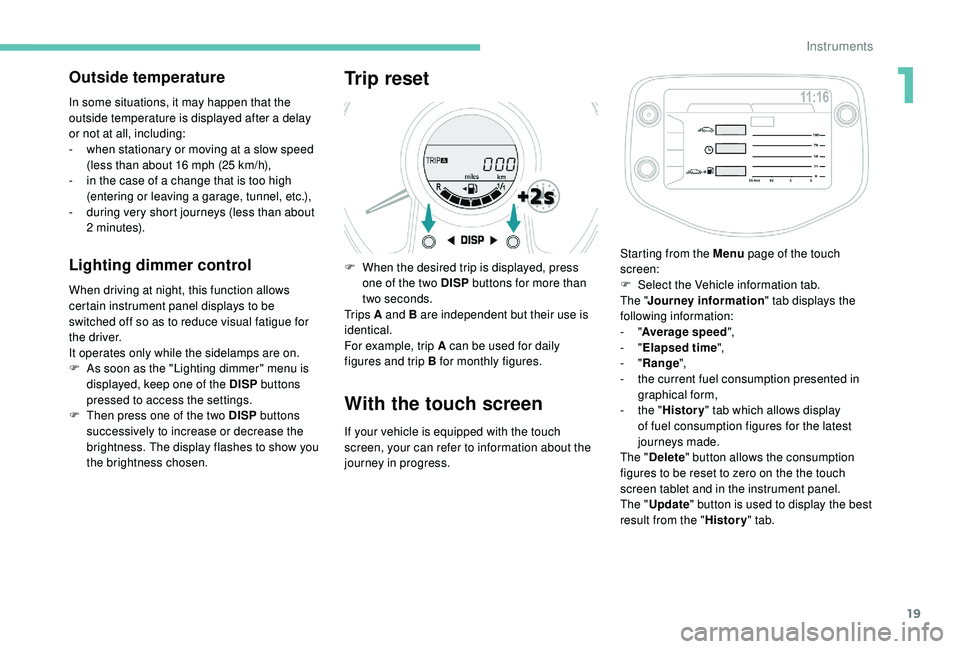
Trip reset
F When the desired trip is displayed, press one of the two DISP buttons for more than
two seconds.
Tr i p s A and B are independent but their use is
identical.
For example, trip A can be used for daily
figures and trip B for monthly figures.
With the touch screen
If your vehicle is equipped with the touch
screen, your can refer to information about the
journey in progress. Starting from the Menu
page of the touch
screen:
F
S
elect the Vehicle information tab.
The " Journey information " tab displays the
following information:
- "
Average speed ",
- "
Elapsed time ",
- "
Range ",
-
t
he current fuel consumption presented in
graphical form,
-
t
he "
History " tab which allows display
of fuel consumption figures for the latest
journeys made.
The " Delete " button allows the consumption
figures to be reset to zero on the the touch
screen tablet and in the instrument panel.
The " Update " button is used to display the best
result from the " History" tab.
1
Instruments
Page 24 of 180
22
Keys
These allow operation of the front door locks,
the boot lock, the steering lock, the control
for deactivating the passenger airbag and the
ignition.
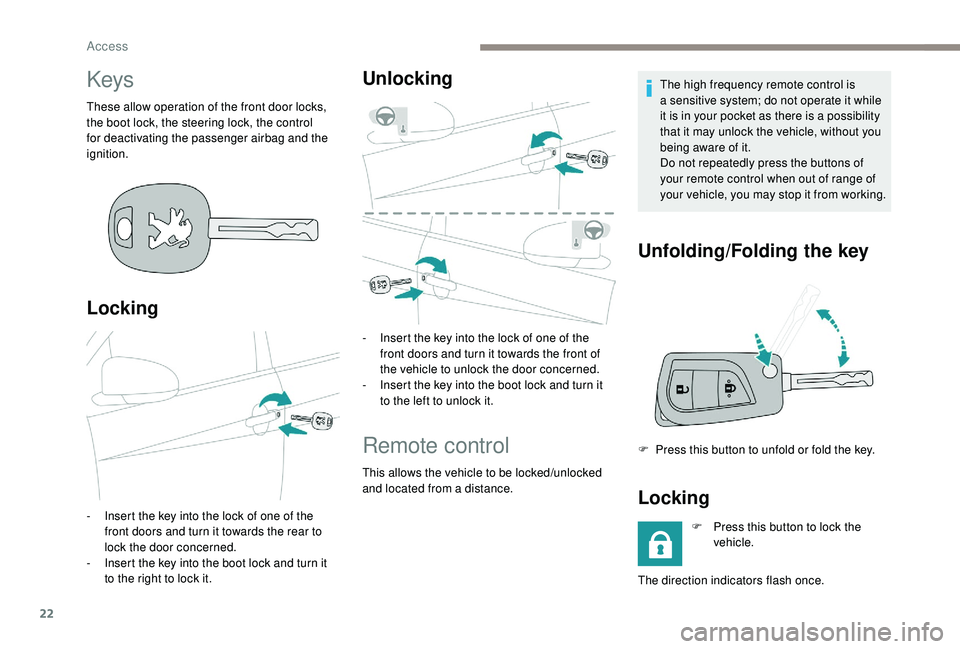
Locking
- Insert the key into the lock of one of the front doors and turn it towards the rear to
lock the door concerned.
-
I
nsert the key into the boot lock and turn it
to the right to lock it.
Unlocking
- Insert the key into the lock of one of the front doors and turn it towards the front of
the vehicle to unlock the door concerned.
-
I
nsert the key into the boot lock and turn it
to the left to unlock it.
Remote control
This allows the vehicle to be locked/unlocked
and located from a distance. The high frequency remote control is
a
sensitive system; do not operate it while
it is in your pocket as there is a possibility
that it may unlock the vehicle, without you
being aware of it.
Do not repeatedly press the buttons of
your remote control when out of range of
your vehicle, you may stop it from working.
Unfolding/Folding the key
F Press this button to unfold or fold the key.
Locking
F Press this button to lock the vehicle.
The direction indicators flash once.
Access
Page 28 of 180

26
Check that the light on the electronic key
flashes 4 times.
While this function is activated, the "
K
eyless
Entry and Starting" system is inoperative.
To reactivate the electronic key, press one of
the buttons (open or closed padlock).
Changing the battery of the
electronic key
Battery type: CR2032/3 volts.
I f the battery of the electronic key is
defective, this warning lamp comes
on in the instrument panel. F
F
it the new battery into its compartment
observing the original fitting direction.
F
R
eplace the protective cover.
F
C
lip the cover onto the casing.
Advice
Remote control/electronic key
These high frequency remote controls are
sensitive systems; do not handle them
while in your pocket as there is a
risk that
the vehicle may unlock without you being
aware of it.
Do not repeatedly press the buttons of
your remote control or your electronic key
when out of range and out of sight of your
vehicle. You may stop it from working.
The remote control would then have to be
reinitialised.
Locking the vehicle
Driving with the doors locked could make
it difficult for the emergency ser vices to
enter the vehicle in an emergency.
As a
safety precaution (with children on
board), remove the key from the ignition or
take the electronic key when you leave the
vehicle, even for a
short time. Lost keys, remote control, electronic
key
Visit a
PEUGEOT dealer with the vehicle's
registration certificate, your personal
identification documents and if possible,
the label bearing the key code.
The PEUGEOT dealer will be able to look
up the key code and the transponder code
required to order a new key.
Purchasing a
second-hand vehicle
Have the pairing of all of the keys in your
possession checked by a
PEUGEOT
dealer, to ensure that only your keys can
be used to open and start the vehicle.
F
U
nclip the cover using a
small screwdriver
at the cut-out.
F
R
emove the casing.
F
R
emove the protective cover from the
battery by pulling it upwards.
F
R
emove the dead battery from its
compartment.
Doors
Locking/unlocking from
inside
Access
Page 83 of 180
81
Operation
Going into engine STOP mode
This indicator lamp comes on in the
instrument panel and the engine
goes into standby automatically:
-
w
hen the vehicle is stationary, you put the
gearbox into neutral and release the clutch
pedal.
Stop & Starttime counters
A partial time counter counts the periods in
STOP mode during a journey. For your convenience during parking
manoeuvres, STOP mode is not available
for a
few seconds after coming out of
reverse gear.
Stop & Start does not change features
of the vehicle such as braking, power
steering…
Never refuel with the engine in STOP
mode; you must switch off the ignition.
Special cases: STOP mode not
available
Stop & Start
The Stop & Start system puts the engine
temporarily into standby – STOP mode – during
traffic stops (red lights, traffic jams, etc.). The
engine restarts automatically – START mode
– as soon as you want to move off. Restarting
occurs instantly, quickly and silently.
Per fect for urban use, the Stop & Start system
reduces fuel consumption and exhaust
emissions as well as the noise level when
stationary. -
t
he engine is needed to maintain
a comfortable temperature in the passenger
compartment,
-
d
emisting is active,
-
s
ome special conditions (battery charge,
engine temperature, braking assistance,
vehicle stopped on a
steep slope, high
altitude…) where the engine is needed to
assure control of a
system.
Going into engine START mode
This indicator lamp goes off and the
engine restarts automatically:
-
w
hen you fully depress the clutch pedal.
Special case: START invoked
automatically
START mode is invoked automatically if:
- y
ou open the driver's door,
-
y
ou open the bonnet,
-
y
ou unfasten the driver's seat belt,
-
s
ome temporary conditions apply (battery
charge, engine temperature, braking
assistance, vehicle on a
steep slope,
adjustment of the air conditioning, …) where
it is necessary for control of a
system or of
the vehicle.
It is displayed in the trip computer as soon as
the Stop & Start acts.
Press one of the "
DISP" buttons to return to the
previous display.
A global time counter counts the periods in
STOP mode since the last reset to zero.
When it is displayed, press for more than two
seconds on one of the " DISP" buttons to reset
to zero.
STOP mode does not activate, mainly when:
-
t
he driver's door is open,
-
t
he driver's seat belt is not fastened,
6
Driving
Page 135 of 180
5
MODE
MODE
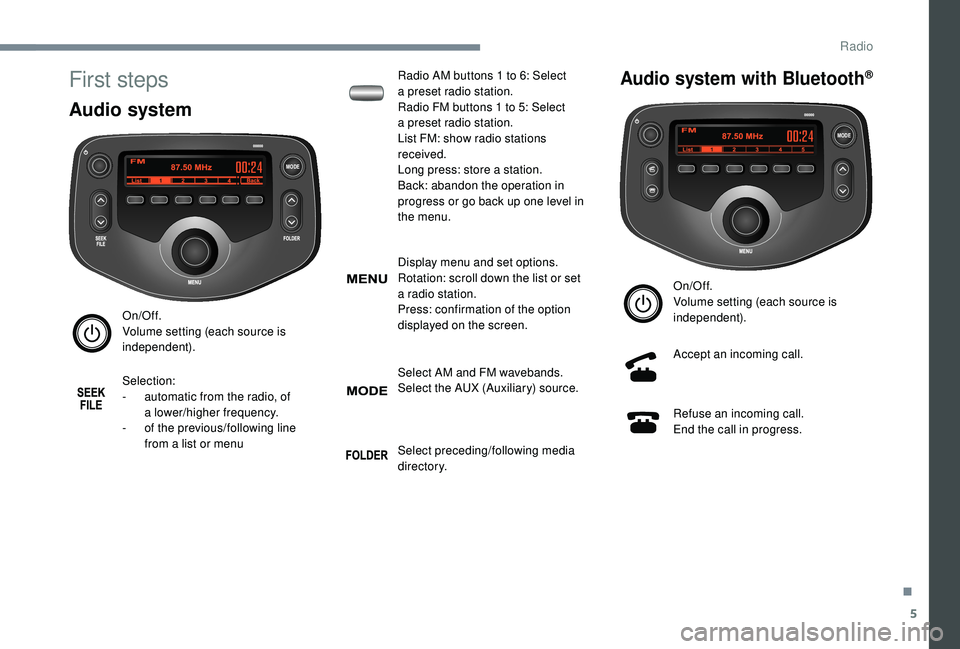
First steps
Audio system
On/Off.
Volume setting (each source is
independent).
Selection:
-
a
utomatic from the radio, of
a
lower/higher frequency.
-
o
f the previous/following line
from a
list or menu Radio AM buttons 1
to 6: Select
a
preset radio station.
Radio FM buttons 1 to 5: Select
a
preset radio station.
List FM: show radio stations
received.
Long press: store a station.
Back: abandon the operation in
progress or go back up one level in
the menu.
Display menu and set options.
Rotation: scroll down the list or set
a
radio station.
Press: confirmation of the option
displayed on the screen.
Select AM and FM wavebands.
Select the AUX (Auxiliary) source.
Select preceding/following media
di r e c to r y.
Audio system with Bluetooth®
On/Off.
Volume setting (each source is
independent).
Accept an incoming call.
Refuse an incoming call.
End the call in progress.
.
Radio
Page 136 of 180
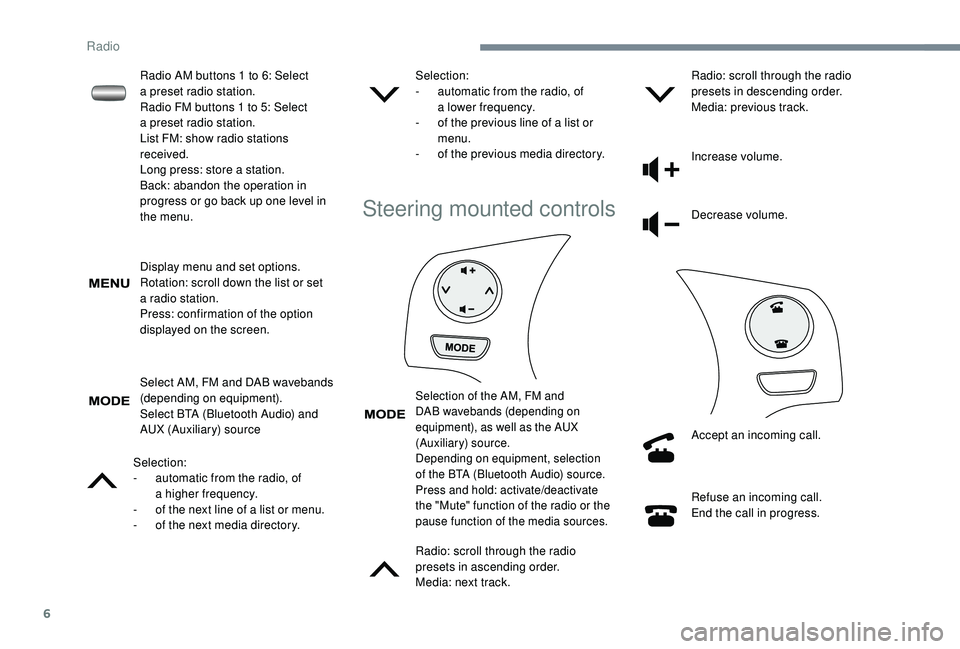
6
Display menu and set options.
Rotation: scroll down the list or set
a
radio station.
Press: confirmation of the option
displayed on the screen.
Select AM, FM and DAB wavebands
(depending on equipment).
Select BTA (Bluetooth Audio) and
AUX (Auxiliary) source
Selection:
-
a
utomatic from the radio, of
a
higher frequency.
-
o
f the next line of a list or menu.
-
o
f the next media directory. Selection:
-
a
utomatic from the radio, of
a
lower frequency.
-
o
f the previous line of a list or
menu.
-
o
f the previous media directory.
Steering mounted controls
Selection of the AM, FM and
DAB wavebands (depending on
equipment), as well as the AUX
(Auxiliary) source.
Depending on equipment, selection
of the BTA (Bluetooth Audio) source.
Press and hold: activate/deactivate
the "Mute" function of the radio or the
pause function of the media sources.
Radio: scroll through the radio
presets in ascending order.
Media: next track.Radio: scroll through the radio
presets in descending order.
Media: previous track.
Increase volume.
Decrease volume.
Accept an incoming call.
Refuse an incoming call.
End the call in progress.
Radio AM buttons 1
to 6: Select
a
preset radio station.
Radio FM buttons 1
to 5: Select
a
preset radio station.
List FM: show radio stations
received.
Long press: store a
station.
Back: abandon the operation in
progress or go back up one level in
the menu.
Radio
Page 137 of 180
7
Radio
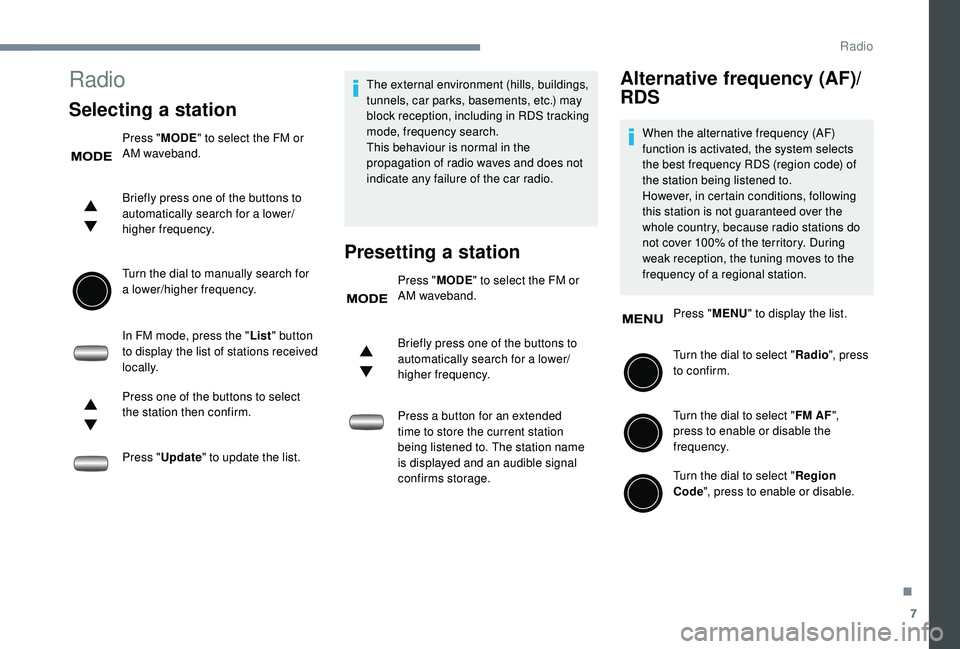
Selecting a station
Press "MODE" to select the FM or
AM waveband.
Briefly press one of the buttons to
automatically search for a
lower/
higher frequency.
Turn the dial to manually search for
a
lower/higher frequency.
In FM mode, press the " List" button
to display the list of stations received
locally.
Press one of the buttons to select
the station then confirm.
Press " Update " to update the list. The external environment (hills, buildings,
tunnels, car parks, basements, etc.) may
block reception, including in RDS tracking
mode, frequency search.
This behaviour is normal in the
propagation of radio waves and does not
indicate any failure of the car radio.
Presetting a station
Press "
MODE" to select the FM or
AM waveband.
Briefly press one of the buttons to
automatically search for a
lower/
higher frequency.
Press a
button for an extended
time to store the current station
being listened to. The station name
is displayed and an audible signal
confirms storage.
Alternative frequency (AF)/
RDS
When the alternative frequency (AF)
function is activated, the system selects
the best frequency RDS (region code) of
the station being listened to.
However, in certain conditions, following
this station is not guaranteed over the
whole country, because radio stations do
not cover 100% of the territory. During
weak reception, the tuning moves to the
frequency of a
regional station.
Press " MENU" to display the list.
Turn the dial to select " Radio", press
to confirm.
Turn the dial to select " FM AF",
press to enable or disable the
frequency.
Turn the dial to select " Region
Code ", press to enable or disable.
.
Radio