2018 OPEL INSIGNIA BREAK audio
[x] Cancel search: audioPage 115 of 323
Instruments and controls113Information displays
Driver Information Centre
The Driver Information Centre is
located in the instrument cluster.
Depending on the version and the
instrument cluster, the Driver
Information Centre is available as
Baselevel display, Midlevel display or Uplevel display.
Driver Information Centre indicates
depending on the equipment:
● overall and trip odometer
● vehicle information and settings
● trip/fuel information
● driving economic information
● driver assistance alerts
● warning messages
● audio and infotainment information
● phone information
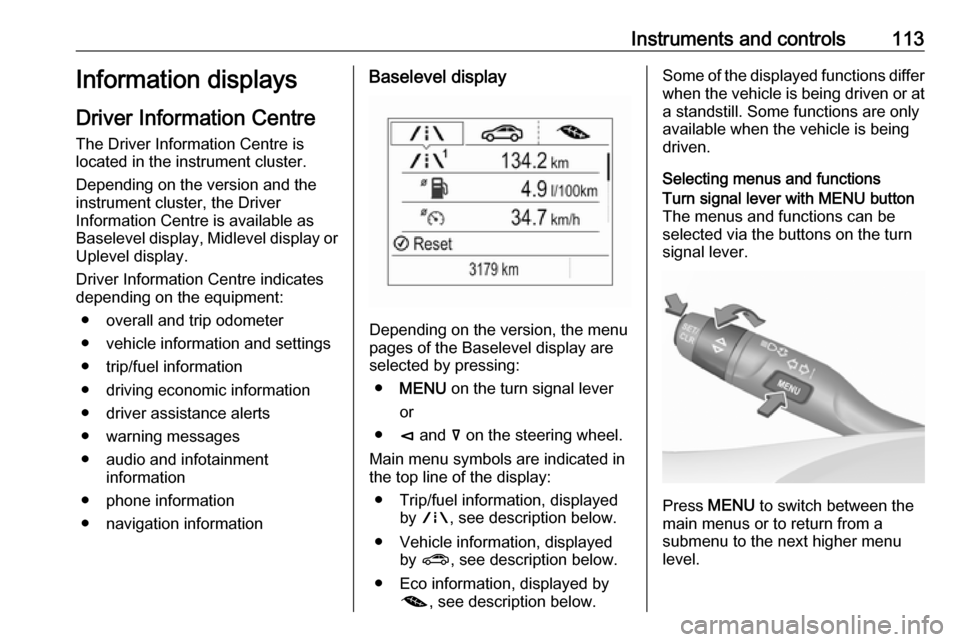
● navigation informationBaselevel display
Depending on the version, the menu
pages of the Baselevel display are selected by pressing:
● MENU on the turn signal lever
or
● è and å on the steering wheel.
Main menu symbols are indicated in
the top line of the display:
● Trip/fuel information, displayed by ; , see description below.
● Vehicle information, displayed by ? , see description below.
● Eco information, displayed by @ , see description below.
Some of the displayed functions differ
when the vehicle is being driven or at a standstill. Some functions are only
available when the vehicle is being
driven.
Selecting menus and functionsTurn signal lever with MENU button
The menus and functions can be selected via the buttons on the turnsignal lever.
Press MENU to switch between the
main menus or to return from a
submenu to the next higher menu
level.
Page 116 of 323
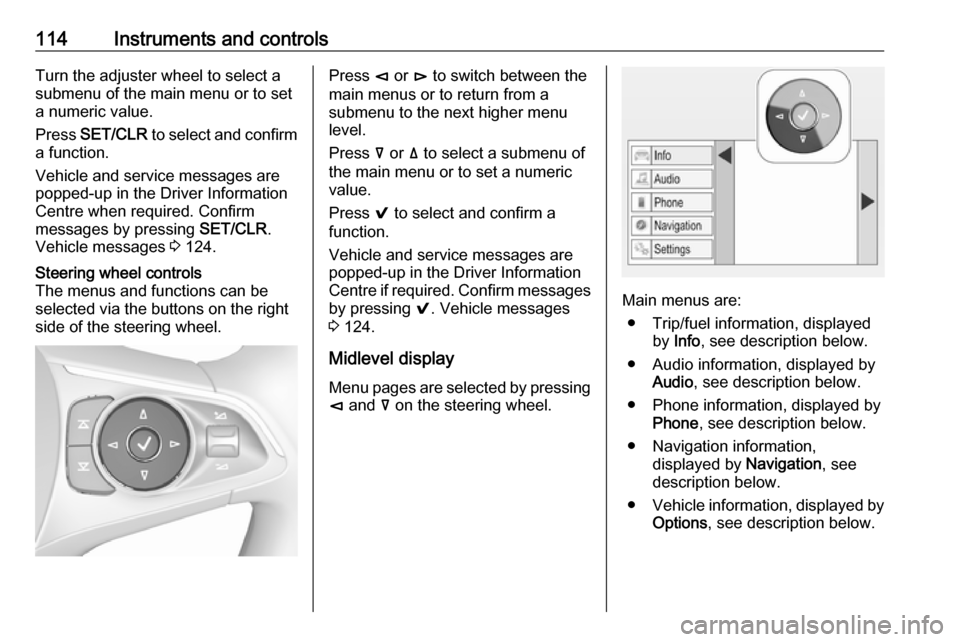
114Instruments and controlsTurn the adjuster wheel to select a
submenu of the main menu or to set
a numeric value.
Press SET/CLR to select and confirm
a function.
Vehicle and service messages are
popped-up in the Driver Information
Centre when required. Confirm
messages by pressing SET/CLR.
Vehicle messages 3 124.Steering wheel controls
The menus and functions can be
selected via the buttons on the right
side of the steering wheel.Press è or é to switch between the
main menus or to return from a
submenu to the next higher menu
level.
Press å or ä to select a submenu of
the main menu or to set a numeric
value.
Press 9 to select and confirm a
function.
Vehicle and service messages are
popped-up in the Driver Information
Centre if required. Confirm messages by pressing 9. Vehicle messages
3 124.
Midlevel display Menu pages are selected by pressing
è and å on the steering wheel.
Main menus are:
● Trip/fuel information, displayed by Info , see description below.
● Audio information, displayed by Audio , see description below.
● Phone information, displayed by Phone , see description below.
● Navigation information, displayed by Navigation, see
description below.
● Vehicle information, displayed by
Options , see description below.
Page 117 of 323
Instruments and controls115Some of the displayed functions differ
when the vehicle is being driven or at
a standstill and some functions are
only active when the vehicle is being
driven.
Selecting menus and functions
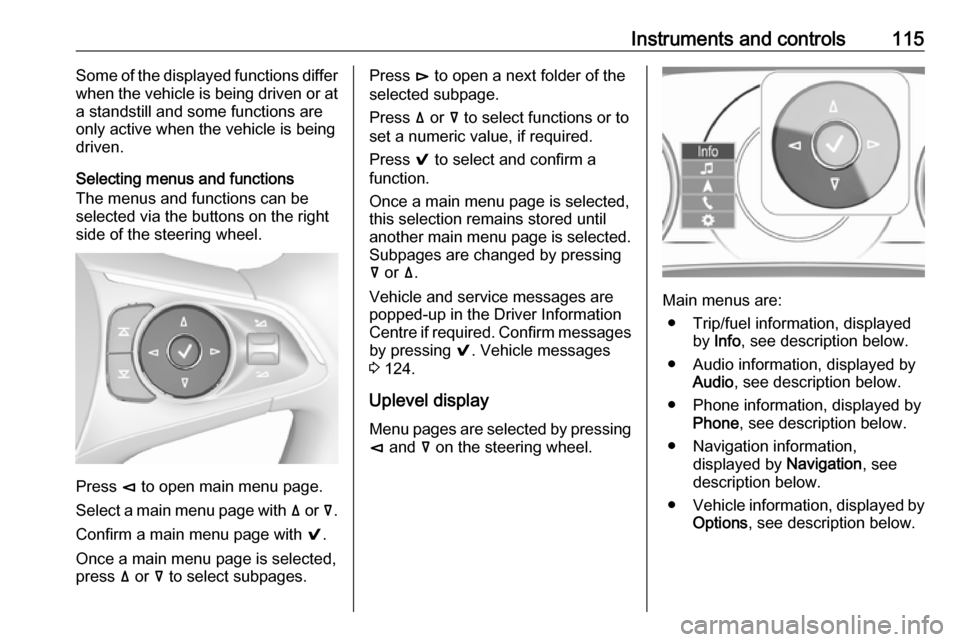
The menus and functions can be selected via the buttons on the right
side of the steering wheel.
Press è to open main menu page.
Select a main menu page with ä or å.
Confirm a main menu page with 9.
Once a main menu page is selected, press ä or å to select subpages.
Press é to open a next folder of the
selected subpage.
Press ä or å to select functions or to
set a numeric value, if required.
Press 9 to select and confirm a
function.
Once a main menu page is selected, this selection remains stored until
another main menu page is selected.
Subpages are changed by pressing
å or ä.
Vehicle and service messages are
popped-up in the Driver Information
Centre if required. Confirm messages by pressing 9. Vehicle messages
3 124.
Uplevel display
Menu pages are selected by pressing è and å on the steering wheel.
Main menus are:
● Trip/fuel information, displayed by Info , see description below.
● Audio information, displayed by Audio , see description below.
● Phone information, displayed by Phone , see description below.
● Navigation information, displayed by Navigation, see
description below.
● Vehicle information, displayed by
Options , see description below.
Page 120 of 323
118Instruments and controlsEco information menu, @
● Top consumers
● Economy trend
● Eco index
On Mid- and Uplevel display the
pages Top Consumers, Economy
Trend and Eco index, are displayed in
the Trip/fuel information menu, select
Info .
Top Consumers
List of top comfort consumers
currently switched on is displayed in
descending order. Fuel saving
potential is indicated.
During sporadic driving conditions,
the engine will activate the heated
rear window automatically to increase the engine load. In this event, the
heated rear window is indicated as
one of the top consumers, without
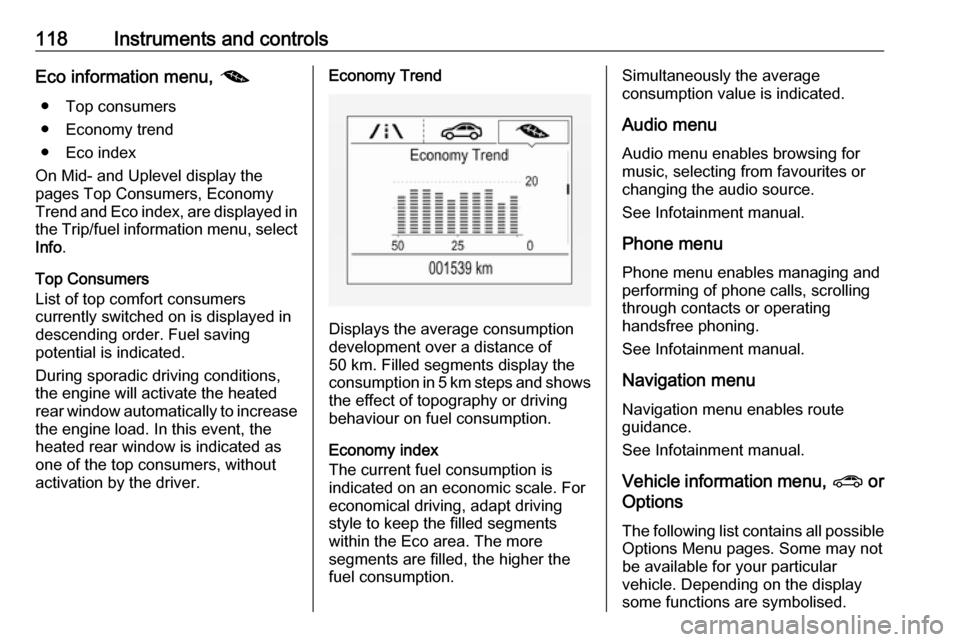
activation by the driver.Economy Trend
Displays the average consumption
development over a distance of
50 km. Filled segments display the
consumption in 5 km steps and shows the effect of topography or driving
behaviour on fuel consumption.
Economy index
The current fuel consumption is
indicated on an economic scale. For
economical driving, adapt driving
style to keep the filled segments
within the Eco area. The more
segments are filled, the higher the
fuel consumption.
Simultaneously the average
consumption value is indicated.
Audio menu
Audio menu enables browsing for
music, selecting from favourites or
changing the audio source.
See Infotainment manual.
Phone menu
Phone menu enables managing and performing of phone calls, scrolling
through contacts or operating
handsfree phoning.
See Infotainment manual.
Navigation menu
Navigation menu enables route
guidance.
See Infotainment manual.
Vehicle information menu, ? or
Options
The following list contains all possible Options Menu pages. Some may notbe available for your particular
vehicle. Depending on the display
some functions are symbolised.
Page 124 of 323
122Instruments and controlsValet mode
Some functions of the Driver
Information Centre and the Info-
Display can be limited for some
drivers. The load compartment is
being locked and cannot be unlocked.
For more information, see
Infotainment manual.
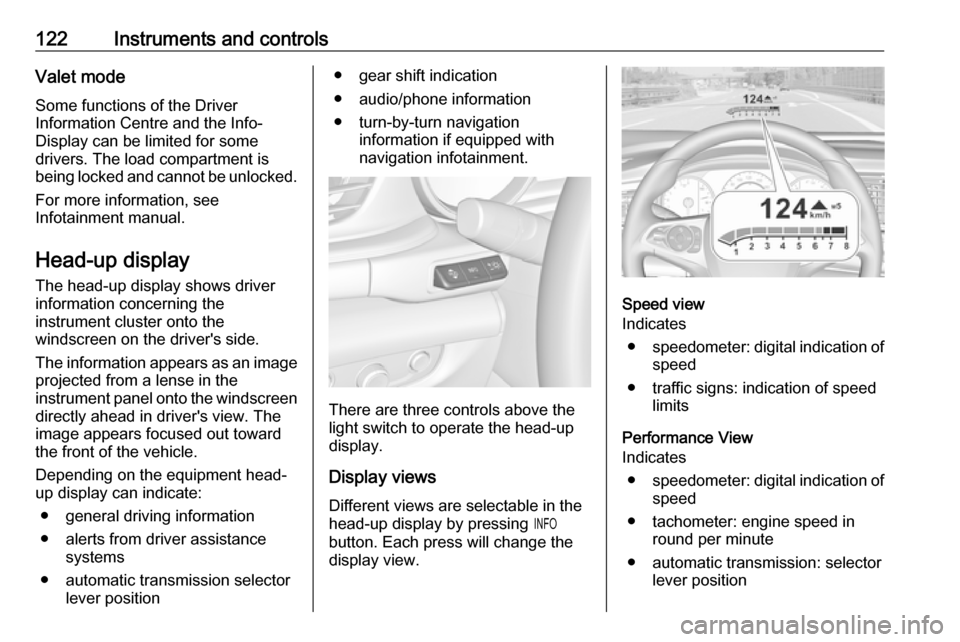
Head-up display The head-up display shows driver
information concerning the
instrument cluster onto the
windscreen on the driver's side.
The information appears as an image
projected from a lense in the
instrument panel onto the windscreen
directly ahead in driver's view. The
image appears focused out toward
the front of the vehicle.
Depending on the equipment head-
up display can indicate:
● general driving information
● alerts from driver assistance systems
● automatic transmission selector lever position● gear shift indication
● audio/phone information
● turn-by-turn navigation information if equipped with
navigation infotainment.
There are three controls above the
light switch to operate the head-up display.
Display views
Different views are selectable in the
head-up display by pressing /
button. Each press will change the
display view.
Speed view
Indicates
● speedometer: digital indication of
speed
● traffic signs: indication of speed limits
Performance View
Indicates
● speedometer: digital indication of
speed
● tachometer: engine speed in round per minute
● automatic transmission: selector lever position
Page 125 of 323

Instruments and controls123● manual/automatic transmission:gear shift indication
● auto stop indication
Audio view
Indicates
● speedometer: digital indication of
speed
● actual audio playing information
Navigation view
Indicates
● speedometer: digital indication of
speed
● turn-by-turn navigation information
Active safety control indicators
On all views control indicators of
following Driver assistance systems are indicated in the top line of the
display
● vehicle detected ahead A:
vehicle recognition
● lane keep assist a: status and
warning● adaptive cruise control Õ: set
speed and status
● pedestrian detected ahead 7:
pedestrian recognition
Pop-up alerts
The following list contains just an
extract of possible alerts. Some may
not be available for your particular
vehicle, others can appear depending on vehicle configuration.
Alerts pop-up on each page if
required
● pedestrian protection alert
● forward collision alert
● up-/downshift alert
● incoming call
Alerts with lower priority can be reset by pressing G, high priority alerts
appear as long as danger continues.
System messages or vehicle
warnings may require immediately
action. Seek the assistance of a
workshop.Adjust position of head-up display
image
1. Adjust the driver's seat.
2. Start the engine.
3. Press down or lift up button . to
centre the image. It can only be
adjusted up and down, not side to side.9 Warning
If the head-up display image is too
bright or too high in your field of
view, it may obstruct your view
when it is dark outside. Be sure to keep the head-up display imagedim and placed low in your field of
view.
Adjust brightness
The head-up display image will
automatically dim and brighten to compensate for outside lighting.
Brightness can also be adjusted
manually as needed:
Lift up & and hold to brighten the
display. Press down and hold to dim
the display.
Page 136 of 323

134Instruments and controlsIf the OnStar service is used on
another vehicle, press Z and request
that the account be transferred to the new vehicle.
Note
In any case, if the vehicle is disposed
of, sold or otherwise transferred,
immediately inform OnStar about
the changes and terminate the
OnStar service on this vehicle.
Vehicle location
The vehicle location is transmitted to OnStar when service is requested or triggered. A message on the Info-
Display informs about this
transmission.
To activate or deactivate the
transmission of the vehicle location,
press and hold j until an audio
message is heard.
The deactivation is indicated by the
status light flashing red and green for a short period of time and each time
the vehicle is started.
Note
If the transmission of the vehicle
location is deactivated, some
services are no longer available.Note
The vehicle location always remains
accessible to OnStar in the case of
an emergency.
Find the privacy policy in your
account.
Software updates
OnStar may remotely carry out software updates without further notice or consent. These updates are to enhance or maintain safety and
security or the operation of the
vehicle.
These updates may concern privacy
issues. Find the privacy policy in your
account.
Page 264 of 323

262Vehicle careVehicles without spare wheel
The screwdriver and the towing eye
are located in a box below the floor
cover in the load compartment.
Tyre repair kit 3 268.
Vehicles with audio speaker system
The screwdriver and the towing eye
are located below the floor cover in
the load compartment, beside the
round speaker system component.
Tyre repair kit 3 268.
Wheels and tyres
Tyre condition, wheel condition Drive over edges slowly and at right
angles if possible. Driving over sharp
edges can cause tyre and wheel
damage. Do not trap tyres on the kerb when parking.
Regularly check the wheels for
damage. Seek the assistance of a
workshop in the event of damage or
unusual wear.
Winter tyres
Winter tyres improve driving safety at temperatures below 7 °C and shouldtherefore be fitted on all wheels.
In accordance with country-specific
regulations, affix the speed sticker in
the driver's field of view.
All tyre sizes are permitted as winter
tyres 3 301.