Page 11 of 426
1. Head restraints/headrests(2nd, 3rd and 4th rows) (P. 1-15)
2. LATCH (Lower Anchors and Tethers
for CHildren) system (second row
shown; 3rd and 4th rows similar)
(P. 1-32)
3. Head restraints/headrests
(front row) (P. 1-15)
4. Front seat belts (P. 1-21, 1-55)
5. Roof-mounted curtain side-impact
and rollover supplemental air bag
(P. 1-55)
6. Supplemental air bags (P. 1-55)
7. Front seats (P. 1-2)
8. Front seat-mounted side-impact
supplemental air bag (P. 1-55)
9. Top tether strap anchor points
(2nd, 3rd, and 4th rows — found on
bottom of seatback) (2nd row
shown; other rows similar) (P. 1-32)
10. Rear seat configurations (P. 1-2)
Refer to the page number indicated in
parentheses for operating details.
LII2319
AIR BAGS, SEAT BELTS AND CHILD
RESTRAINTS
0-2Illustrated table of contents
Page 21 of 426

1 Safety—Seats, seat belts and
supplemental restraint system
Seats............................................ 1-2Front manual seat adjustment
(for passenger’s seat and if so
equipped for driver’s seat) .....................1-3
Front power seat adjustment
(if so equipped for driver’s seat) ............... 1-4
Armrests (if so equipped) ..................... 1-6
Flexible seating ............................... 1-6
Removing the 2nd, 3rd and 4th row
seats......................................... 1-8
Installing the 2nd, 3rd and 4th row
seats......................................... 1-10
Seatrailcovers............................... 1-12
Seat configurations ........................... 1-14
Head restraints/headrests ......................1-15
Adjustable head restraint/headrest
components ................................. 1-16
Non-adjustable head restraint/
headrest components ........................ 1-17
Remove...................................... 1-17
Install ......................................... 1-18
Adjust ........................................ 1-19
Seatbelts ....................................... 1-21
Precautions on seat belt usage ...............1-21Seat belt warning light
....................... 1-24
Pregnant women ............................ 1-24
Injured persons .............................. 1-24
Three-point type seat belt with
retractor .................................... 1-25
Seat belt extenders .......................... 1-28
Seat belt maintenance ......................1-29
Child safety ..................................... 1-29
Infants ...................................... 1-30
Small children ............................... 1-30
Larger children ............................... 1-31
Child restraints ................................. 1-32
Precautions on child restraints ..............1-32
LATCH (Lower Anchors and Tethers for
CHildren) system ............................ 1-34
Rear-facing child restraint installation
using LATCH ................................. 1-38
Rear-facing child restraint installation
using the seat belts ......................... 1-40
Forward-facing child restraint
installation using LATCH .....................1-42
Forward-facing child restraint
installation using the seat belts ..............1-46
Booster seats ................................ 1-51
Page 27 of 426

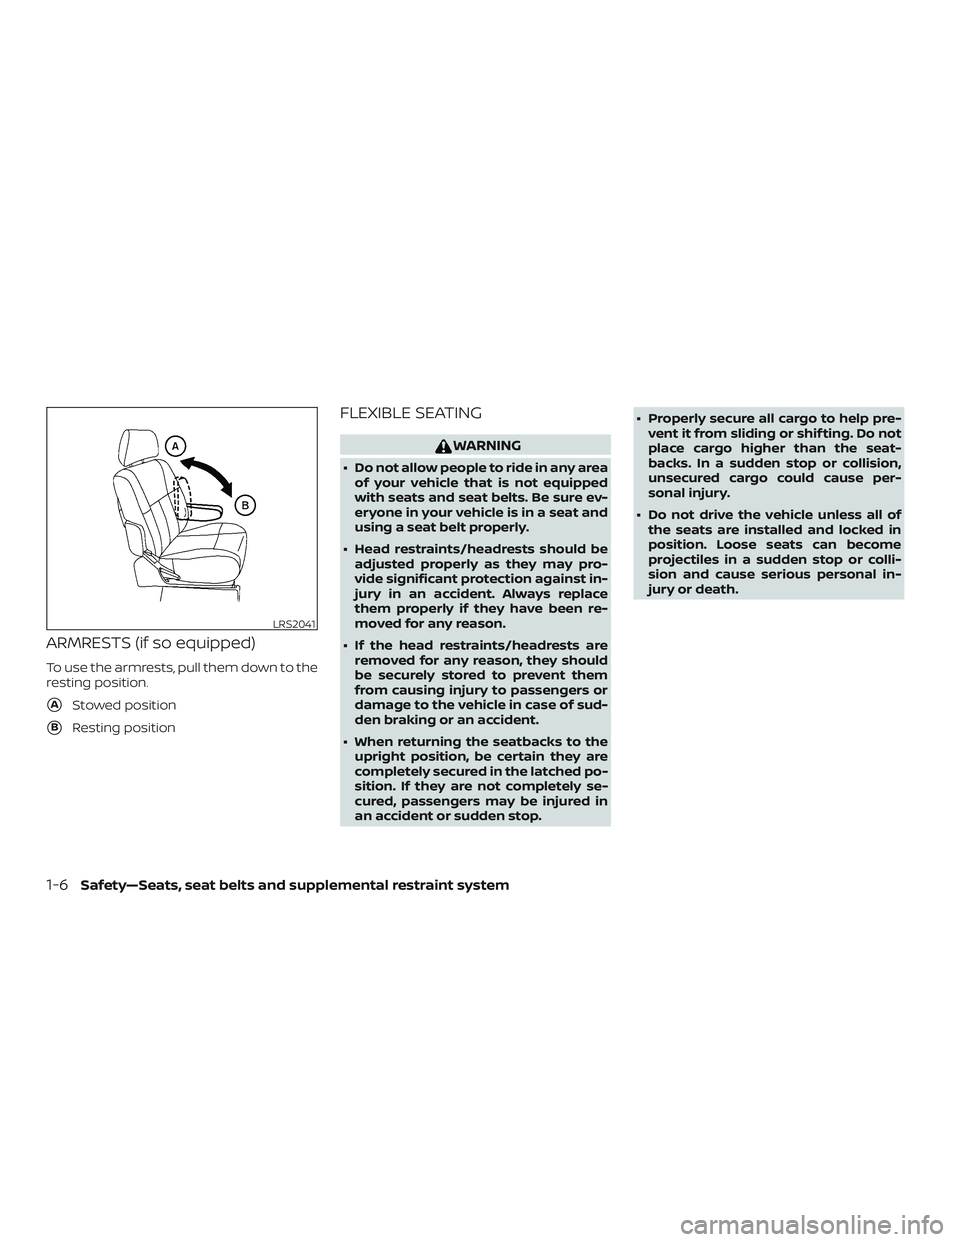
ARMRESTS (if so equipped)
To use the armrests, pull them down to the
resting position.
�AStowed position
�BResting position
FLEXIBLE SEATING
WARNING
∙ Do not allow people to ride in any areaof your vehicle that is not equipped
with seats and seat belts. Be sure ev-
eryone in your vehicle is in a seat and
using a seat belt properly.
∙ Head restraints/headrests should be adjusted properly as they may pro-
vide significant protection against in-
jury in an accident. Always replace
them properly if they have been re-
moved for any reason.
∙ If the head restraints/headrests are removed for any reason, they should
be securely stored to prevent them
from causing injury to passengers or
damage to the vehicle in case of sud-
den braking or an accident.
∙ When returning the seatbacks to the upright position, be certain they are
completely secured in the latched po-
sition. If they are not completely se-
cured, passengers may be injured in
an accident or sudden stop. ∙ Properly secure all cargo to help pre-
vent it from sliding or shif ting. Do not
place cargo higher than the seat-
backs. In a sudden stop or collision,
unsecured cargo could cause per-
sonal injury.
∙ Do not drive the vehicle unless all of the seats are installed and locked in
position. Loose seats can become
projectiles in a sudden stop or colli-
sion and cause serious personal in-
jury or death.
LRS2041
1-6Safety—Seats, seat belts and supplemental restraint system
Page 36 of 426

The 2nd and 3rd row seats have two
fore/af t mounting locations. The rows are
identical and can be interchanged for con-
venience. The passenger side seats can be
moved to the rear position independently
of the driver’s side seats.
WARNING
Head restraints/headrests supplement
the other vehicle safety systems. They
may provide additional protection
against injury in certain rear end colli-
sions. Adjustable head
restraints/headrests must be adjusted
properly, as specified in this section.
Check the adjustment af ter someone
else uses the seat. Do not attach any-
thing to the head restraint/headrest
stalks or remove the head
restraint/headrest. Do not use the seat
if the head restraint/headrest has been
removed. If the head restraint/headrest
was removed, reinstall and properly ad-
just the head restraint/headrest before
an occupant uses the seating position.
Failure to follow these instructions can
reduce the effectiveness of the head
restraints/headrests. This may in-
crease the risk of serious injury or death
in a collision.
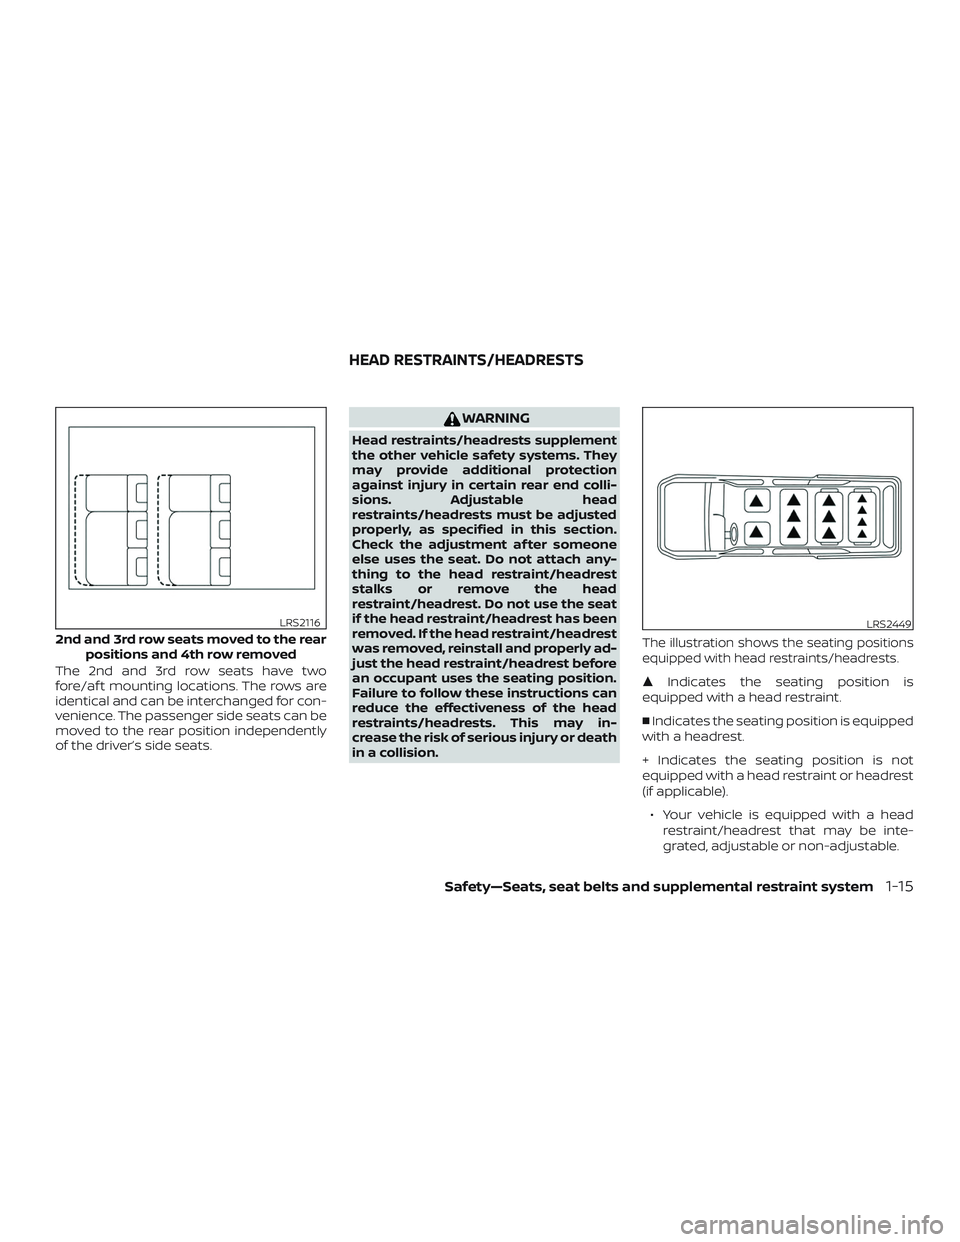
The illustration shows the seating positions
equipped with head restraints/headrests.
�Indicates the seating position is
equipped with a head restraint.
� Indicates the seating position is equipped
with a headrest.
+ Indicates the seating position is not
equipped with a head restraint or headrest
(if applicable).
∙ Your vehicle is equipped with a head restraint/headrest that may be inte-
grated, adjustable or non-adjustable.
2nd and 3rd row seats moved to the rear positions and 4th row removed
LRS2116LRS2449
HEAD RESTRAINTS/HEADRESTS
Safety—Seats, seat belts and supplemental restraint system1-15
Page 37 of 426
∙ Adjustable head restraints/headrestshave multiple notches along the stalk(s)
to lock them in a desired adjustment
position.
∙ The non-adjustable head restraints/ headrests have a single locking notch
to secure them to the seat frame.
∙ Proper Adjustment: – For the adjustable type, align thehead restraint/headrest so the cen-
ter of your ear is approximately level
with the center of the head
restraint/headrest.
– If your ear position is still higher than the recommended alignment, place
the head restraint/headrest at the
highest position.
∙ If the head restraint/headrest has been removed, ensure that it is reinstalled
and locked in place before riding in that
designated seating position.
ADJUSTABLE HEAD RESTRAINT/
HEADREST COMPONENTS
1. Removable head restraint/headrest
2. Multiple notches
3. Lock knob(s)
4. Stalks
Type A (if so equipped)
LRS2300
Type B (if so equipped)
LRS2834
1-16Safety—Seats, seat belts and supplemental restraint system
Page 38 of 426
NON-ADJUSTABLE HEAD
RESTRAINT/HEADREST
COMPONENTS
1. Removable head restraint/headrest
2. Single notch
3. Lock knob(s)
4. Stalks
REMOVE
Use the following procedure to remove the
head restraint/headrest:1. Pull the head restraint/headrest up to the highest position.
2. Push and hold the lock knob(s).
3. Remove the head restraint/headrest from the seat.
Type A (if so equipped)
LRS2299
Type B (if so equipped)
LRS2835
Type A (if so equipped)
LRS2302
Safety—Seats, seat belts and supplemental restraint system1-17
Page 39 of 426
4. Store the head restraint/headrestproperly in a secure place so it is not
loose in the vehicle.
5. Reinstall and properly adjust the head restraint/headrest before an occupant
uses the seating position.INSTALL
1. Align the head restraint/headreststalks with the holes in the seat. Make
sure that the head restraint/headrest is
facing the correct direction. For ve-
hicles with Type A, the stalk with the
notch (notches)
�1must be installed in
the hole with the lock knob
�2. 2. Push and hold the lock knob(s) and
push the head restraint/headrest
down.
3. Properly adjust the head restraint/ headrest before an occupant uses the
seating position.
Type B (if so equipped)
LRS2836
Type A (if so equipped)
LRS2303
Type B (if so equipped)
LRS2837
1-18Safety—Seats, seat belts and supplemental restraint system
Page 40 of 426
ADJUST
For adjustable head restraint/headrest
Adjust the head restraint/headrest so the
center is level with the center of your ears. If
your ear position is still higher than the
recommended alignment, place the head
restraint/headrest at the highest position.For non-adjustable head restraint/headrest
Make sure the head restraint/headrest is
positioned so the lock knob(s) is engaged
in the notch (notches) before riding in that
designated seating position.
WRS0134
Type A (if so equipped)
LRS2351
Type B (if so equipped)
LRS2838
Safety—Seats, seat belts and supplemental restraint system1-19