2018 NISSAN MICRA center console
[x] Cancel search: center consolePage 69 of 330
WARNING
To ensure proper operation of the pas-
senger’s NISSAN Advanced Air Bag Sys-
tem, please observe the following
items.
∙ Do not allow a passenger in the rearseat to push or pull on the seatback
pocket.
∙ Do not place heavy loads heavier than 9.1 lbs. (4 kg) on the seatback, head
restraint/headrest or in the seatback
pocket.
∙ Make sure that there is nothing press- ing against the rear of the seatback,
such as a child restraint installed in
the rear seat or an object stored on
the floor.
∙ Make sure that there is no object placed under the front passenger
seat.
∙ Make sure that there is no object placed between the seat cushion and
center console or between the seat
cushion and the door. ∙ If a forward-facing child restraint is
installed in the front passenger seat,
do not position the front passenger
seat so the child restraint contacts the
instrument panel. If the child restraint
does contact the instrument panel,
the system may determine the seat is
occupied and the passenger air bag
may deploy in a collision. Also the
front passenger air bag status light
may not illuminate. For additional in-
formation, refer to “Child restraints” in
this section.
∙ Confirm the operating condition with the front passenger air bag status
light.
∙ If you notice that the front passenger air bag status light is not operating as
described later in this section, get the
occupant classification system
checked. It is recommended that you
visit a NISSAN dealer for this service.
∙ Until you have confirmed with a dealer that your front passenger seat
occupant classification system is
working properly, position the occu-
pants in the rear seating positions. ∙ Do not position the front passenger
seat so it contacts the rear seat. If the
front seat does contact the rear seat,
the air bag system may determine a
sensor malfunction has occurred and
the front passenger air bag status
light may illuminate and the supple-
mental air bag warning light may
flash.
This vehicle is equipped with the NISSAN
Advanced Air Bag System for the driver and
front passenger seats. This system is de-
signed to meet certification requirements
under U.S. regulations. It is also permitted in
Canada. However, all of the information,
cautions and warnings in this manual
still apply and must be followed.
The driver supplemental front-impact air
bag is located in the center of the steering
wheel. The front passenger supplemental
front-impact air bag is mounted in the
dashboard above the glove box. The front
air bags are designed to inflate in higher
severity frontal collisions, although they
may inflate if the forces in another type of
collision are similar to those of a higher
severity frontal impact. They may not in-
flate in certain frontal collisions. Vehicle
1-52Safety—Seats, seat belts and supplemental restraint system
Page 74 of 330
NOTE:
This vehicle’s occupant classification
sensor system locks the classification
during driving so it is important that you
confirm that the front passenger is prop-
erly classified prior to driving. Also, the
occupant classification sensor system
may recalculate the weight of the occu-
pant when the vehicle comes to a stop
(i.e. stop light, stop sign, etc.), so front
passenger seat occupants should con-
tinue to remain seated as outlined
above.
Troubleshooting
If you think the front passenger air bag
status light is incorrect:1. If the light is ON with no front passenger and no objects on the front passenger
seat:
This may be due to the following condi-
tions that may be interfering with the
weight sensors: ∙ An object weighing over 9.1 lbs. (4 kg) hanging on the seat or placed in the
seatback pocket.
∙ A child restraint or other object pressing against the rear of the seatback. ∙ A rear passenger pushing or pulling on
the back of the front passenger seat.
∙ Forcing the front seat or seatback against an object on the seat or floor
behind it.
∙ An object placed under the front pas- senger seat.
∙ An object placed between the seat cushion and center console or between
the seat cushion and the door.
If the vehicle is moving, please come to a
stop when it is safe to do so. Check and
correct any of the above conditions. Re-
start the vehicle and wait 1 minute.
NOTE:
A system check will be performed during
which the front passenger air bag status
light will remain lit for about 7 seconds
initially.
If the light is still ON af ter this, the vehicle
should be checked as soon as possible. It is
recommended that you visit a NISSAN
dealer for this service. 2. If the light is ON with an adult occupy-
ing the front passenger seat:
∙ Occupant is a small adult — the air bag light is functioning as intended. The
front passenger air bag is suppressed.
However, if the occupant is not a small
adult, then this may be due to the following
conditions that may be interfering with the
weight sensors: ∙ Occupant is not sitting upright, leaning against the seatback, and centered on
the seat cushion with his/her feet com-
fortably extended to the floor.
∙ A child restraint or other object pressing against the rear of the seatback.
∙ A rear passenger pushing or pulling on the back of the front passenger seat.
∙ Forcing the front seat or seatback against an object on the seat or floor
behind it.
∙ An object placed under the front pas- senger seat.
∙ An object placed between the seat cushion and center console or between
the seat cushion and the door.
Safety—Seats, seat belts and supplemental restraint system1-57
Page 75 of 330
If the vehicle is moving, please come to a
stop when it is safe to do so. Check and
correct any of the above conditions. Re-
start the vehicle and wait 1 minute.
NOTE:
A system check will be performed during
which the front passenger air bag status
light will remain lit for about 7 seconds
initially.
If the light is still ON af ter this, the person
should be advised not to ride in the front
passenger seat and the vehicle should be
checked as soon as possible. It is recom-
mended that you visit a NISSAN dealer for
this service.3. If the light is OFF with a small adult, child or child restraint occupying the
front passenger seat.
This may be due to the following con-
ditions that may be interfering with the
weight sensors:
∙ Small adult or child is not sitting upright, leaning against the seatback, and cen-
tered on the seat cushion with his/her
feet comfortably extended to the floor. ∙ The child restraint is not properly in-
stalled, as outlined in the “Child re-
straints” section of this manual.
∙ An object weighing over 9.1 lbs. (4 kg) hanging on the seat or placed in the
seatback pocket.
∙ A child restraint or other object pressing against the rear of the seatback.
∙ A rear passenger pushing or pulling on the back of the front passenger seat.
∙ Forcing the front seat or seatback against an object on the seat or floor
behind it.
∙ An object placed under the front pas- senger seat.
∙ An object placed between the seat cushion and center console.
If the vehicle is moving, please come to a
stop when it is safe to do so. Check and
correct any of the above conditions. Re-
start the vehicle and wait 1 minute.
NOTE:
A system check will be performed during
which the front passenger air bag status
light will remain lit for about 7 seconds
initially. If the light is still OFF af ter this, the small
adult, child or child restraint should be re-
positioned in the rear seat and the vehicle
should be checked as soon as possible. It is
recommended that you visit a NISSAN
dealer for this service.
Other supplemental front-impact air
bag precautions
WARNING
∙ Do not place any objects on the steer-
ing wheel pad or on the instrument
panel. Also, do not place any objects
between any occupant and the steer-
ing wheel or instrument panel. Such
objects may become dangerous pro-
jectiles and cause injury if the front air
bags inflate.
∙ Immediately af ter inflation, several front air bag system components will
be hot. Do not touch them; you may
severely burn yourself.
∙ No unauthorized changes should be made to any components or wiring of
the supplemental air bag system. This
is to prevent accidental inflation of
the supplemental air bag or damage
to the supplemental air bag system.
1-58Safety—Seats, seat belts and supplemental restraint system
Page 159 of 330

iPod®* player (if so equipped)
∙Some characters used in other languages
(Chinese, Japanese, etc.) are not displayed
properly on the vehicle center screen. We
recommend using English or Spanish lan-
guage characters with an iPod®.
∙ Large video podcast files cause slowresponses in the iPod®. The vehicle cen-
ter display may momentarily black out,
but it will soon recover.
∙ If the iPod® automatically selects large video podcast files while in the shuffle
mode, the vehicle center display may
momentarily black out, but it will soon
recover.
∙ Improperly plugging in the iPod® may cause a checkmark to be displayed on
and off (flickering). Always make sure
that the iPod® is connected properly.
∙ The iPod® nano (2nd Generation) will continue to fast forward or rewind if it is
disconnected during a seek operation.
∙ An incorrect song title may appear when the Play Mode is changed while
using the iPod® nano (2nd Generation).
∙ Audiobooks may not play in the same order as they appear on the iPod®. ∙
The iPod® nano (1st Generation) may re-
main in fast forward or rewind mode if it is
connected during a seek operation. In this
case, please manually reset the iPod®.
∙ If you are using an iPod® (3rd Generation
with Dock connector), do not use very
long names for the song title, album
name or artist name to prevent the
iPod® from resetting itself.
∙ Be careful not to do the following, or the cable could be damaged and a loss of
function may occur:
∙ Bend the cable excessively (40 mm [1.6 in] radius maximum).
∙ Twist the cable excessively (more than 180 degrees).
∙ Pull or drop the cable.
∙ Do not force the iPod® cable connec- tor into the device port.
∙ Close the center console lid on the cable or connectors.
∙ Store objects with sharp edges in the storage where the cable is stored.
∙
Spill liquids on the cable and connec-
tors.
∙ Do not connect the cable to the iPod® if the cable and/or connectors are wet. It
may damage the iPod®.
∙ If the cable and connectors are ex- posed to water, allow the cable and/or
connectors to dry completely before
connecting the cable to the iPod® (wait
24 hours for it to dry).
∙ If the connector is exposed to fluids other than water, evaporative residue
may cause a short between the con-
nector pins. In this case, replace the
cable, otherwise damage to the iPod®
and a loss of function may occur.
∙
If the cable is damaged (insulation cut,
connectors cracked, contamination
such as liquids, dust, dirt, etc., in the con-
nectors), do not use the cable and con-
tact a NISSAN dealer to replace the cable
with a new one.
∙ When not in use for extended periods of time, store the cable in a clean, dust-
free environment at room temperature
and without direct sun exposure.
∙ Do not use the cable for any other pur- poses other than its intended use in the
vehicle.
*iPod® is a trademark of Apple Inc., regis-
tered in the U.S. and other countries.
4-30Heater, air conditioner, audio and phone systems
Page 169 of 330
The current play pattern of the CD is dis-
played on the screen unless no pattern is
applied.
RDM (random) button
When the RDM button is pressed while a
compact disc is playing, the play pattern
can be changed as follows:
CD:
1 Disc Random←→OFF
CD with MP3 or WMA:
1 Disc Random →1 Folder Random →OFF
1 Disc Random: all tracks on the disc will be
played randomly.
1 Folder Random: all tracks in the current
folder will be played randomly.
OFF: No random play pattern is applied. The
indicator on the display will turn off.
The current play pattern of the CD is dis-
played on the screen unless no pattern is
applied.
AUX button
The AUX IN jack is located on the CD player.
The AUX IN audio input jack accepts any
standard analog audio input such as from a portable cassette tape/CD player, MP3
player or a laptop computer.
Press the AUX button to play a compatible
device plugged into the AUX IN jack. The
AUX button is also used to switch the audio
system to a source plugged into the USB
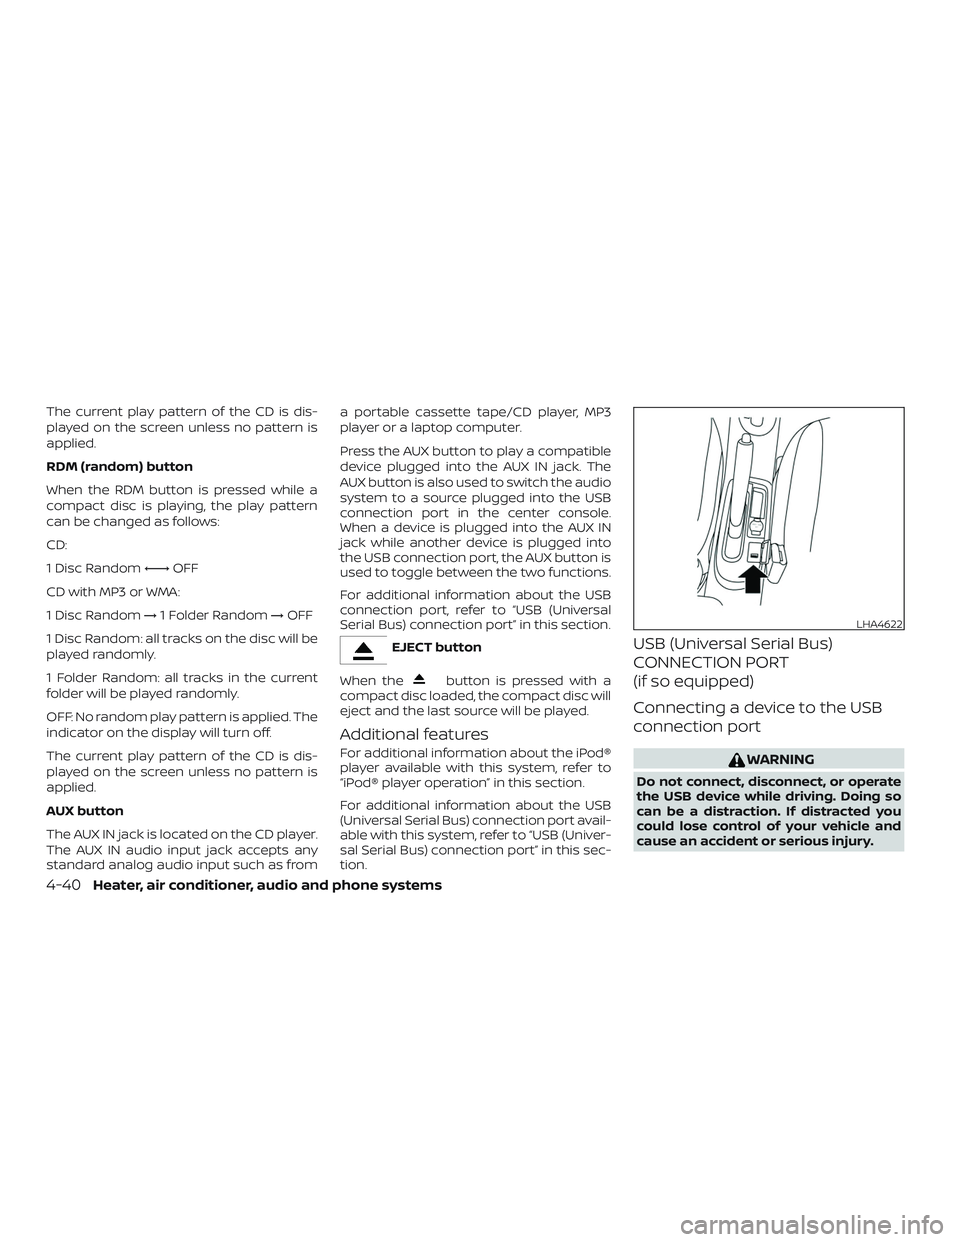
connection port in the center console.
When a device is plugged into the AUX IN
jack while another device is plugged into
the USB connection port, the AUX button is
used to toggle between the two functions.
For additional information about the USB
connection port, refer to “USB (Universal
Serial Bus) connection port” in this section.
EJECT button
When the
button is pressed with a
compact disc loaded, the compact disc will
eject and the last source will be played.
Additional features
For additional information about the iPod®
player available with this system, refer to
“iPod® player operation” in this section.
For additional information about the USB
(Universal Serial Bus) connection port avail-
able with this system, refer to “USB (Univer-
sal Serial Bus) connection port” in this sec-
tion.
USB (Universal Serial Bus)
CONNECTION PORT
(if so equipped)
Connecting a device to the USB
connection port
WARNING
Do not connect, disconnect, or operate
the USB device while driving. Doing so
can be a distraction. If distracted you
could lose control of your vehicle and
cause an accident or serious injury.
LHA4622
4-40Heater, air conditioner, audio and phone systems
Page 172 of 330
CAUTION
∙ Do not force the USB device into theUSB port. Inserting the USB device
tilted or up-side-down into the port
may damage the port. Make sure that
the USB device is connected correctly
into the USB port.
∙ Do not grab the USB port cover (if so equipped) when pulling the USB de-
vice out of the port. This could dam-
age the port and the cover.
∙ Do not leave the USB cable in a place where it can be pulled unintentionally.
Pulling the cable may damage the
port.
For additional information, refer to your de-
vice manufacturer’s owner information re-
garding the proper use and care of the
device.
To connect an iPod® to the vehicle so that
the iPod® can be controlled with the audio
system controls and display screen, use
the USB port located in the center console.
Connect the iPod®-specific end of the
cable to the iPod® and the USB end of the
cable to the USB connection port on the
vehicle. If your iPod® supports charging via
a USB connection, its battery will be charged while connected to the vehicle
with the ignition switch in the ACC or ON
position.
While connected to the vehicle, the iPod®
can only be operated by the vehicle audio
controls.
To disconnect the iPod® from the vehicle,
remove the USB end of the cable from the
USB connection port on the vehicle, then
remove the cable from the iPod®.
* iPod® is a trademark of Apple Inc., regis-
tered in the U.S. and other countries.
Compatibility
The following models are compatible:
∙ iPod® Classic - 1st through 6th genera- tion
∙ iPod® Mini - 1st and 2nd generation
∙ iPod® Nano - 1st through 3rd generation
∙ iPod® Touch - 1st generation
∙ iPhone® - 1st generation
Make sure that your iPod® firmware is up-
dated to the version indicated above.
Audio main operation
iPod MENU button
Place the ignition switch in the ACC or ON
position and press the iPod MENU button
to switch to the iPod® mode.
If another audio source is playing and the
iPod® is connected, press the iPod MENU
button to switch to the iPod® mode.
If the system is turned off while the iPod® is
playing, the iPod® will start when the PWR
button is pressed.
Top menu item selecting
Press the iPod MENU button while the
iPod® is connected to show the interface
for iPod® operation on the audio display.
The items can be chosen from the menu
list screen by pressing the
orSEEK button while the iPod® is operational.
The display pattern can be changed as fol-
lows:
Playlists →Artists →Albums →Songs →
Podcasts →Genres →Composers →
Audiobooks
For additional information, refer to the
iPod® owner’s manual.
Heater, air conditioner, audio and phone systems4-43